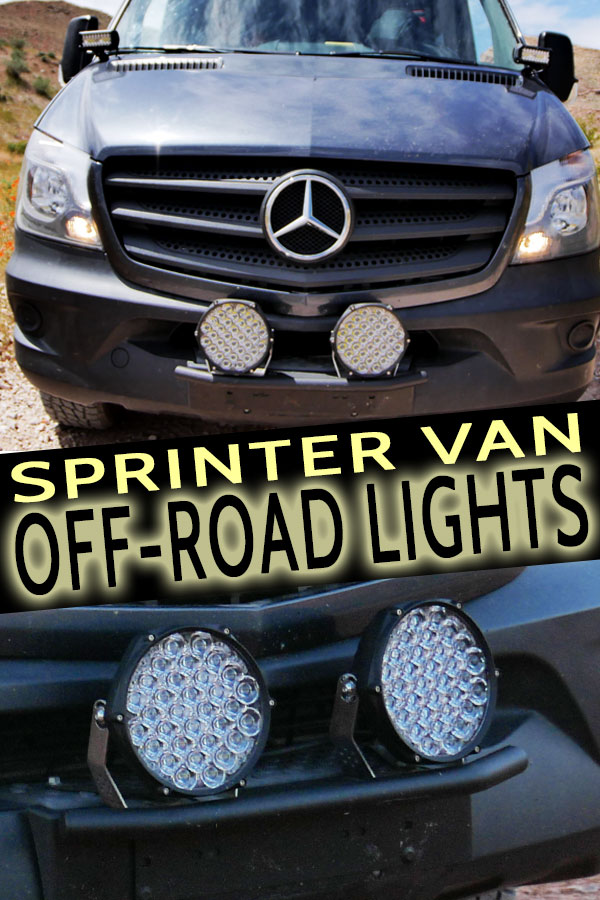
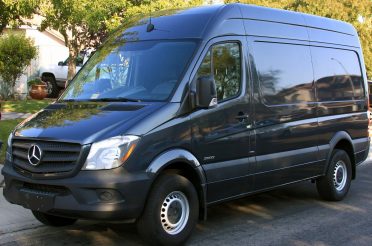
 The biggest reason we wanted to get some insanely bright lights mounted on the front of our Sprinter van is to be able to avoid hitting wildlife at night. There have been too many close calls while driving down some dark mountain roads in the pitch black. Of course, many products on the over-saturated Sprinter market offer ways to mount lights such as big fancy bumpers for vans but they are mostly all overpriced in my opinion. I always look at a product and think to myself, I can either build that for a fraction of the price or come up with a way to achieve the same goal for much less money. After all, I just need to mount some lights on the front of our van. It shouldn’t cost me thousands of dollars!
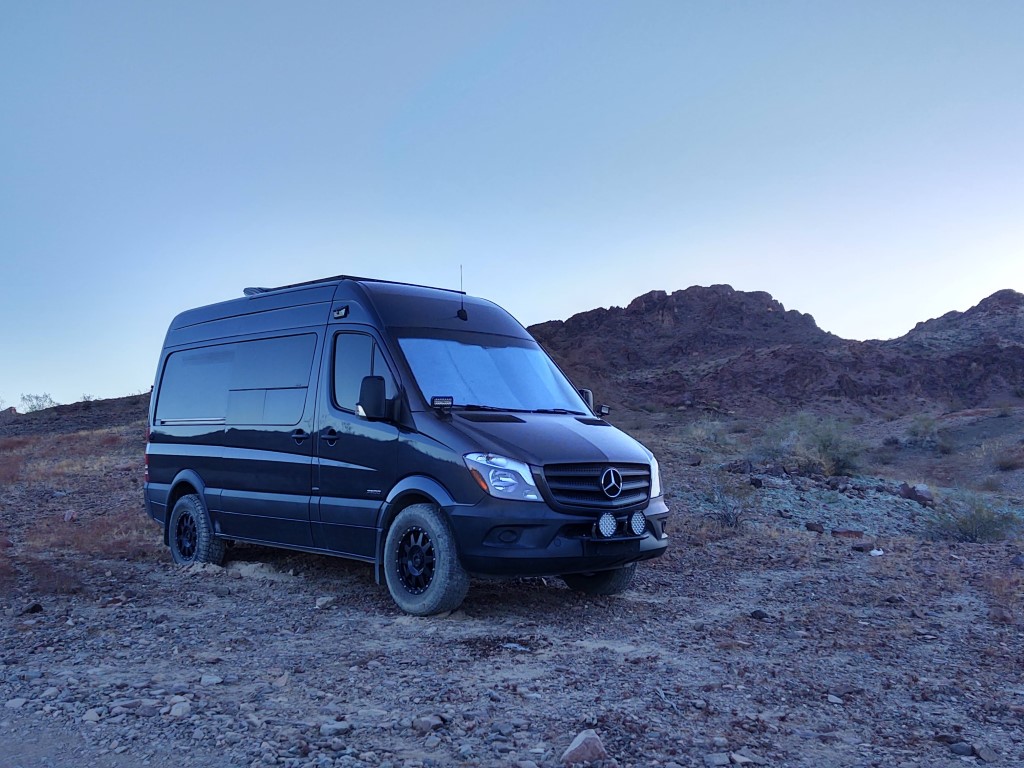
Sprinter Bumper Light Mounting Bracket with 7″ Round LED Lights
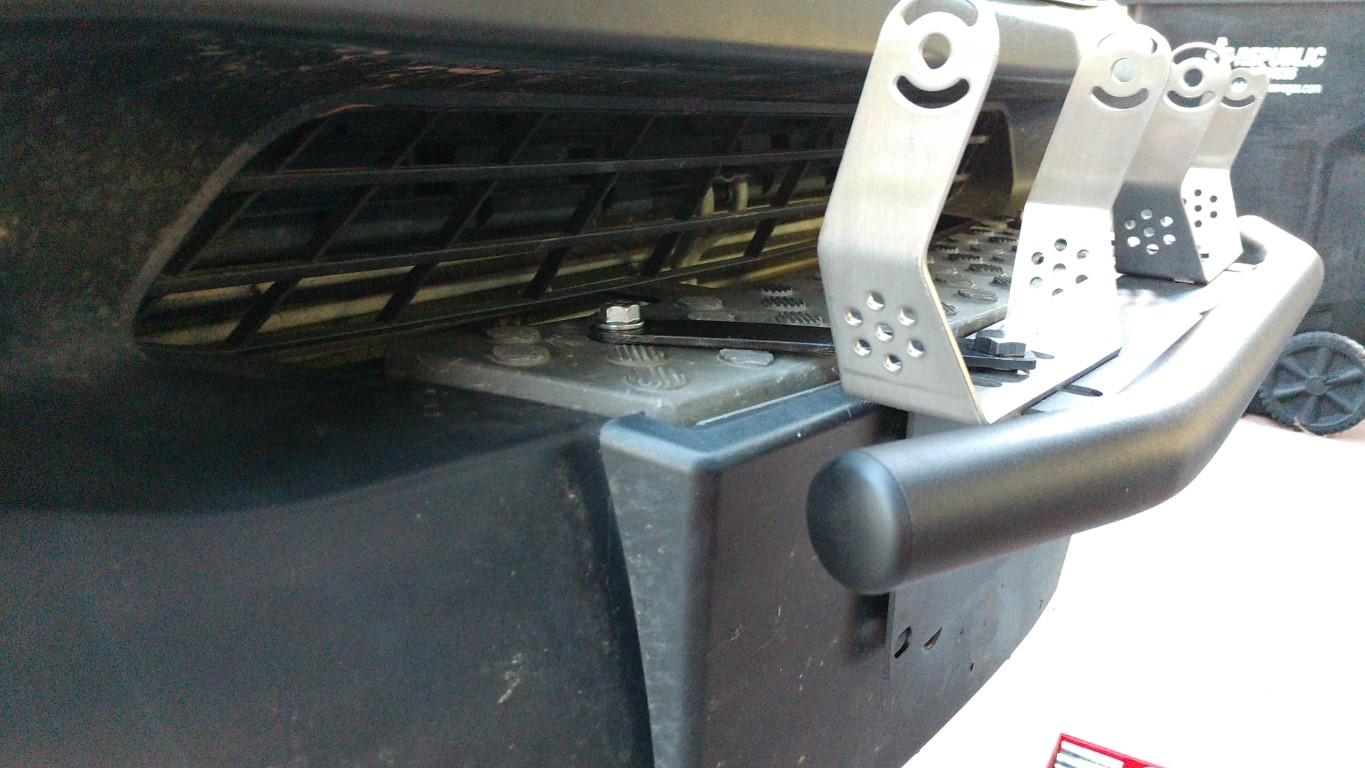
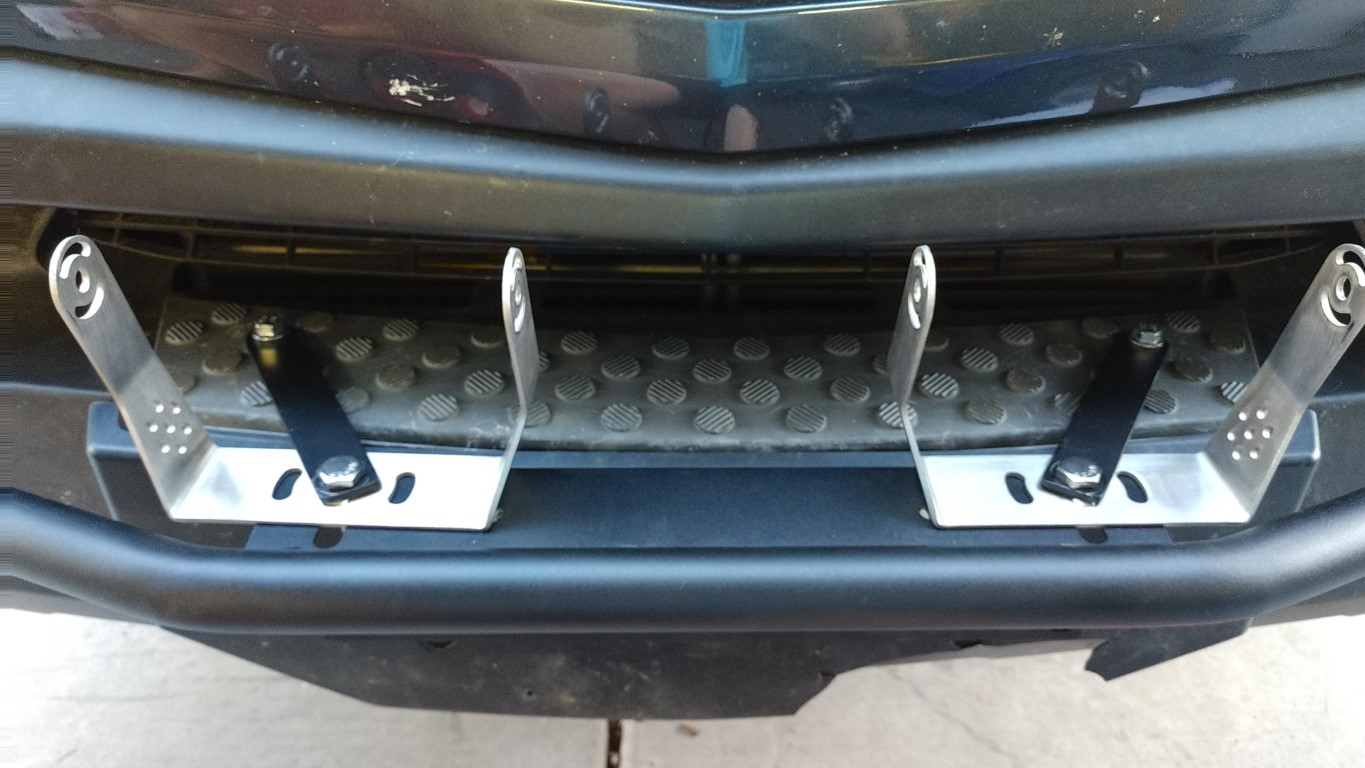
With our van, we didn’t need a big elaborate bumper. Sure they do look cool, but they don’t serve much of a purpose other than mounting some auxiliary lights. They don’t protect your van if you hit a deer or elk anyways. That’s when I came across a very simple and inexpensive solution. This bracket bolts to your bumper on the front license plate mount and gives you an easy place to bolt up some off-road lights. No, it’s not super stout or incredibly rigid, but neither is our van. Hell, half of the front end is made out of plastic. This is simply a thin wall metal bracket that bolts on and doesn’t add a ton of extra weight or bulk.
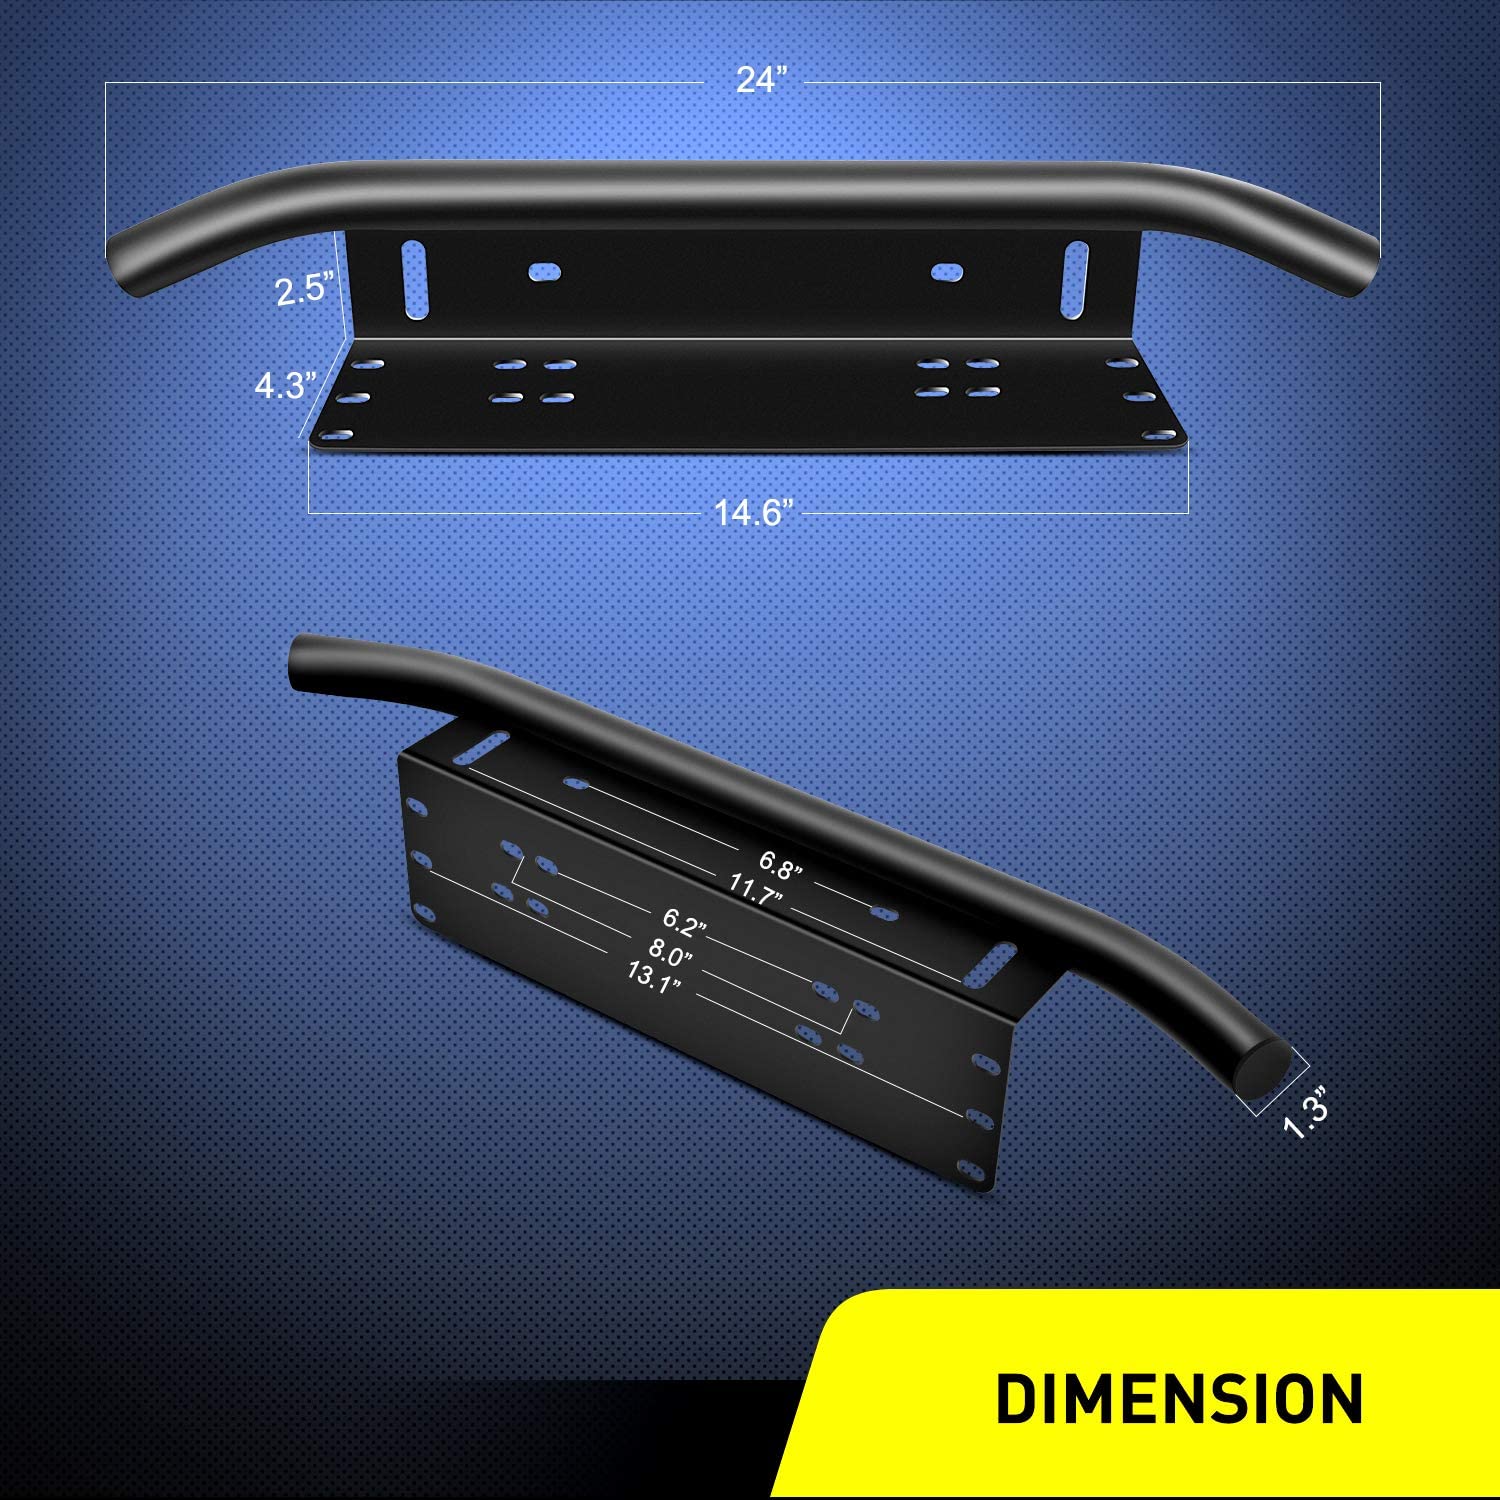
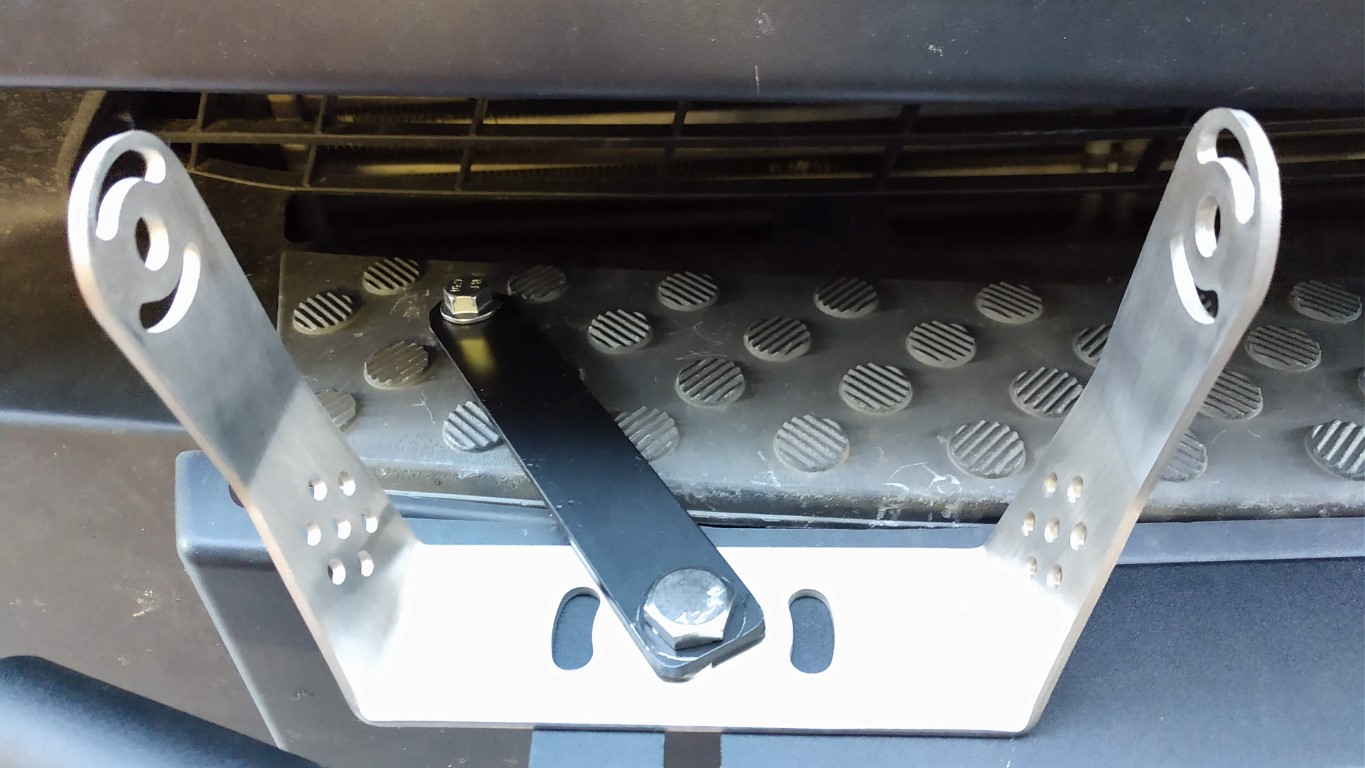
Since we would be mounting some rather large lights on this bracket, I added some supports that allow the bracket to bolt to the top of the bumper. You can use 1″ flat steel or aluminum from Lowes. I just pulled each factory bolt out of the top of the bumper and installed a longer one for the supports. Although you can’t really see them, I still rounded the edges with a grinder and threw a coat of matte black paint on them for a more finished look.
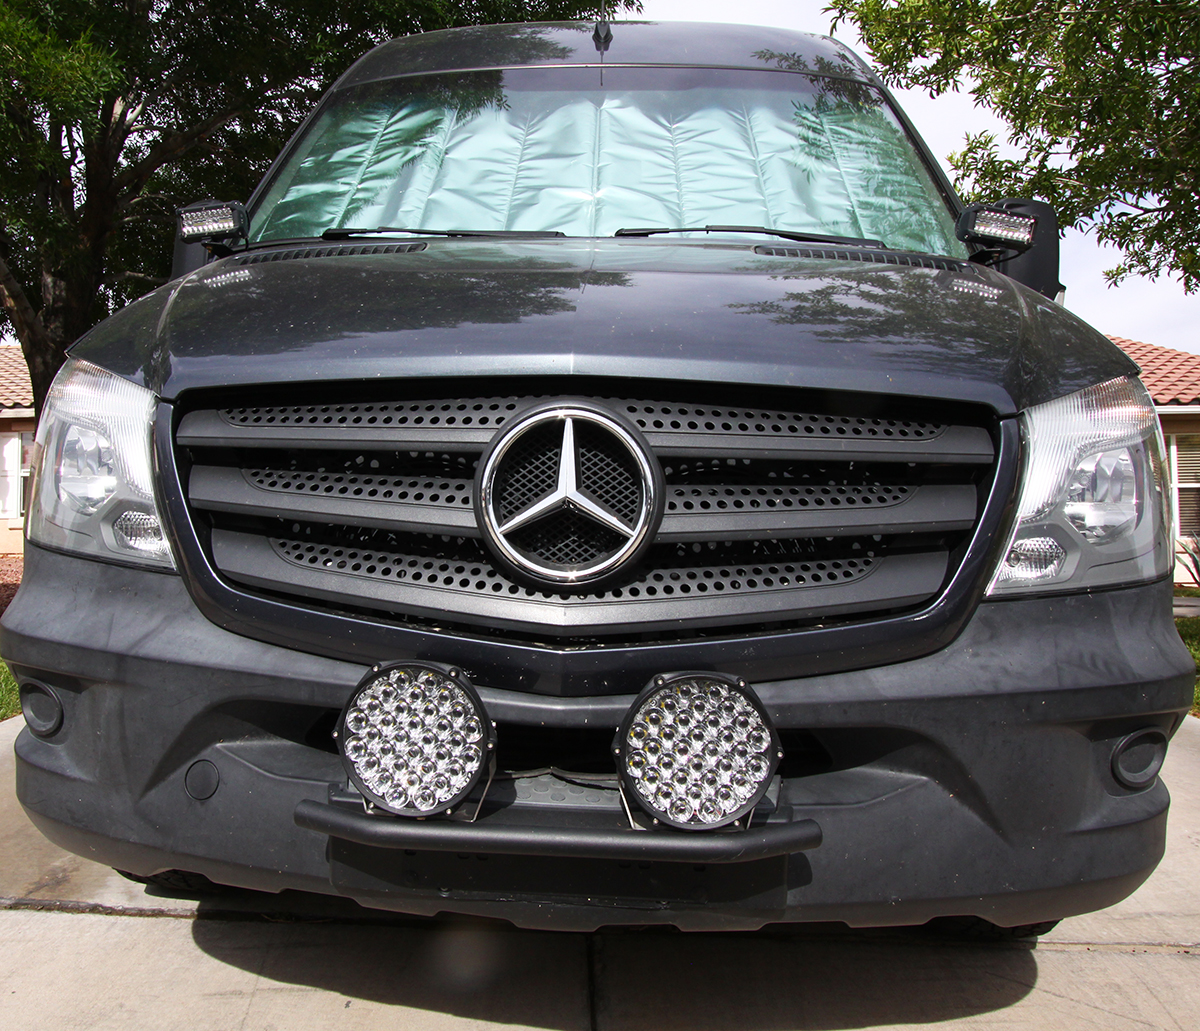
We wanted to source some good lights that wouldn’t break the bank. Sure, Rigid, KC, PIAA, and many other companies build some crazy nice, bright lights, but the price tags are ridiculous. That’s when I remembered how well the lights on my sand car work and they were cheap! So I picked up a set that is just like them but with slightly different brackets.
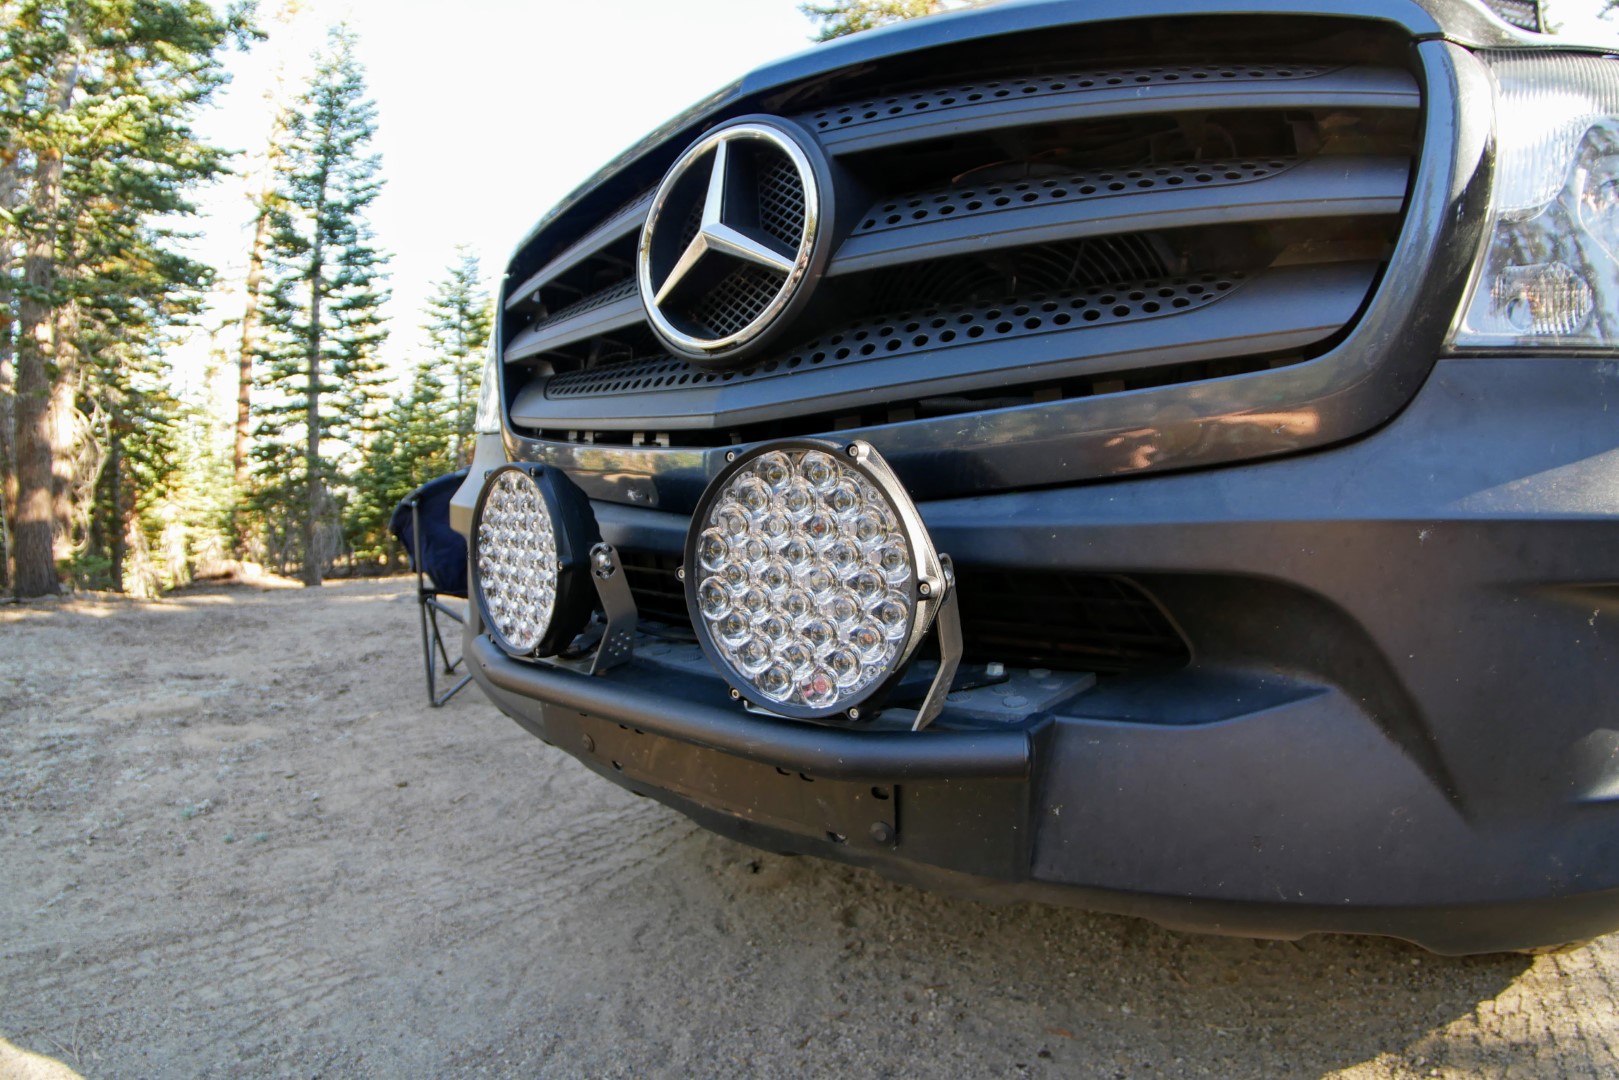
I recently searched for those lights (above) and it seems they are no longer available, however, you can still get a set of the Auxbeams on Amazon or eBay for about 150 bucks. They are 80W of LED and produce a nice combination of spot and flood beams. At 8000 lumens, they light the night up!
Hoodline 7-inch Rectangle LED Lights
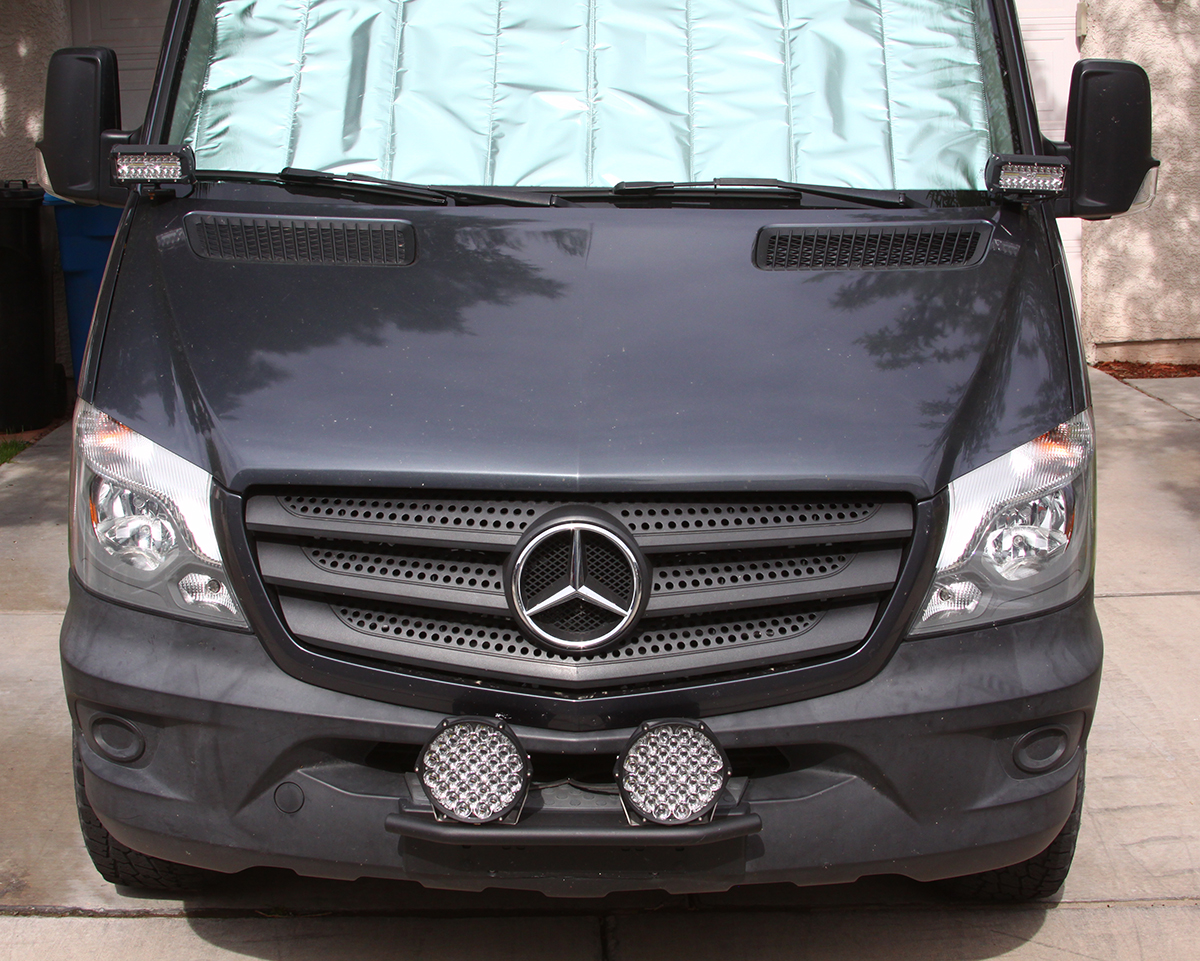
Although the lower 7″ lights emit plenty of light for going down the road, we often find ourselves looking for a camp spot at night and in the forest. I decided some hoodline lights would help so I installed the Van Compass brackets along with some 7″ rectangle LED lights pointed outwards just slightly. They help when looking off to the side of dirt roads for a nice clearing. They also help to light the side of a desolate highway when we are worried about deer jumping out in front of us.

Wiring and Switches
To make wiring a breeze, I bought two 40 amp relay, wire harnesses– one for each set of lights. They’re pretty much plug-and-play. You just hook up your power and ground to a good source (we chose under underhood house batteries), plug in your lights, and then feed the remaining leads to your rocker switches in the dash.

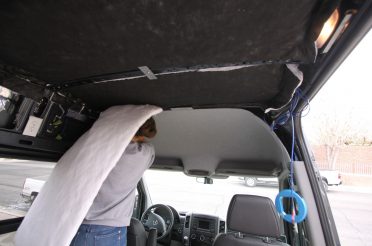
I mounted my switches in the dash blanks using Hein’s 3D-printed switch housings and switches off eBay. They fit perfectly!

Performance
As you can see in the photos, the auxiliary lights light up the night. You end up seeing things you never even knew were there. Just be super careful running them on the road. These lights are for off-road use only and will blind an oncoming driver.

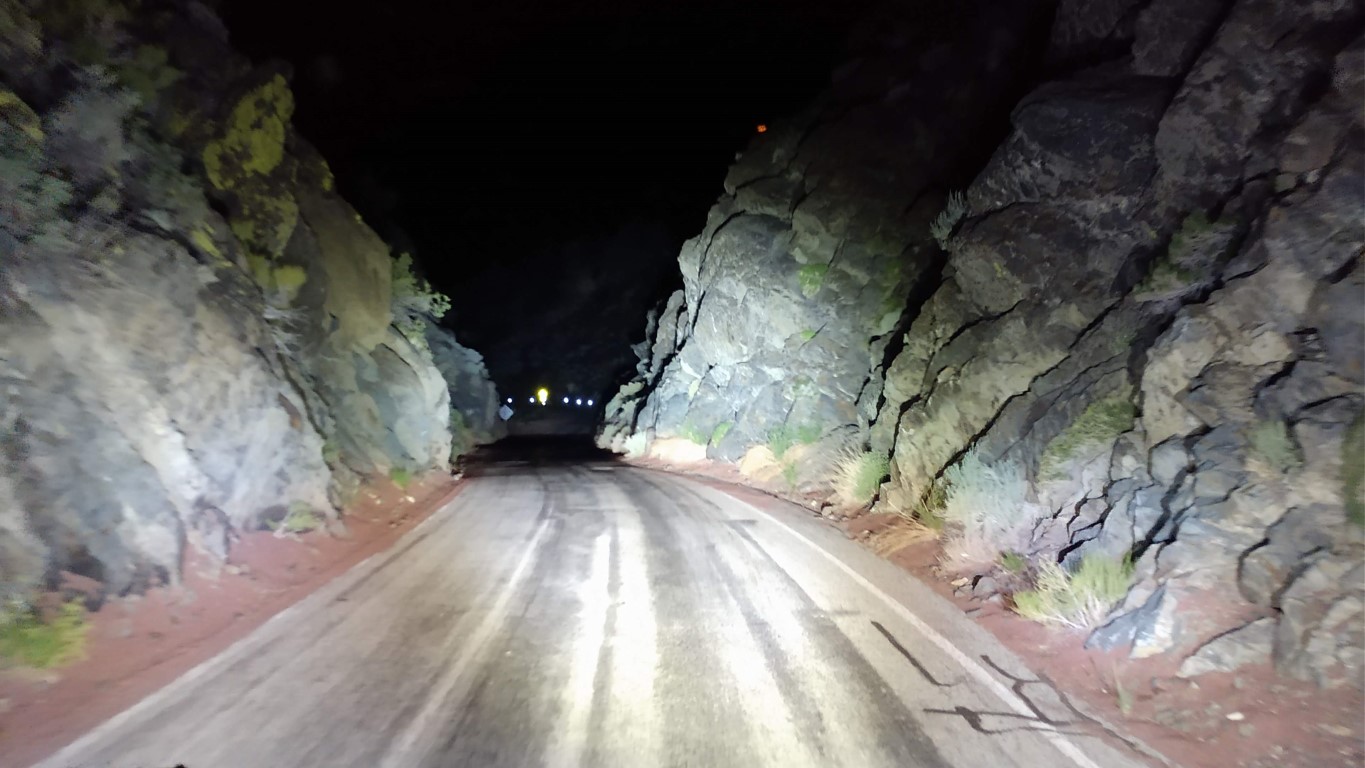
We’ve used these lights for over a year now and they still work great. There isn’t anything we’d change about them. As soon as we hit the dirt, we always flip them on and light the desert or forest up!

2 Responses
Orlando
Nice ride. I just installed KC lights using the same bracket you used. Did you get a sensor remove or adjusted? Mine keeps on beeping
Thx
Pete
Thanks! No nothing had to be removed. Are you referring to the parking sensors? Mine doesn’t have those.