While camping off the grid, the best way to keep the house batteries charged is from the sun. When we first started building the van I was on the fence whether or not to put solar panels on the roof. I was thinking we might not need a solar setup since the batteries charge while we’re driving and our van will be very simple. The more I thought about it, just running lights, vent fan and refrigerator would run down the battery while parked. It was a no-brainer at that point to install solar.
Solar Panels
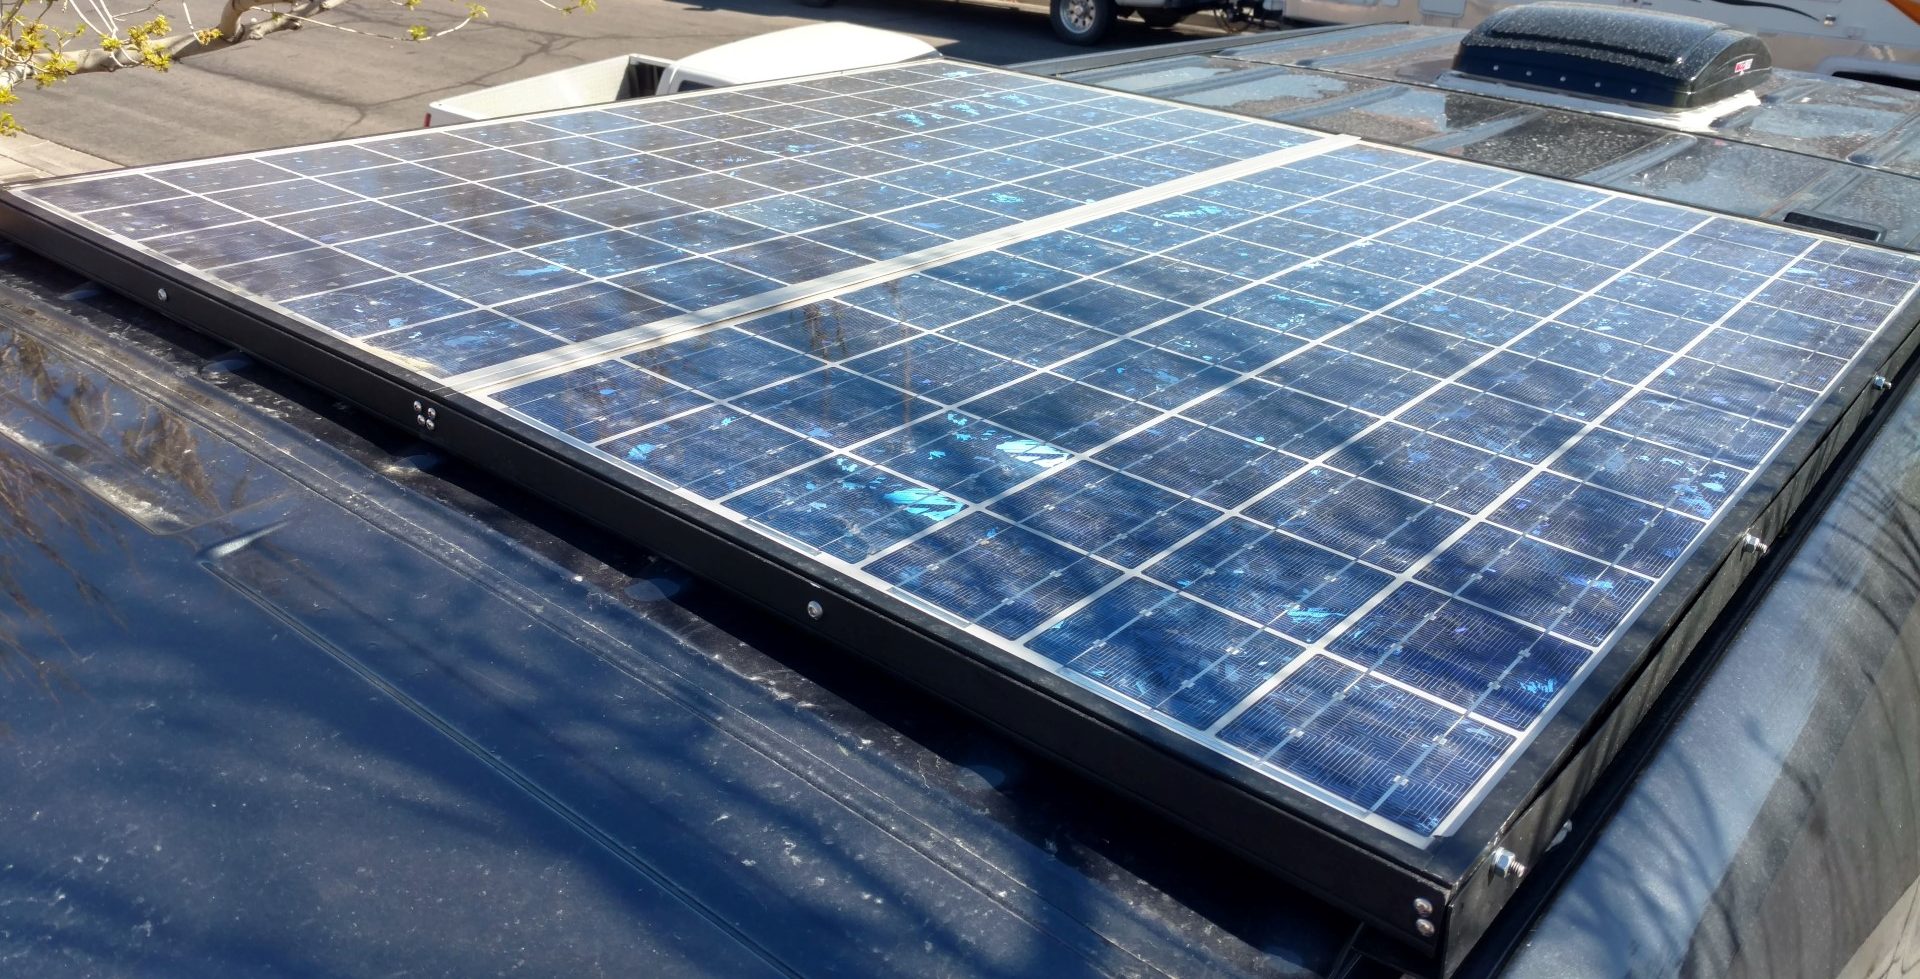
The solar panels we chose were two, 100W panels by Photowatt International. They were donated to us by some friends who no longer needed them for their project. I don’t believe these are made anymore because I can’t find much about them on the web. They are French made and seem to be older, but they work and they were free! We’ll take all the help we can get during this build.

If we had to purchase panels, there are plenty of good quality panels out there at reasonable prices such as these.
Renogy 100 Watt, Monocrystalline Solar Panels or the updated 175W version Renogy Solar Panel
Layout
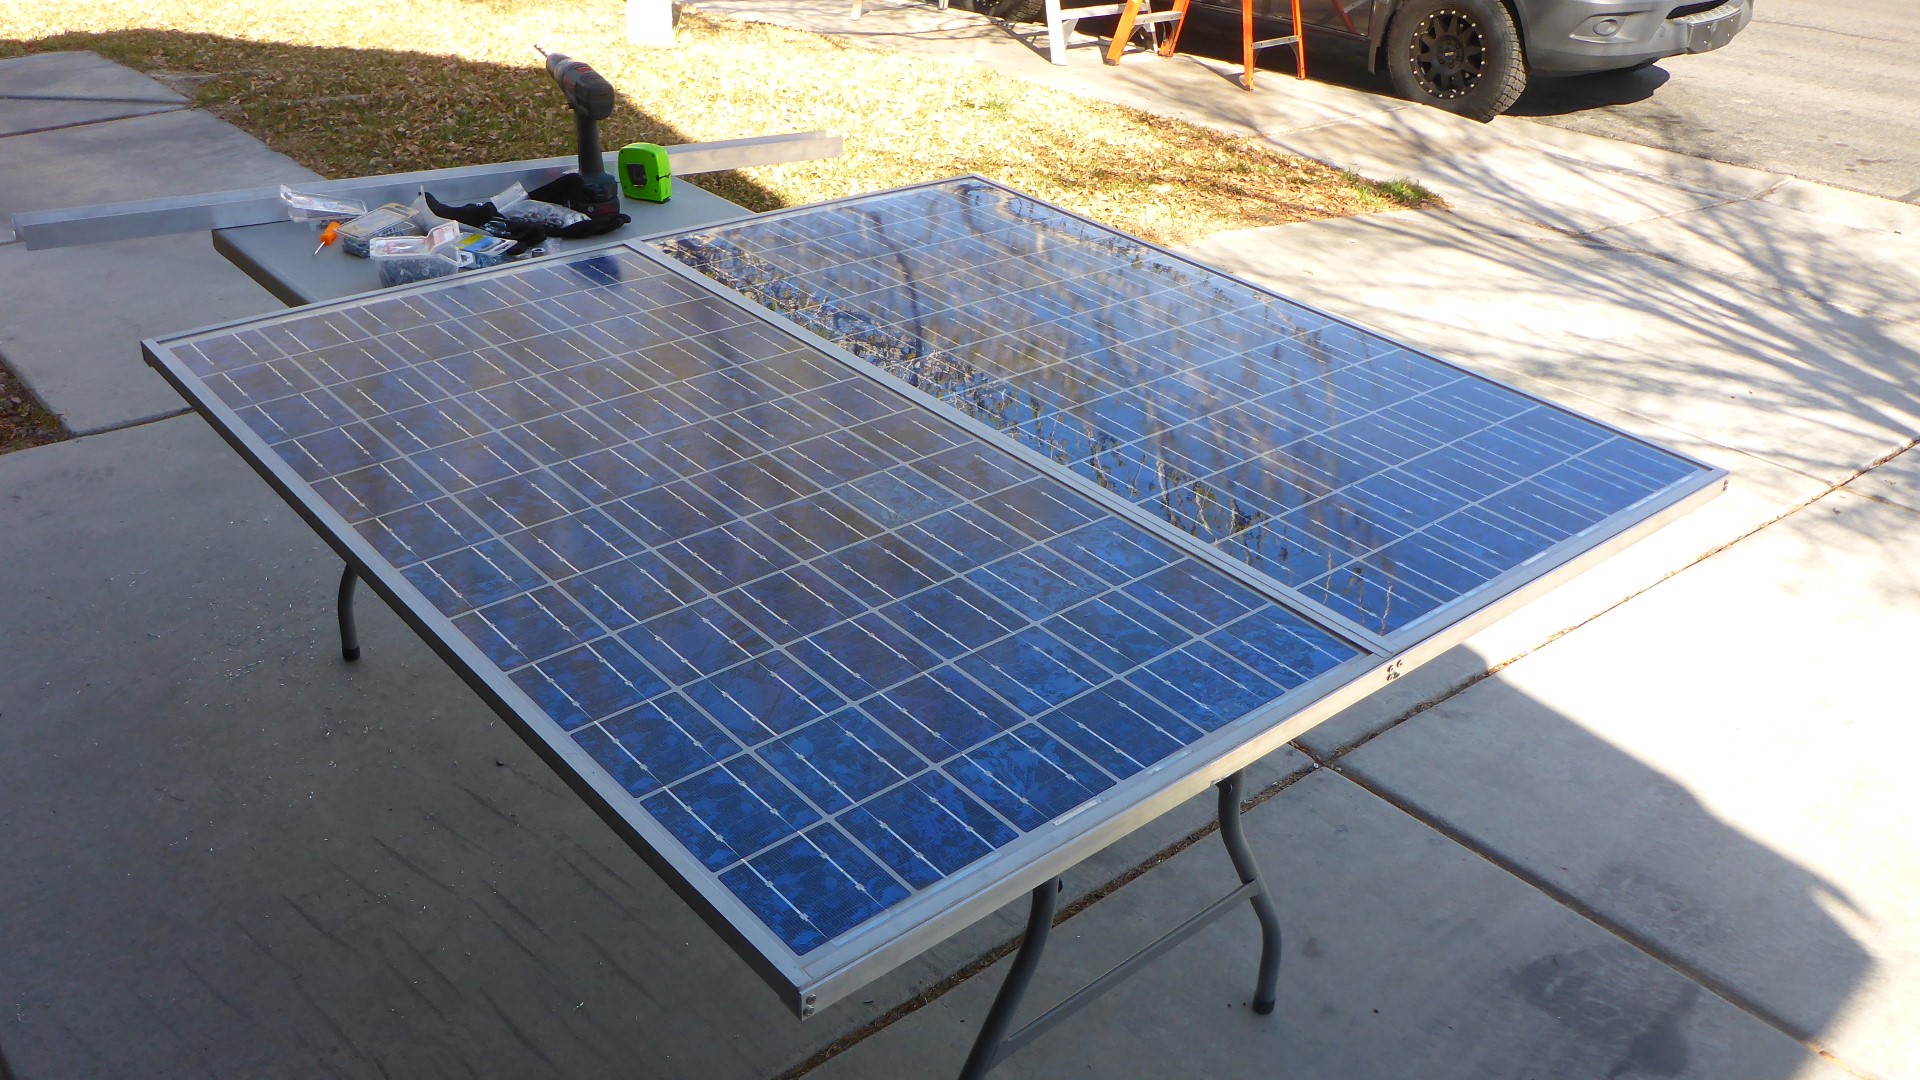
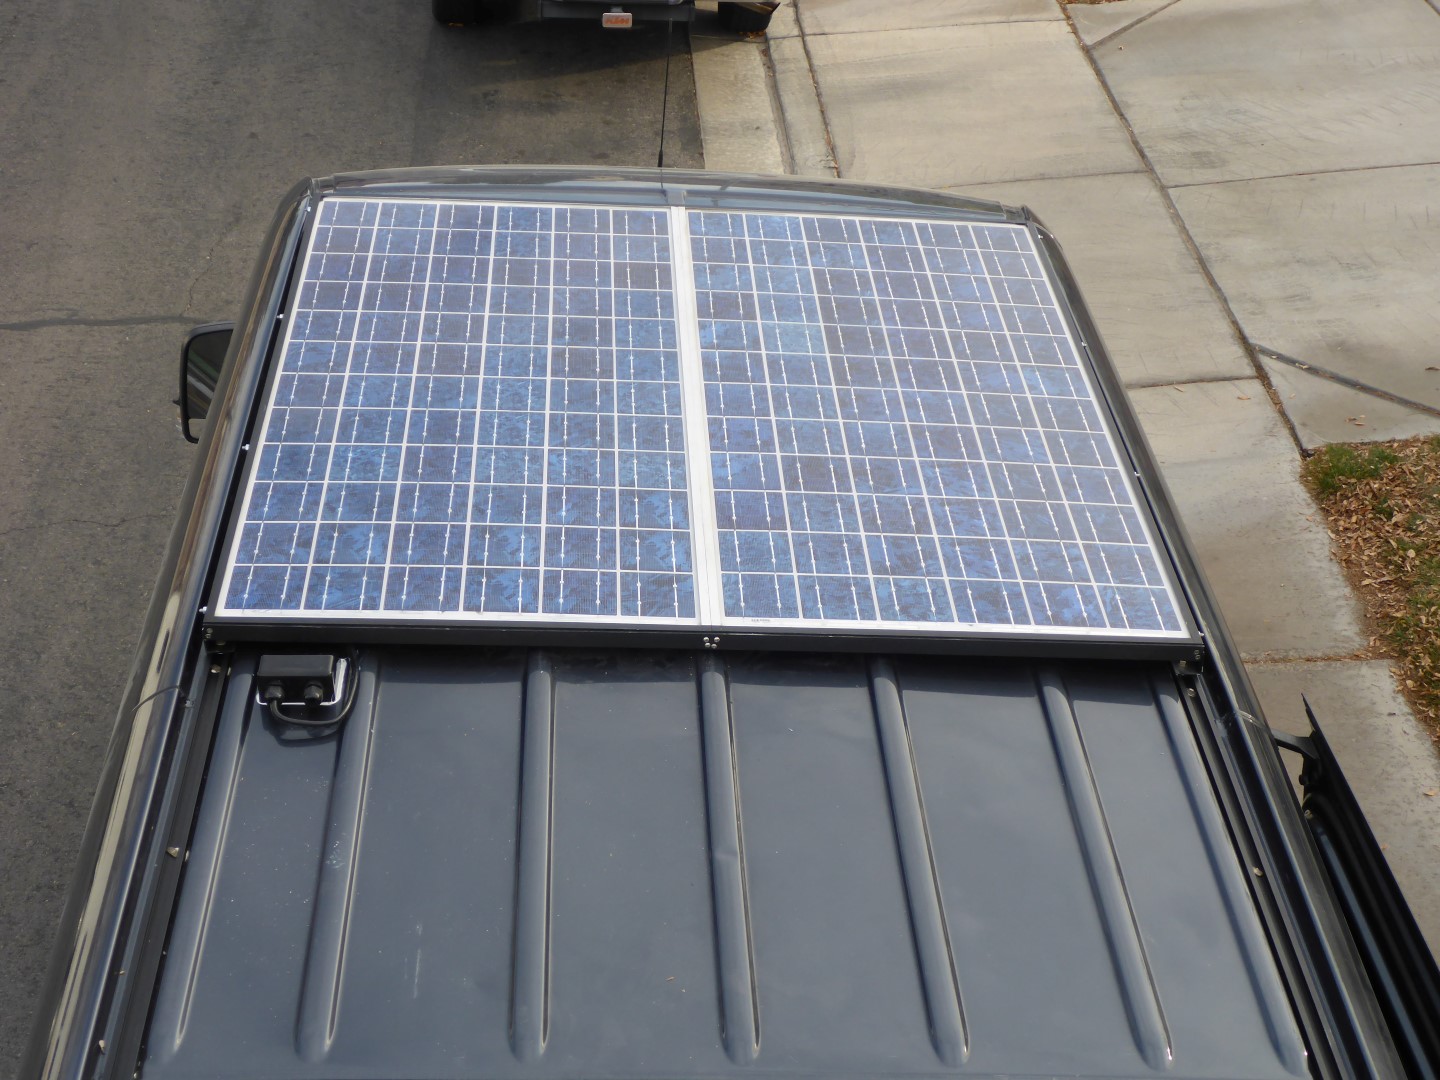
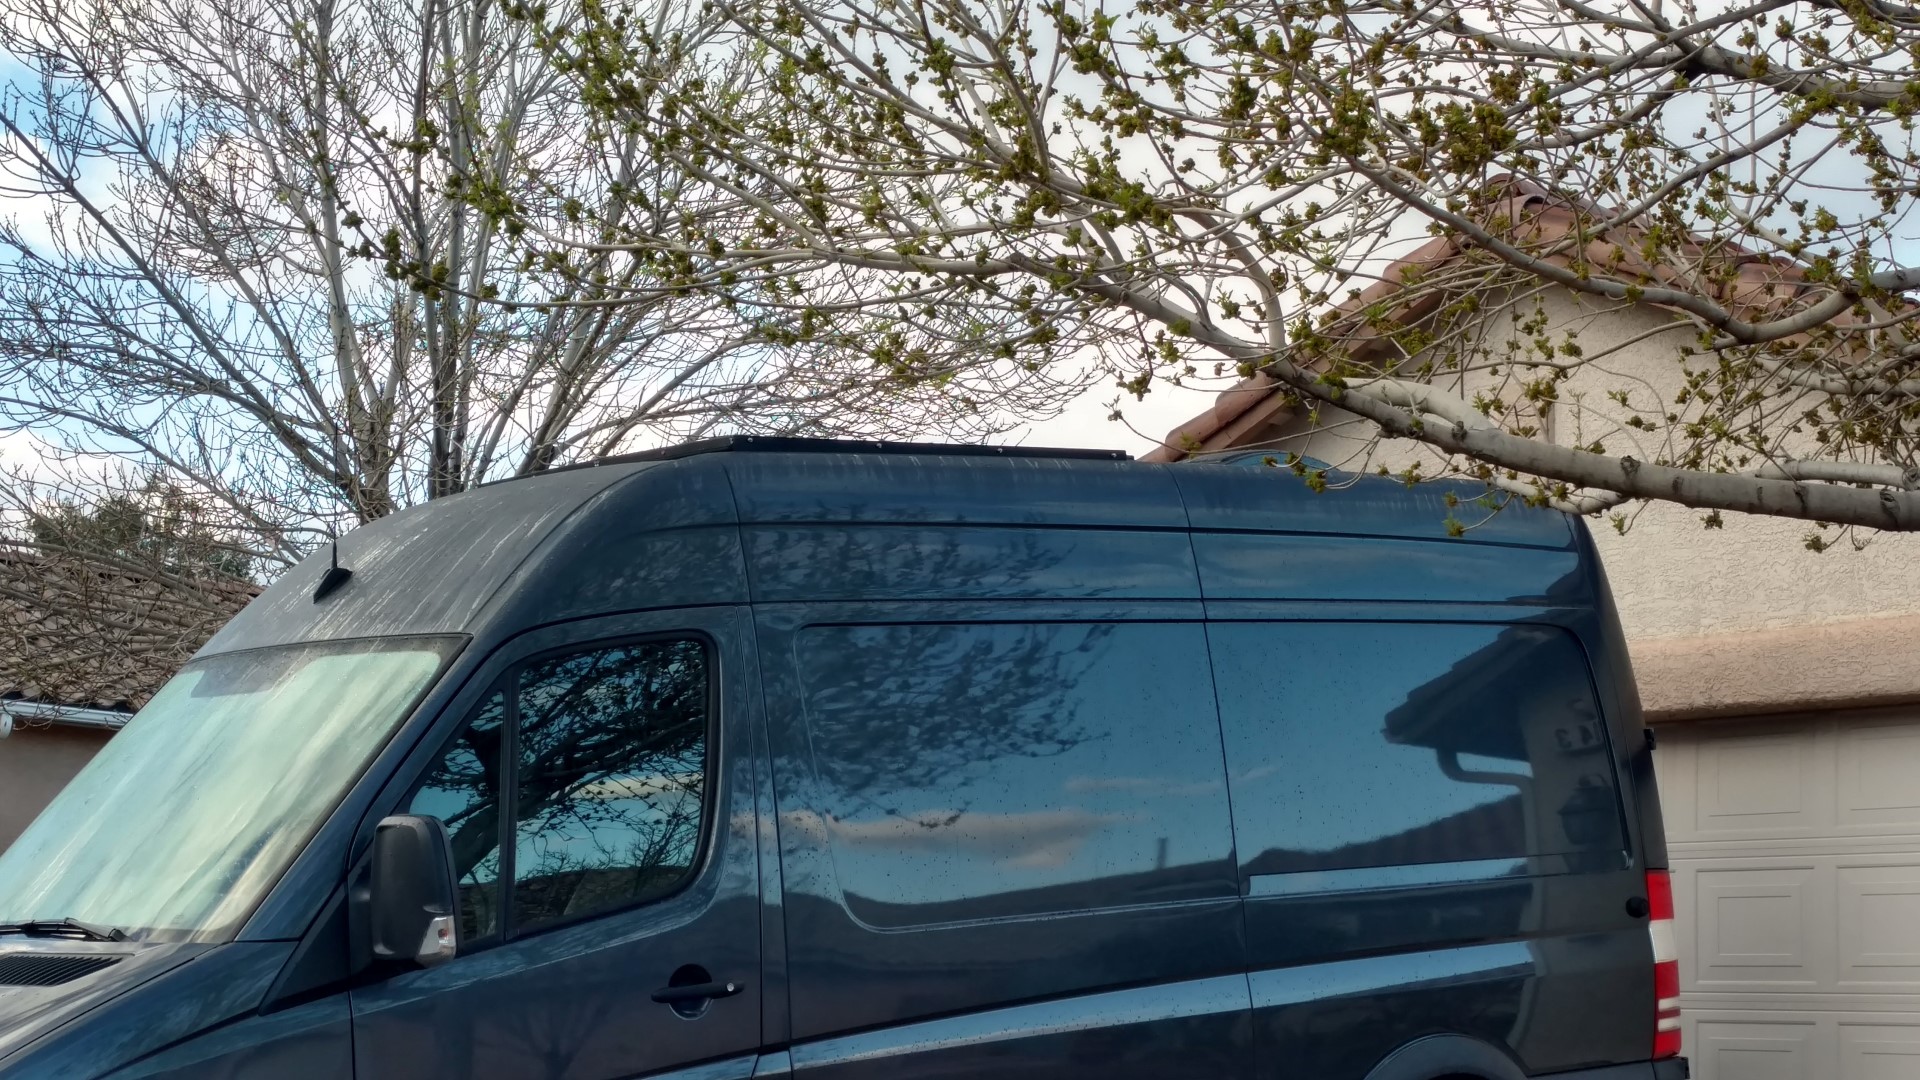
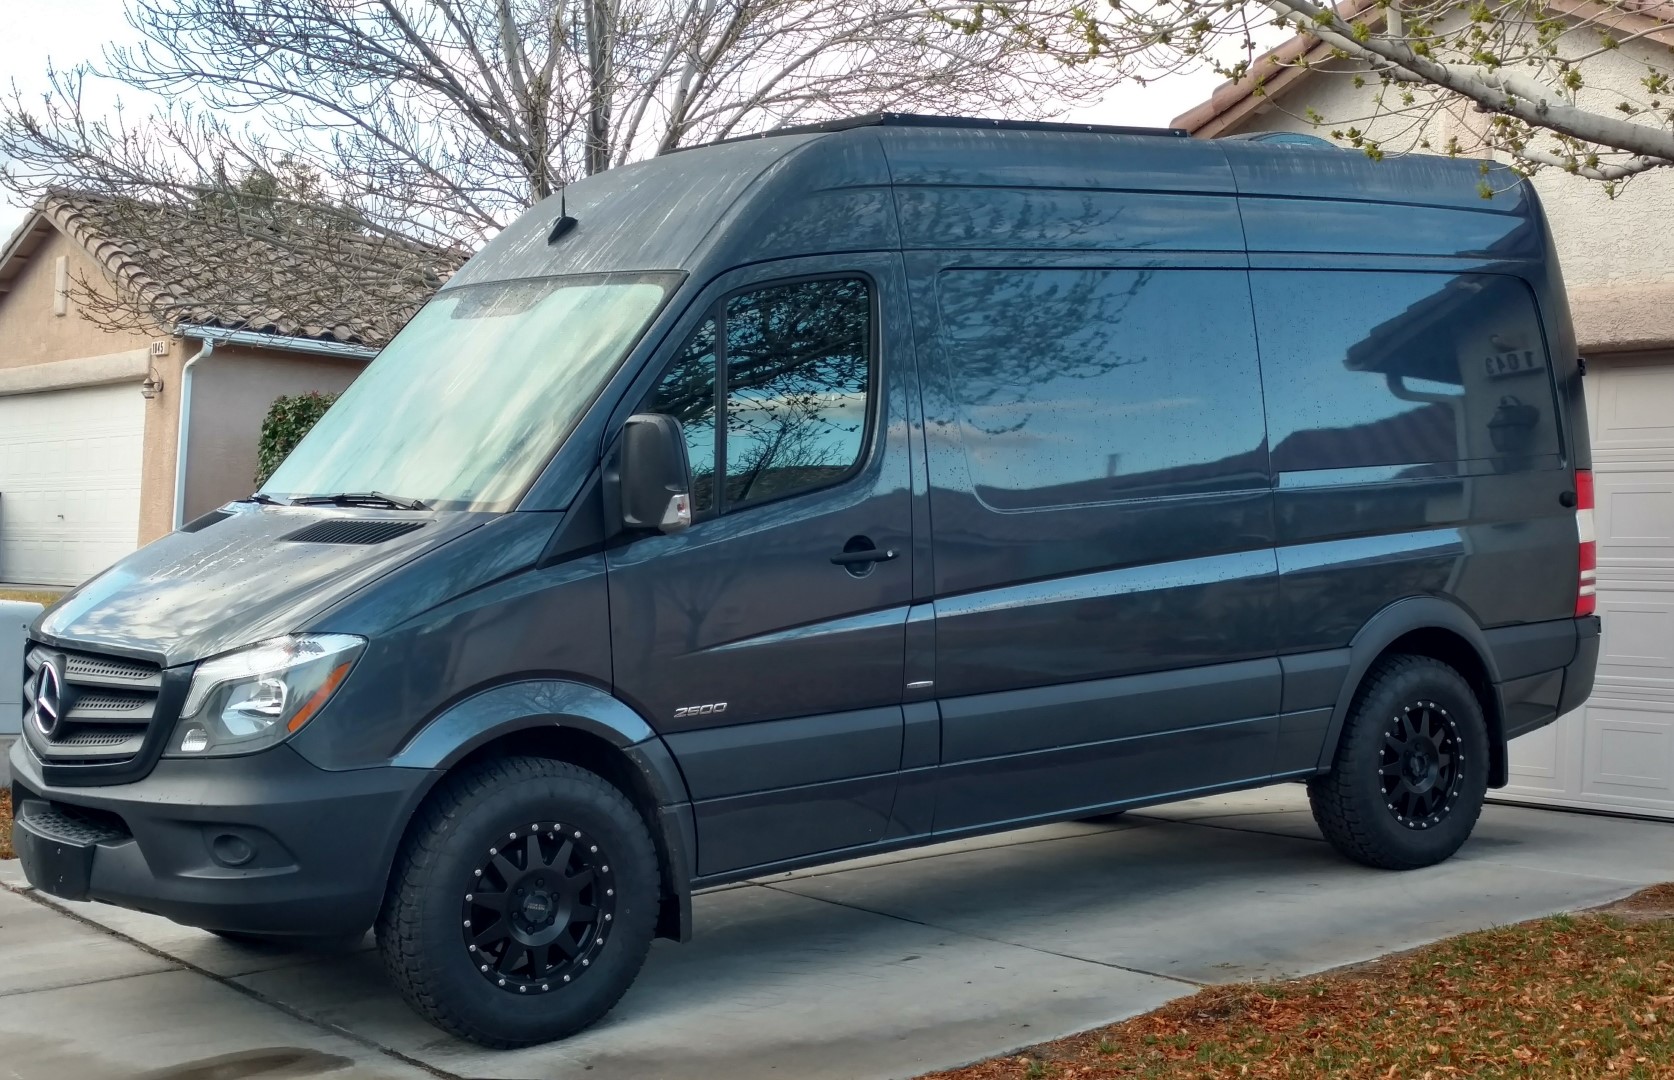
At first, I was leaning towards mounting them sideways across the roof. The length of the panels was perfectly in line with our roof rails. The longer side of the panels has stronger frames, therefore only the ends would need to be mounted. I ran into an issue though. The electrical boxes lined up perfectly with the raised rib in the roof and the panels would have to be installed quite a bit higher than I wanted. So the next option was to bolt them together, build a frame, and mount them length-wise.

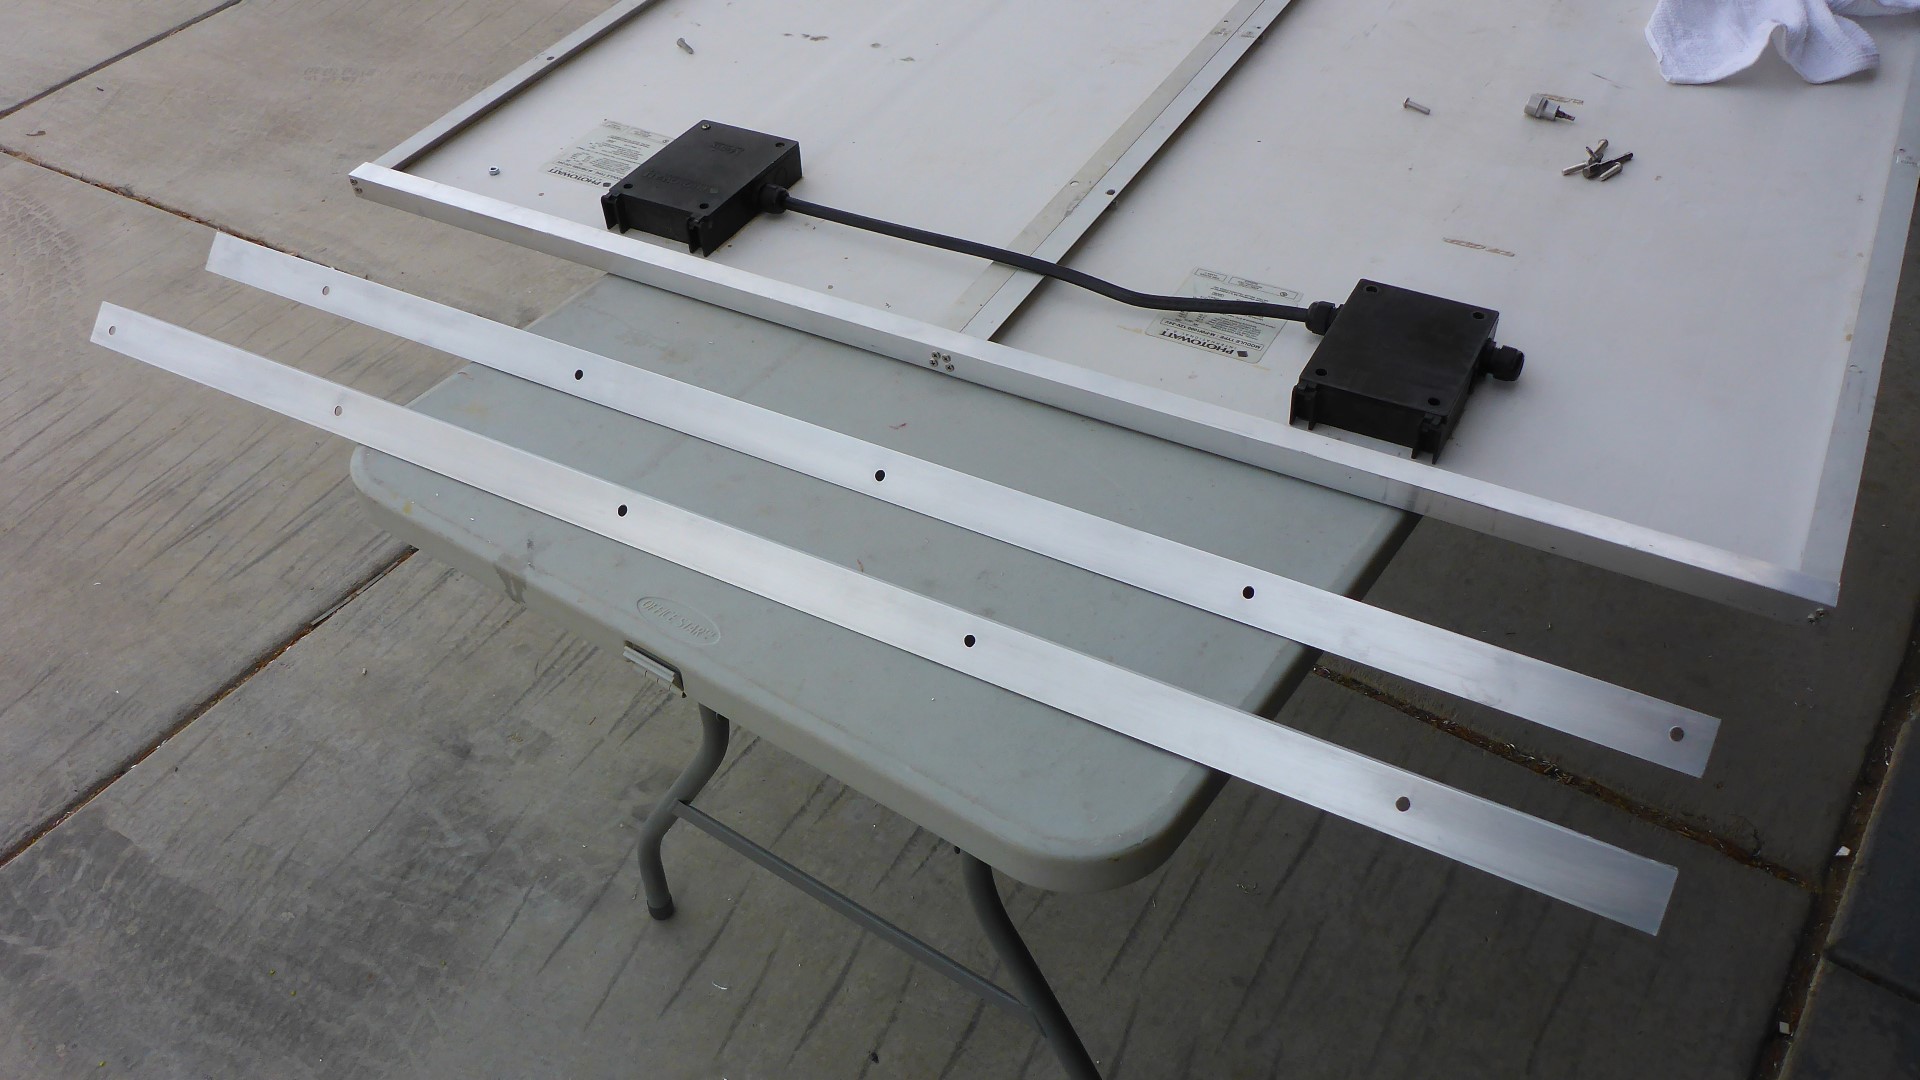
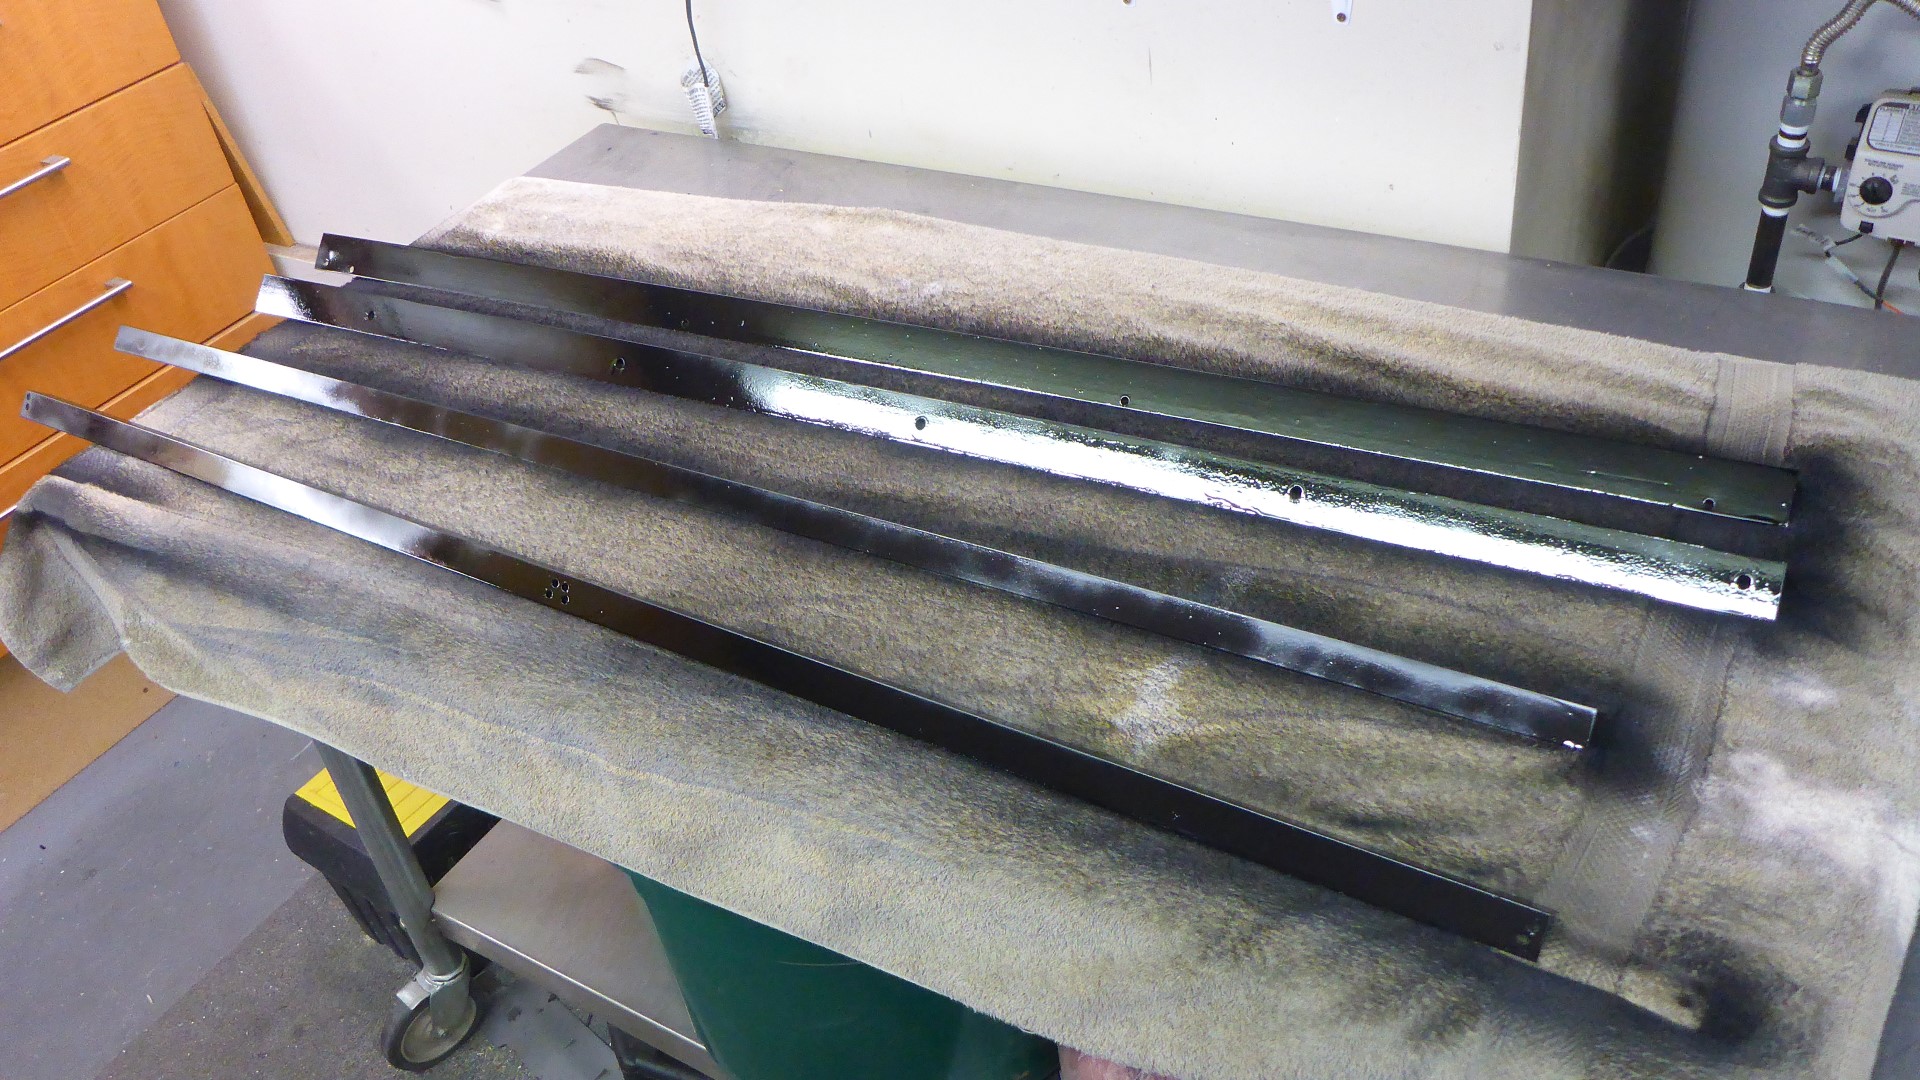
Building a frame
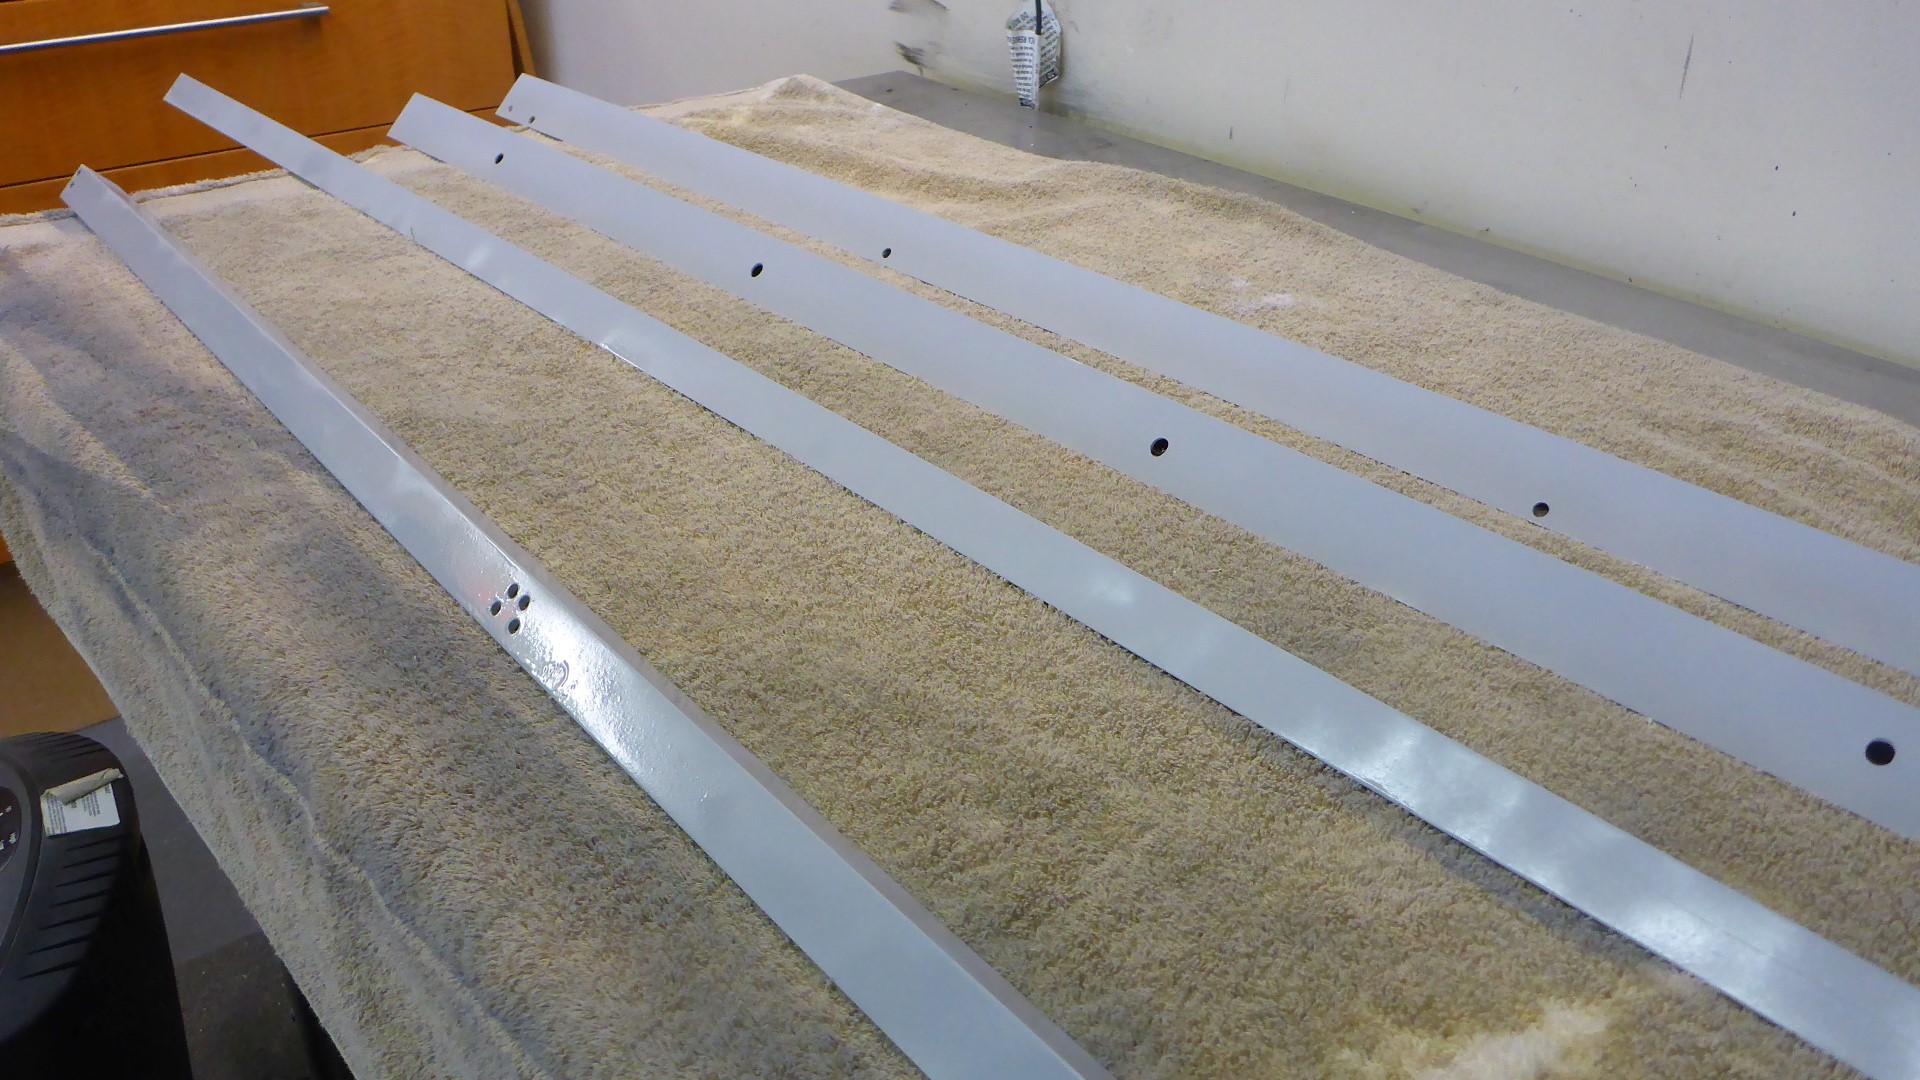
The weaker side frames were braced with 1 inch, 1/8″ thick aluminum angle. I would be attaching the frame to the rails with 1.5″ angle aluminum. Since many of the van accents are black, I painted the frame and brackets flat black to match.


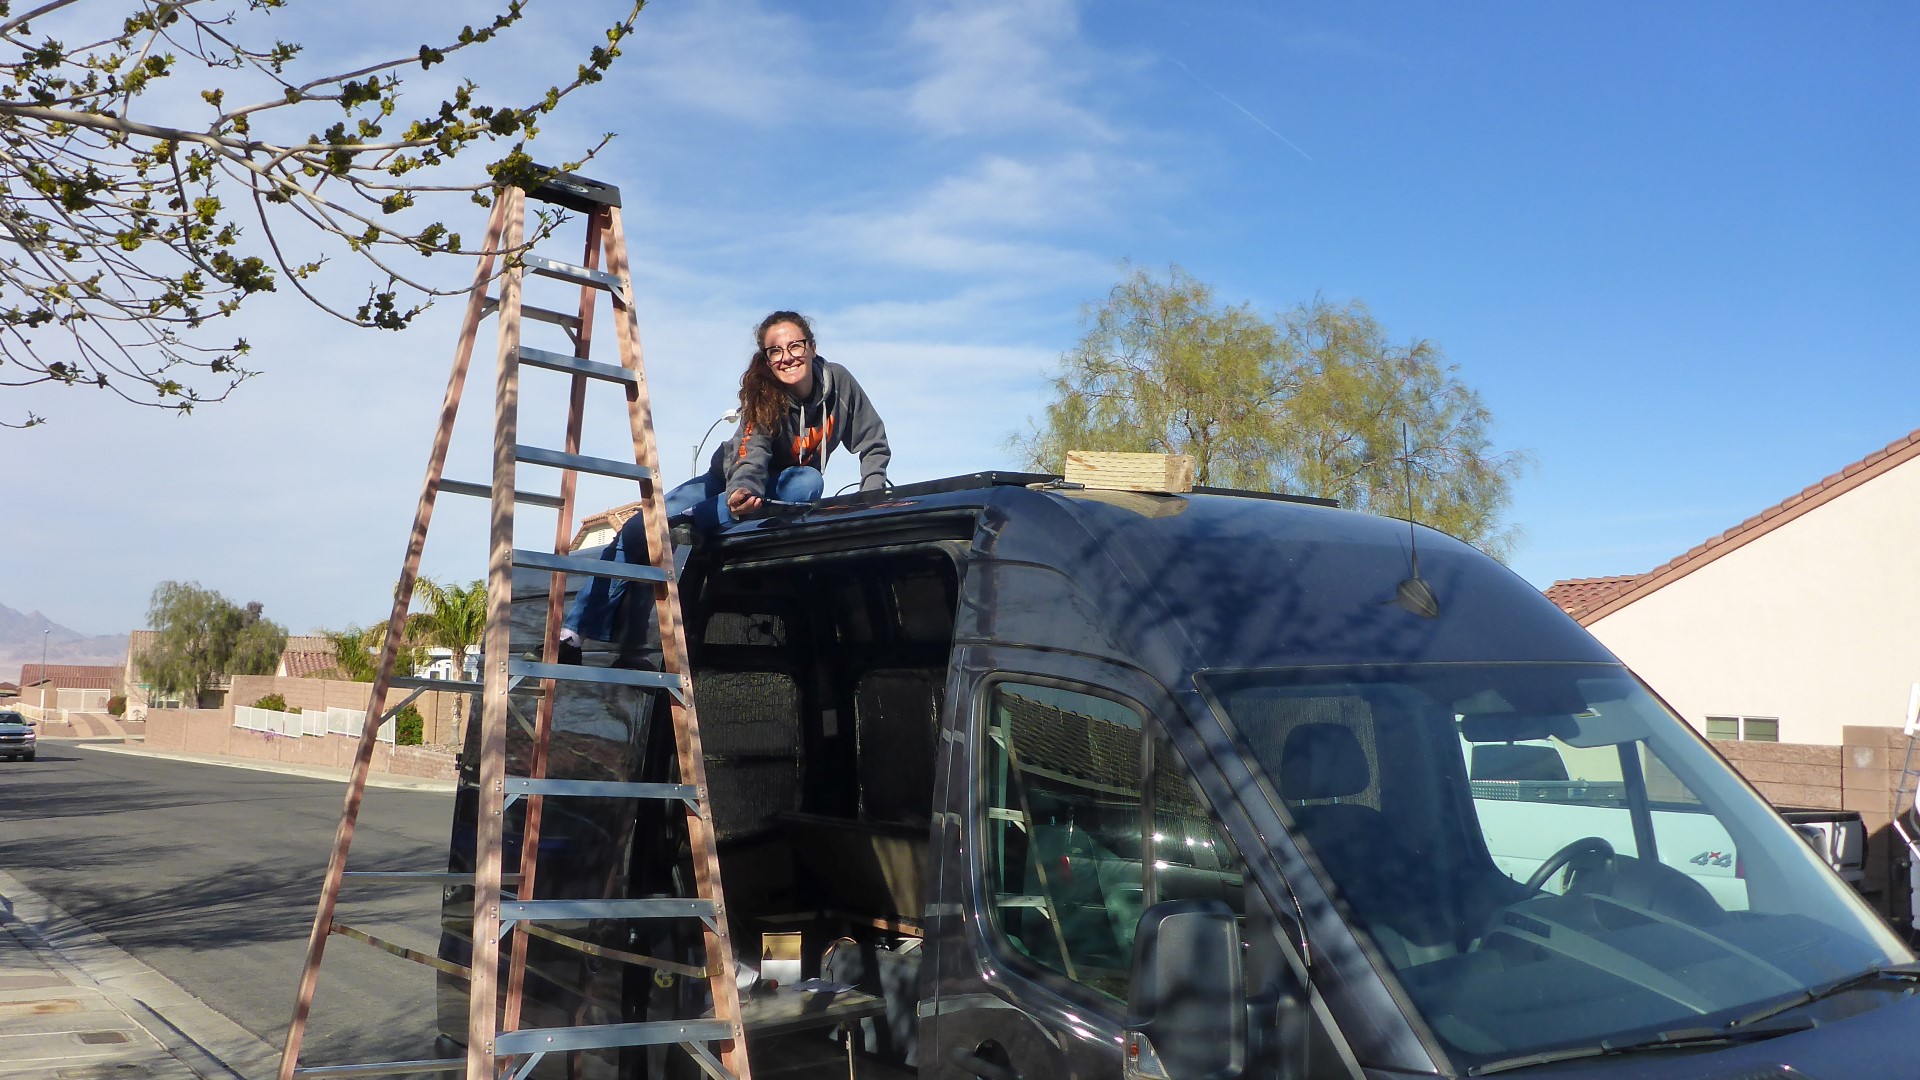
Mounting to Roof
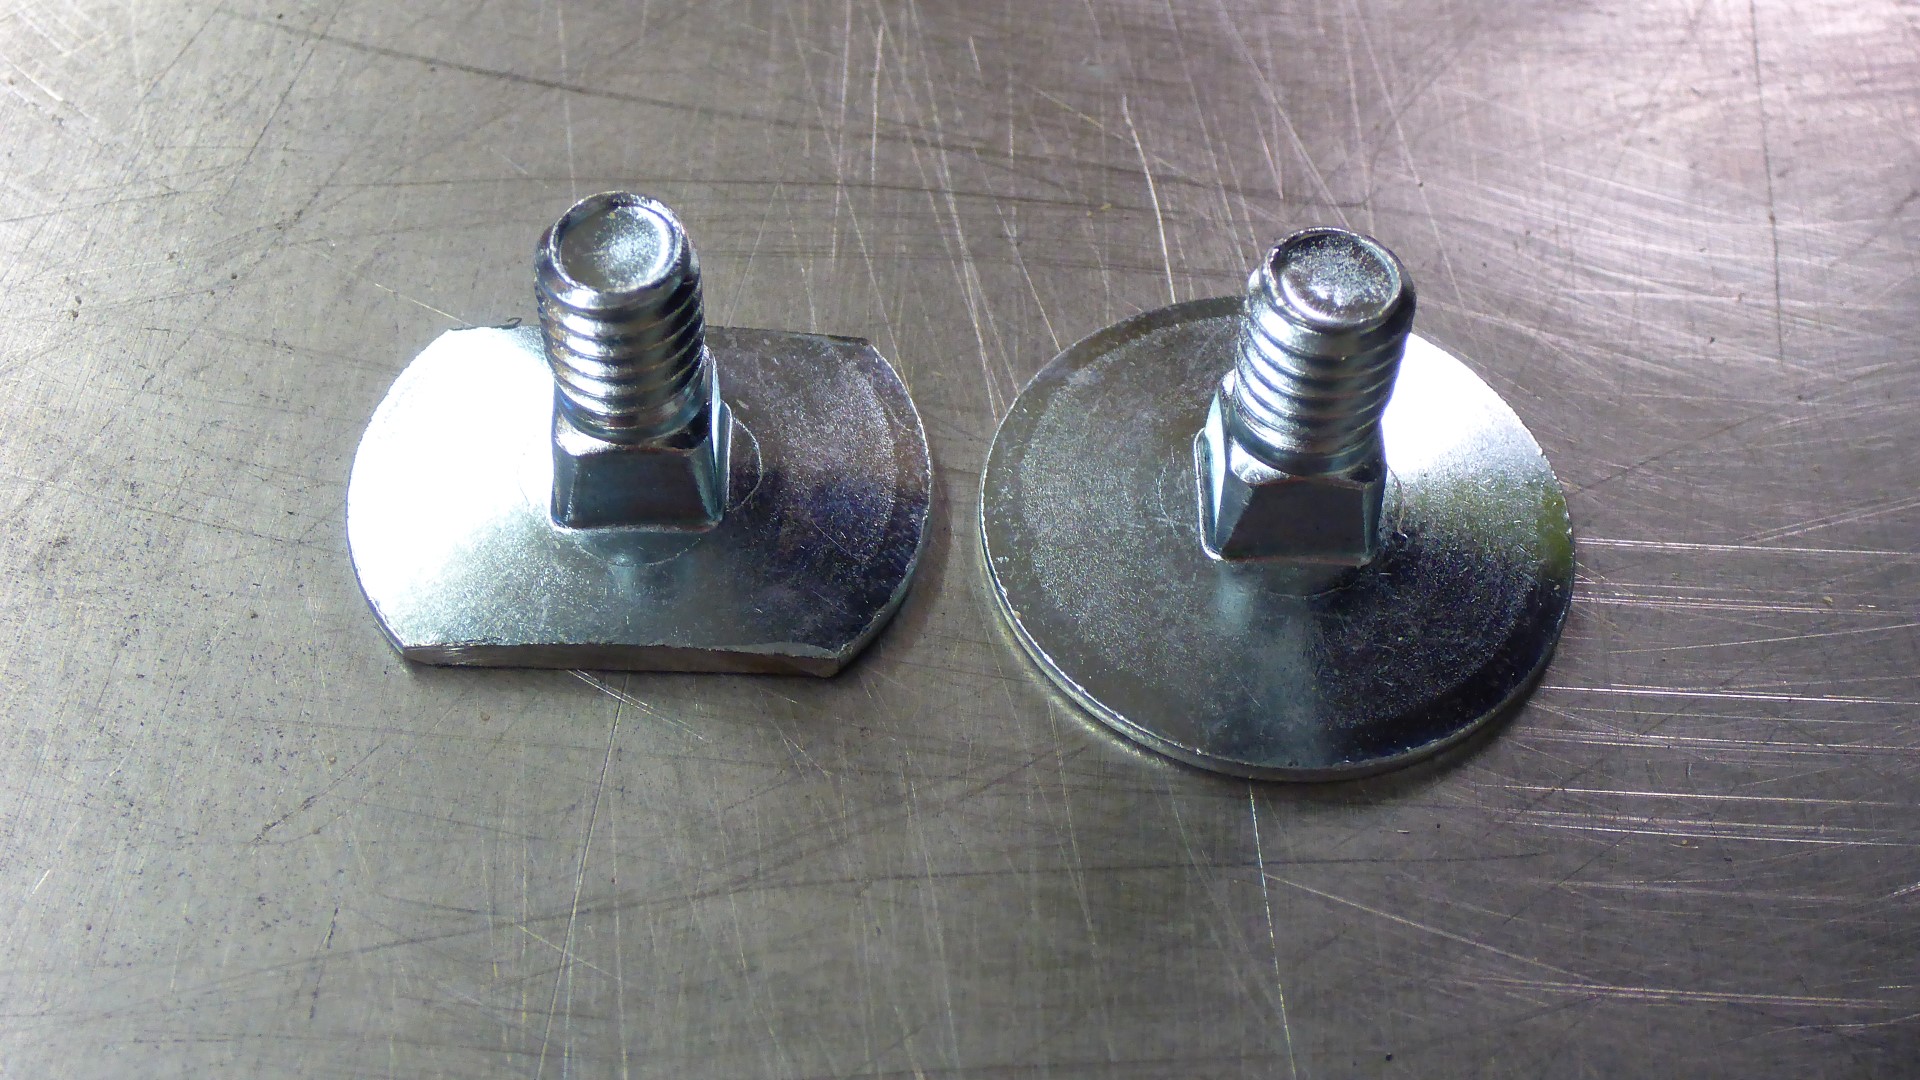
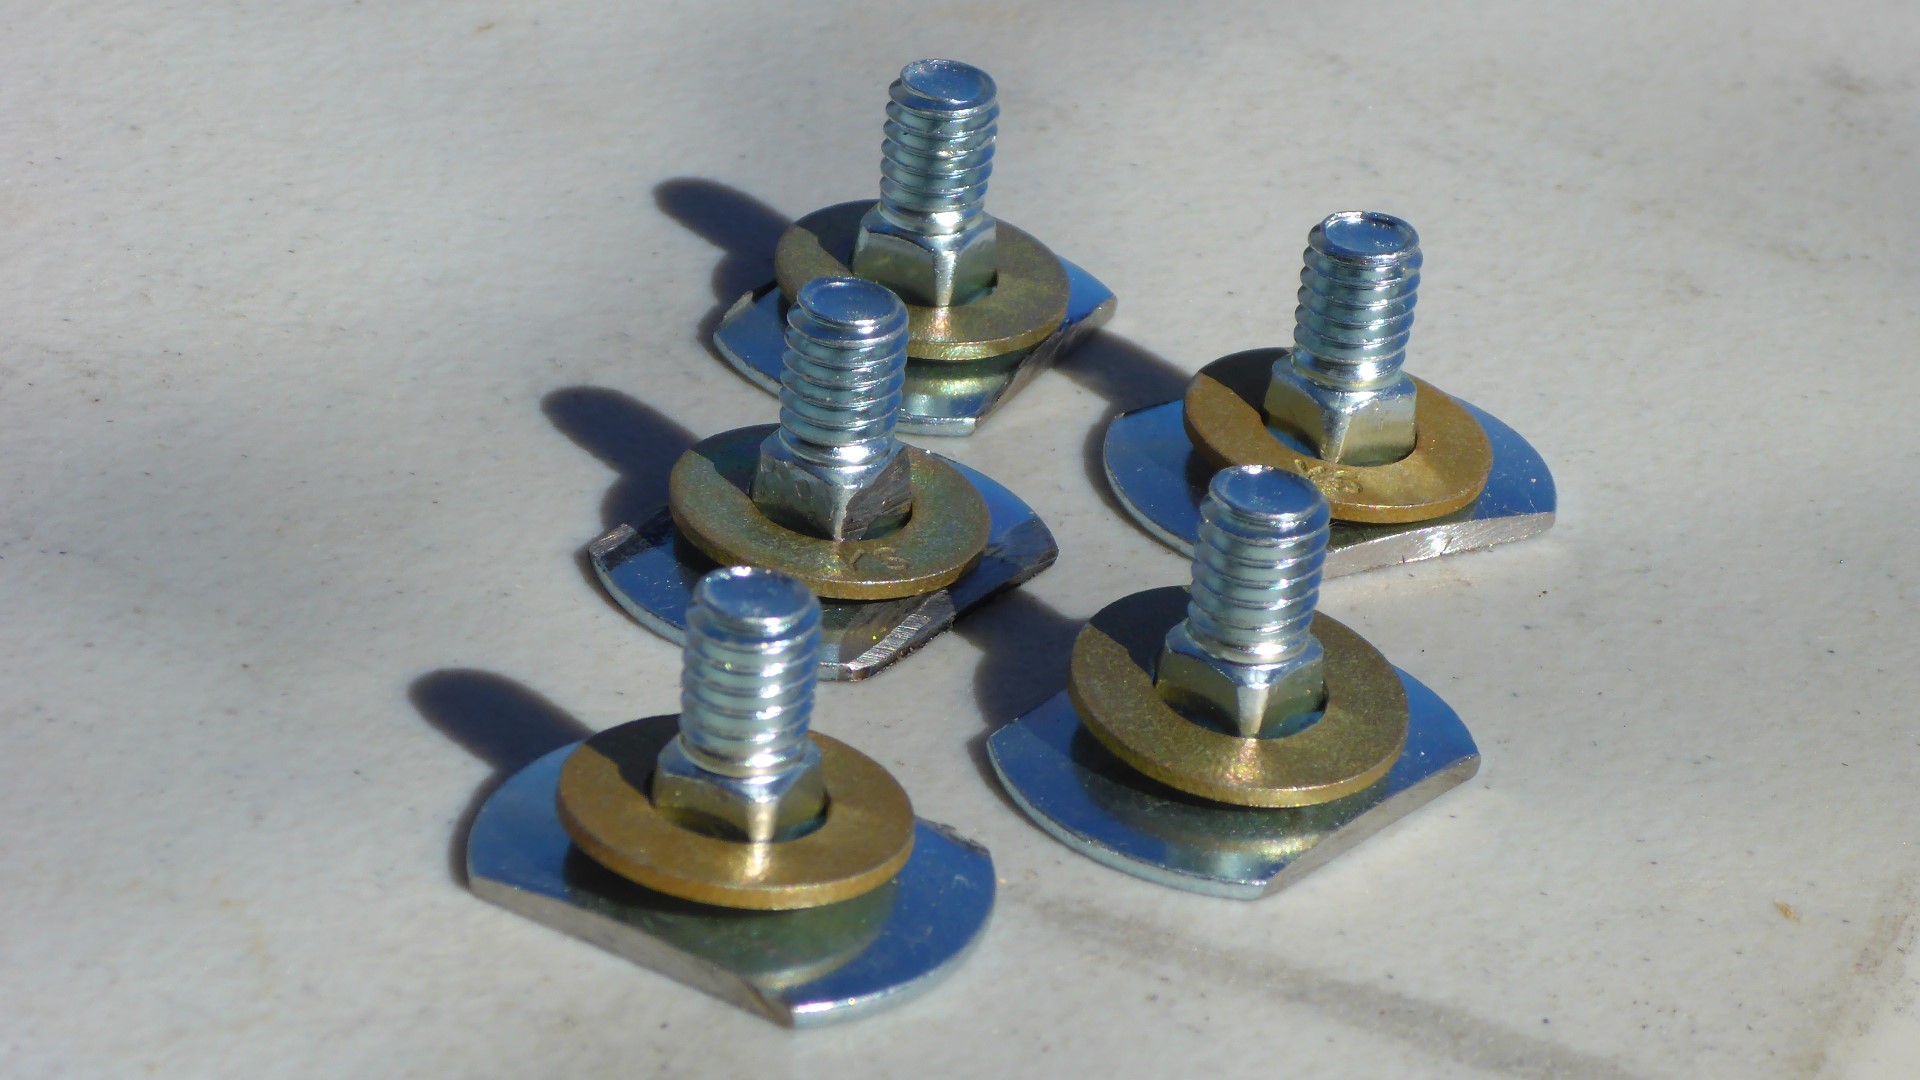
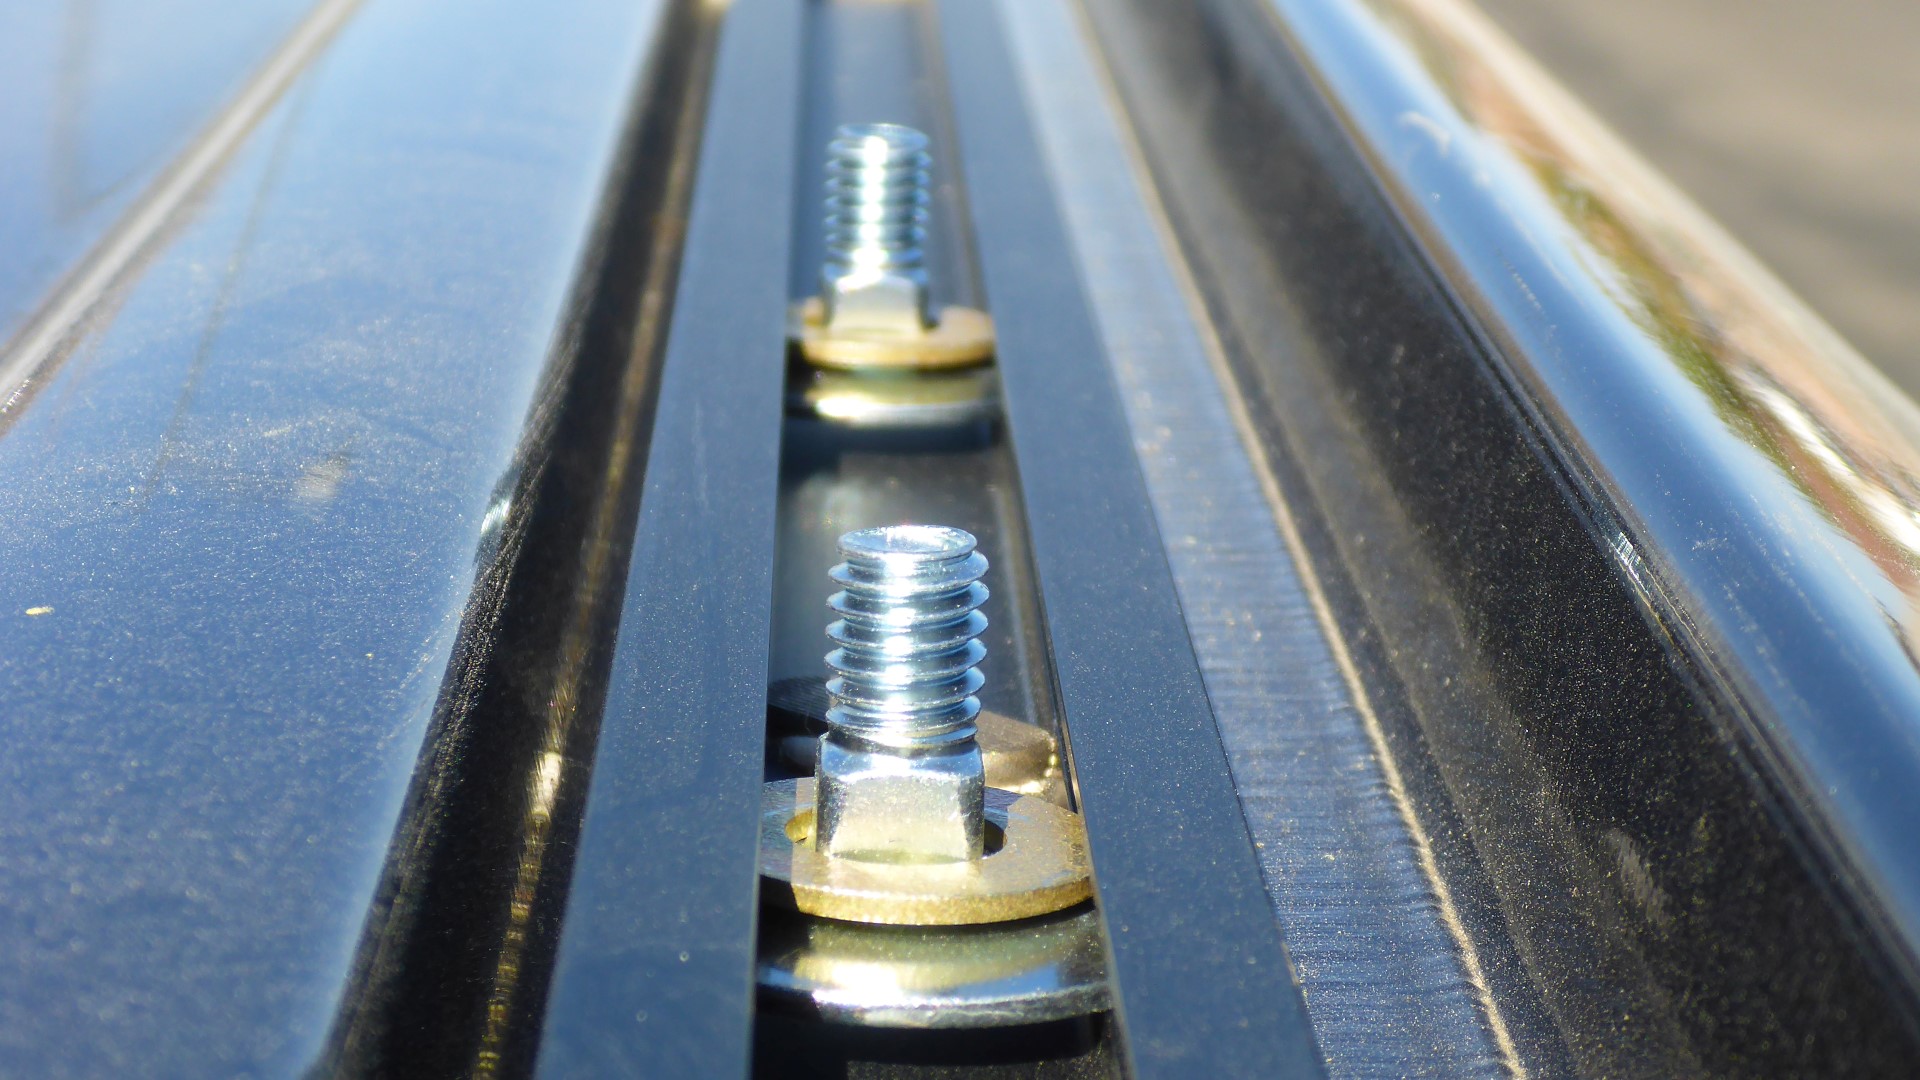
After a bit of online research, I couldn’t find much regarding hardware that is sold separately from an expensive kit that can be used in the Rhino-Rack roof rails. This got me thinking of my method which ended up being a much cheaper route. I used, what is called, elevator bolts to slide into the tracks. I cut down the heads to the exact width of the track (3/4″) and used some 3/8″ washers to space the threads right where I needed them. They worked perfectly!
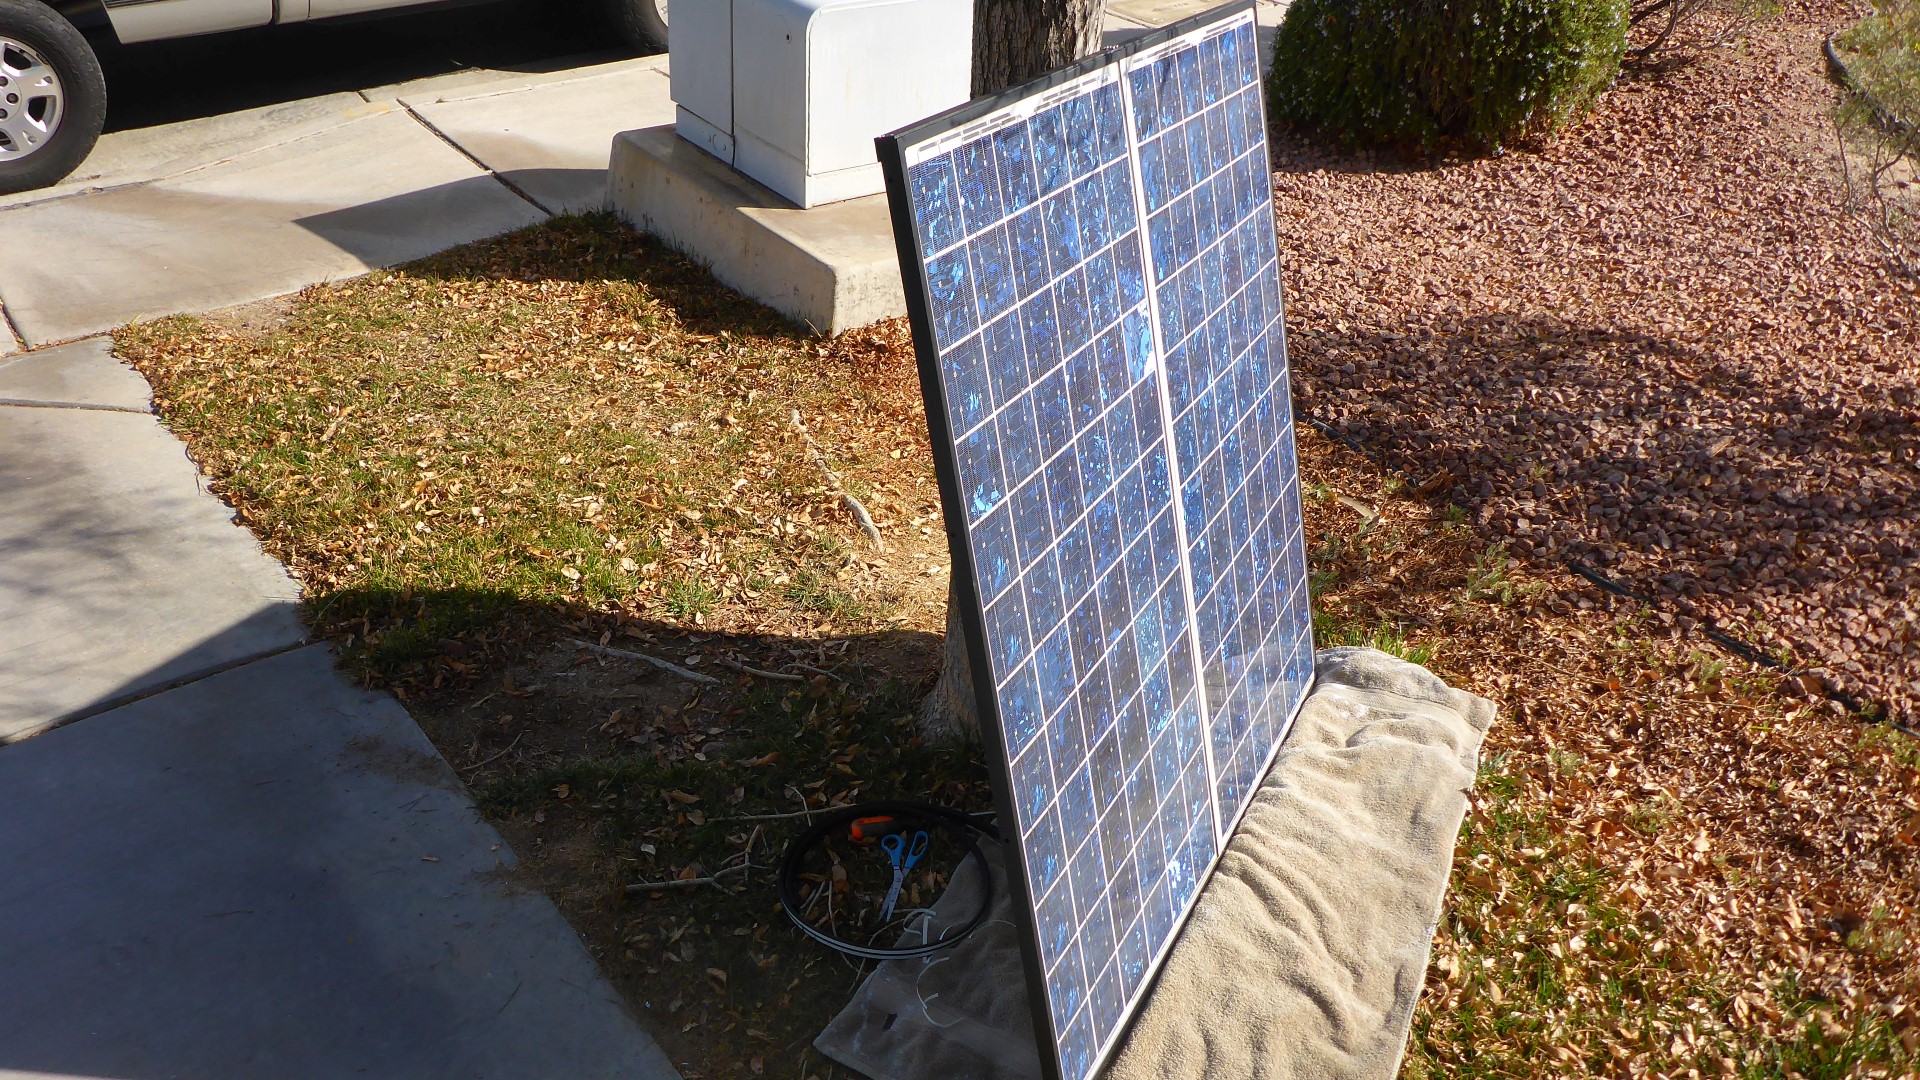
I am very happy with how the panels turned out. They sit very low on the roof and don’t stick out. Originally I was going to install a wind deflector, but I don’t think it even needs one.
Wiring
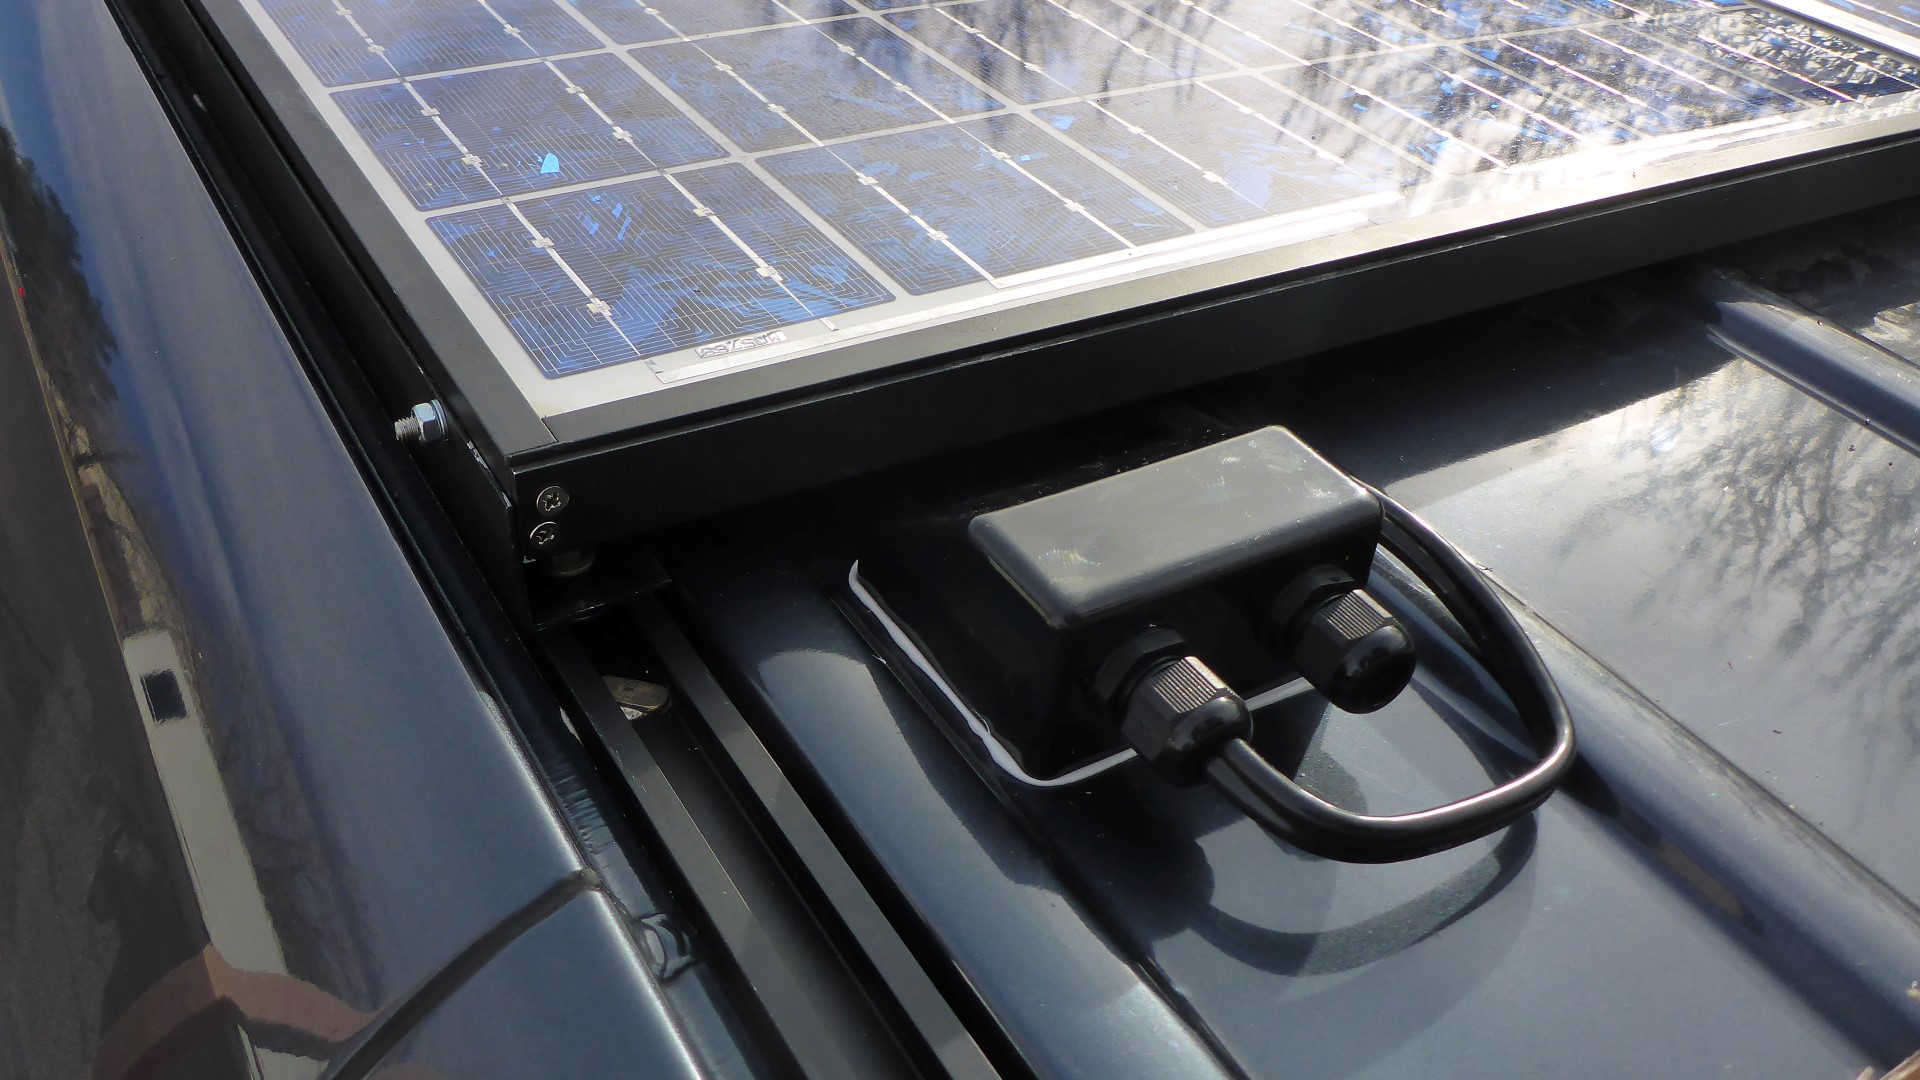
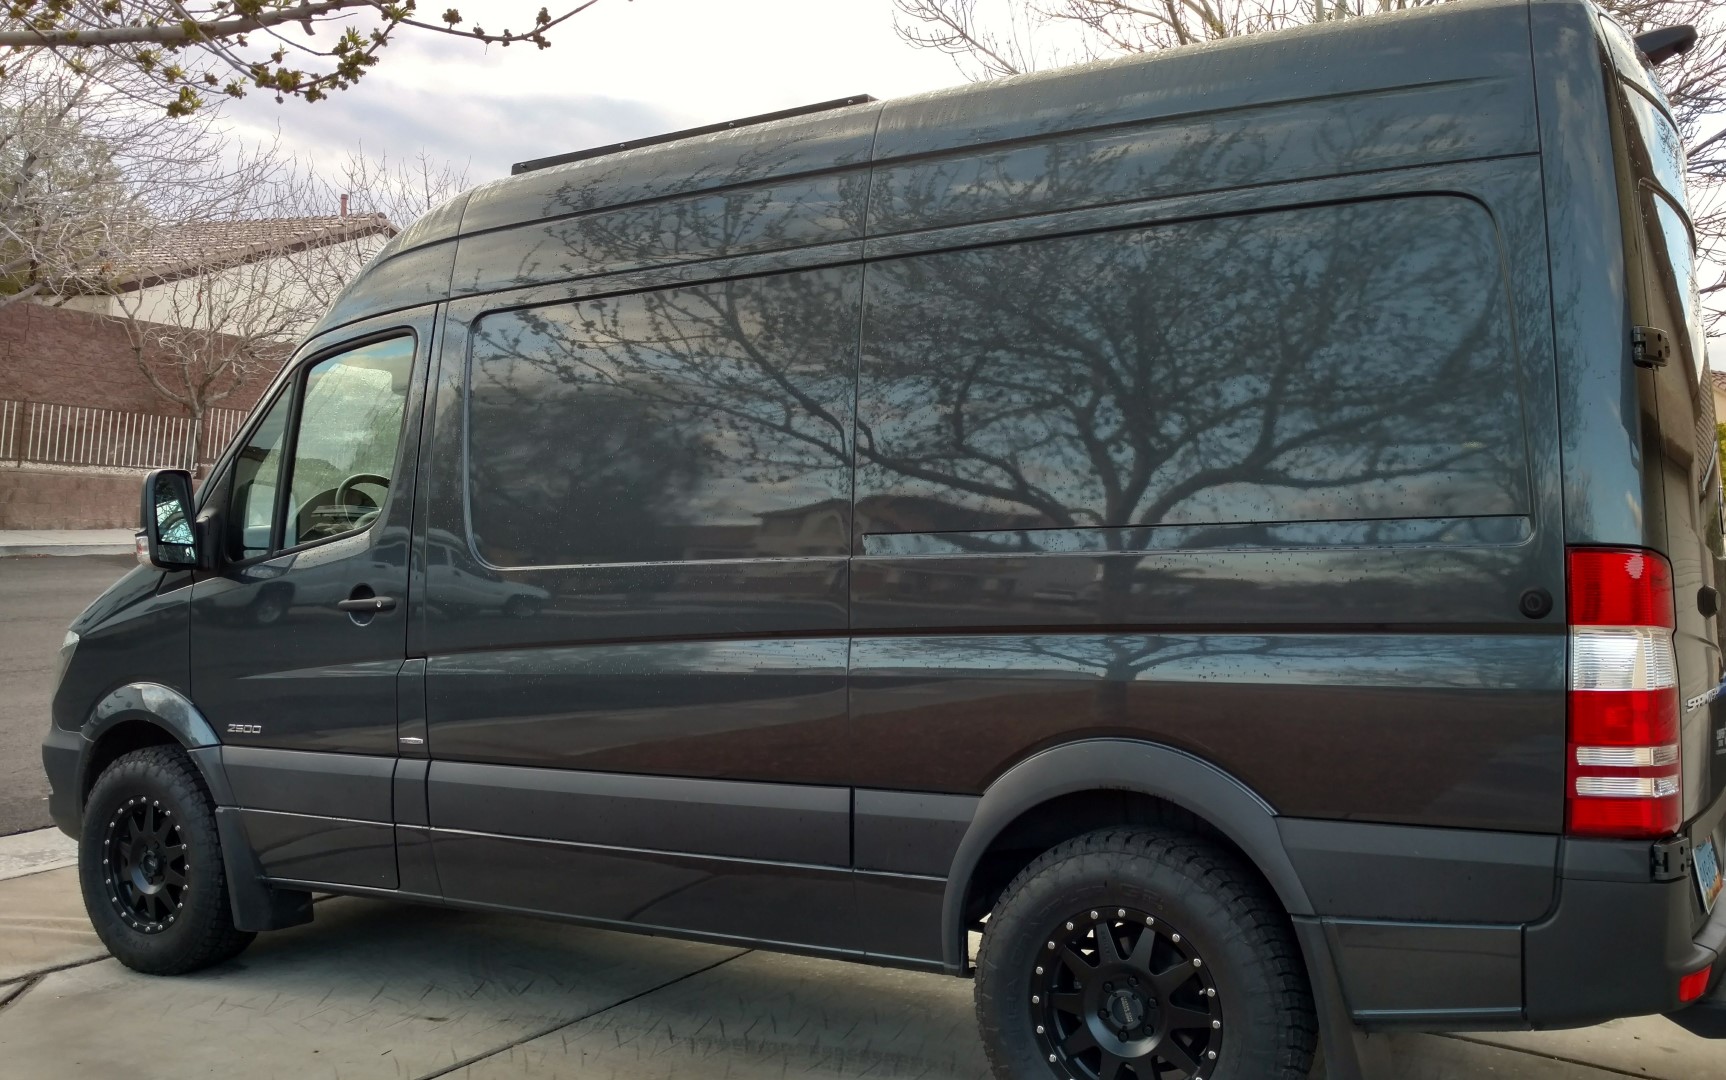
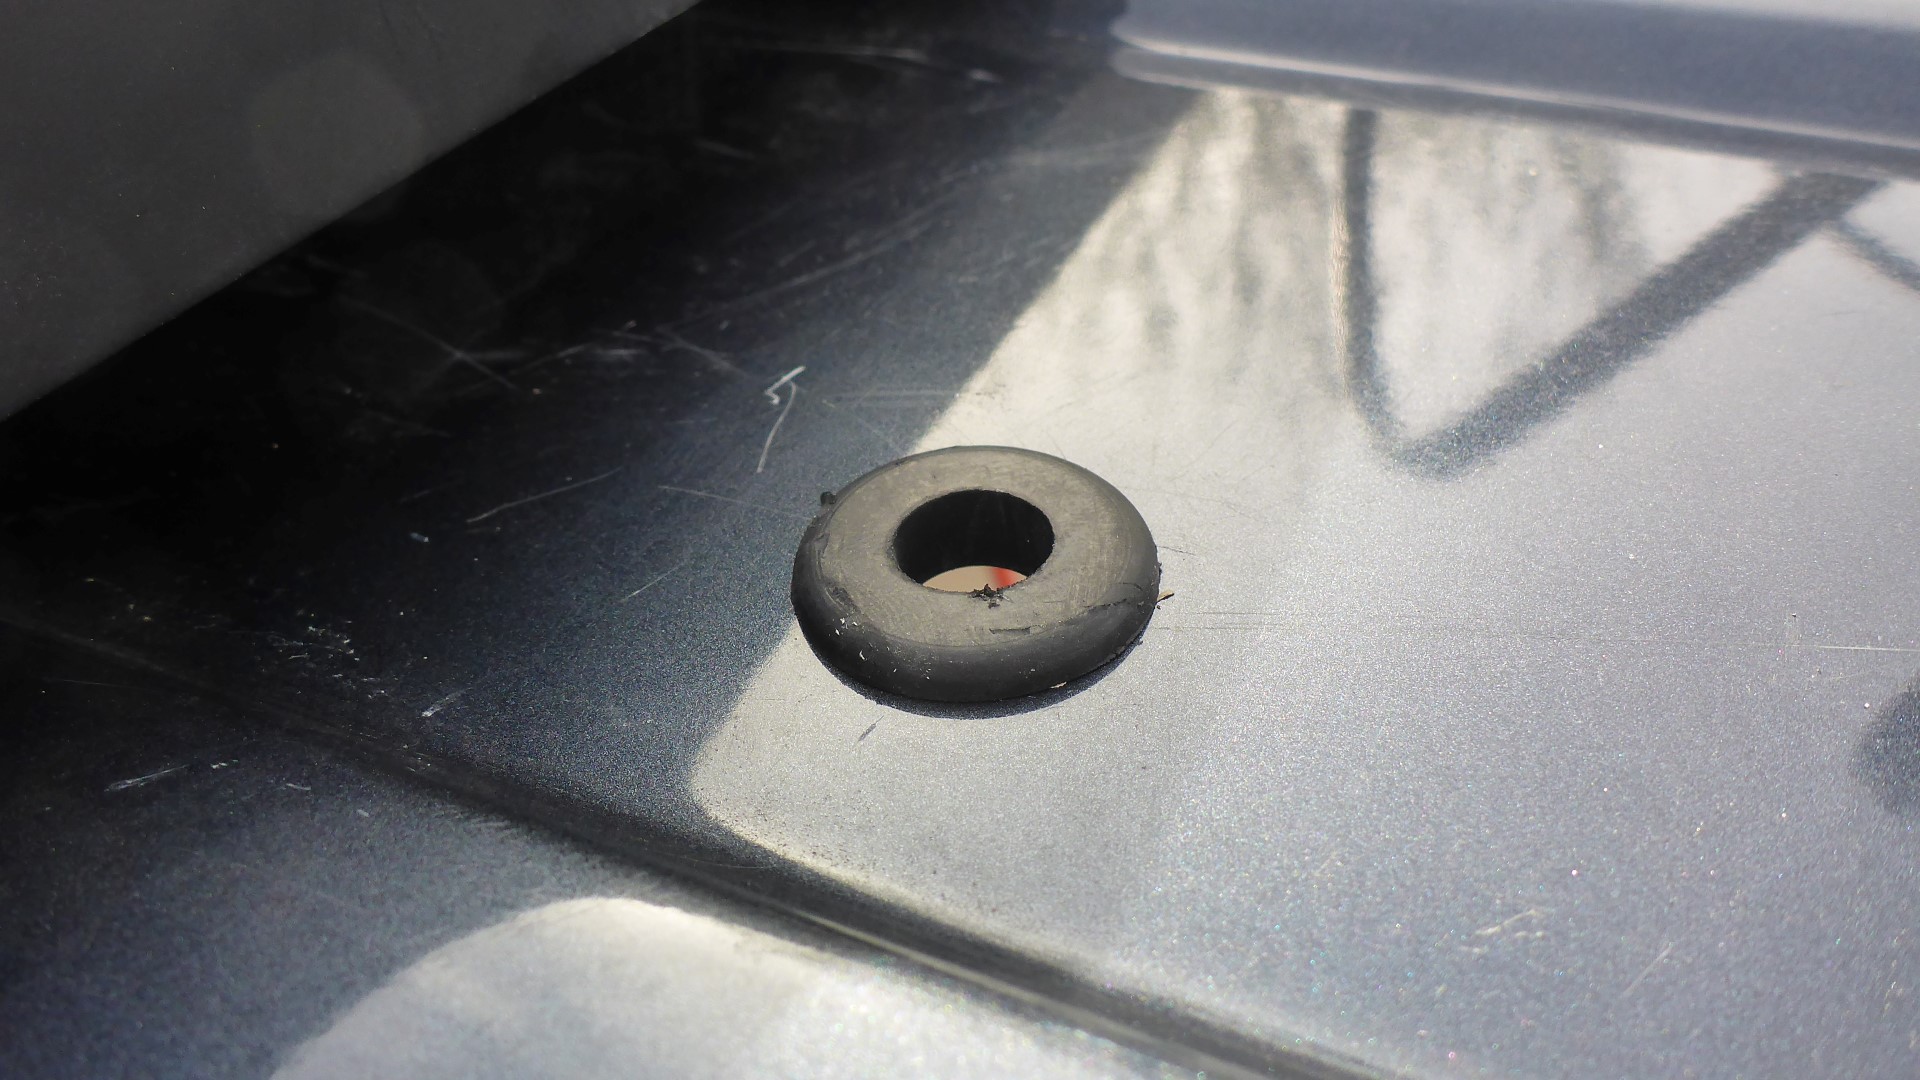
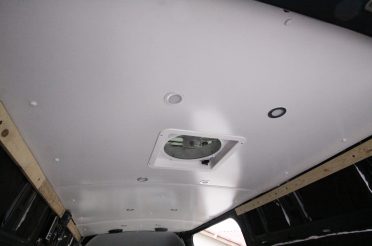
After the panels were mounted up, it was time to put another hole in the van. I still cringe every time I have to do this, but after installing our roof vent fan, it stings a bit less. You just have to carefully think out where you need to drill and think about every possible conflict it may pose. After the hole was drilled and primed, I installed a grommet, and then a Renogy cable entry housing (or gland) to keep it watertight. I used 3M 4200 marine adhesive to seal and glue it to the roof. No fasteners were used. Since my solar panels didn’t have those fancy solar wires and connectors coming out of the box, I used 10AWG solar tray cable. The biggest reason I went with this cable is that it has a sunlight-resistant black PVC jacket.


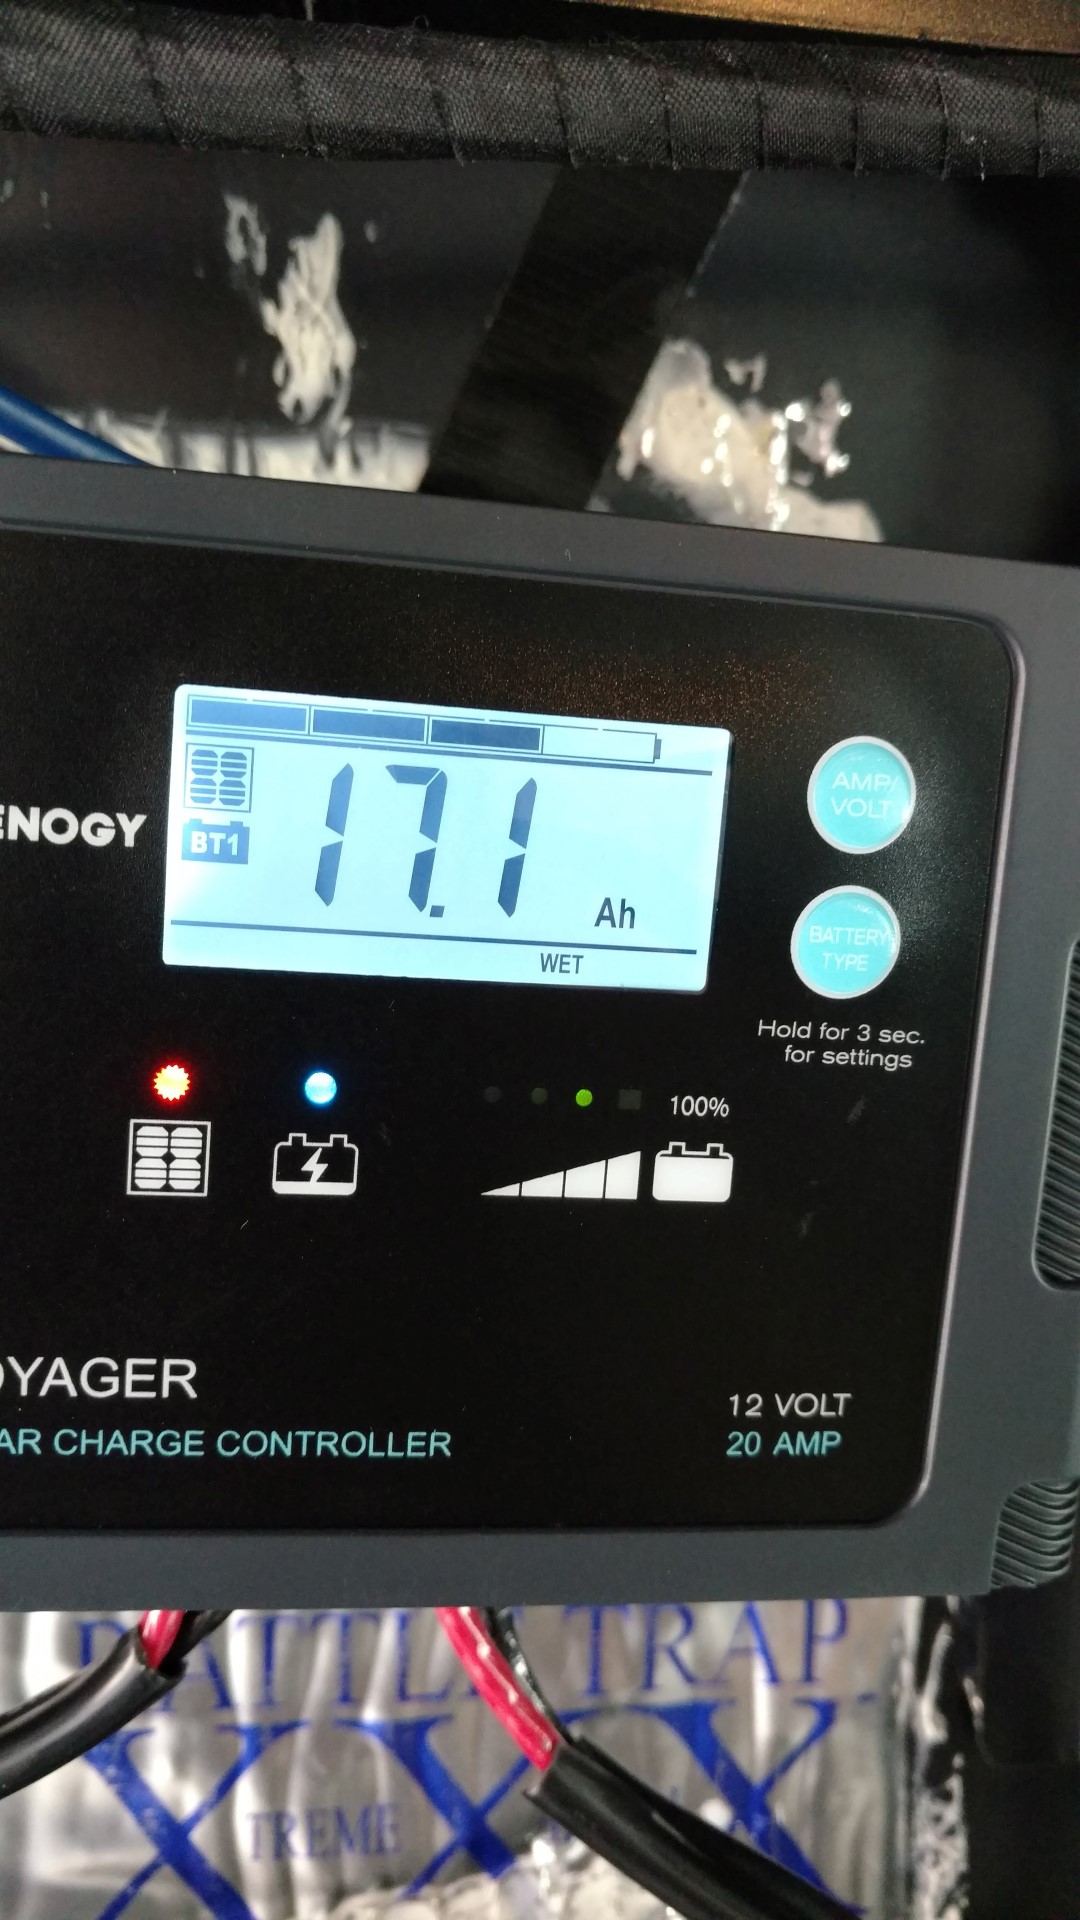
Solar Controller
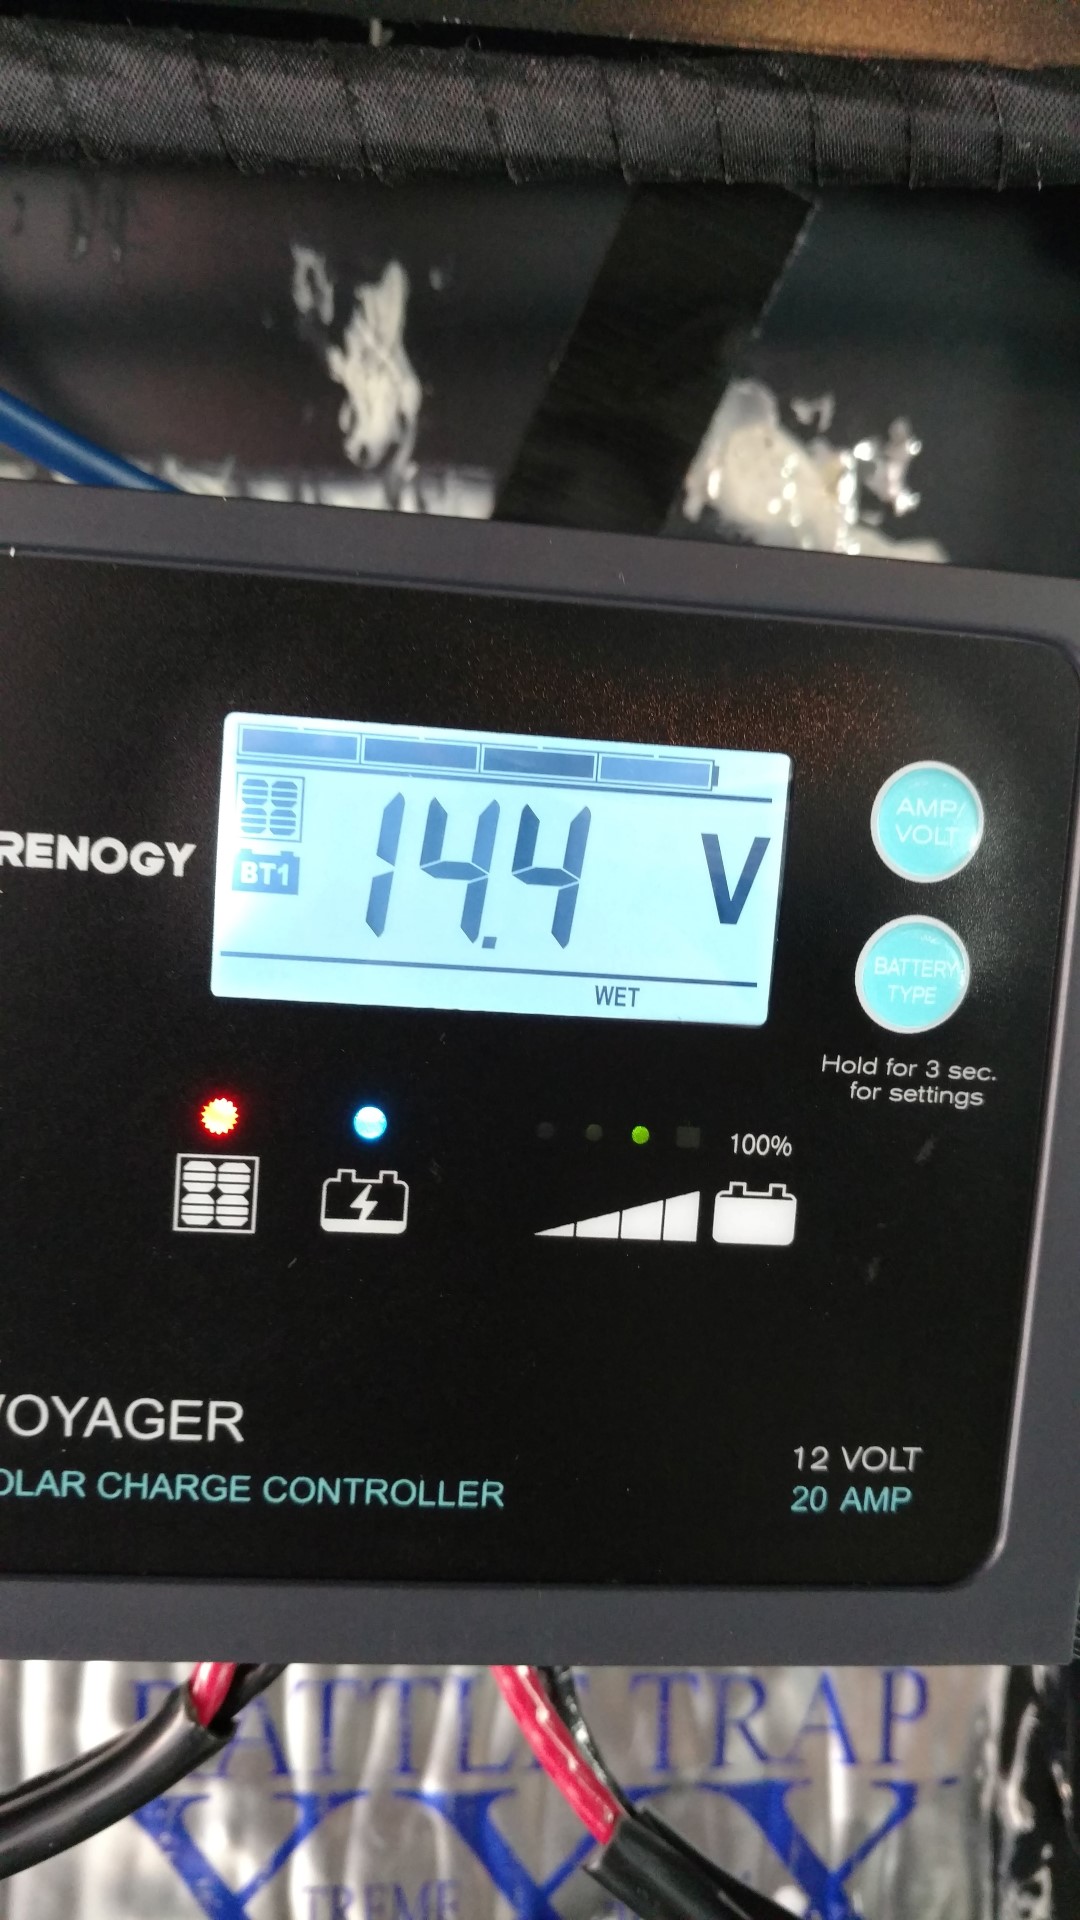
There are two types of solar controllers out there: PWM (pulse width modulated) and MPPT (Maximum Power Point Tracking). Overall, the MPPT controllers charge better and are the newest design, but I ended up keeping it affordable and just went with a Renogy Voyager PWM controller. It charges my batteries just fine.
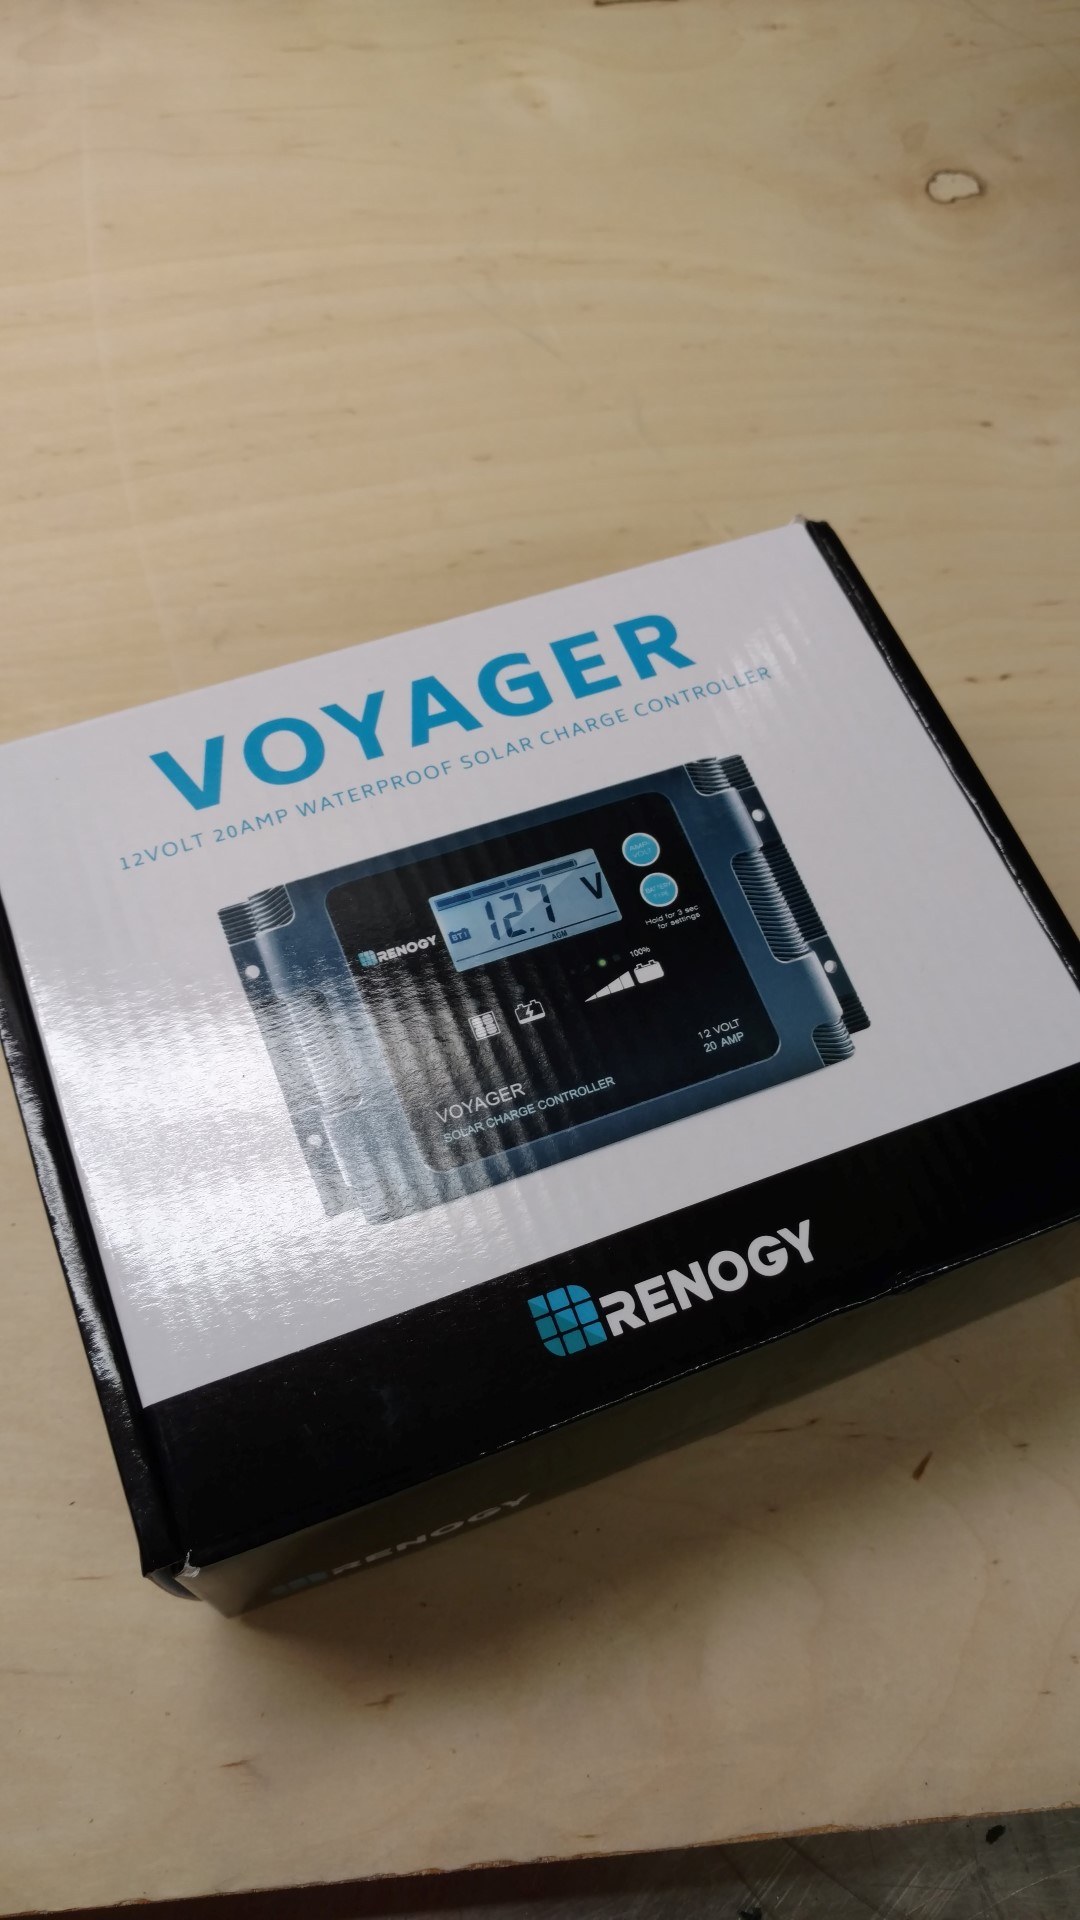
Other solar controller options I considered: Victron MPPT solar controller, Renogy Adventurer 30A PWM Flush Mount Charge Controller
Testing
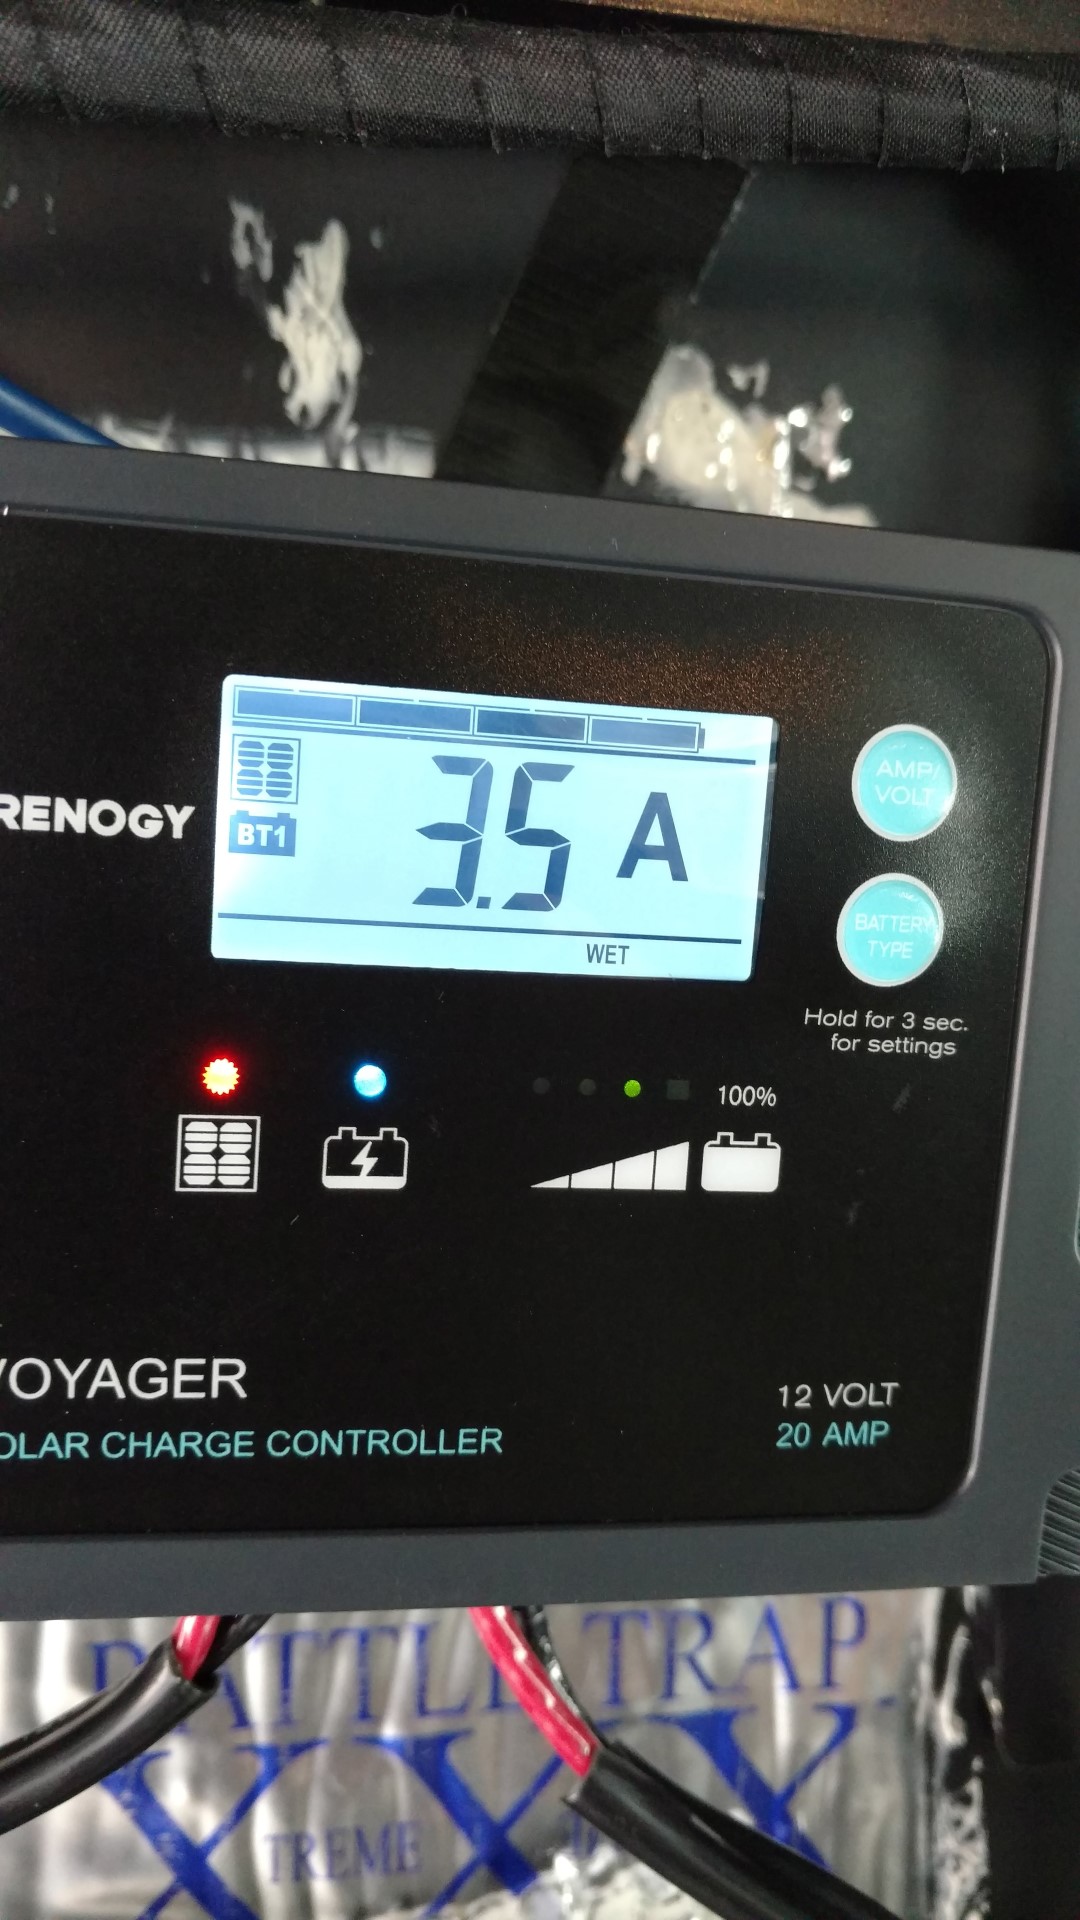
A cloudy day isn’t the best way to check the output of your solar panels, however, it’s still nice to find out the system still charges 3.5 amps when there isn’t much sunlight at all!
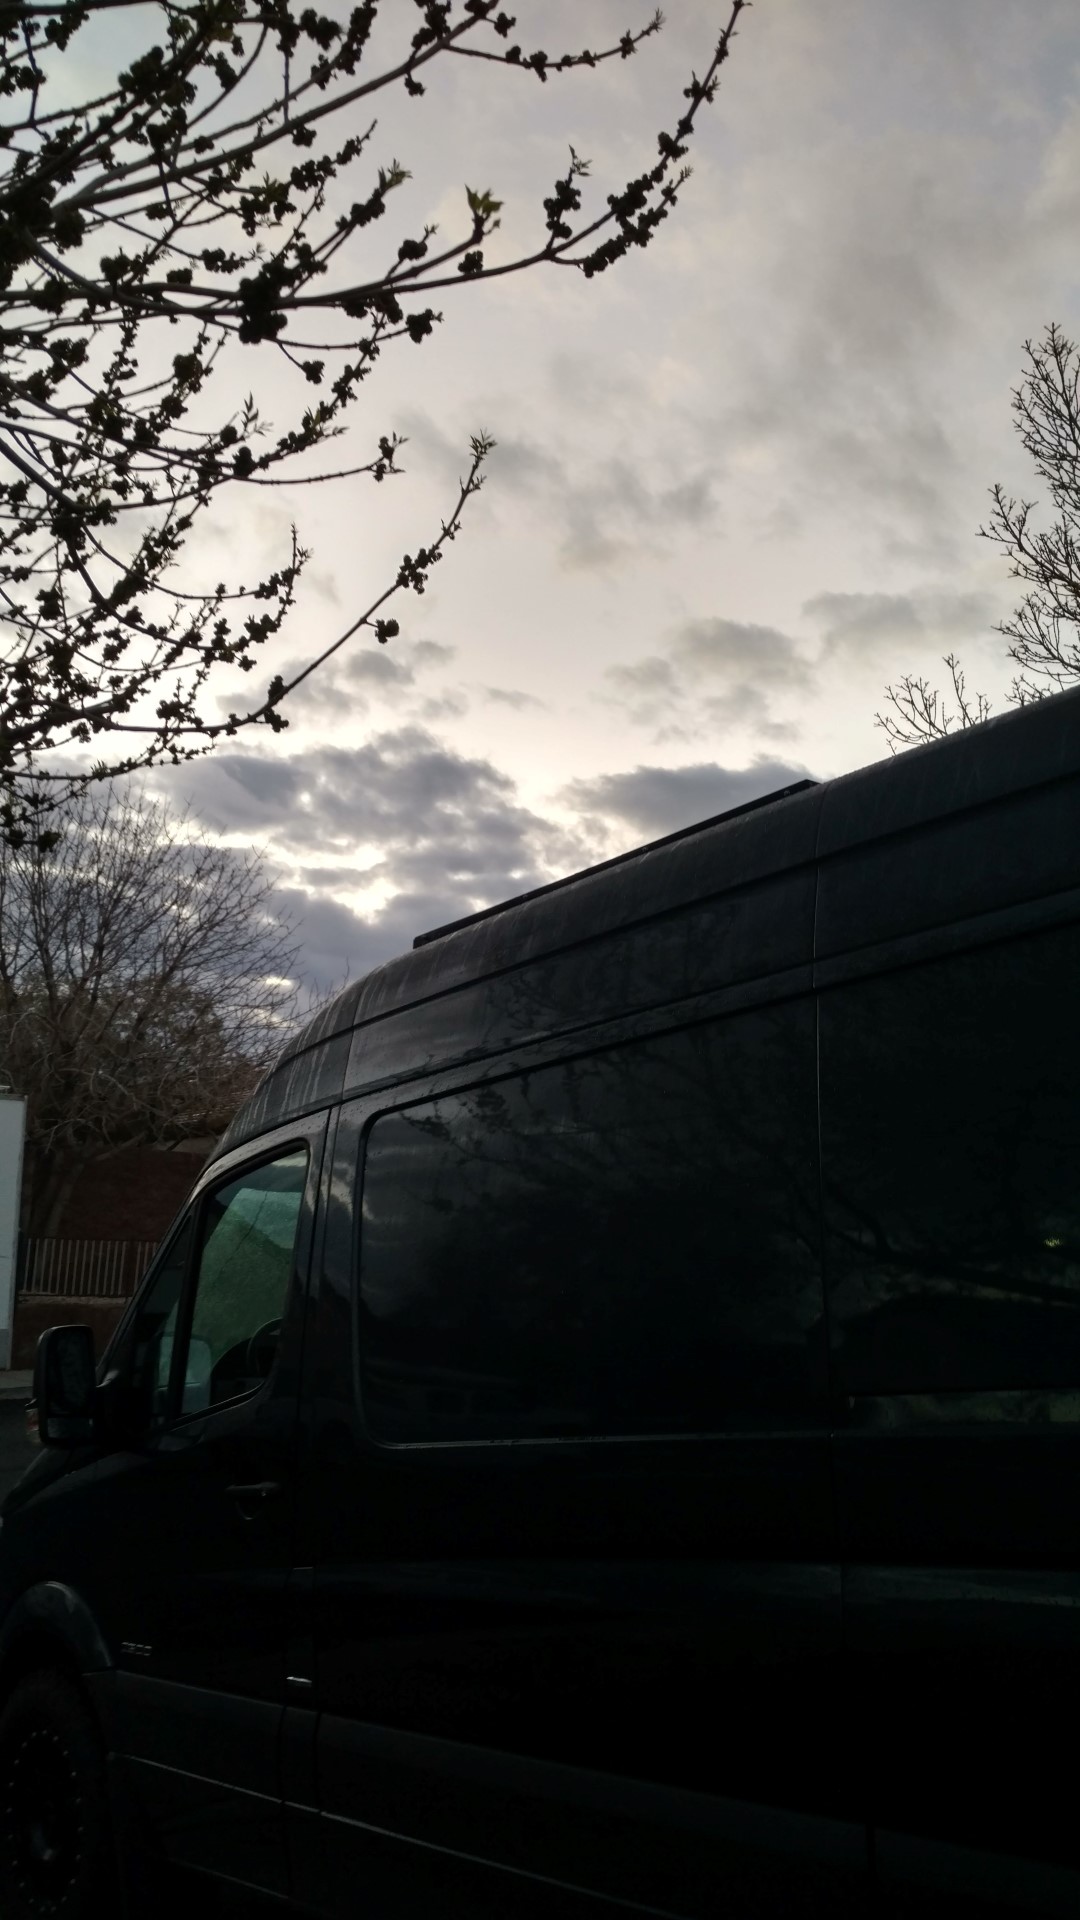
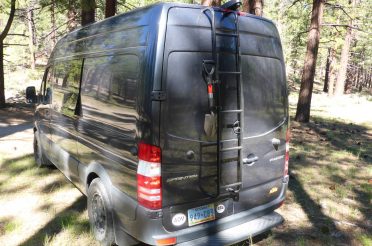
As far as wind noise while driving there is none at all! I ended up having to run a rubber weatherstrip down the front and on the electrical boxes to prevent rattles on the roof. Pardon the dirty van! It needs a bath after the recent rain and constant pollen droppings.


Leave a Reply