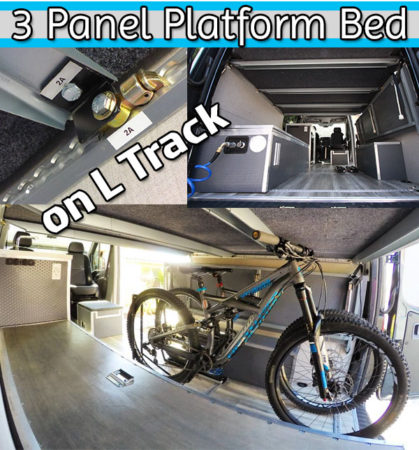
 Platform beds are one of the most common setups in vans because they make good use of a small space. They allow for a garage to securely store bikes and gear while sleeping. Although we already had a dinette/ bed in our van, we wanted a removable platform bed for this reason. Not all of our trips would include our mountain bikes, but we would absolutely need the security when parked.
Platform/ Panel Bed Systems
There aren’t many platform bed kits out there for the do-it-yourselfer. Most kits I found are very expensive ($1000-3000) and you still have to install and design parts of it yourself. The challenge with building a platform bed is it needs to be strong enough for two people, yet be lightweight and slim in design in order to stow away and clear the bikes below. Most builders tig weld 1×1 aluminum square tubing for the frame and then use some sort of upholstered plywood paneling on top. Many of them don’t even stow away, but for those that do, they mount on rather bulky wall brackets. I had yet to find a setup that works for us or is even in our price range. Below are a couple of options I considered.
Flatline Van Co.
The best manufactured, removable platform bed setup I found is built by Flatline Van Co. Had this been available when I built our van, this would have been a very good option for us. They make a complete kit that bolts right into your van.
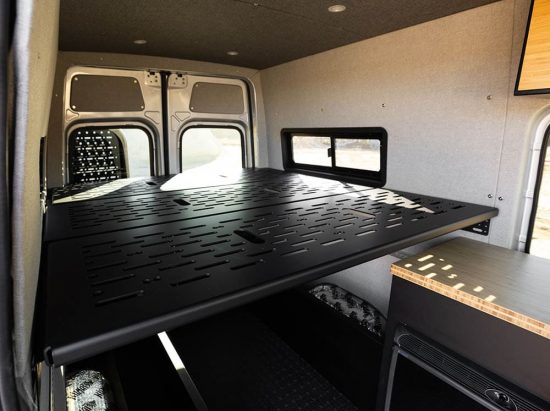
Overland Sprinters
Overland Sprinters makes a very nice aluminum frame for the DIYer for about $900 however, it’s up to you to make the platform material and come up with a way to stow and lock it to the rails. By the time you add up material and tig welding equipment, this is actually a decent price. It’s still more than I wanted to invest in this project though.

Time to Build it Myself!
When I can’t find anyone that sells what I need, I build it! The biggest hurdle was coming up with a strong, yet lightweight beam or frame that would support the bed panels. In all of my hours of internet research, I came come across a guy on the Sprinter Buildout group on Facebook that used Skorva Ikea bed supports. They sell for $10 each in the Ikea stores or $30 each on Amazon. I immediately knew this was the solution. I wanted to attach 4 beams across the van to our existing L track on the walls. They would be easily removable by means of a quick disconnect double stud fitting. Three upholstered ½” plywood panels would be the platform.
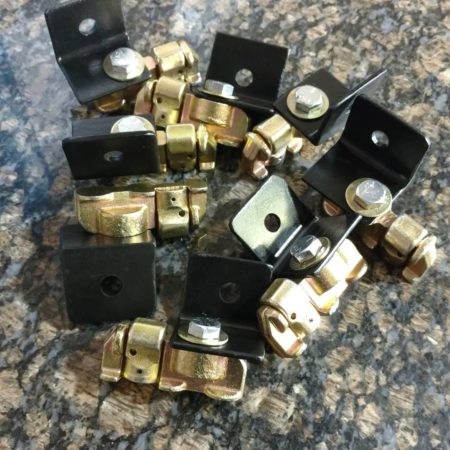
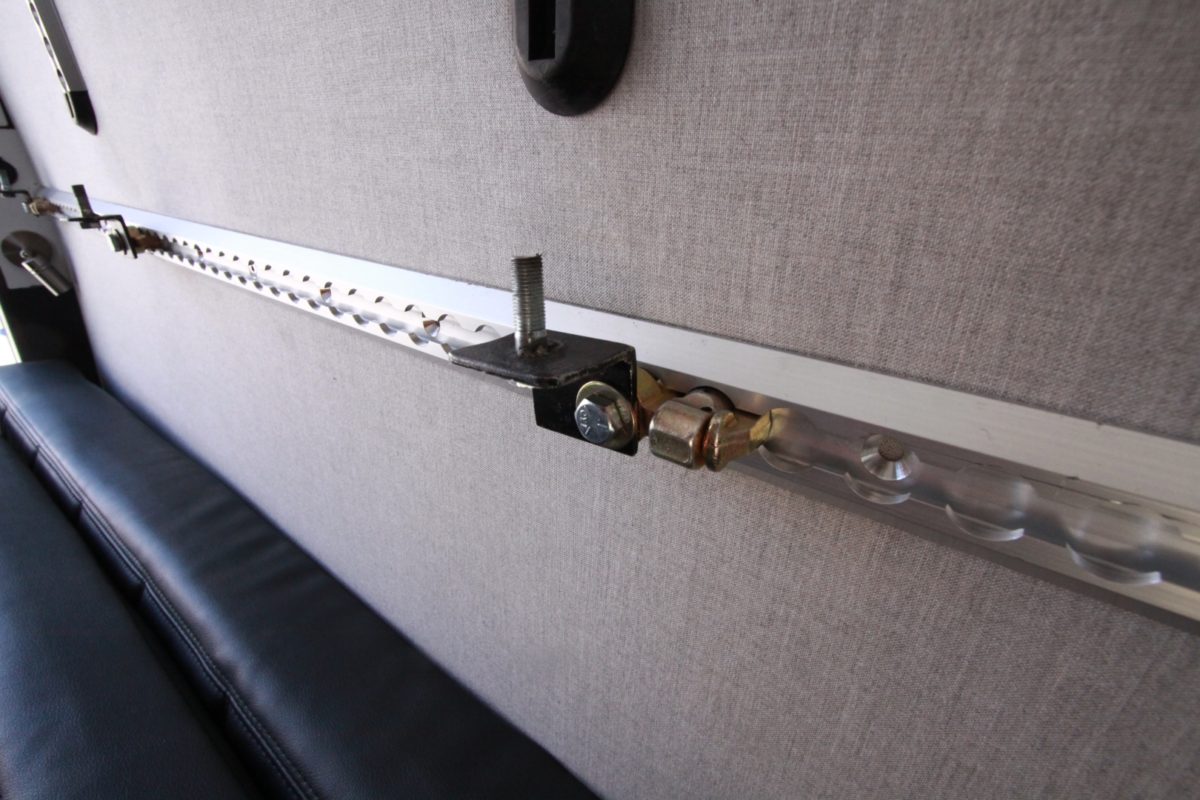
The first step to building this bed system was to come up with a way to attach the Ikea bed supports to the L track. I cut eight, small L brackets out of angle steel and mounted them to the double stud fittings with 3/8-24 bolts cut to a custom length (approx 3/4″).
I welded 3/8-24 bolts into the brackets for the platform panels to slide down onto and hold them in place.
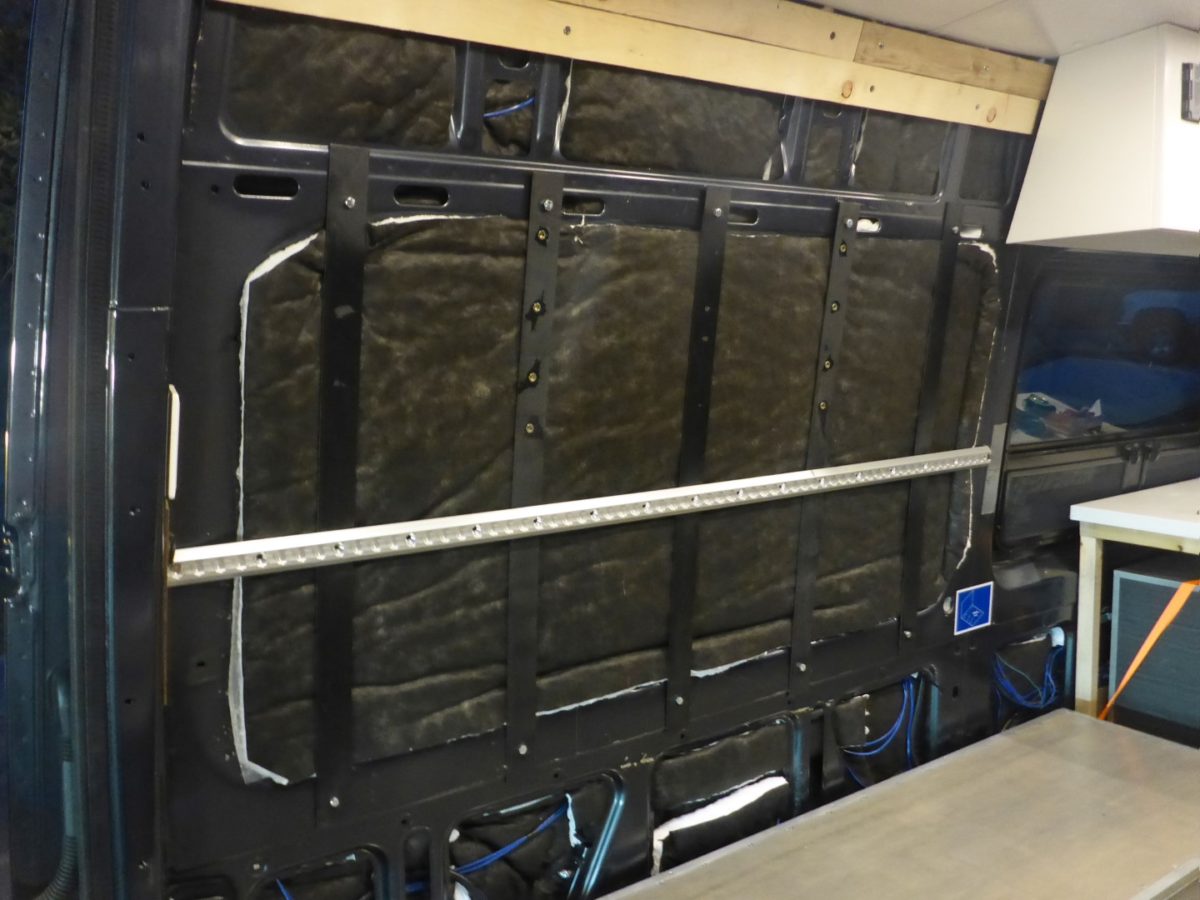
To give you an idea of how the L track is supported, I installed metal beams in the walls before the wall panels were put up. Check out that post for more details. https://livelikepete.com/adding-upholstered-wall-panels-in-our-sprinter-campervan/
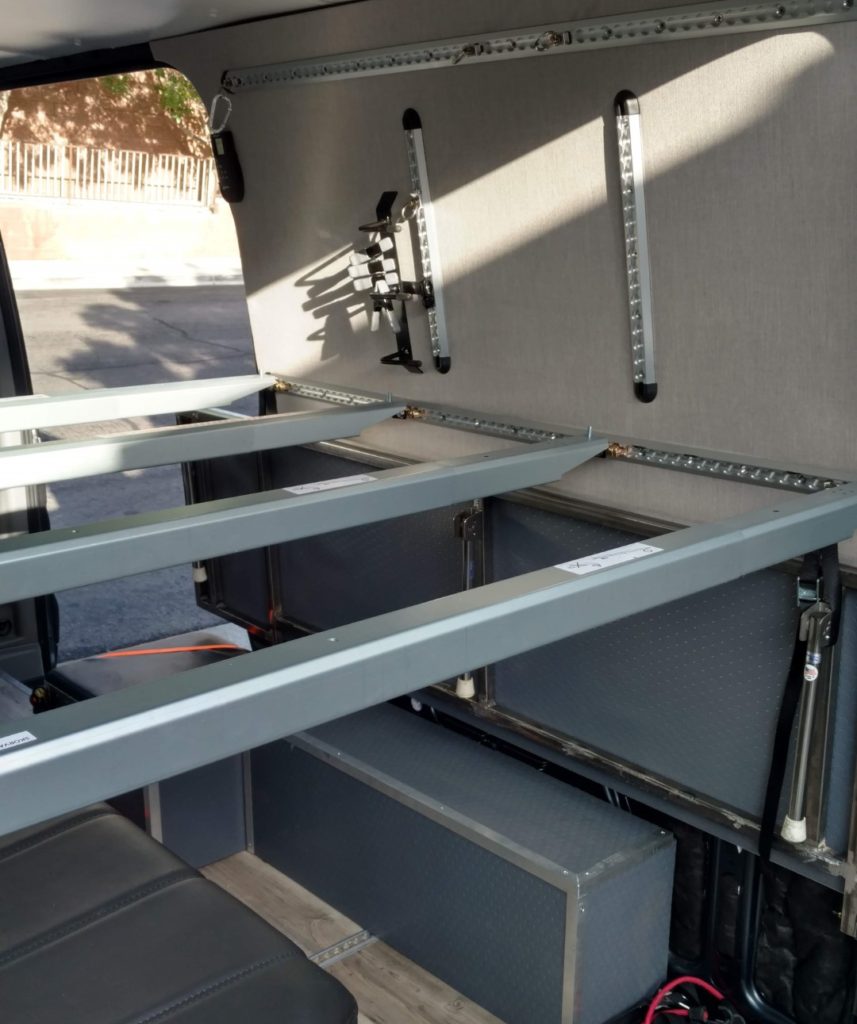
After drilling new holes at the ends of the four Ikea Skorva beams, they were set on the brackets.
Three panels were cut out of ½” birch plywood. They were test fitted in the van and some minor adjustments were made around the mounting points. Thumb screws hold the panels securely in place.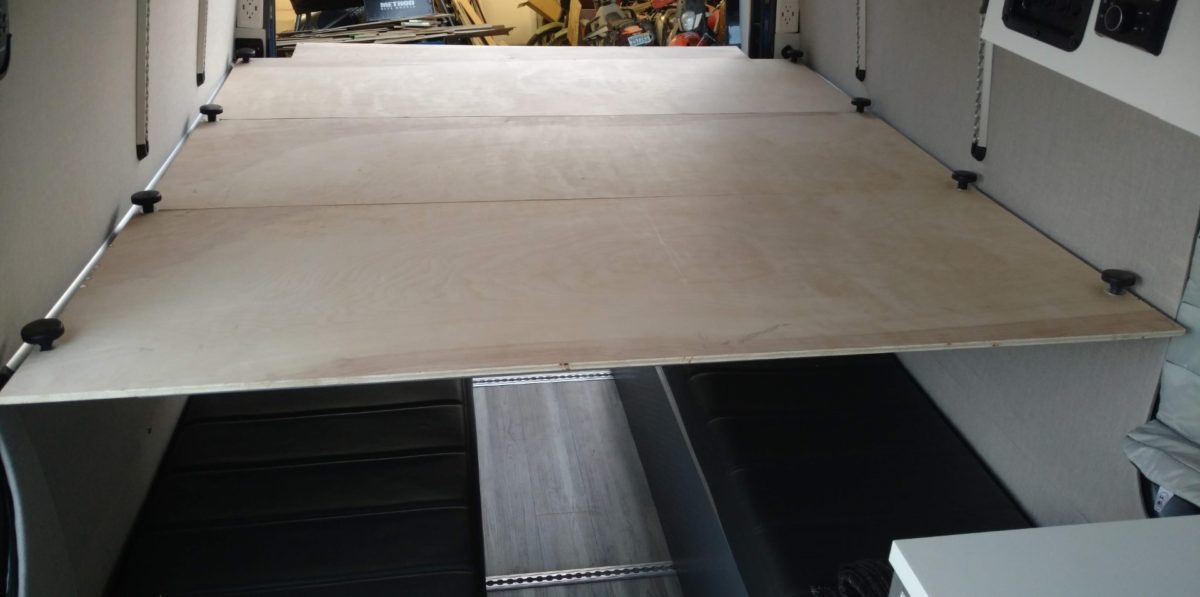
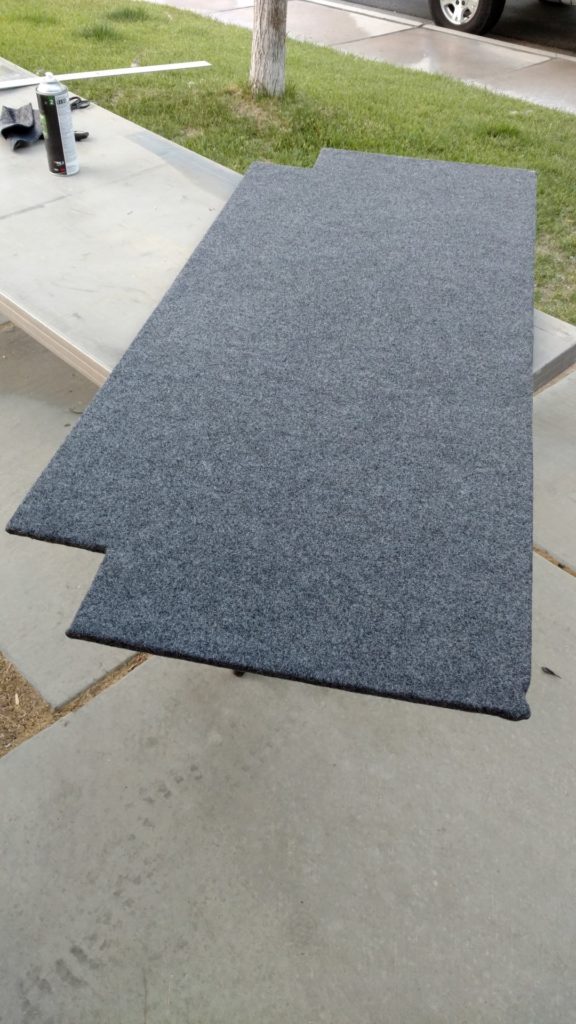
Once fitted and I was happy with how they mounted in the van, I covered them in speaker box carpeting. This carpet is very durable yet easy to work with. I used 3M90 to glue it down.
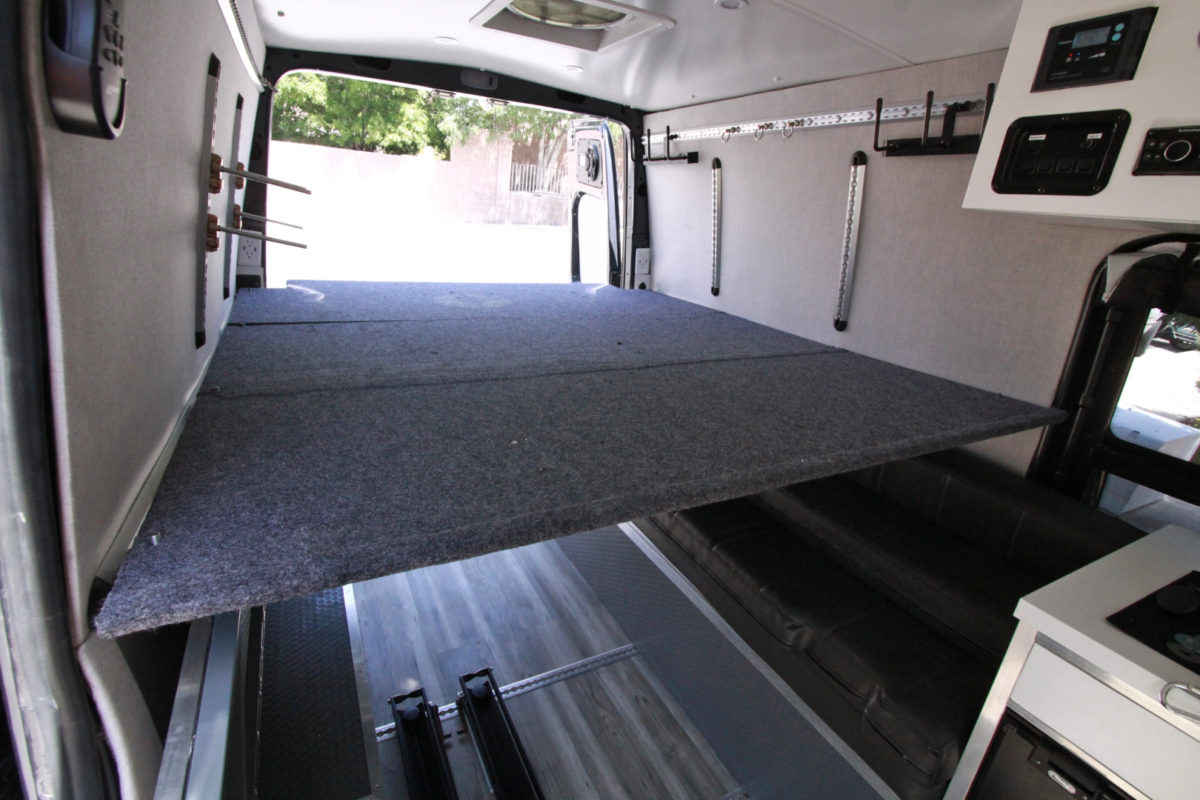
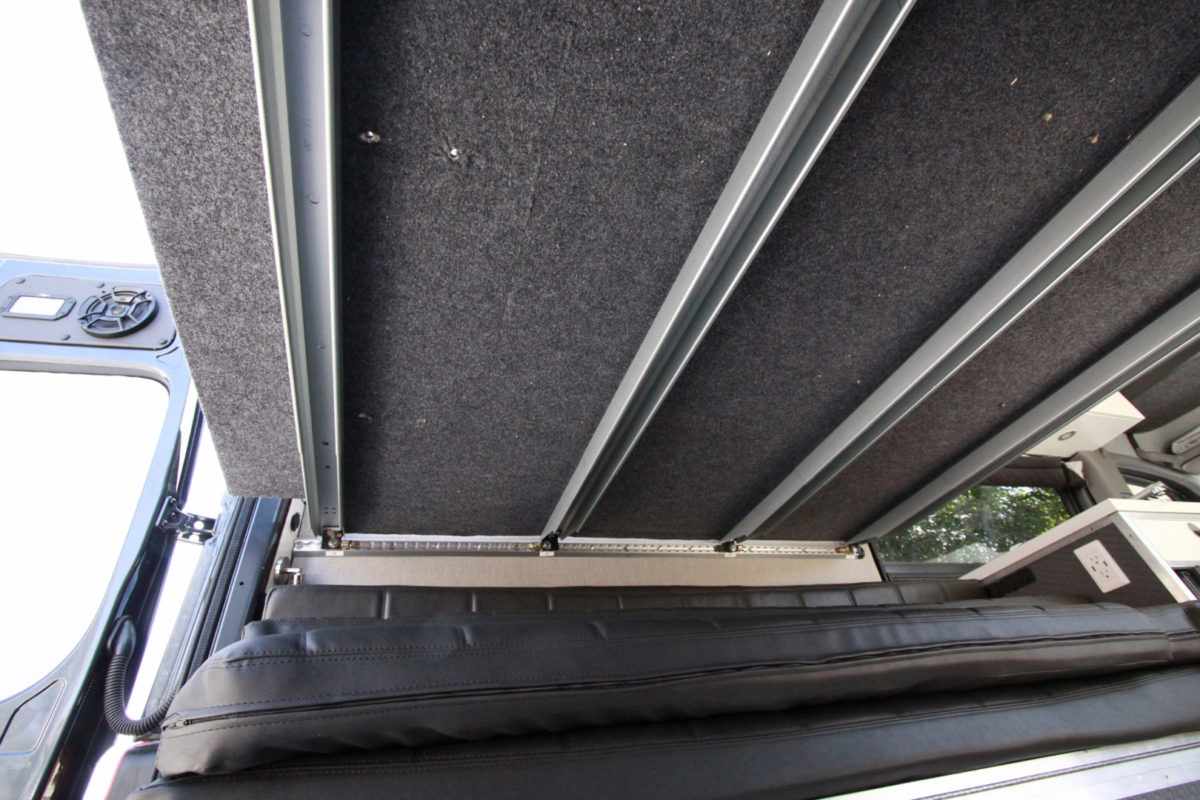
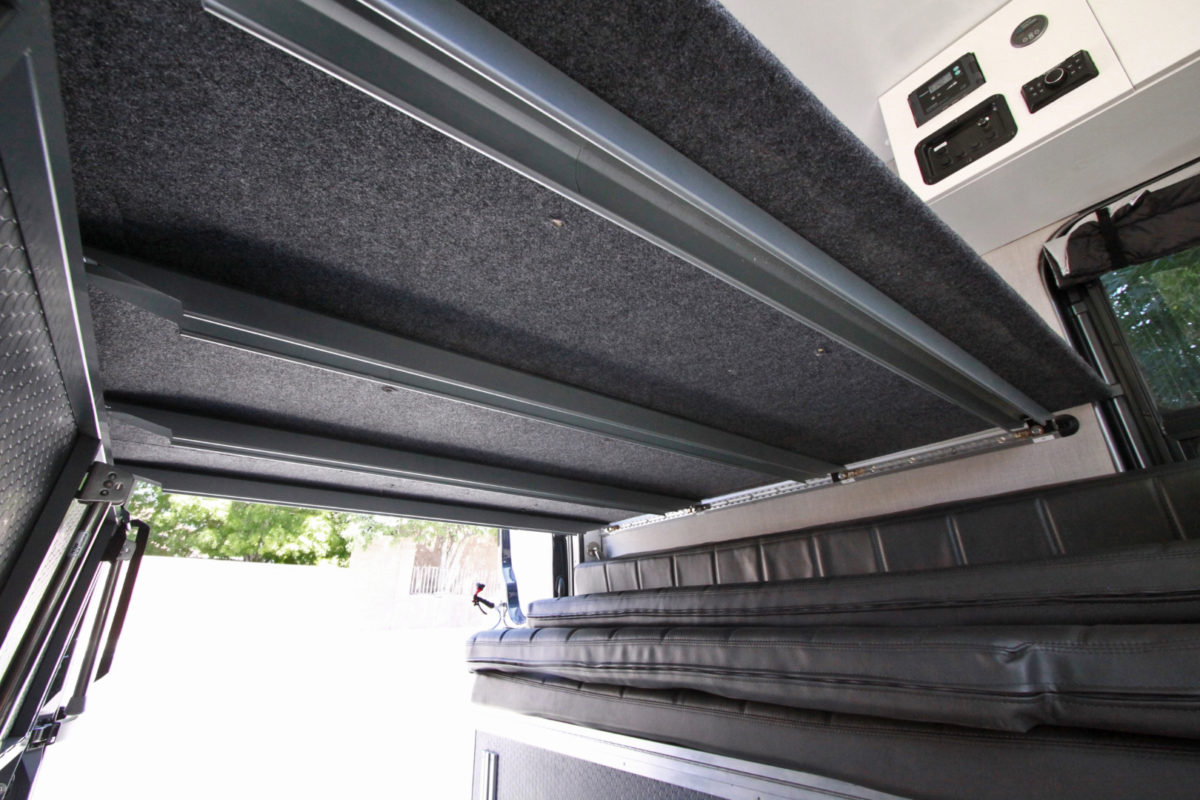
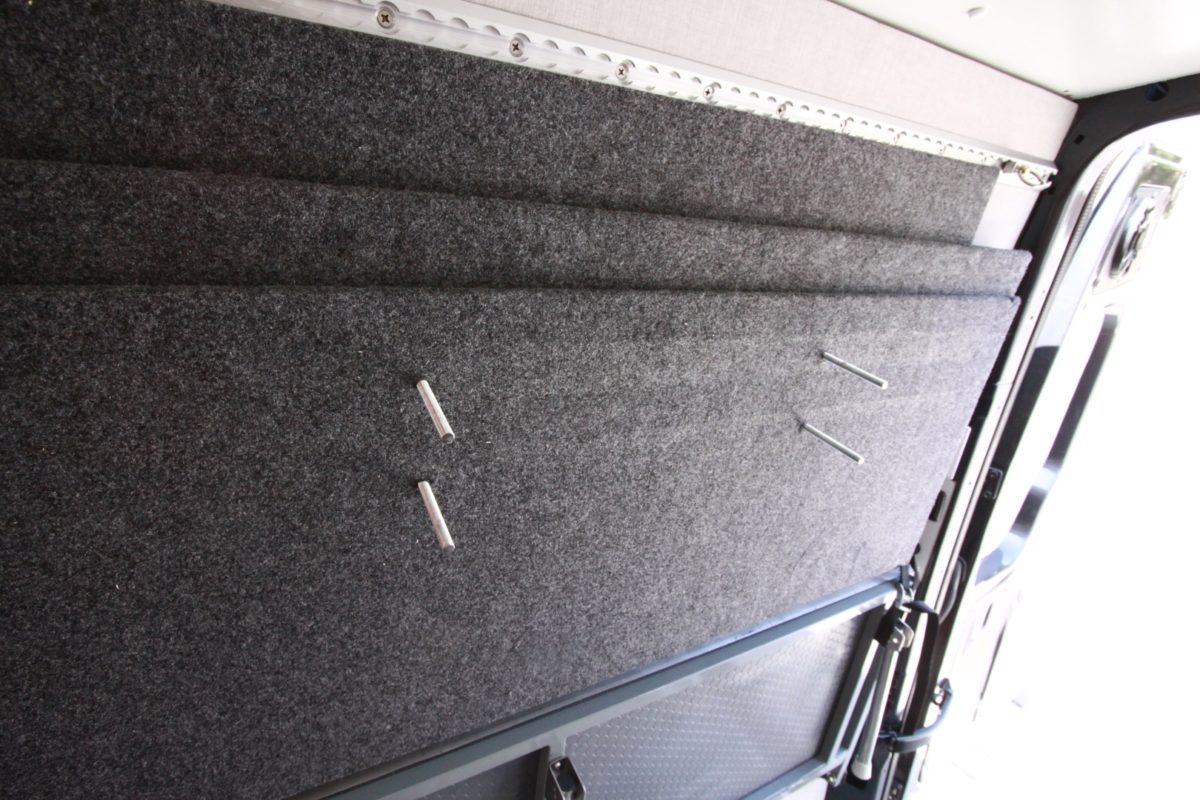
The three panels slide over the bolts and set on the beams.
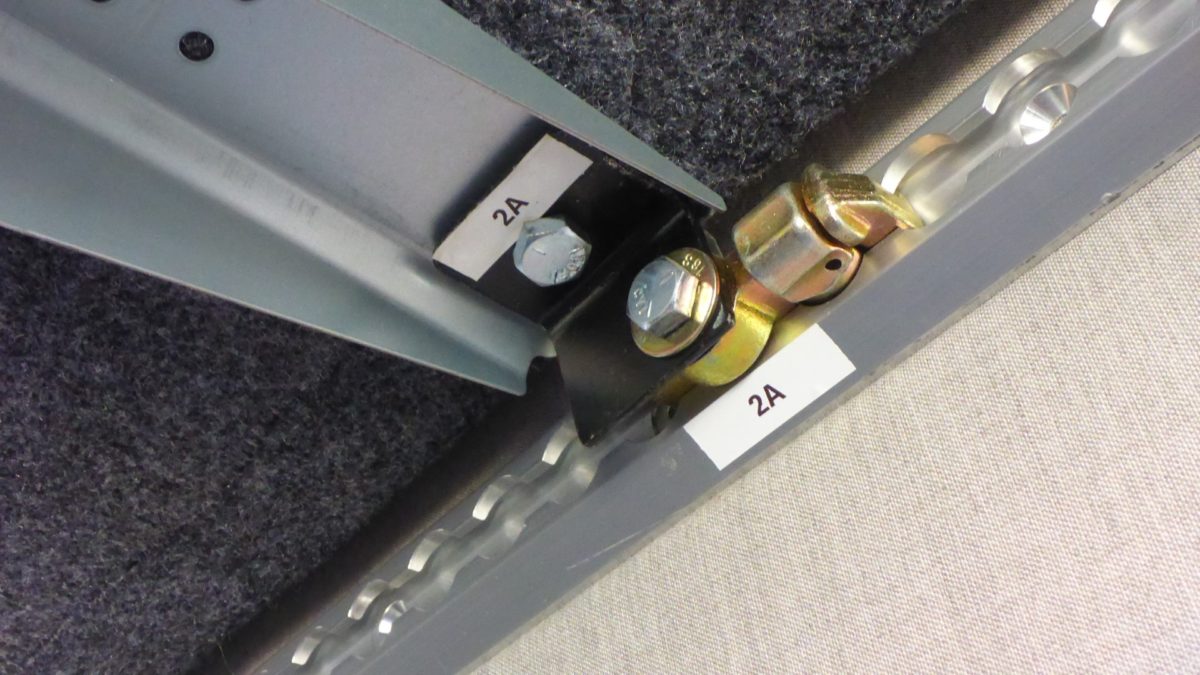
This is what the underside looks like. I labeled each bracket and the corresponding location on the L track since not every single bracket is exactly the same. It makes for a quicker fit without having to adjust anything.
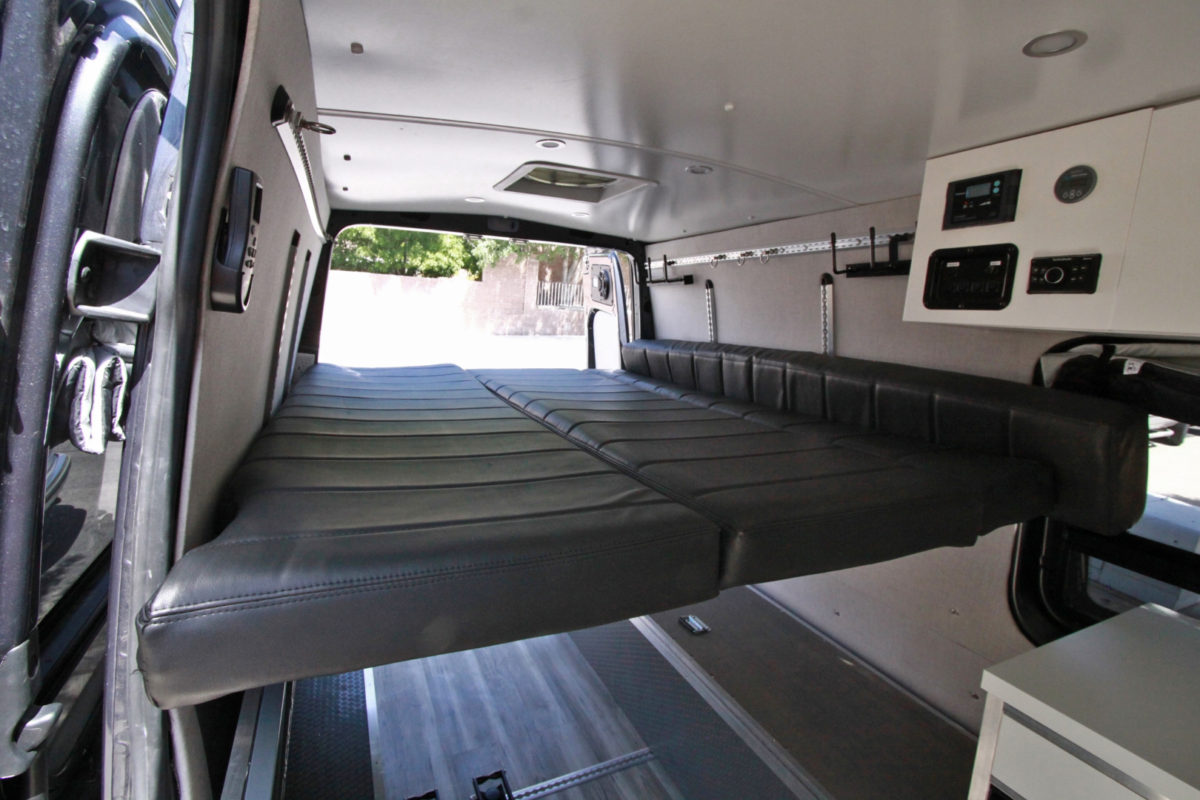
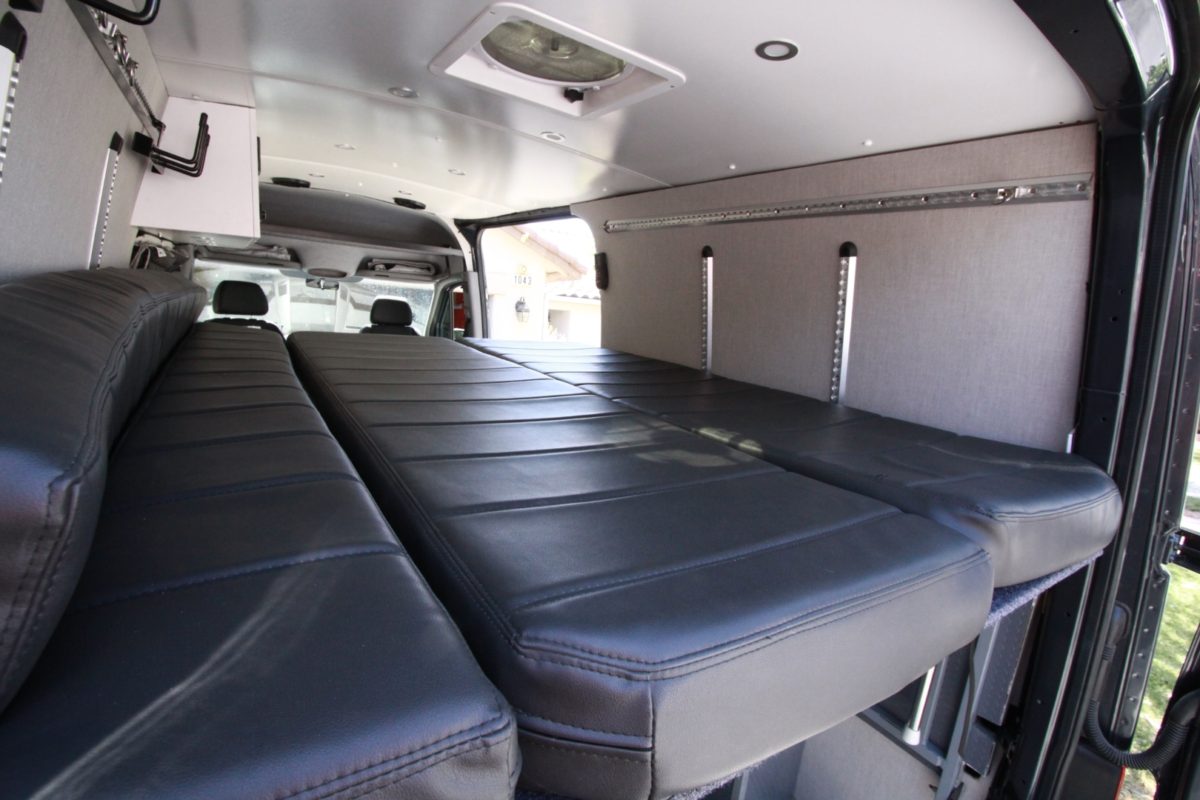
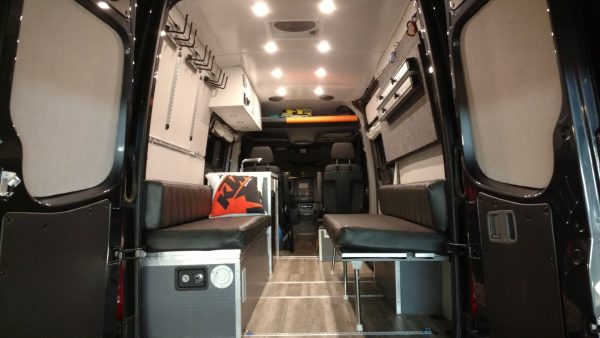
For the mattress, we use the same cushions from our dinette/ bed. The last narrower cushion gets put in on its side due to the curvature of the walls. Some have asked me if the gaps between the cushions are felt when laying down. You can’t even notice them. The memory foam cushions push together when any weight is put on them.
Storing the Platform Bed Away
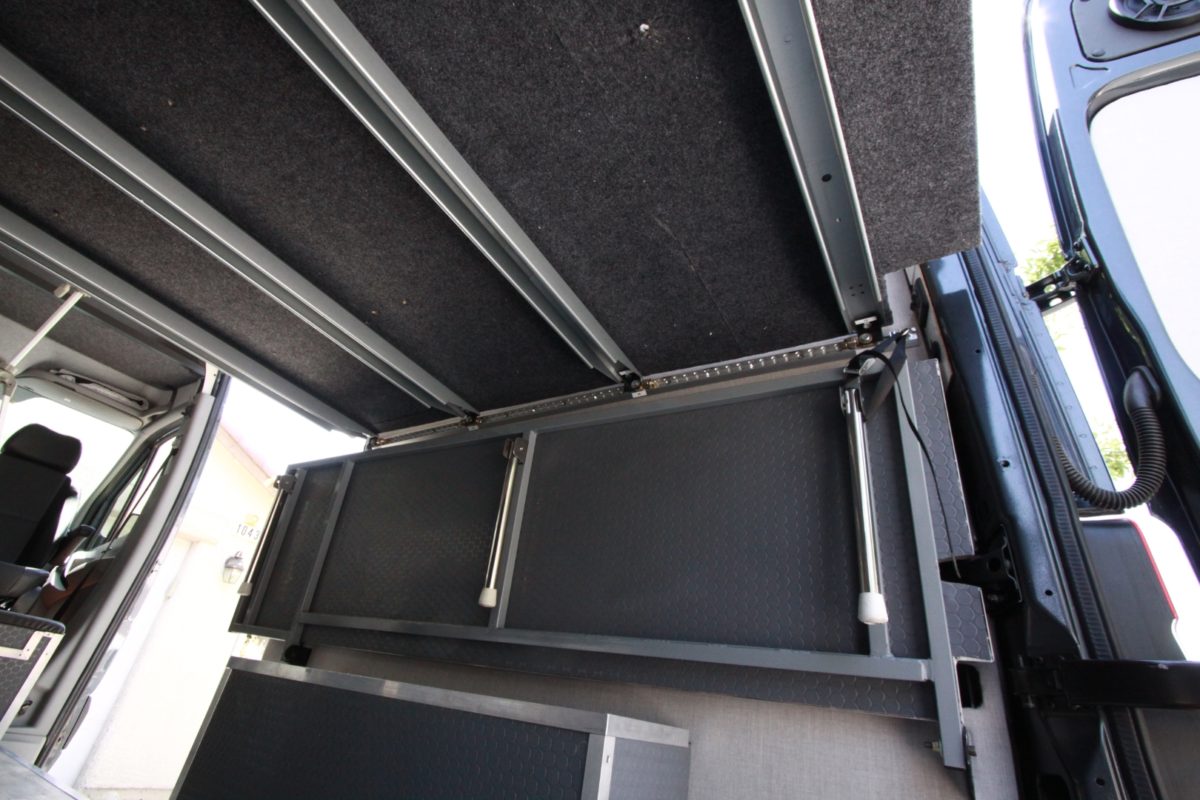
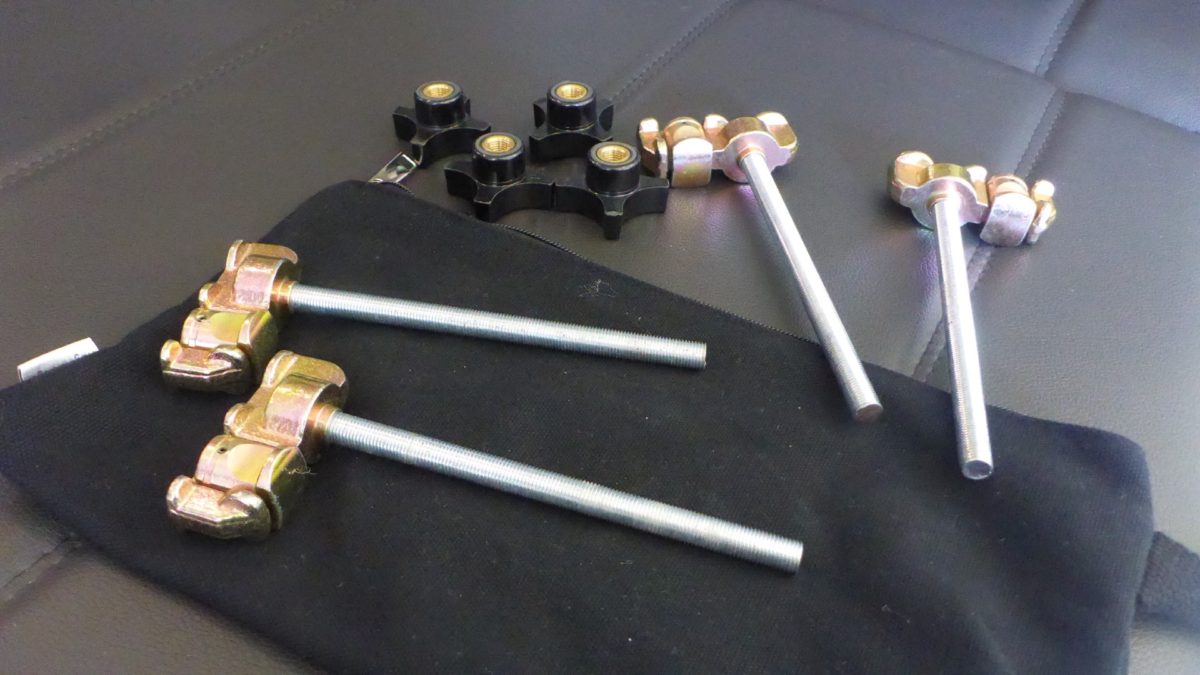
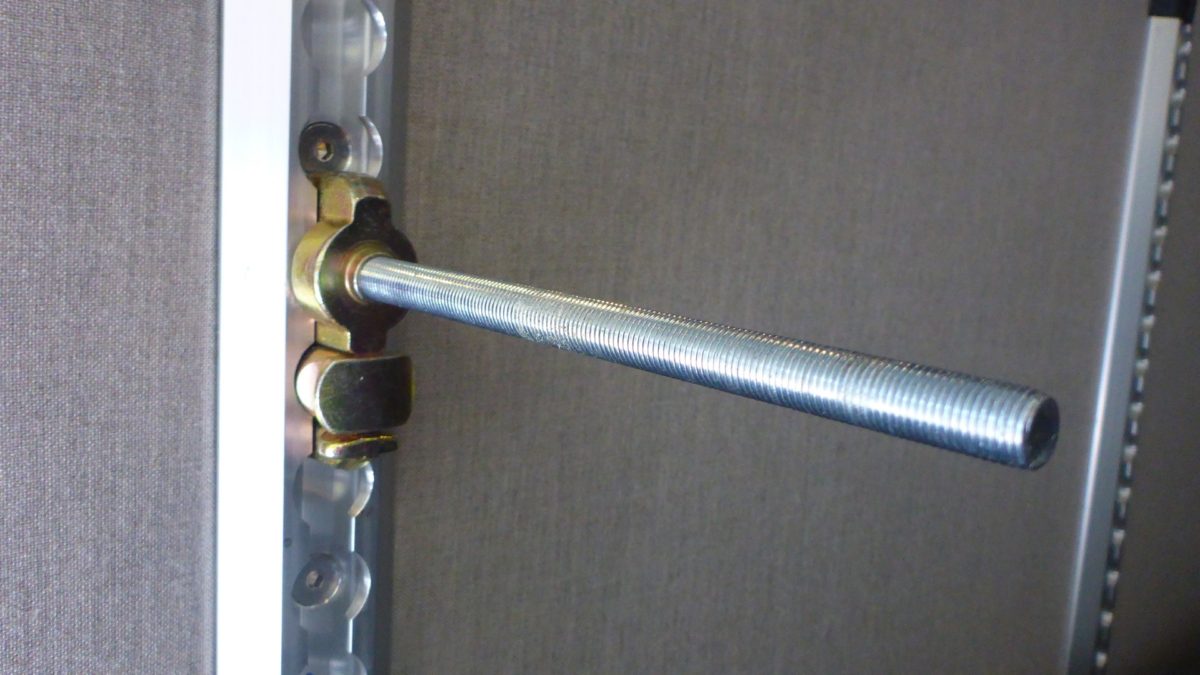
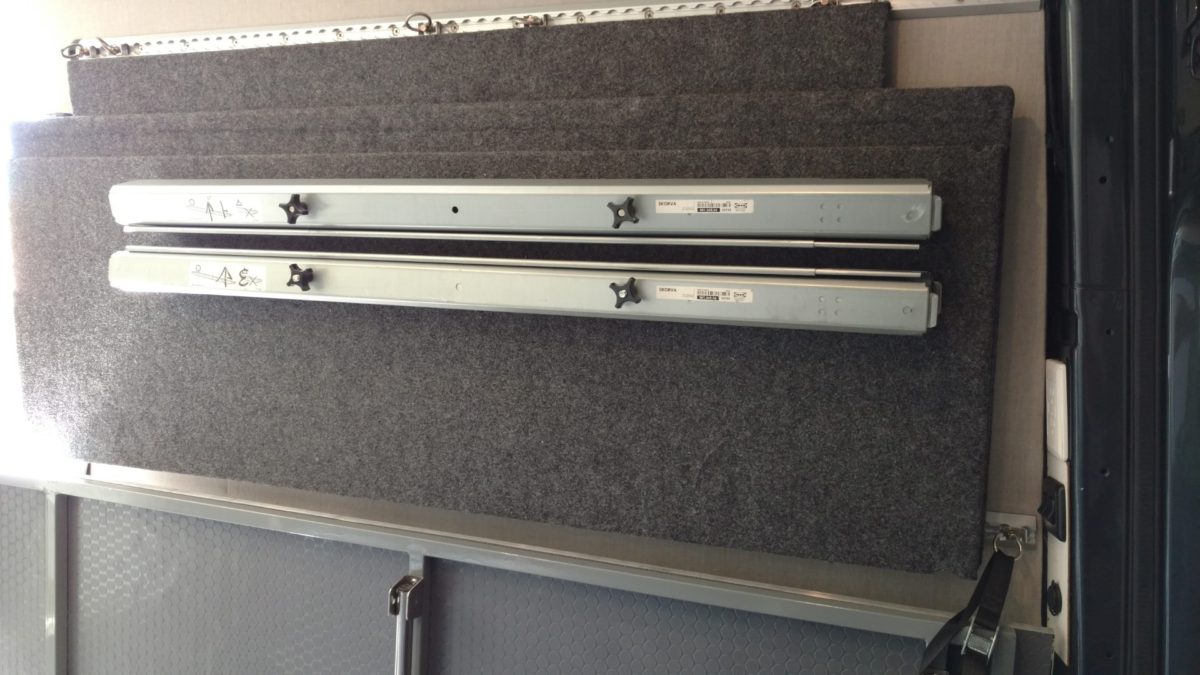
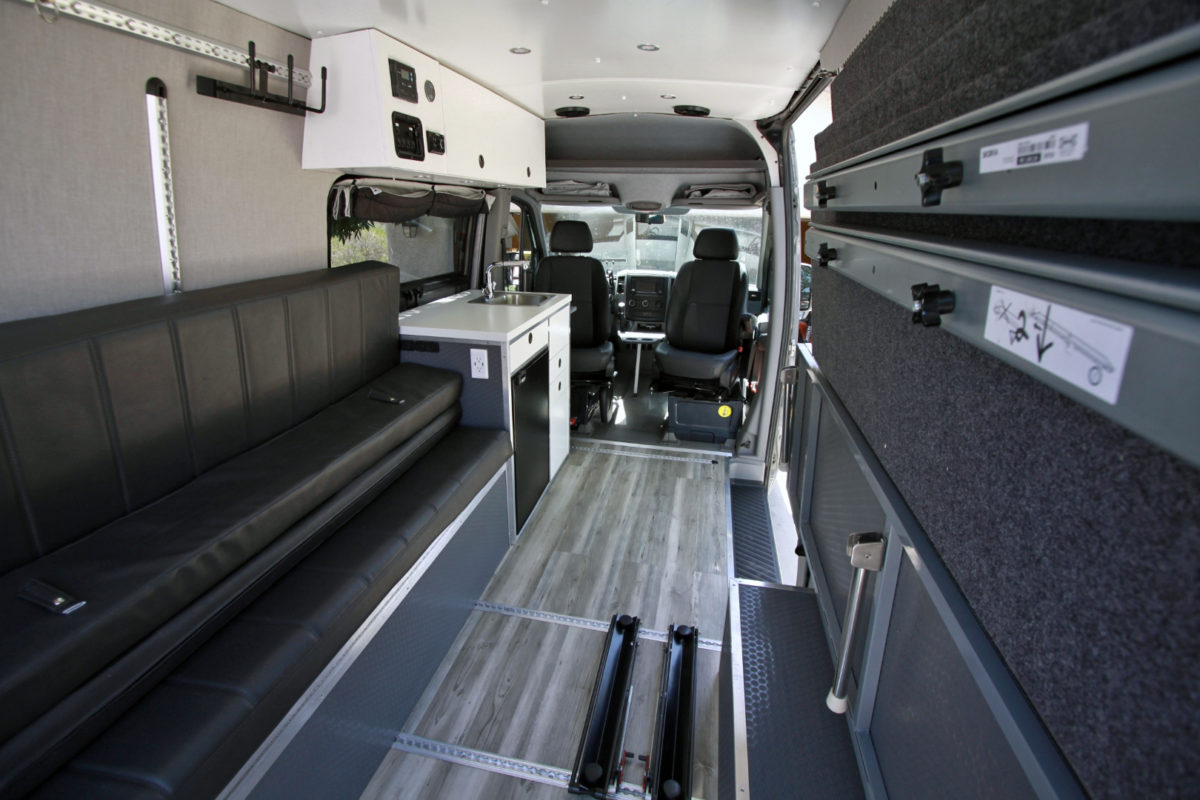
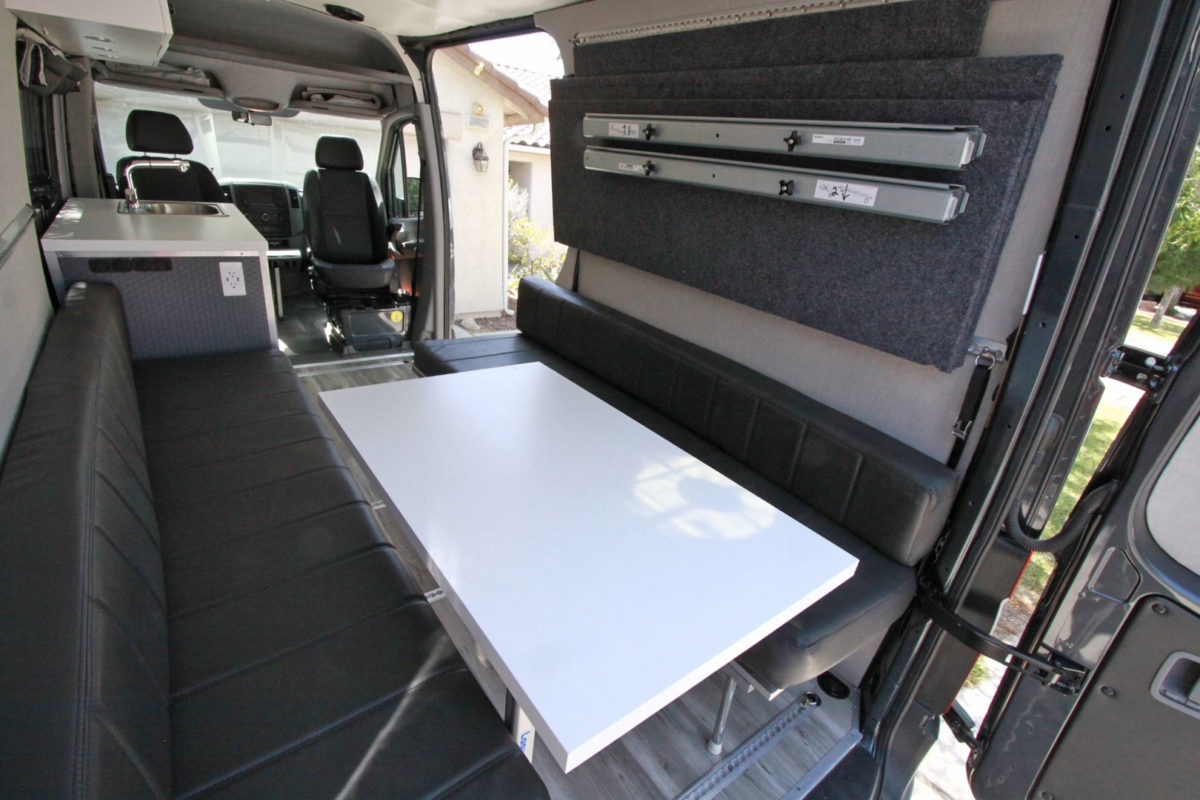
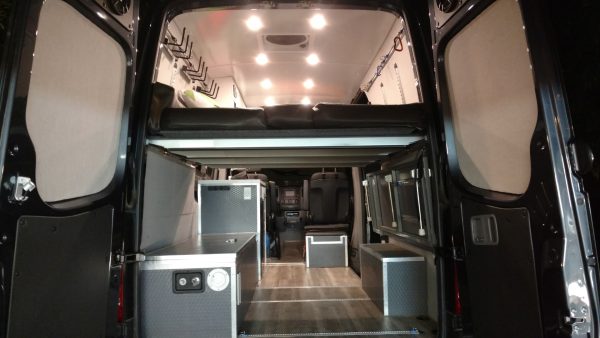
When building our walls, we made sure there were cargo options galore. L track was installed in a few different locations on the wall to allow us to store the platform bed up and out of the way. Four double stud L track fittings hold everything for the bed system to the wall. I cut four sections of ~5″ long, 3/8″-24 threaded rod and screwed them into the L track fittings. These mounts are removable and stowed away in a canvas pouch. Thumb screws hold everything together without the need for tools.
It’s nice not needing ratchet straps like some other panel bed bracket systems require.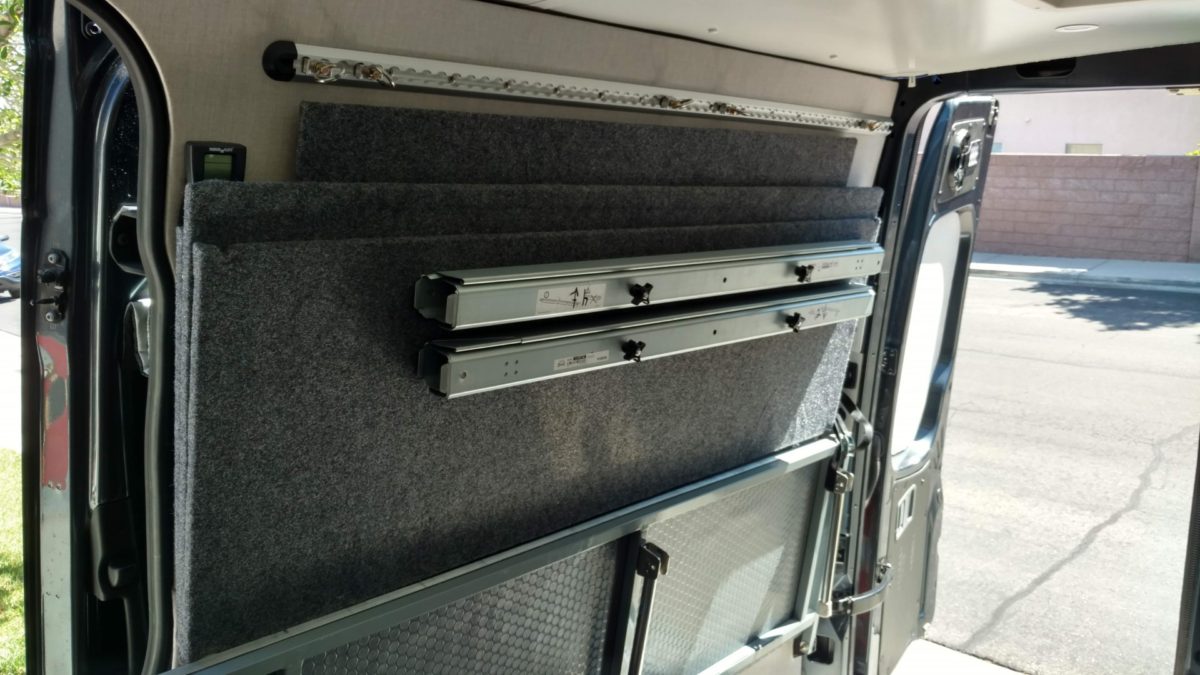
Another great thing about the way this platform bed stows away is that is doesn’t stick out very far. Since we store our cushions on the dinette bench, everything is a very low profile when on the wall. This makes it very easy to load our dirtbikes.
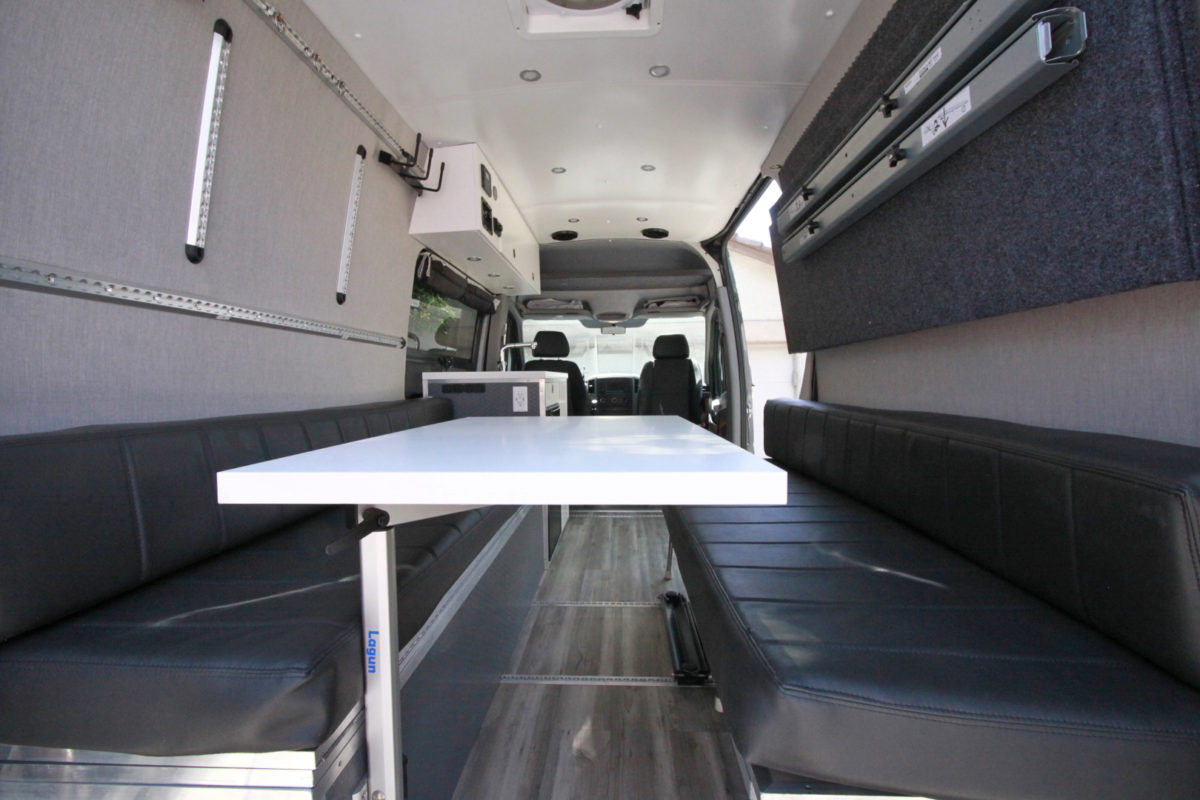
Even when our van is in the dinette configuration, the platform bed is well out of the way.
Storing Mountain Bikes Under Our Platform Bed
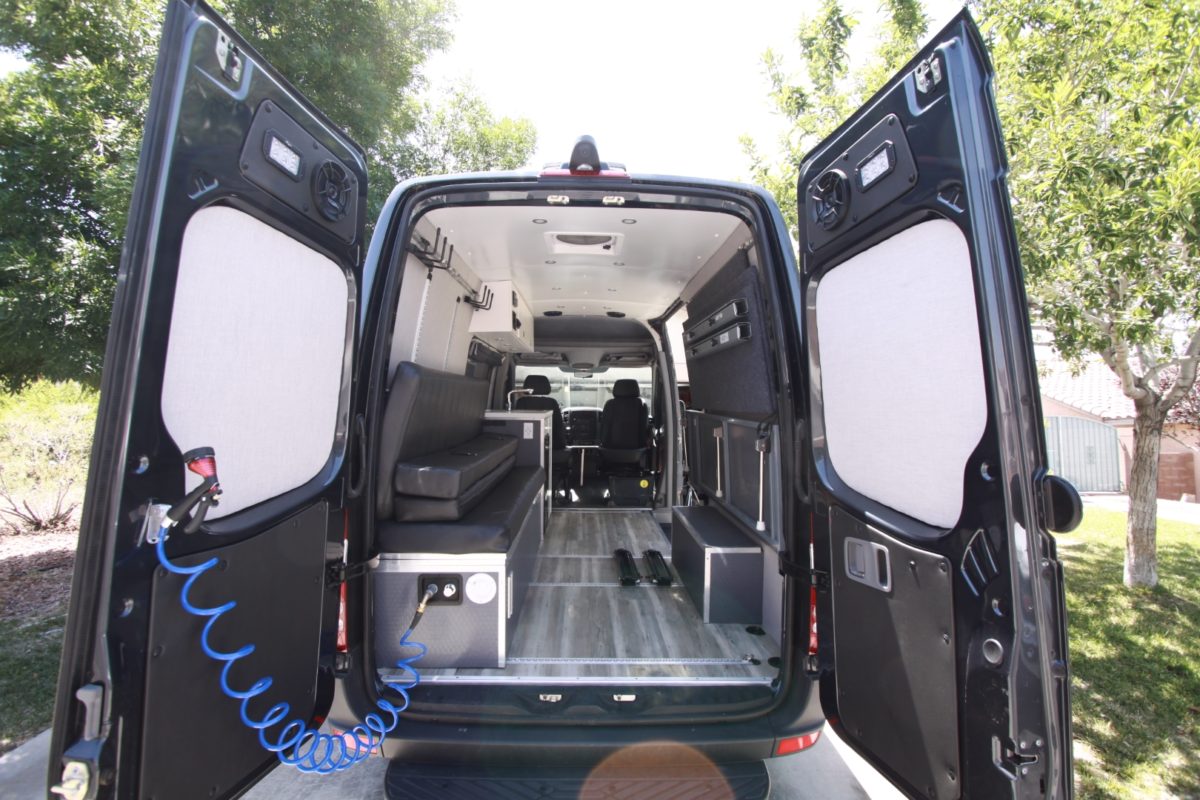
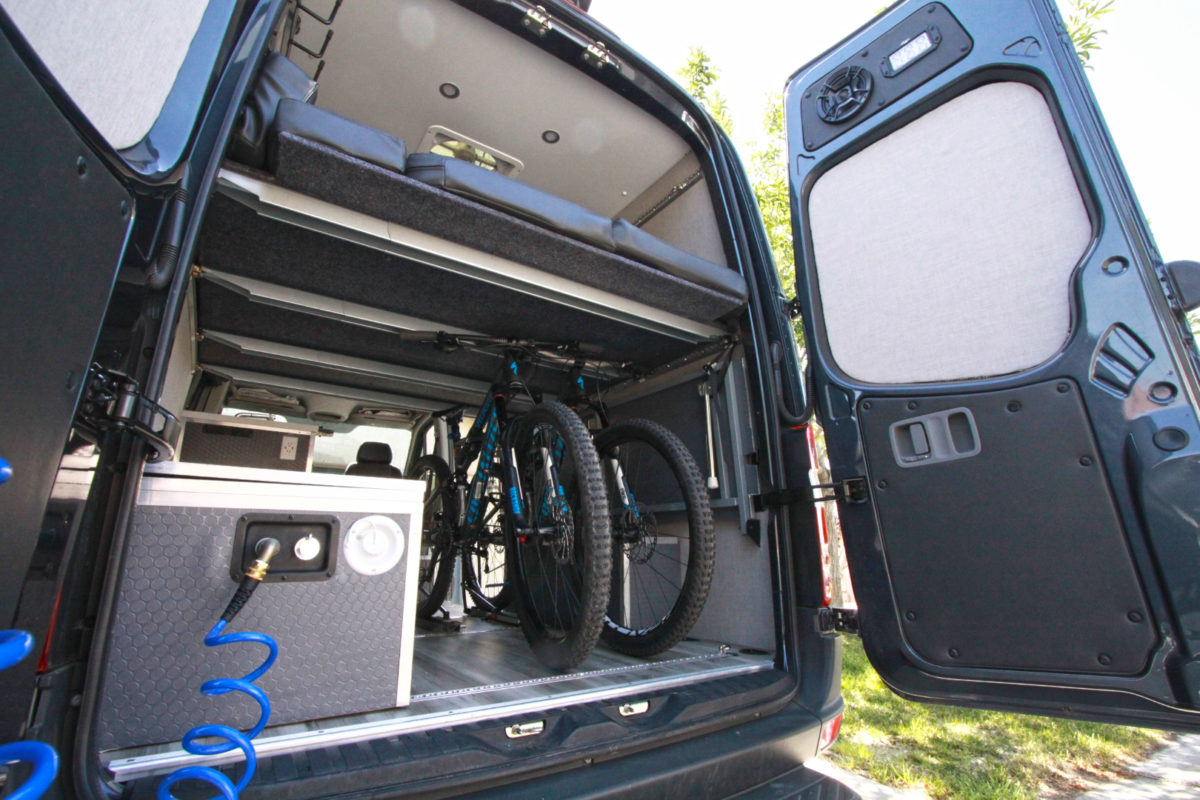
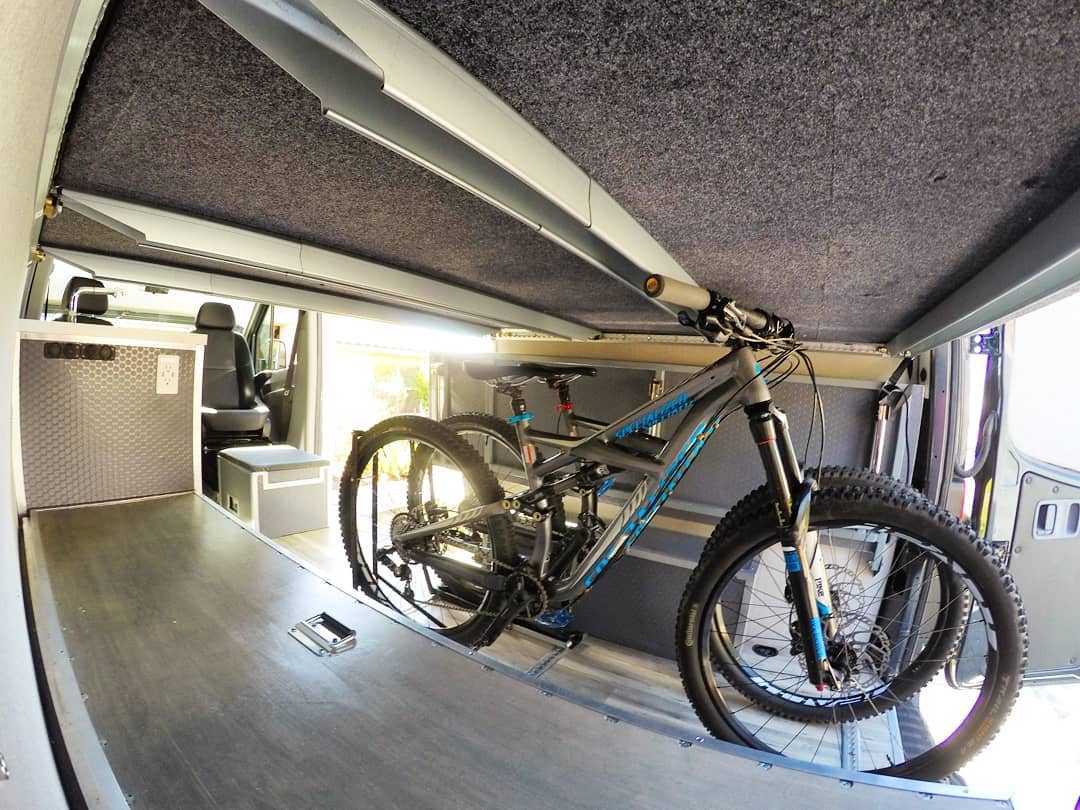
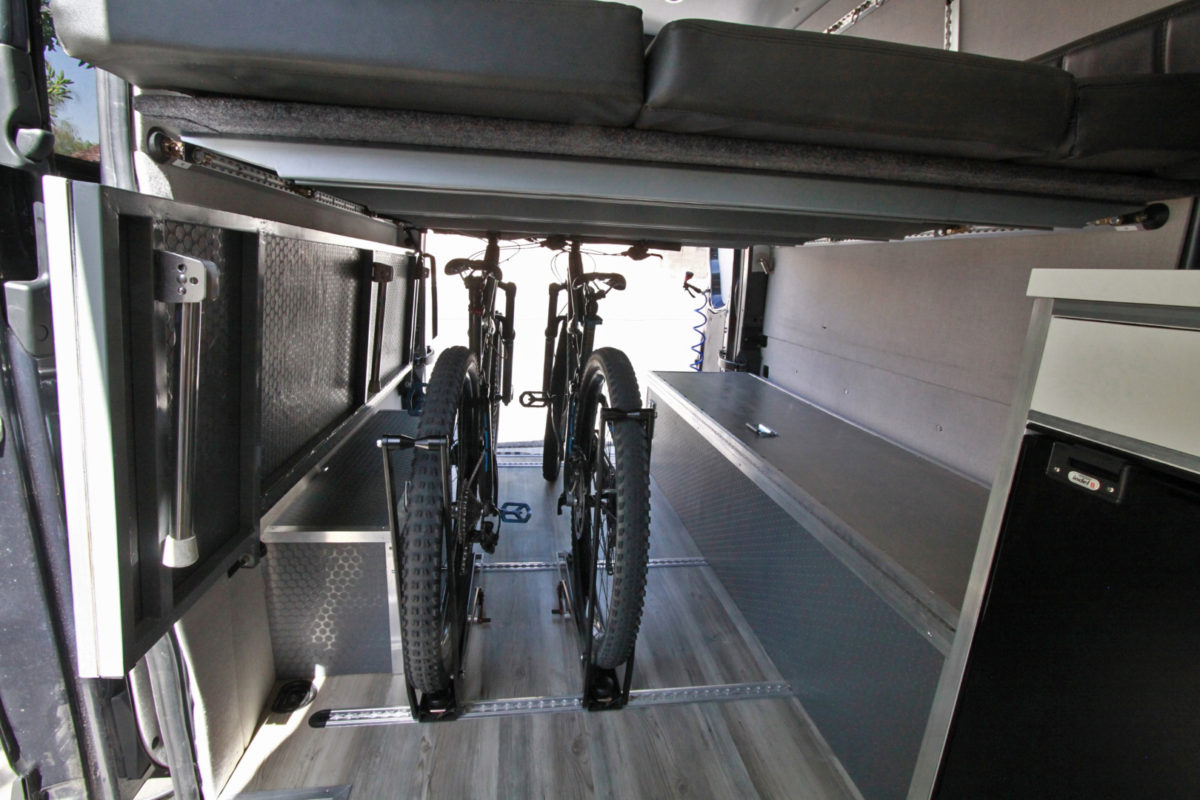
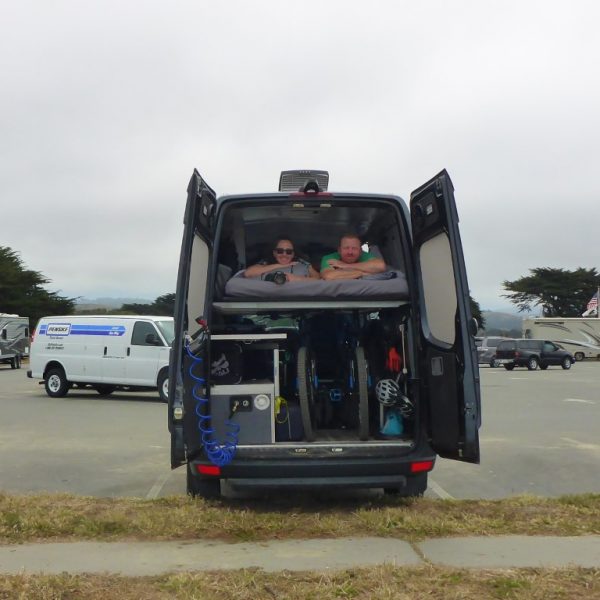
Many of the platform beds I see in vans require the front wheel to be taken off their bikes in order to be stored. Yes, these setups offer more headroom and space in the bed, but it’s quite a hassle having to reassemble your bike every time you want to quickly pull them out to run into town or go on a ride. We positioned our 1UpUSA bike trays in a way that our bikes sit backward in the van and the handlebars clear the bed supports. It is a tight fit and they require a little lean to the side to pull them out past the last bed beam, but the beauty of it all is we get to leave our front wheels on. Shown here is our large and medium Specialized Enduro 29er bikes stored IN the van without having to remove any wheels.
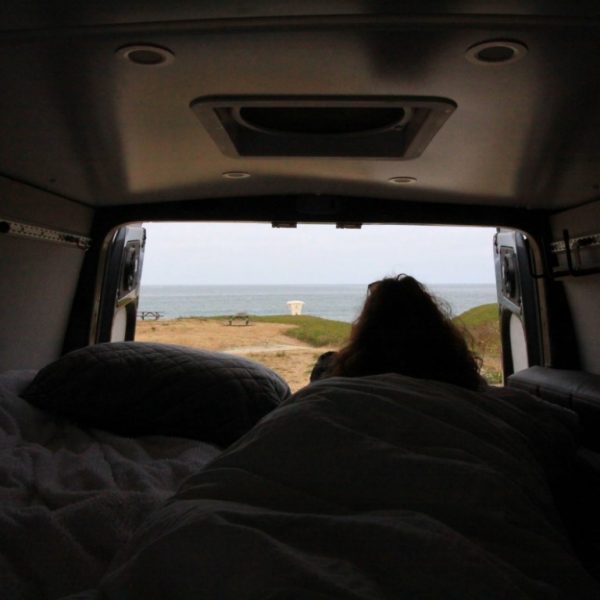
Plenty of Room to Relax
Our platform bed has been fully tested and it passes in every department.
From Party Bus to Adventure Van with a Bed
Videos
Parts List
- Ikea Skorva Bed support beams: sold in Ikea stores for $10 or $30 each on Amazon
- L track for the walls
- L track double stud fittings
- 3/8-24 bolts
- 3/8- 24 thumb screw knob handle
- ½” birch plywood sourced from Home Depot (4×8 sheets)
- speaker box carpet
- 3/8-24 round plastic thumbscrews to hold down panels- I bought them on Ebay, but they are no longer available.
- 3/8″-24 threaded rod
- Thumb screws to secure panels & braces to the wall. A smaller option is available too.

25 Responses
Martin
Hi Pete,
very nice!!! For my future Sprinter project I was thinking about l tracks to install the bed too. This comes very near to my own thoughts. Low costs, nice clean look, seems quite stable too. I am thinking about a diagonal l track in the middle of the car. That can hold one of the panels as a backrest. Together with another horizontal panel in front of it that could be a nice lounge / bench for a rest.
The storage is even a much better solution than any production bed from the famous companies!
Best regards from Berlin, Germany
Martin
Leslie
Love the setup. Can you tell me how tall your bikes are? I am interested in knowing how they compare with a motorcycle I am looking to do something similar with. Thanks!
Best regards from Ohio
Leslie
Pete
Hi Leslie, the top of our handlebars is about 42″. That is higher than most motorcycle seat heights, but the handlebars of my KTM motos are a bit higher than that. When we haul our motorcycles, we don’t use the platform bed. We could make it happen in a pinch and have them stored in a way that the bars were in front of the platform bed, but it would be pretty cramped.
Morgan S
Would you be willing to make and sell me the L brackets you used to mount the beams to the L track? I already have L track in my van, but I don’t have the tools needed to make the L brackets, weld bolts, and cut shorter bolts that go into the L track double stud. I will pay you if you can make me 6 of these considering I would only use 3 beams. I have a 118 wb with less space and I might just need two beams but rather be safe than sorry. Any help would be great!
Pete
Hi Morgan. Possibly. I am very busy these days, but I may be able to knock out a few of them for you. Do you have a way to secure your L track to the wall already?
Morgan Simental
Hey Pete,
Yes, I have L track on my walls already. I just need to mount the beams to the L track. If you could get back to me on this, I would be so appreciative. I’m entering my email when I write this post, but please let me know if that doesn’t work.
-Morgan
Pete
Yes I did get the message.
Ok, I may be able to make them but it may take a little time. I literally just got back from vacation and lots of work to do. How soon do you need them? I also need to see if I have all of the materials.
Morgan Simental
Pete if you could do this that would be amazing. I’m not rushing on this so take your time. I just don’t want you to forget about me. Just give me an ETA so I can plan around that.
-Morgan
Pete
I should know an ETA by this weekend. I’ll keep you posted. I’m guessing a couple of weeks.
denis berthiaume
Very clean job, i would like to know if your floor bounce or flex a little bit at the plywood joint knowing that your closed-cell foam underneath is compressible ? thanks in advance from Montréal
Pete
Thanks Denis. No it doesn’t. I answered you on the flooring post when you asked the question over there.
Todd
Hey Pete awesome site curious on your thoughts on the platform bed set up sleeping sideways in a promaster with flare space
Thanks a bunch Todd
Pete
Thanks Todd. Yep that would work too. The Pro Masters are already wider than the sprinters so that would give you plenty of room! The beauty of DIY is you can build it to your specifications.
Scott Vleeschouwer
I just completed my floating bed using this design! Thanks for the write-up Pete. I really cant express enough how thankful I am you put this together. To anyone reading, my local Ikea in Tempe, AZ had 300+ of the bed slats.
To avoid welding, I used those hammer in bolts and hammered them into the L bracket holes.
Also, it turned out to be annoying getting the wood in and out because the cuts are close to the width of the van. If I did it again, I’d find a way to run the wood Front to back so you can silde each piece in from the rear of van.
Thanks again man, I know it took you way longer to do this project because you documented it.
Pete
Scott thanks for this! Very cool. Glad it helped you out. To make it easier to get the panels in and out, I cut them down a little bit so there was some clearance at each end. It still takes a little finesse because like you said, you can’t just pick them up because the walls get narrower. I found the sweet spot and slide them right in. If they went the other way, then the fasteners would likely be in the way at the end of the bed. Not sure it would matter too much but it was one reasons I went the direction I did. Good luck with the rest of your build. Thanks for the feedback and nice comments.
Jason
I have been racking my brain trying to sleep 5 in a 170 SV. It is possible but trying to be efficient with space is driving me nuts. This may be a step in the right direction. Thank you for the post!!
Travis Wentworth
I love this idea and how detailed it’s documented. One thing I’m wondering is about the rigidity of this design. I know the IKEA bars are adjustable but the plywood anchored at all 4 corners could cause issues as the body of the van flexes etc. no?
Pete
Thanks, Travis. There has been no issue with that. We’ve used this setup for almost 4 years now without any problem. The 3 different panels, although anchored well, probably offer some sort of movement since the L track hardware isn’t super tight in the tracks. Also the holes in the panels are larger than the hardware that keeps them secure so there is room for it to flex.
James
Love the build! What thumb screws did you use? Think the link is broken.
Pete
Thanks James! I appreciate the feedback. I only found one link that was off & I think I fixed it. Here’s the thumb screws I used. Let me know if you have any questions.
https://amzn.to/3G32do5
chris hart
Hi Pete. On the panel bed is the 1/2 birch an over kill? Do you think you could get away with 3/8 with that many rafters? Just looking for your opinion. Thanks
Pete
Hey Chris, yeah you could probably get away with 3/8″ since the supports aren’t spaced that far apart. The cushions also help spread the load too so you’d probably be fine.
chris hart
Hi Pete. Looking for an opinion do you think you could’ve got away with 3/8 plywood versus 1/2 plywood just for the ease of maneuvering it around when taking it apart with the same amount of rafters? Thanks
Paul Cornwell
Hi Pete, Let me start by saying your van build is awesome and perfect for what I want. The only issue is here in the UK its really difficult to get the l track fittings, especially double brackets. What size are your bed base panels and your bench cushions to make the bed please so I can look at doing something similar in some form?
Pete
Thank you, Paul. The van has worked great for us. I don’t know off the top of my head but I can measure when I get home. (I’m currently at work). But I know the cushions are 78″ long. You can obviously make your bed or cushions any size you want as well as the base panels. Just measure your setup once your walls are finished and see what fits best. The width will depend on the height of your bed since the van is shaped like a football. lol I’ll measure when I get some time and include them here and in the post.