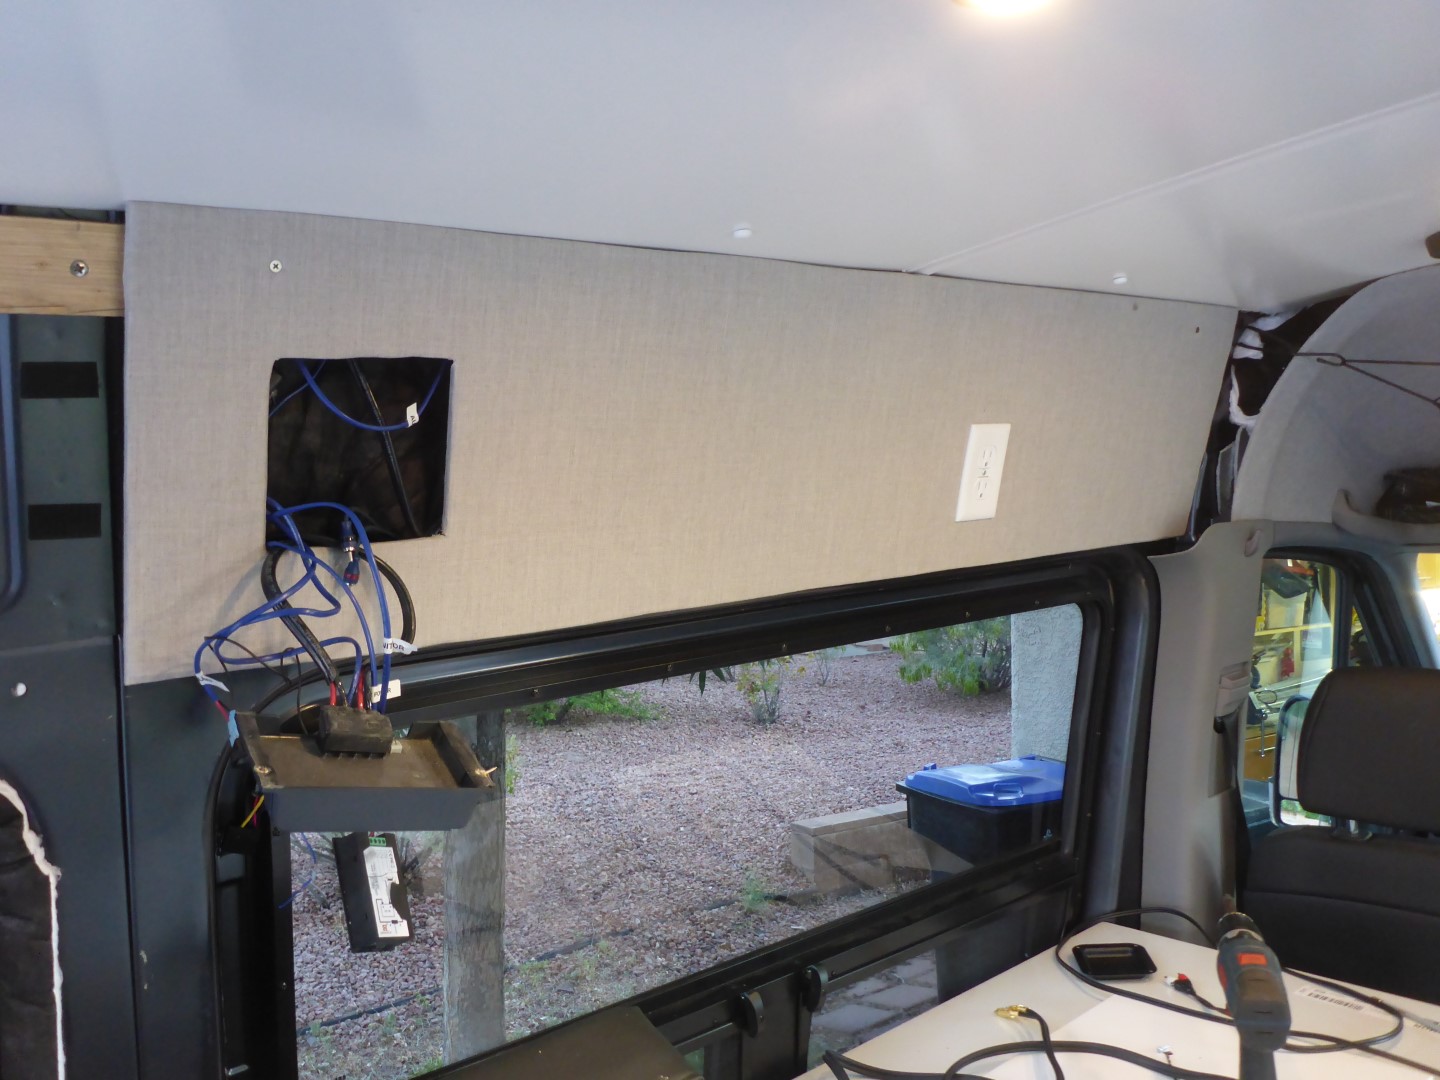
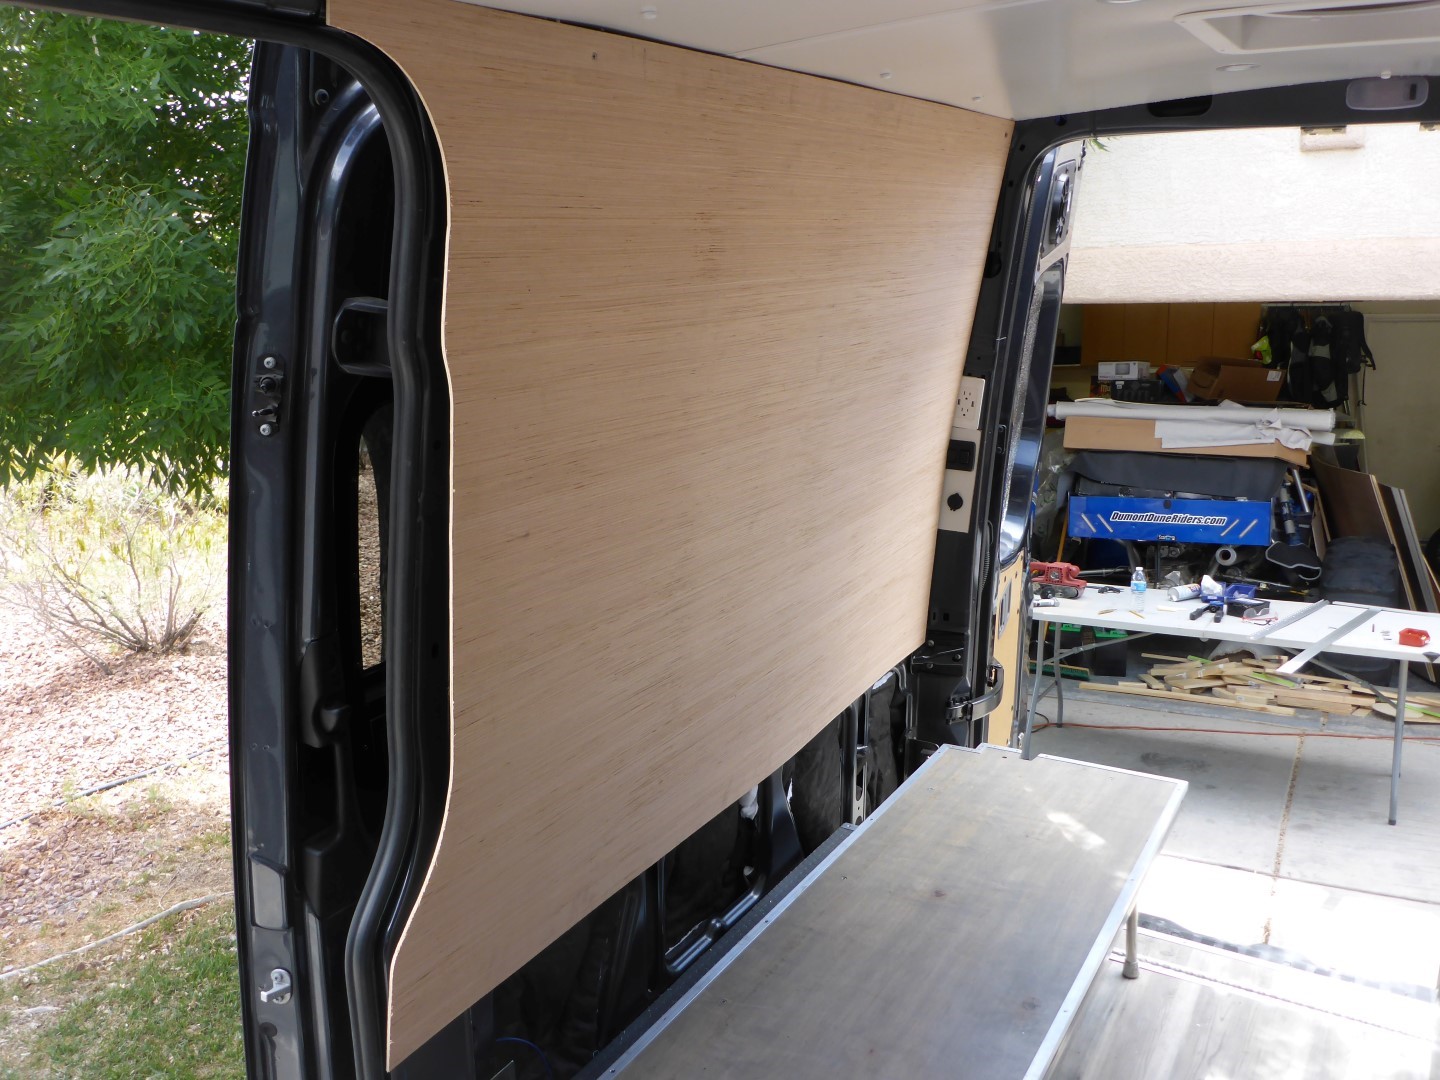
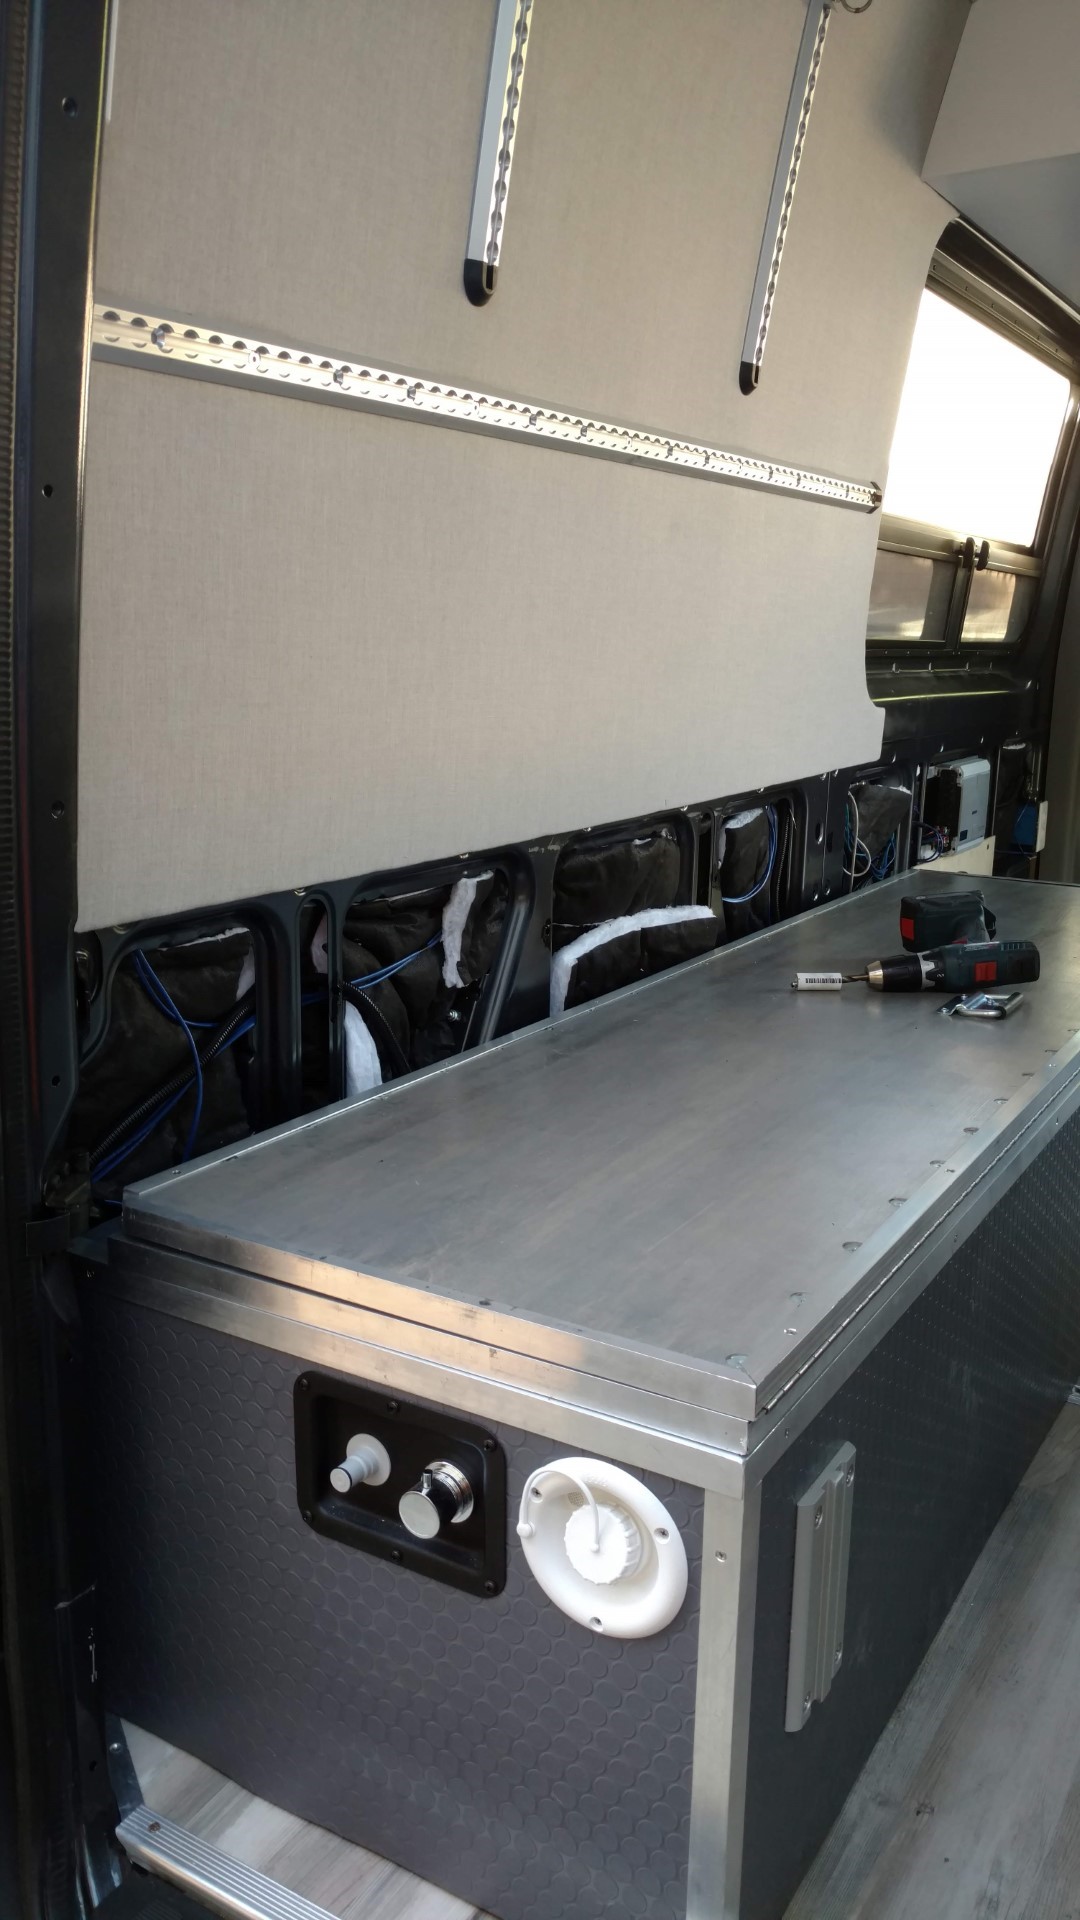
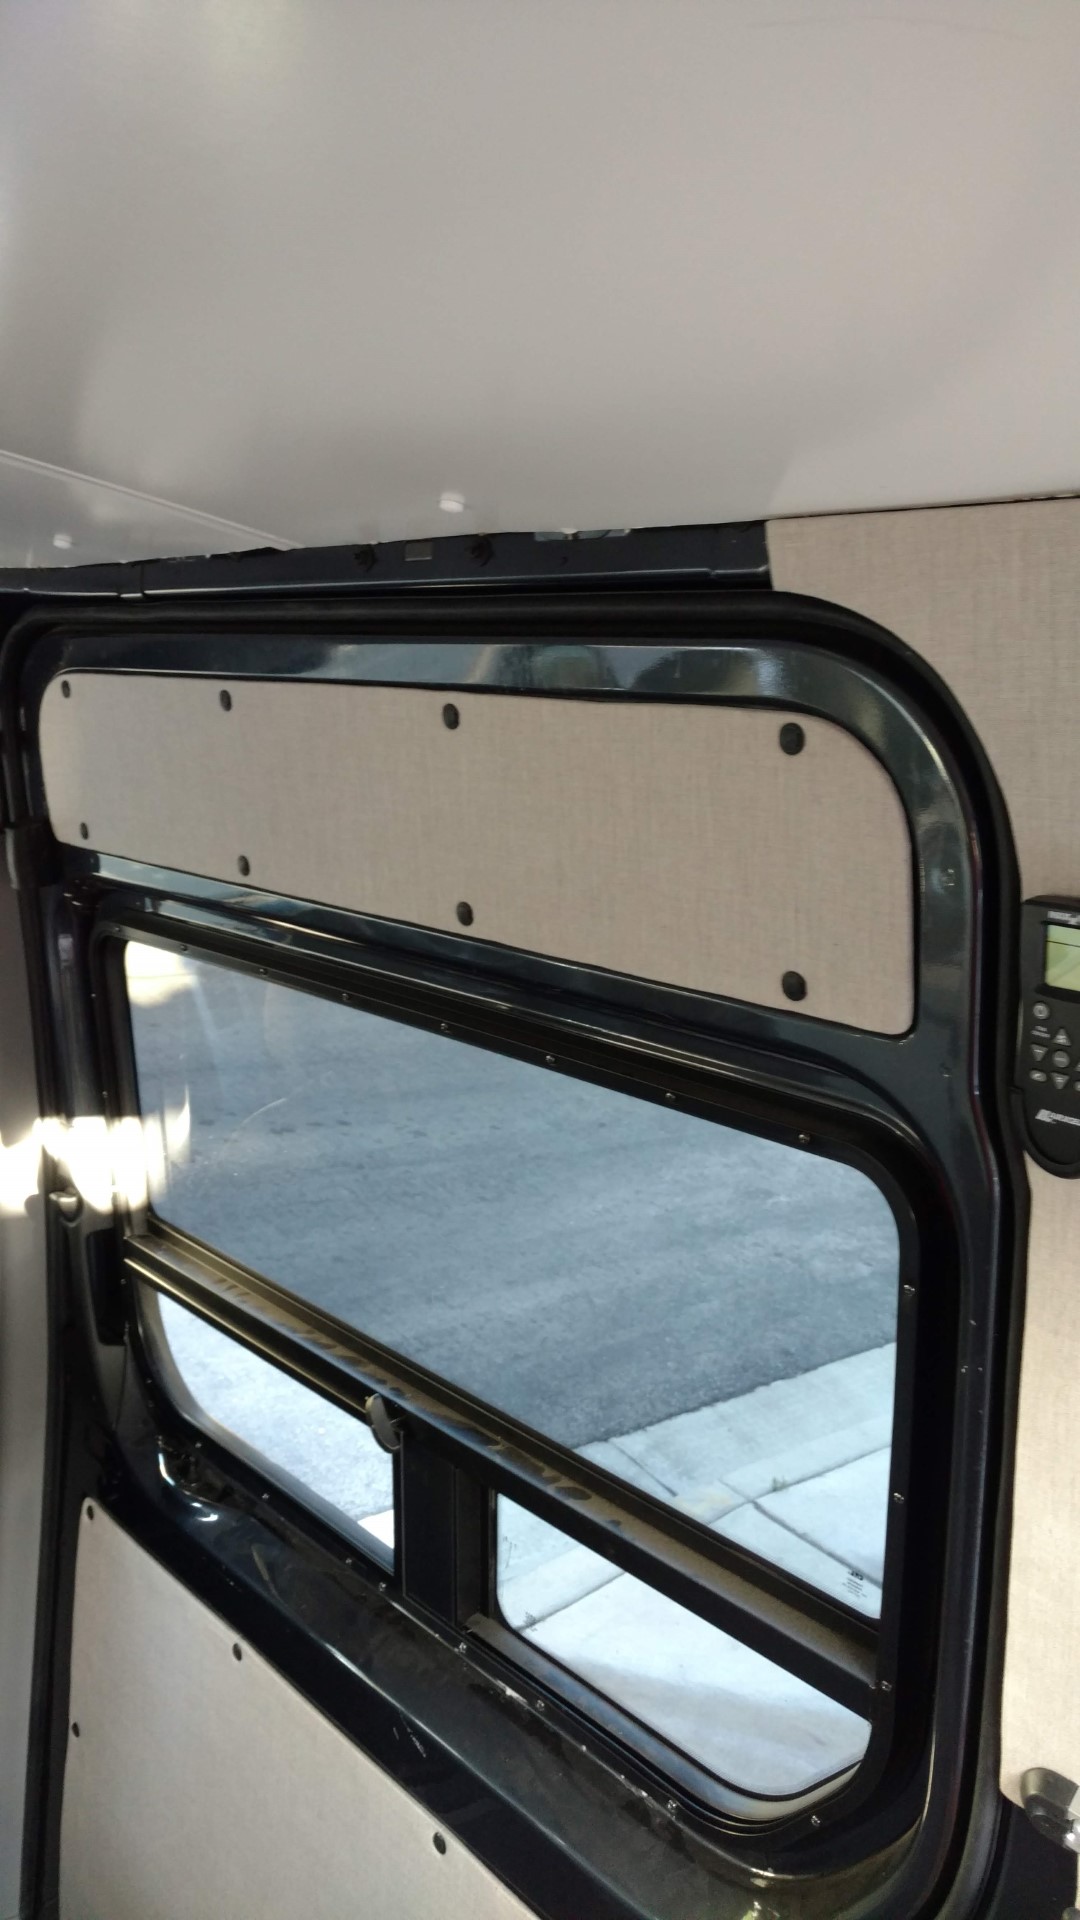
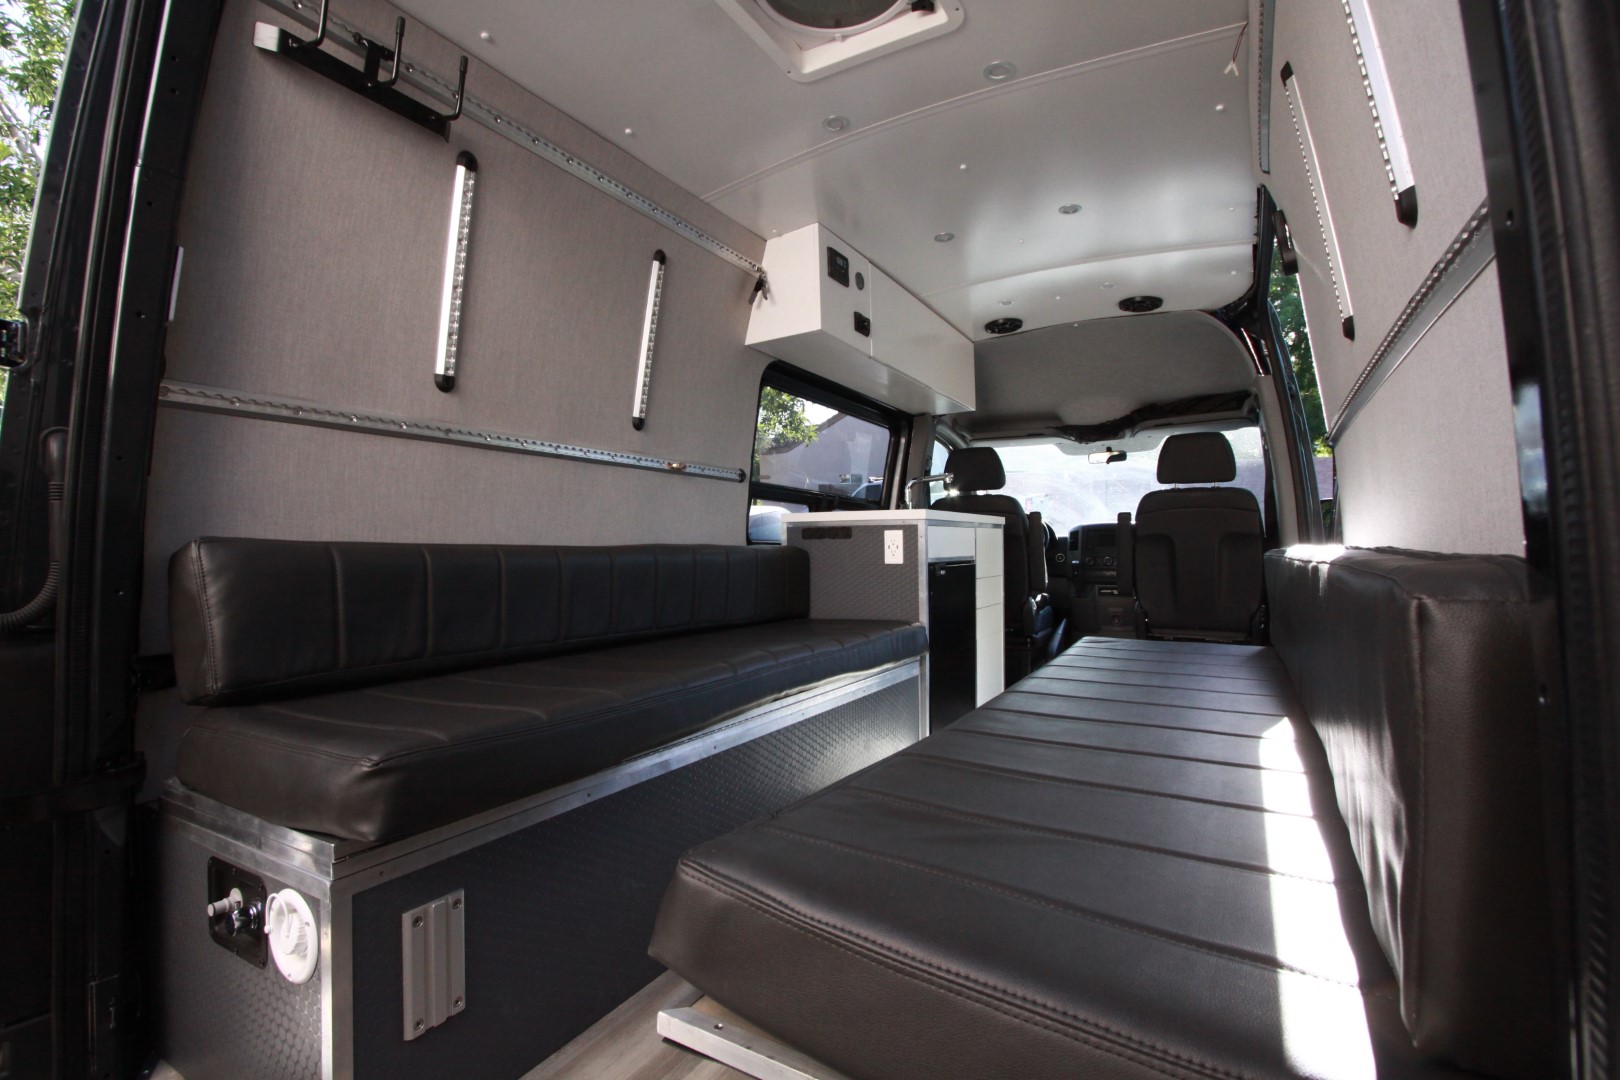
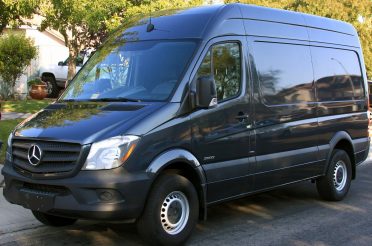
This is one of the most exciting steps in the van build process. For months I have been looking at these ugly, misshapen walls and insulation with little payoff from my hard work. They say building a van is just like a house. It all comes together rather quickly at the end. So now the first finished panel goes up!
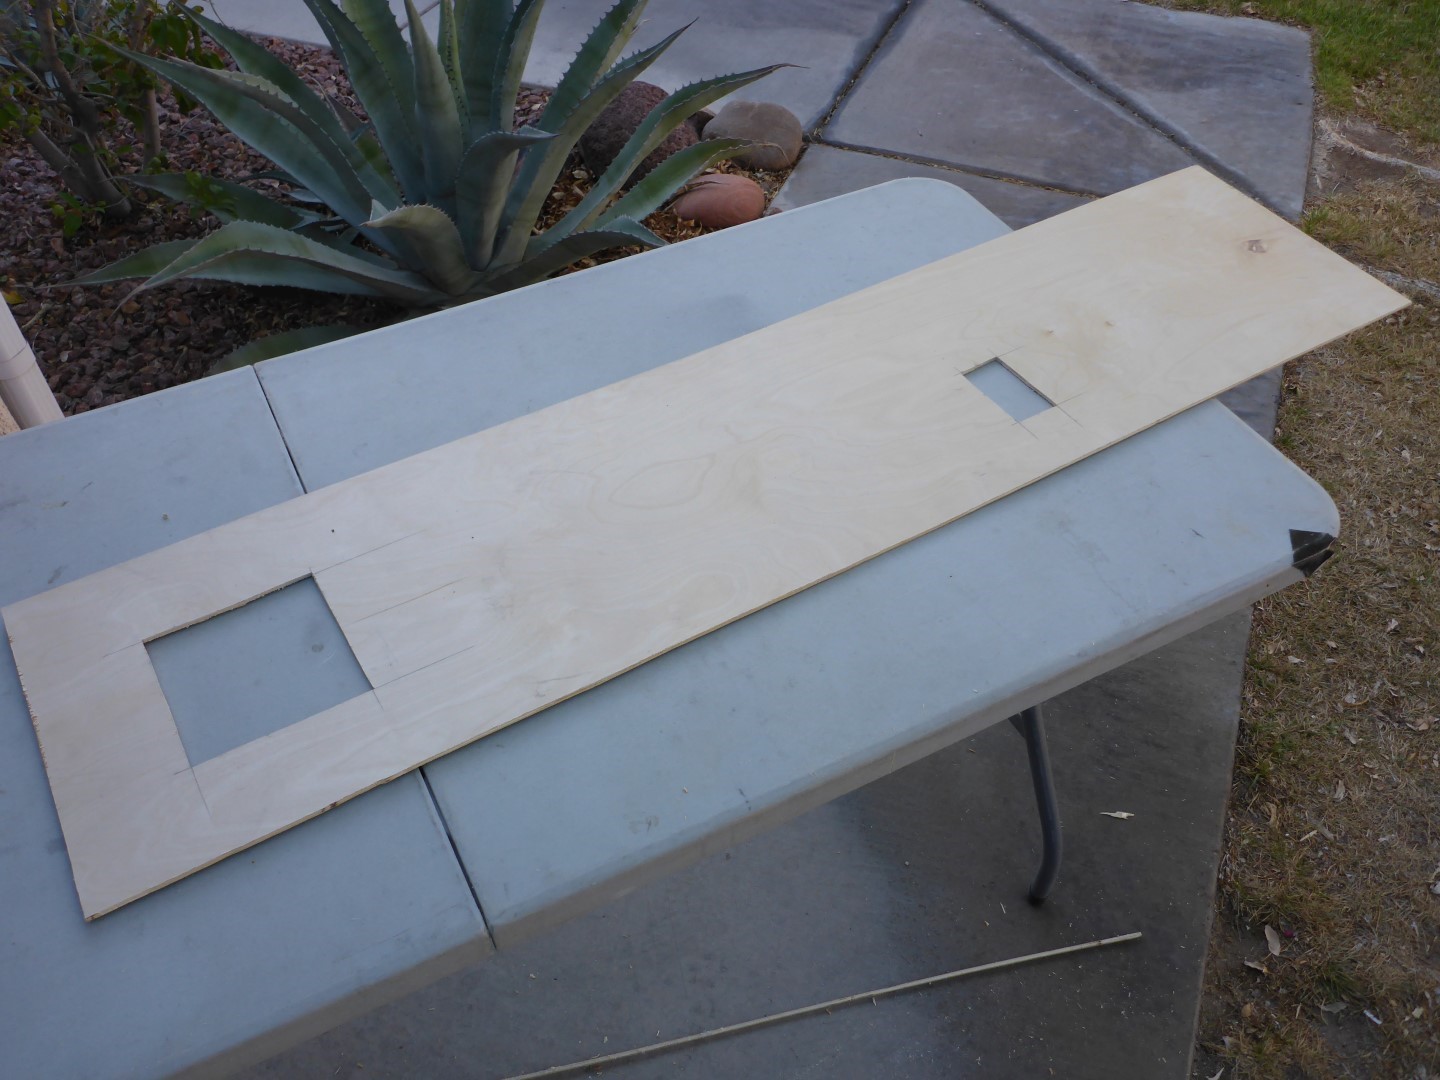
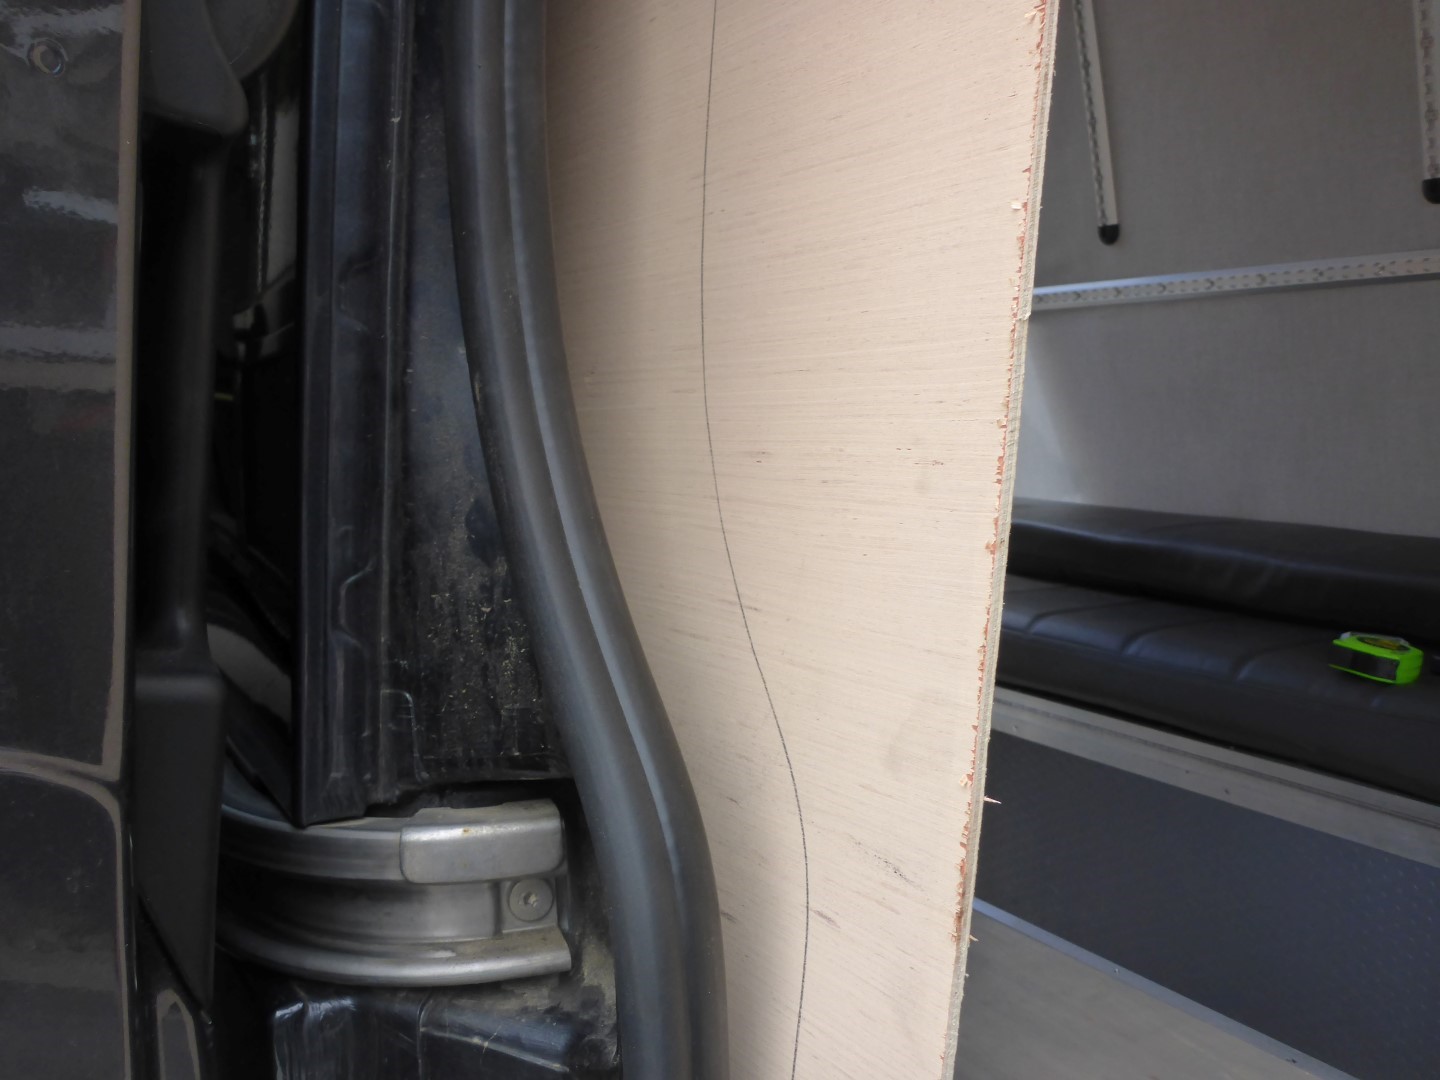
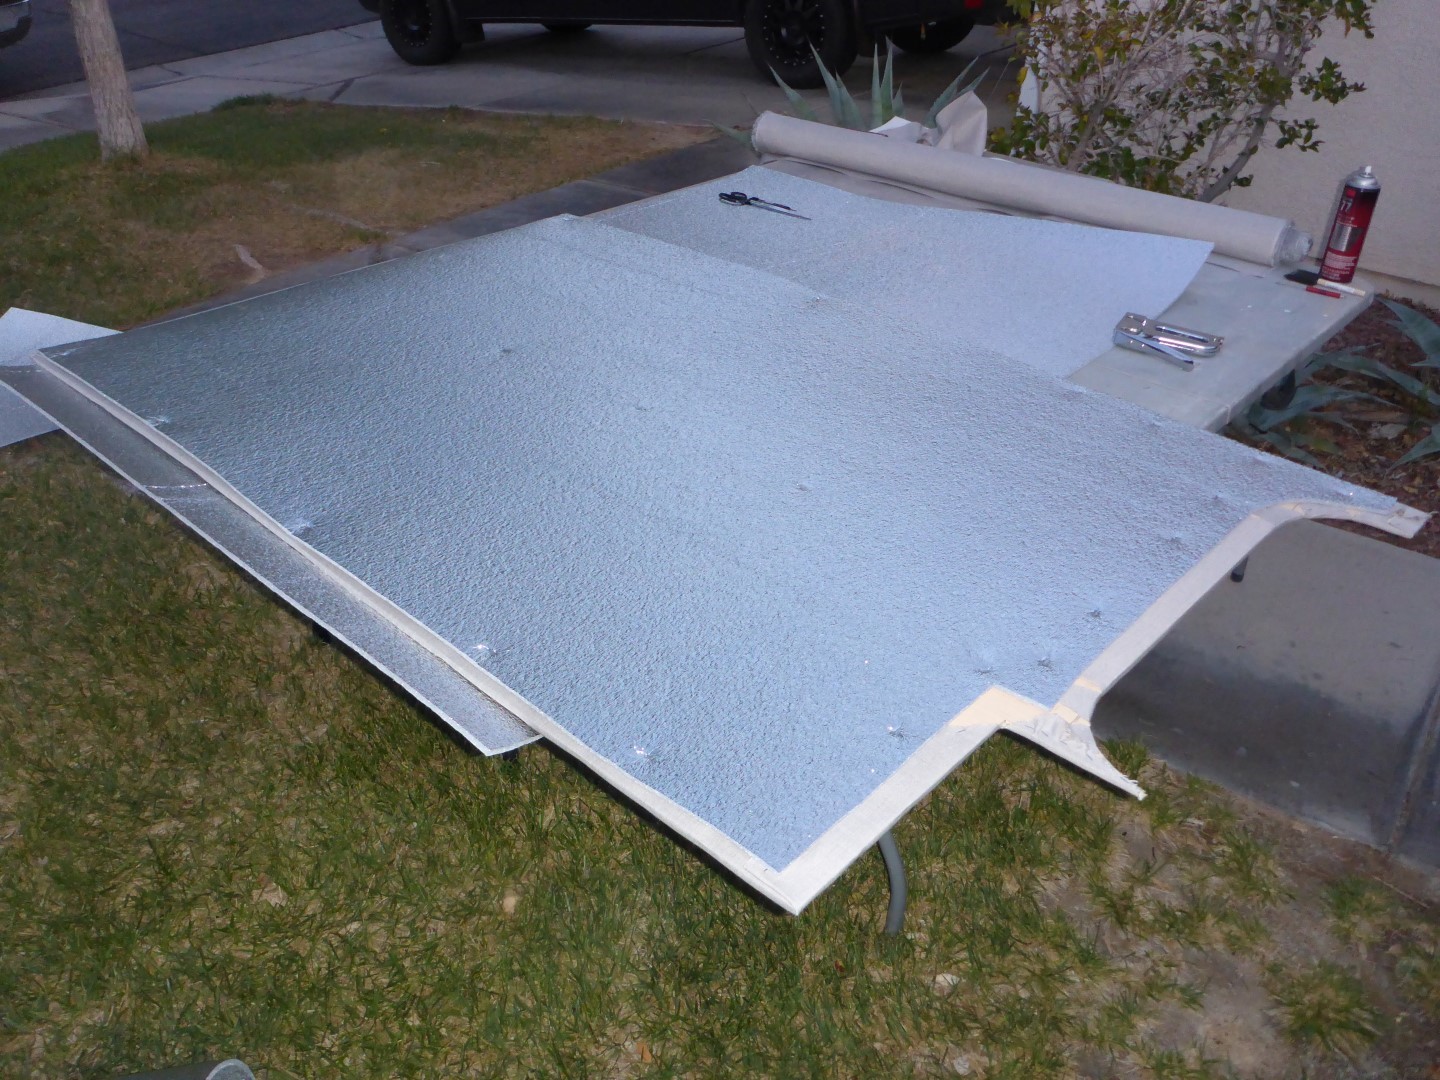
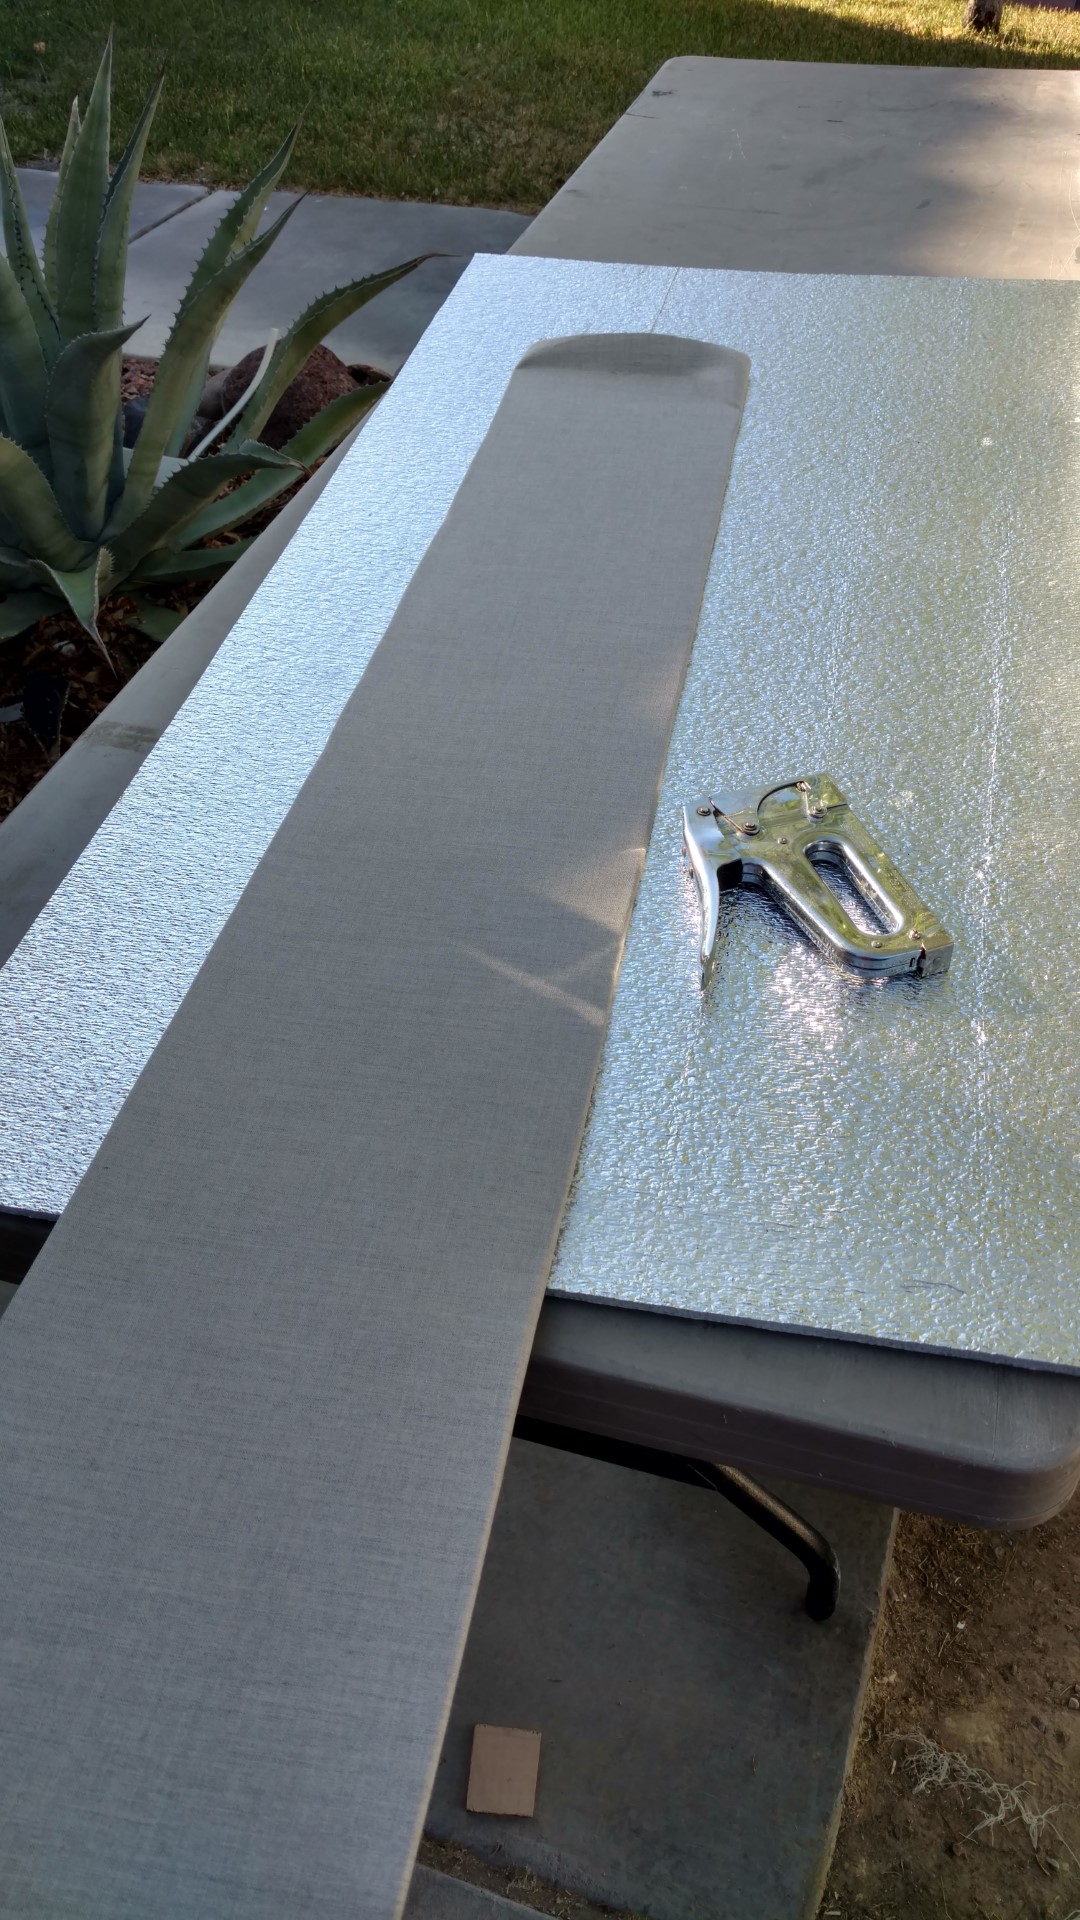
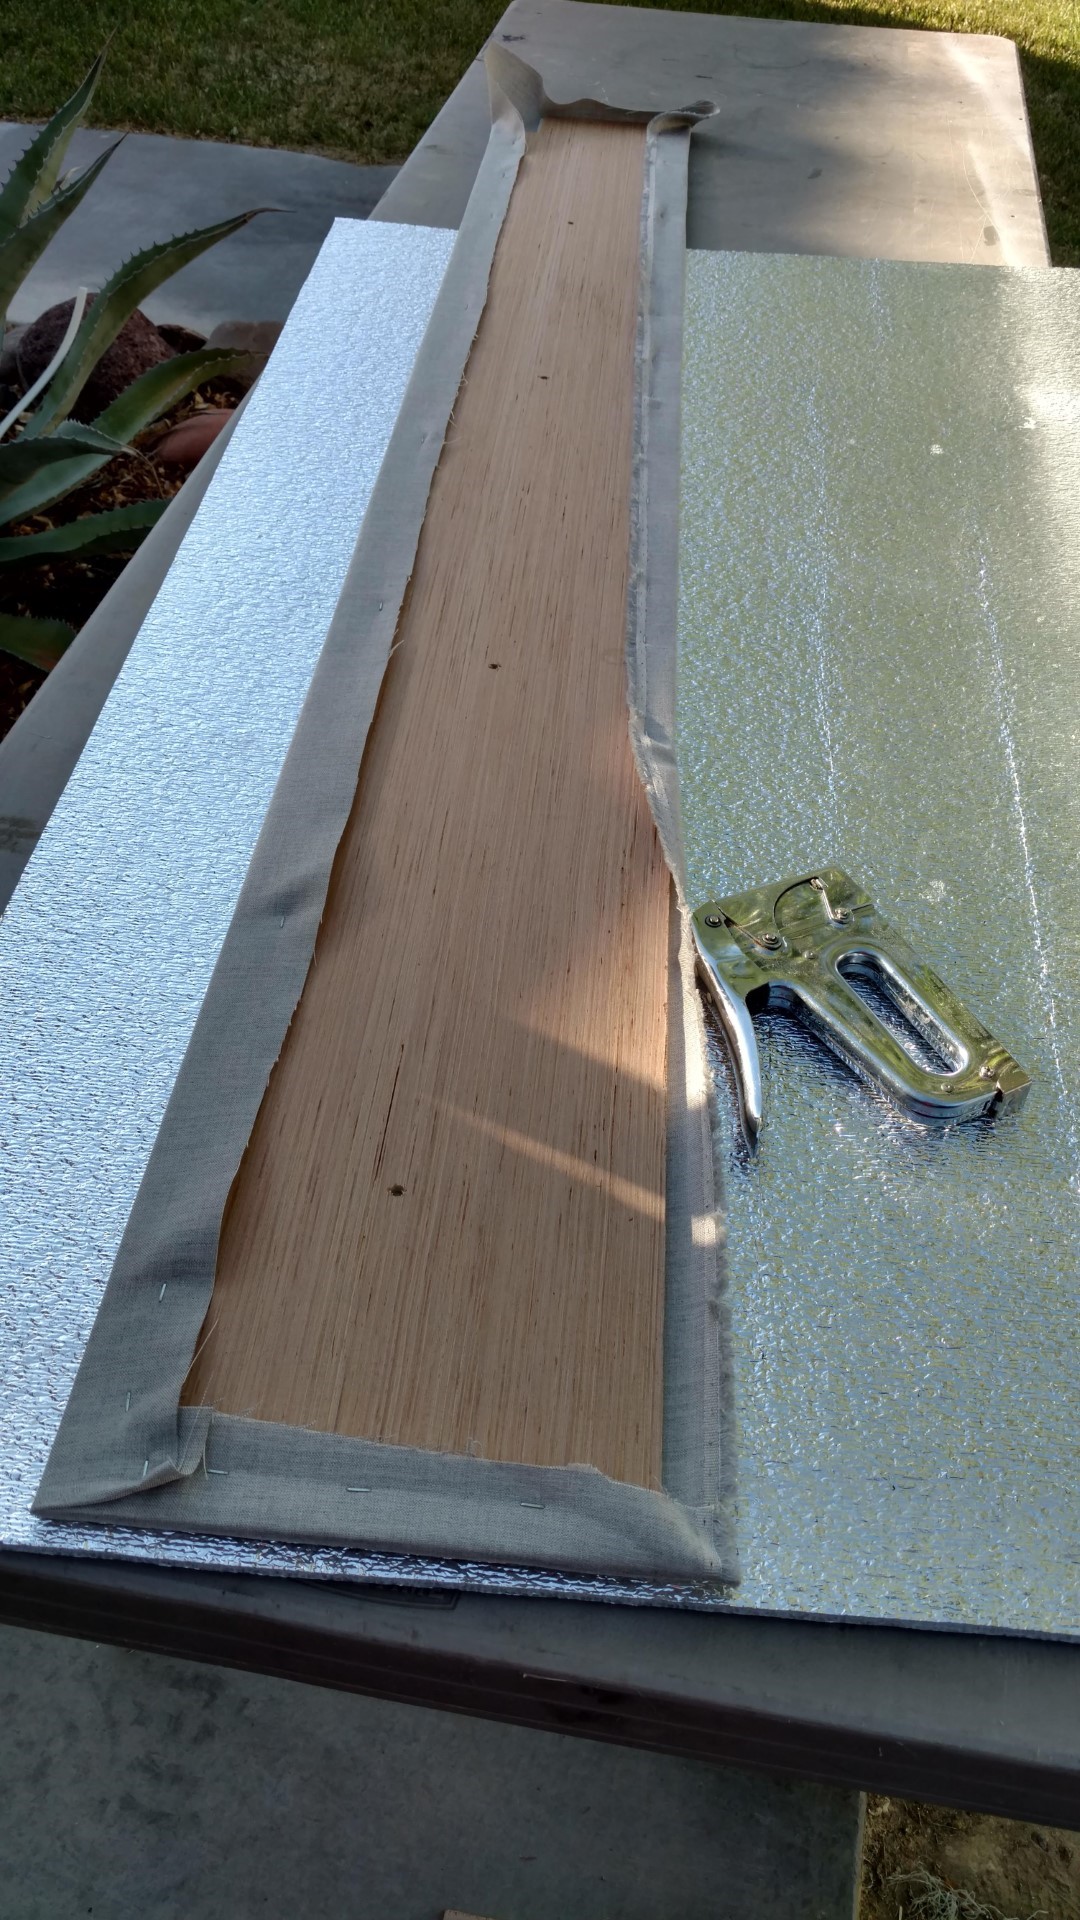
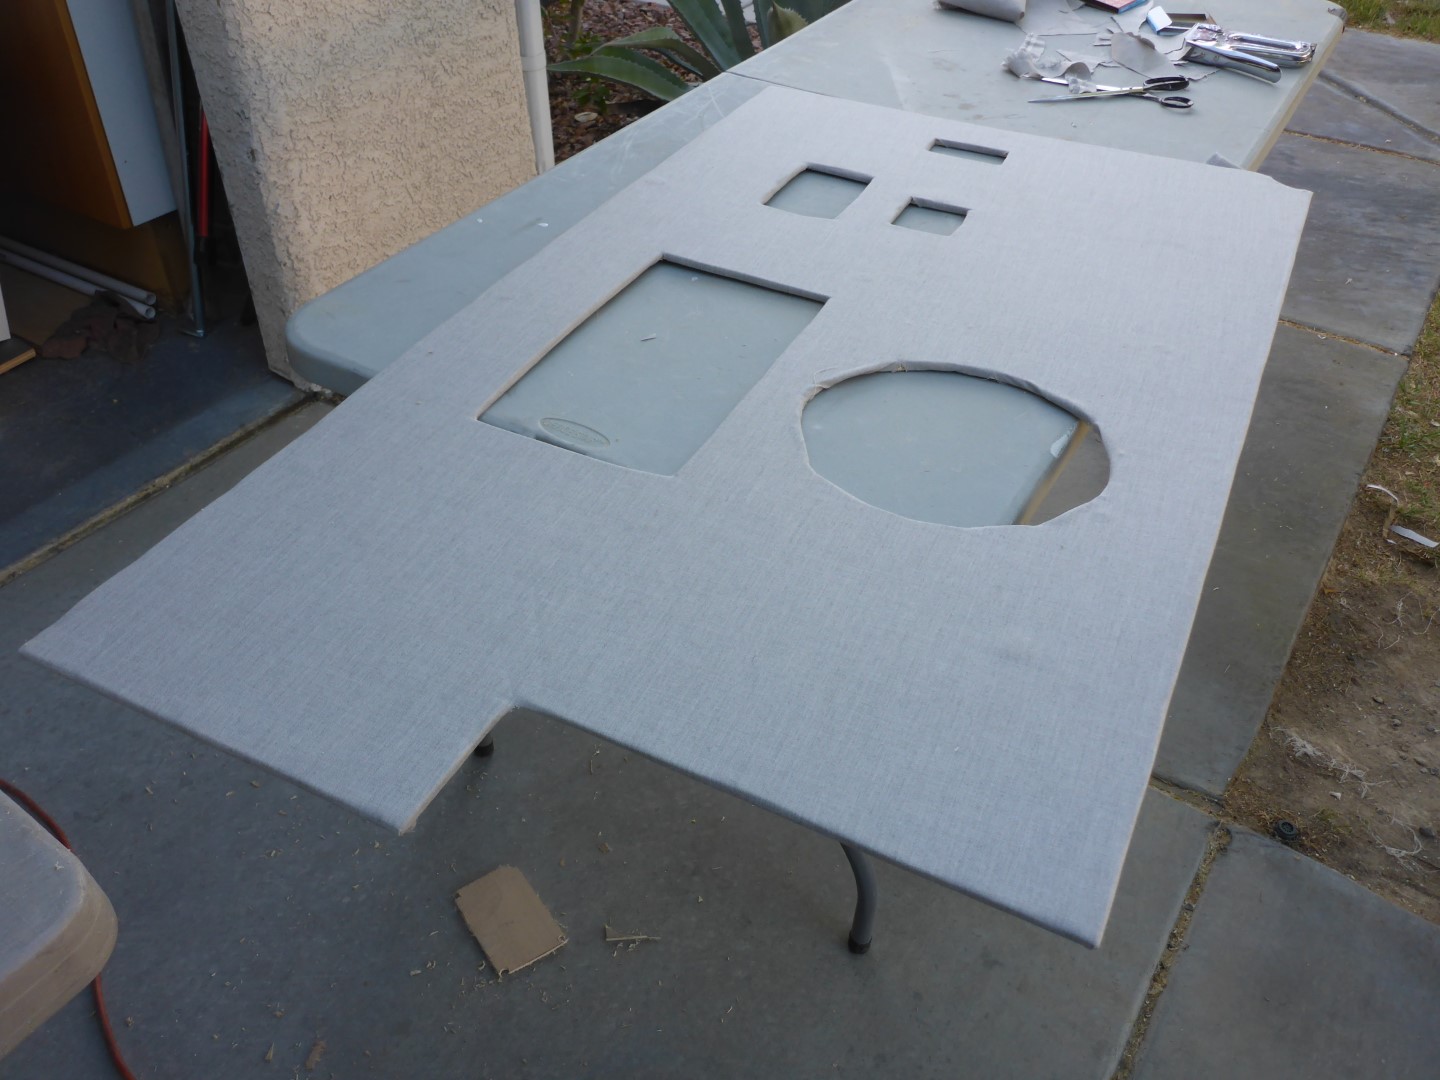
I used 1/4″ plywood from Lowes cut to shape using only measurements. Many people use pieces of cardboard as templates, but I didn’t bother with that. You just have to measure several points because of the odd shape of the van and transfer them to your wall panel. I usually measure 4-5 points along a long stretch and a couple on the shorter sides. Once the panel was cut to fit the wall, a couple holes were cut for things like the wall outlet and giant bundle of wires.
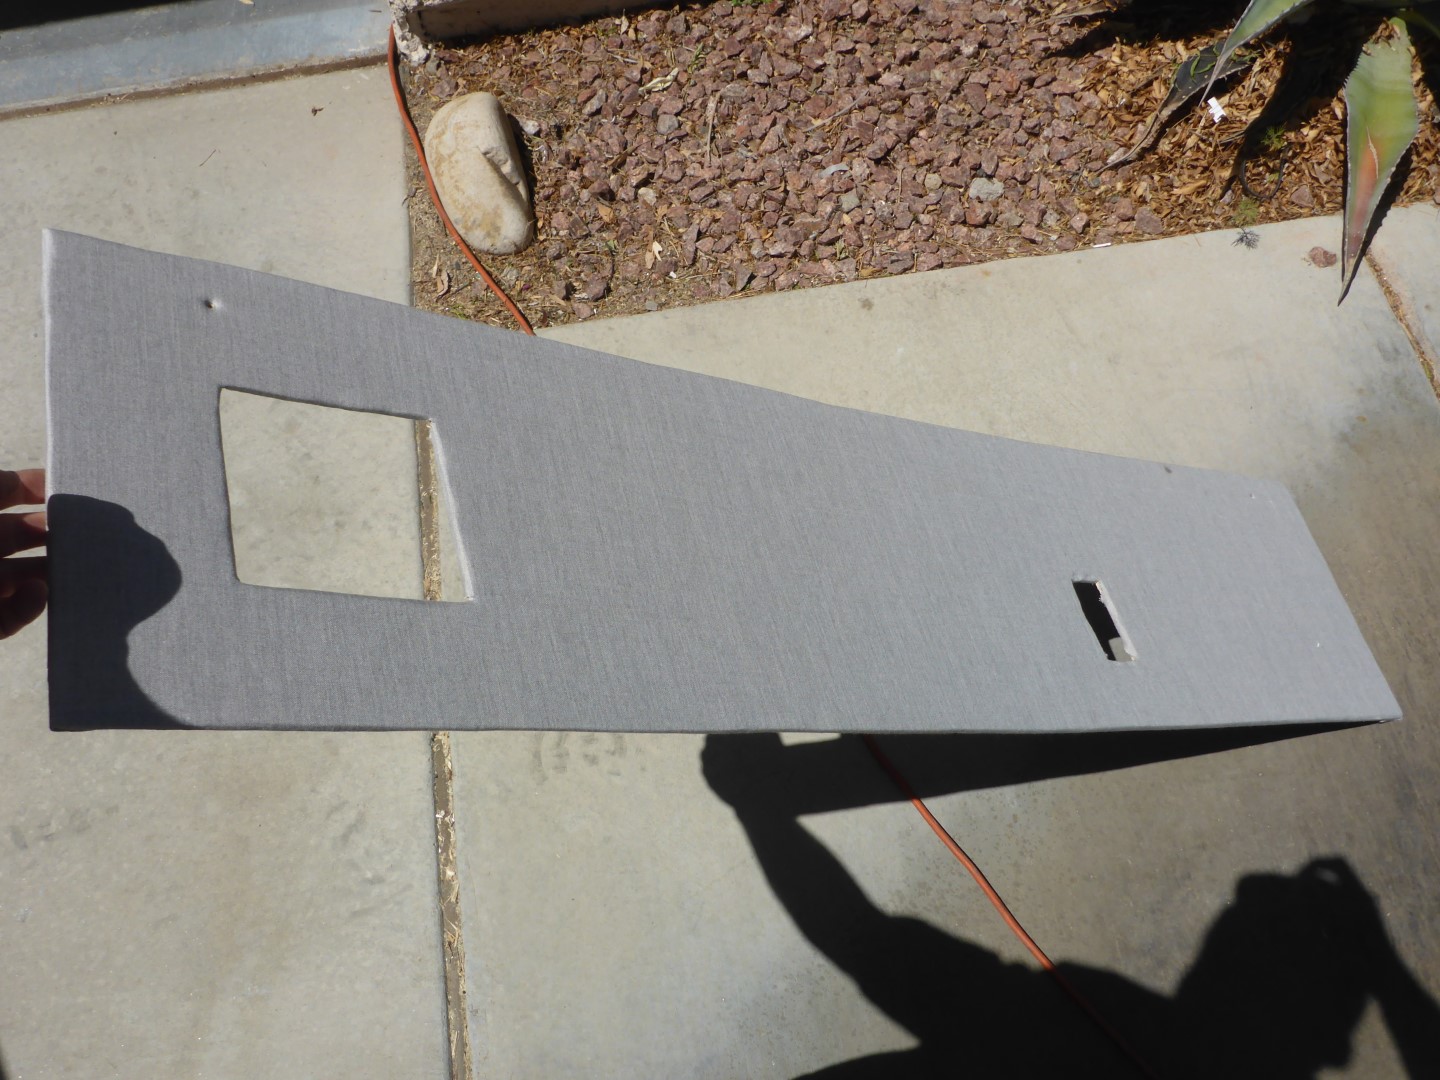
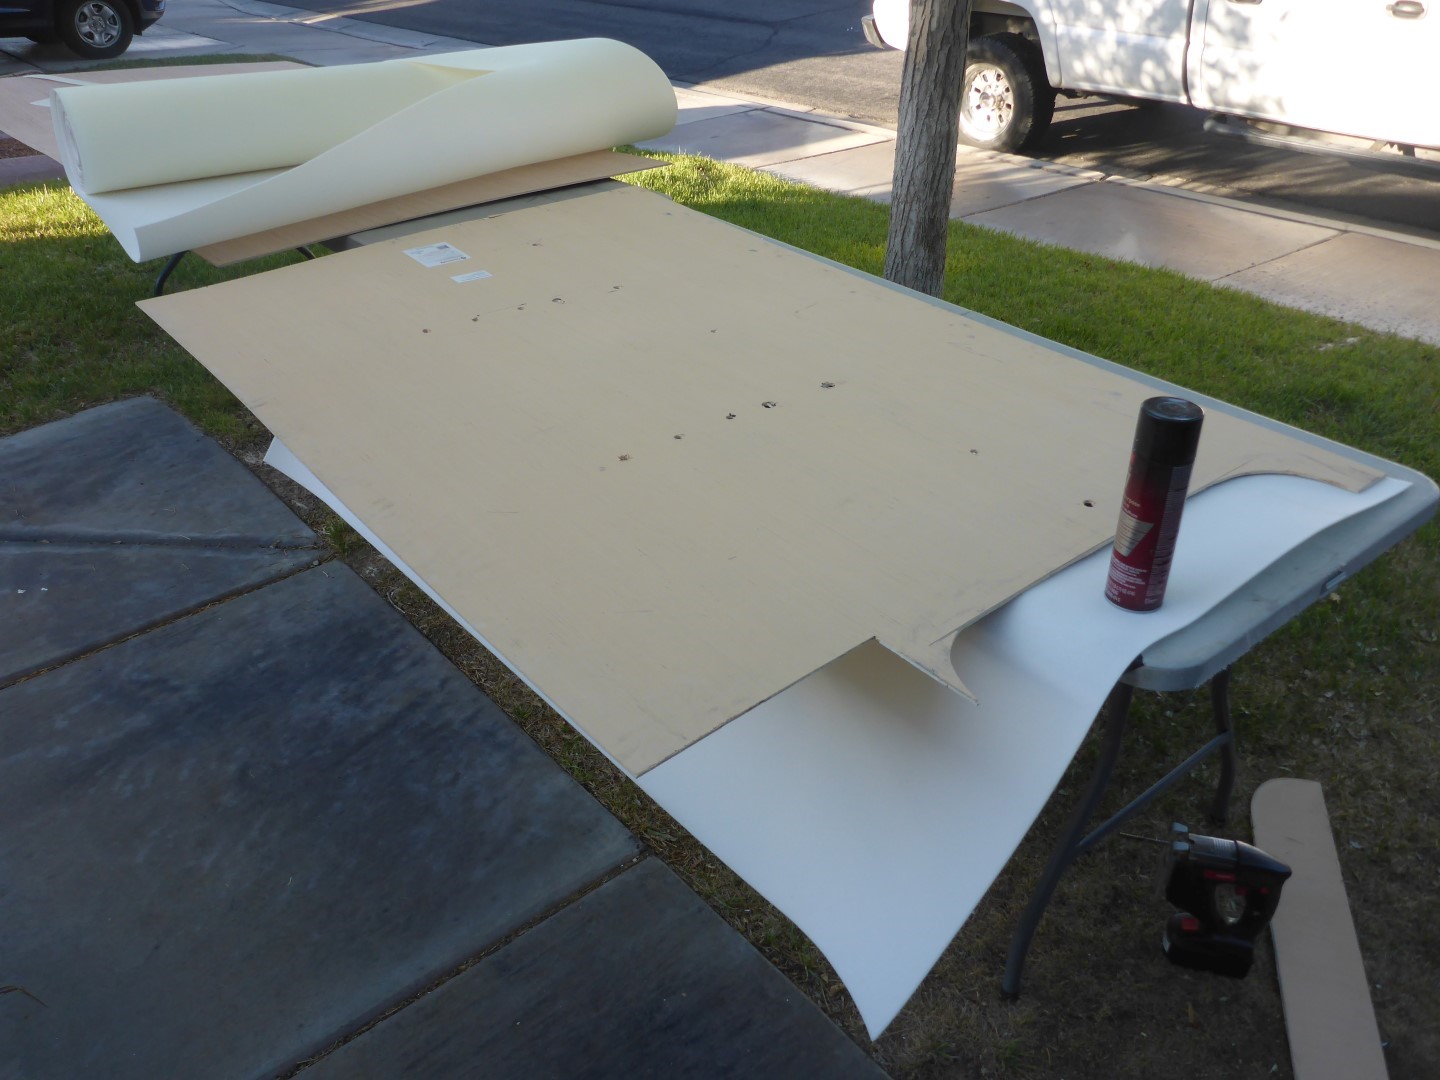
Next, I upholstered the panel using Polyethylene 1/8″, 4 lb, closed cel foam covered with Sunbrella outdoor acrylic fabric. The foam helps with added sound and thermal insulation and gives the walls a nice soft (but firm) feel. We chose Sunbrella fabric for a few reasons. 1) Everyone seems to use tweed or interweave and we wanted something different. 2) It has a nice touch and feel. 3) It looks more finished and smooth. 4) It is used in outdoor furniture applications so we were convinced it would hold up well in the van.
3M90 was used heavily to glue the foam to the panel, then 3M77 was used for the fabric. I used 1/4″ staples to staple the fabric to the panel. Upholstery work is easier than most think. Just take your time on the corners and it is very easy to achieve professional-looking wall panels.

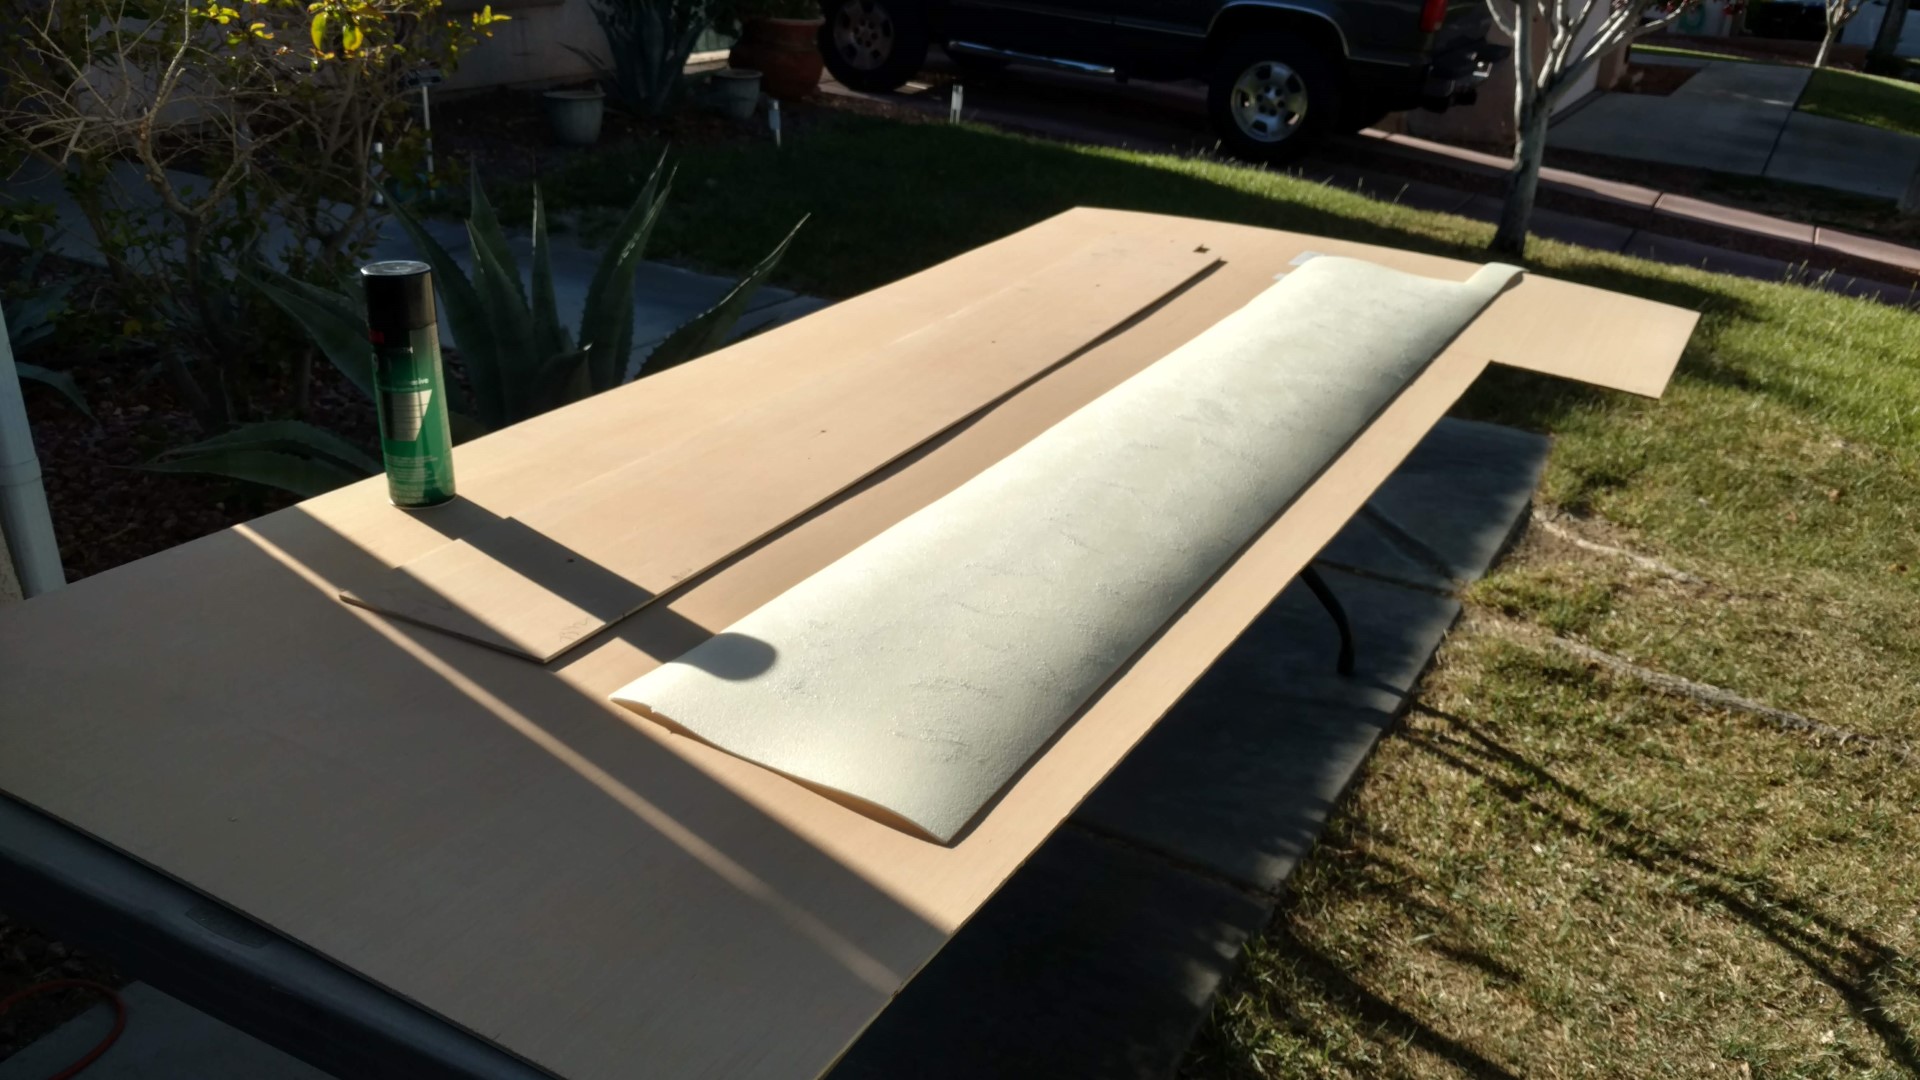
Before the wall panel went up, ONE more layer of insulation was added. I added Low E foil faced foam to the back to block out the heat and also act as a vapor barrier.
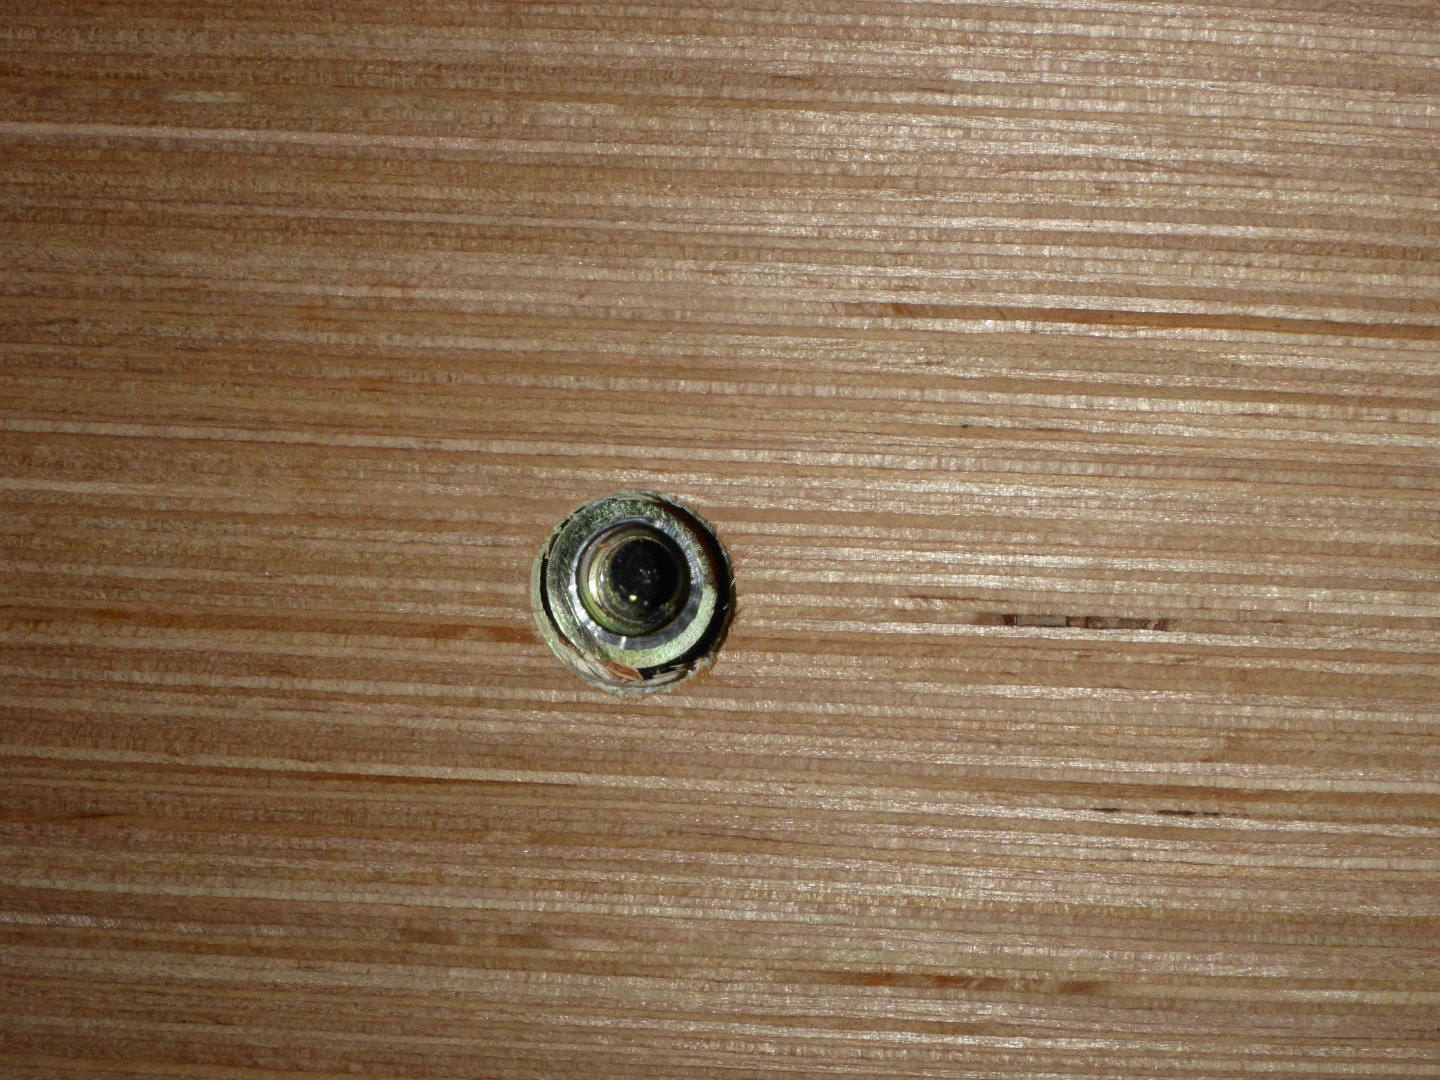
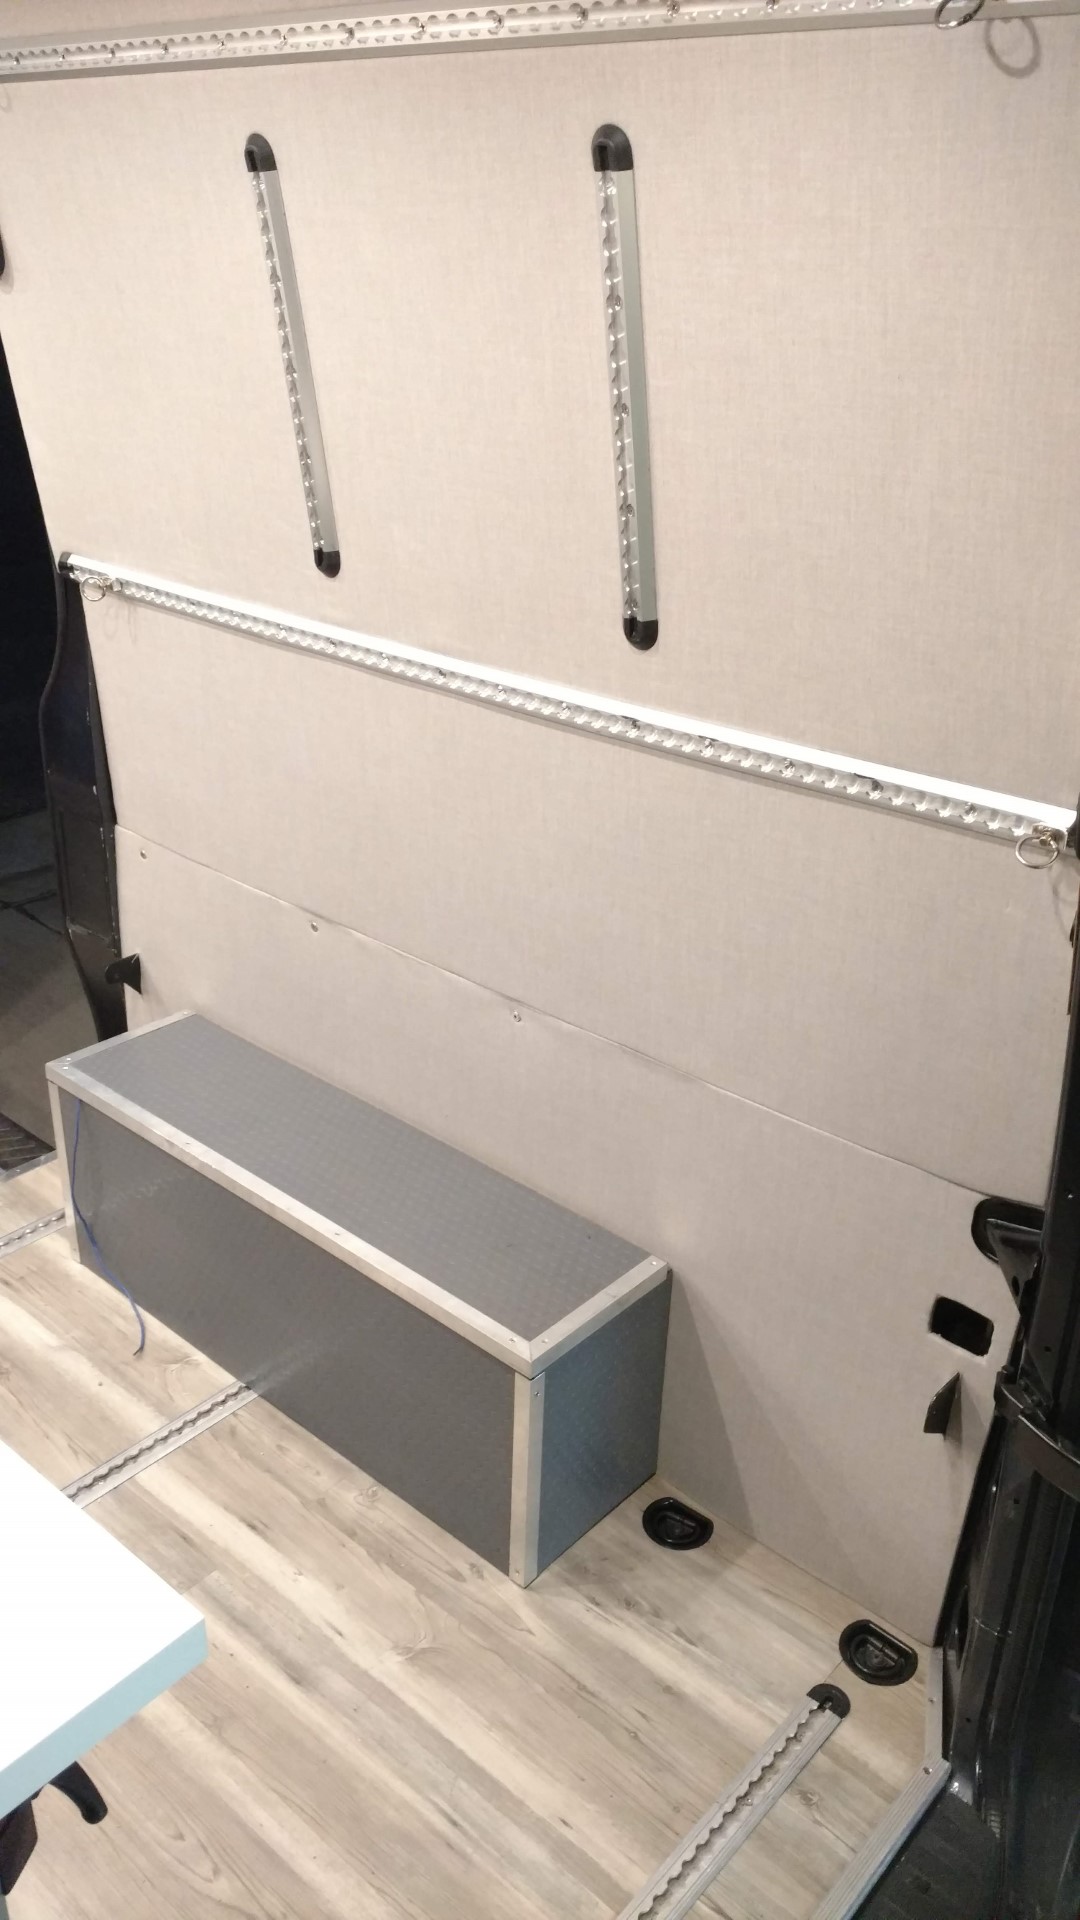
The wall panel was attached with a couple 1/4-20 screws and rivnuts along the top. The cabinet would hold the rest of the panel tight.
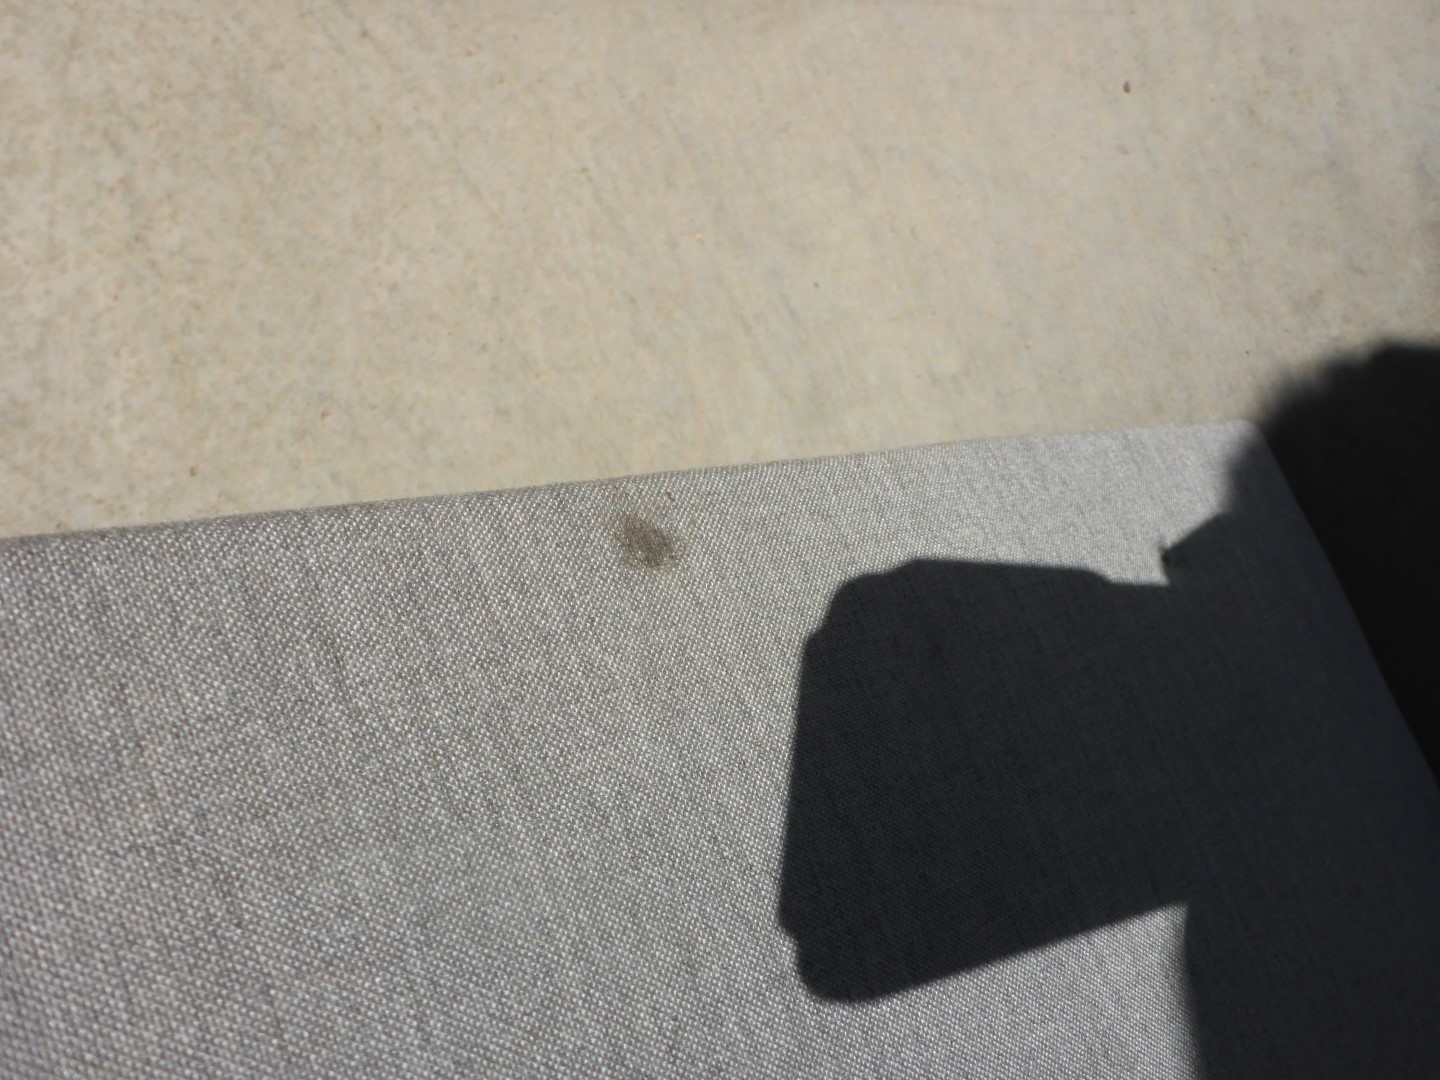
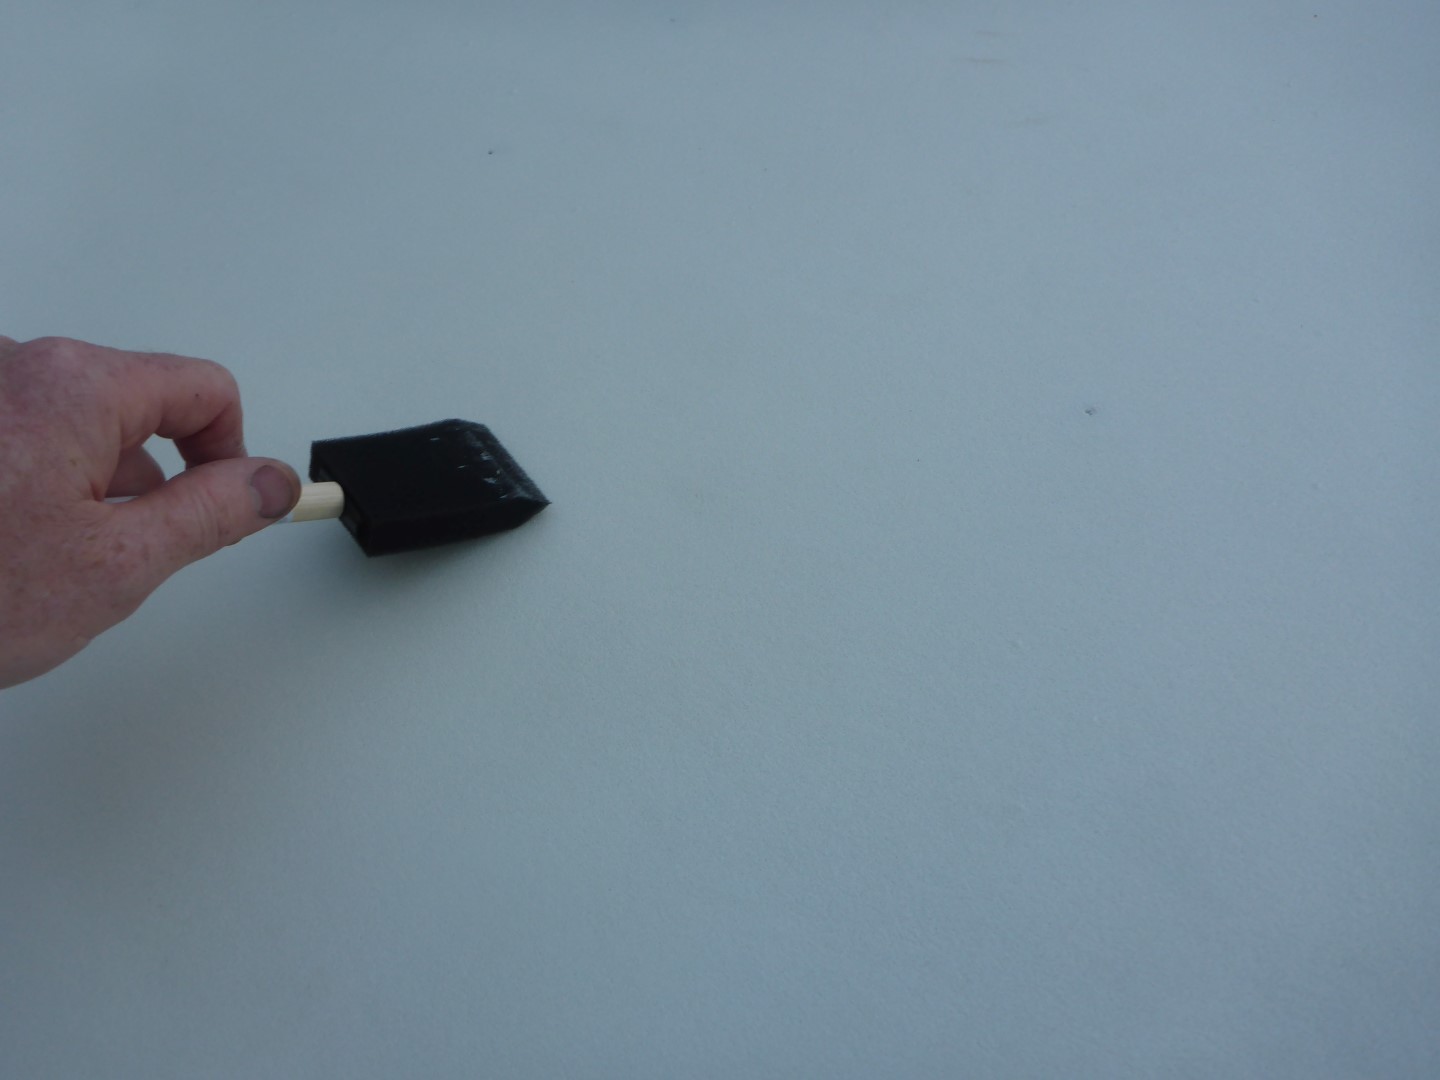
One thing to be very careful of when gluing fabric with spray adhesive is to make sure the adhesive does not clump up or go on too heavy. It can bleed through the fabric and does not go away when it dries. I’m glad I figured out how much was too much on a smaller panel in the beginning.
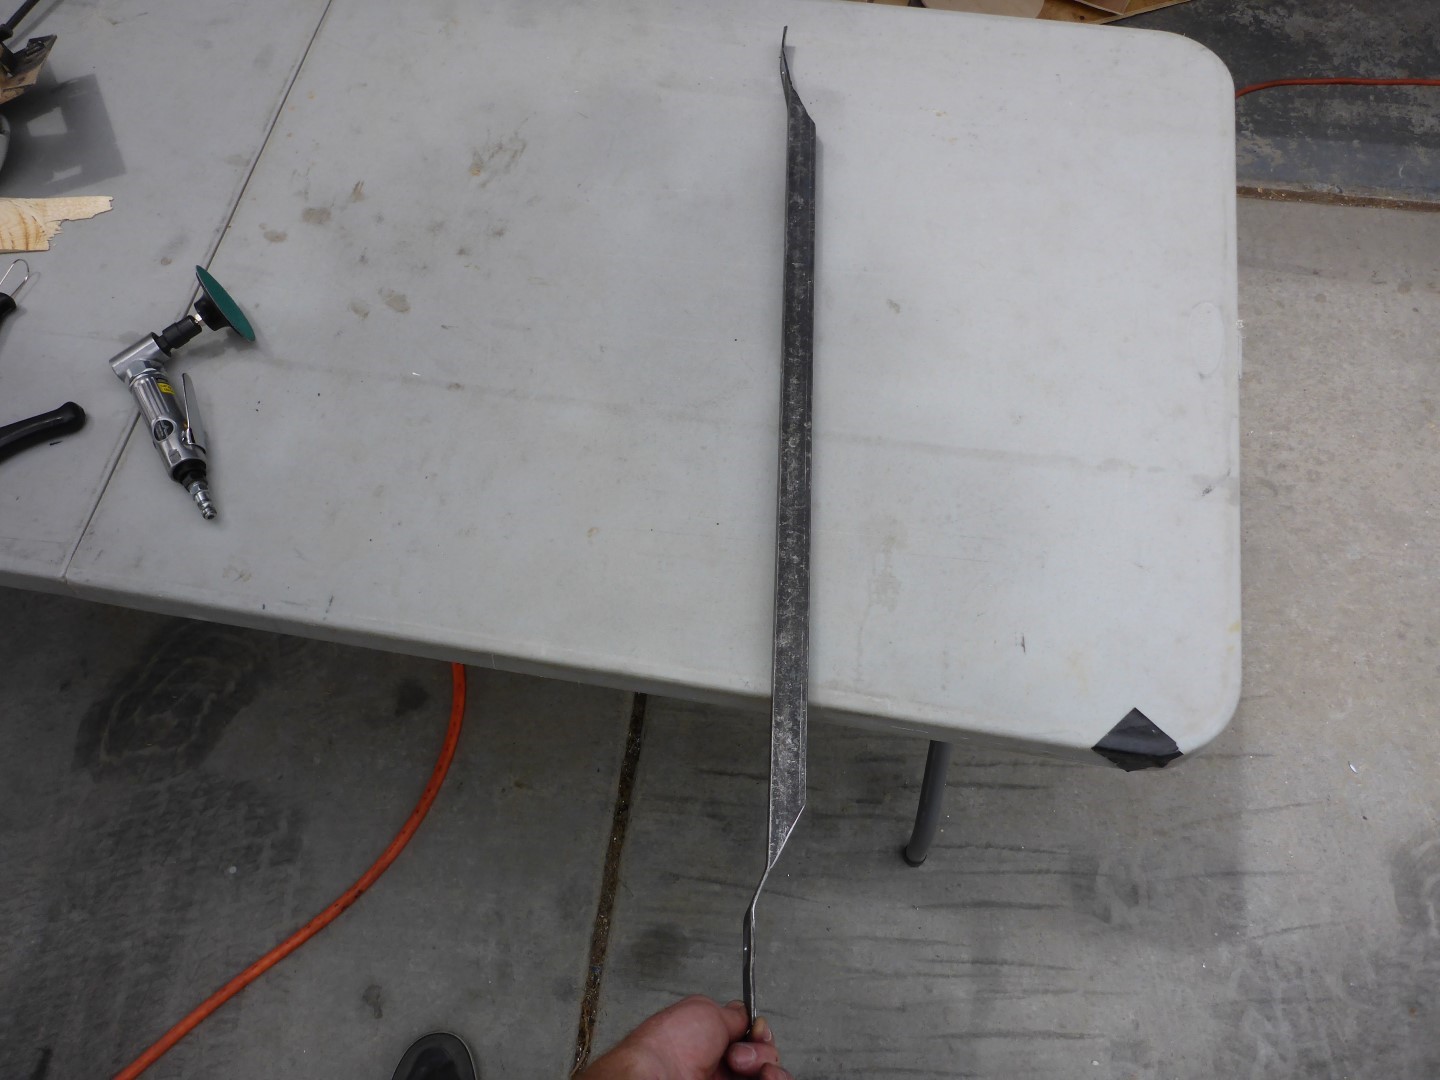
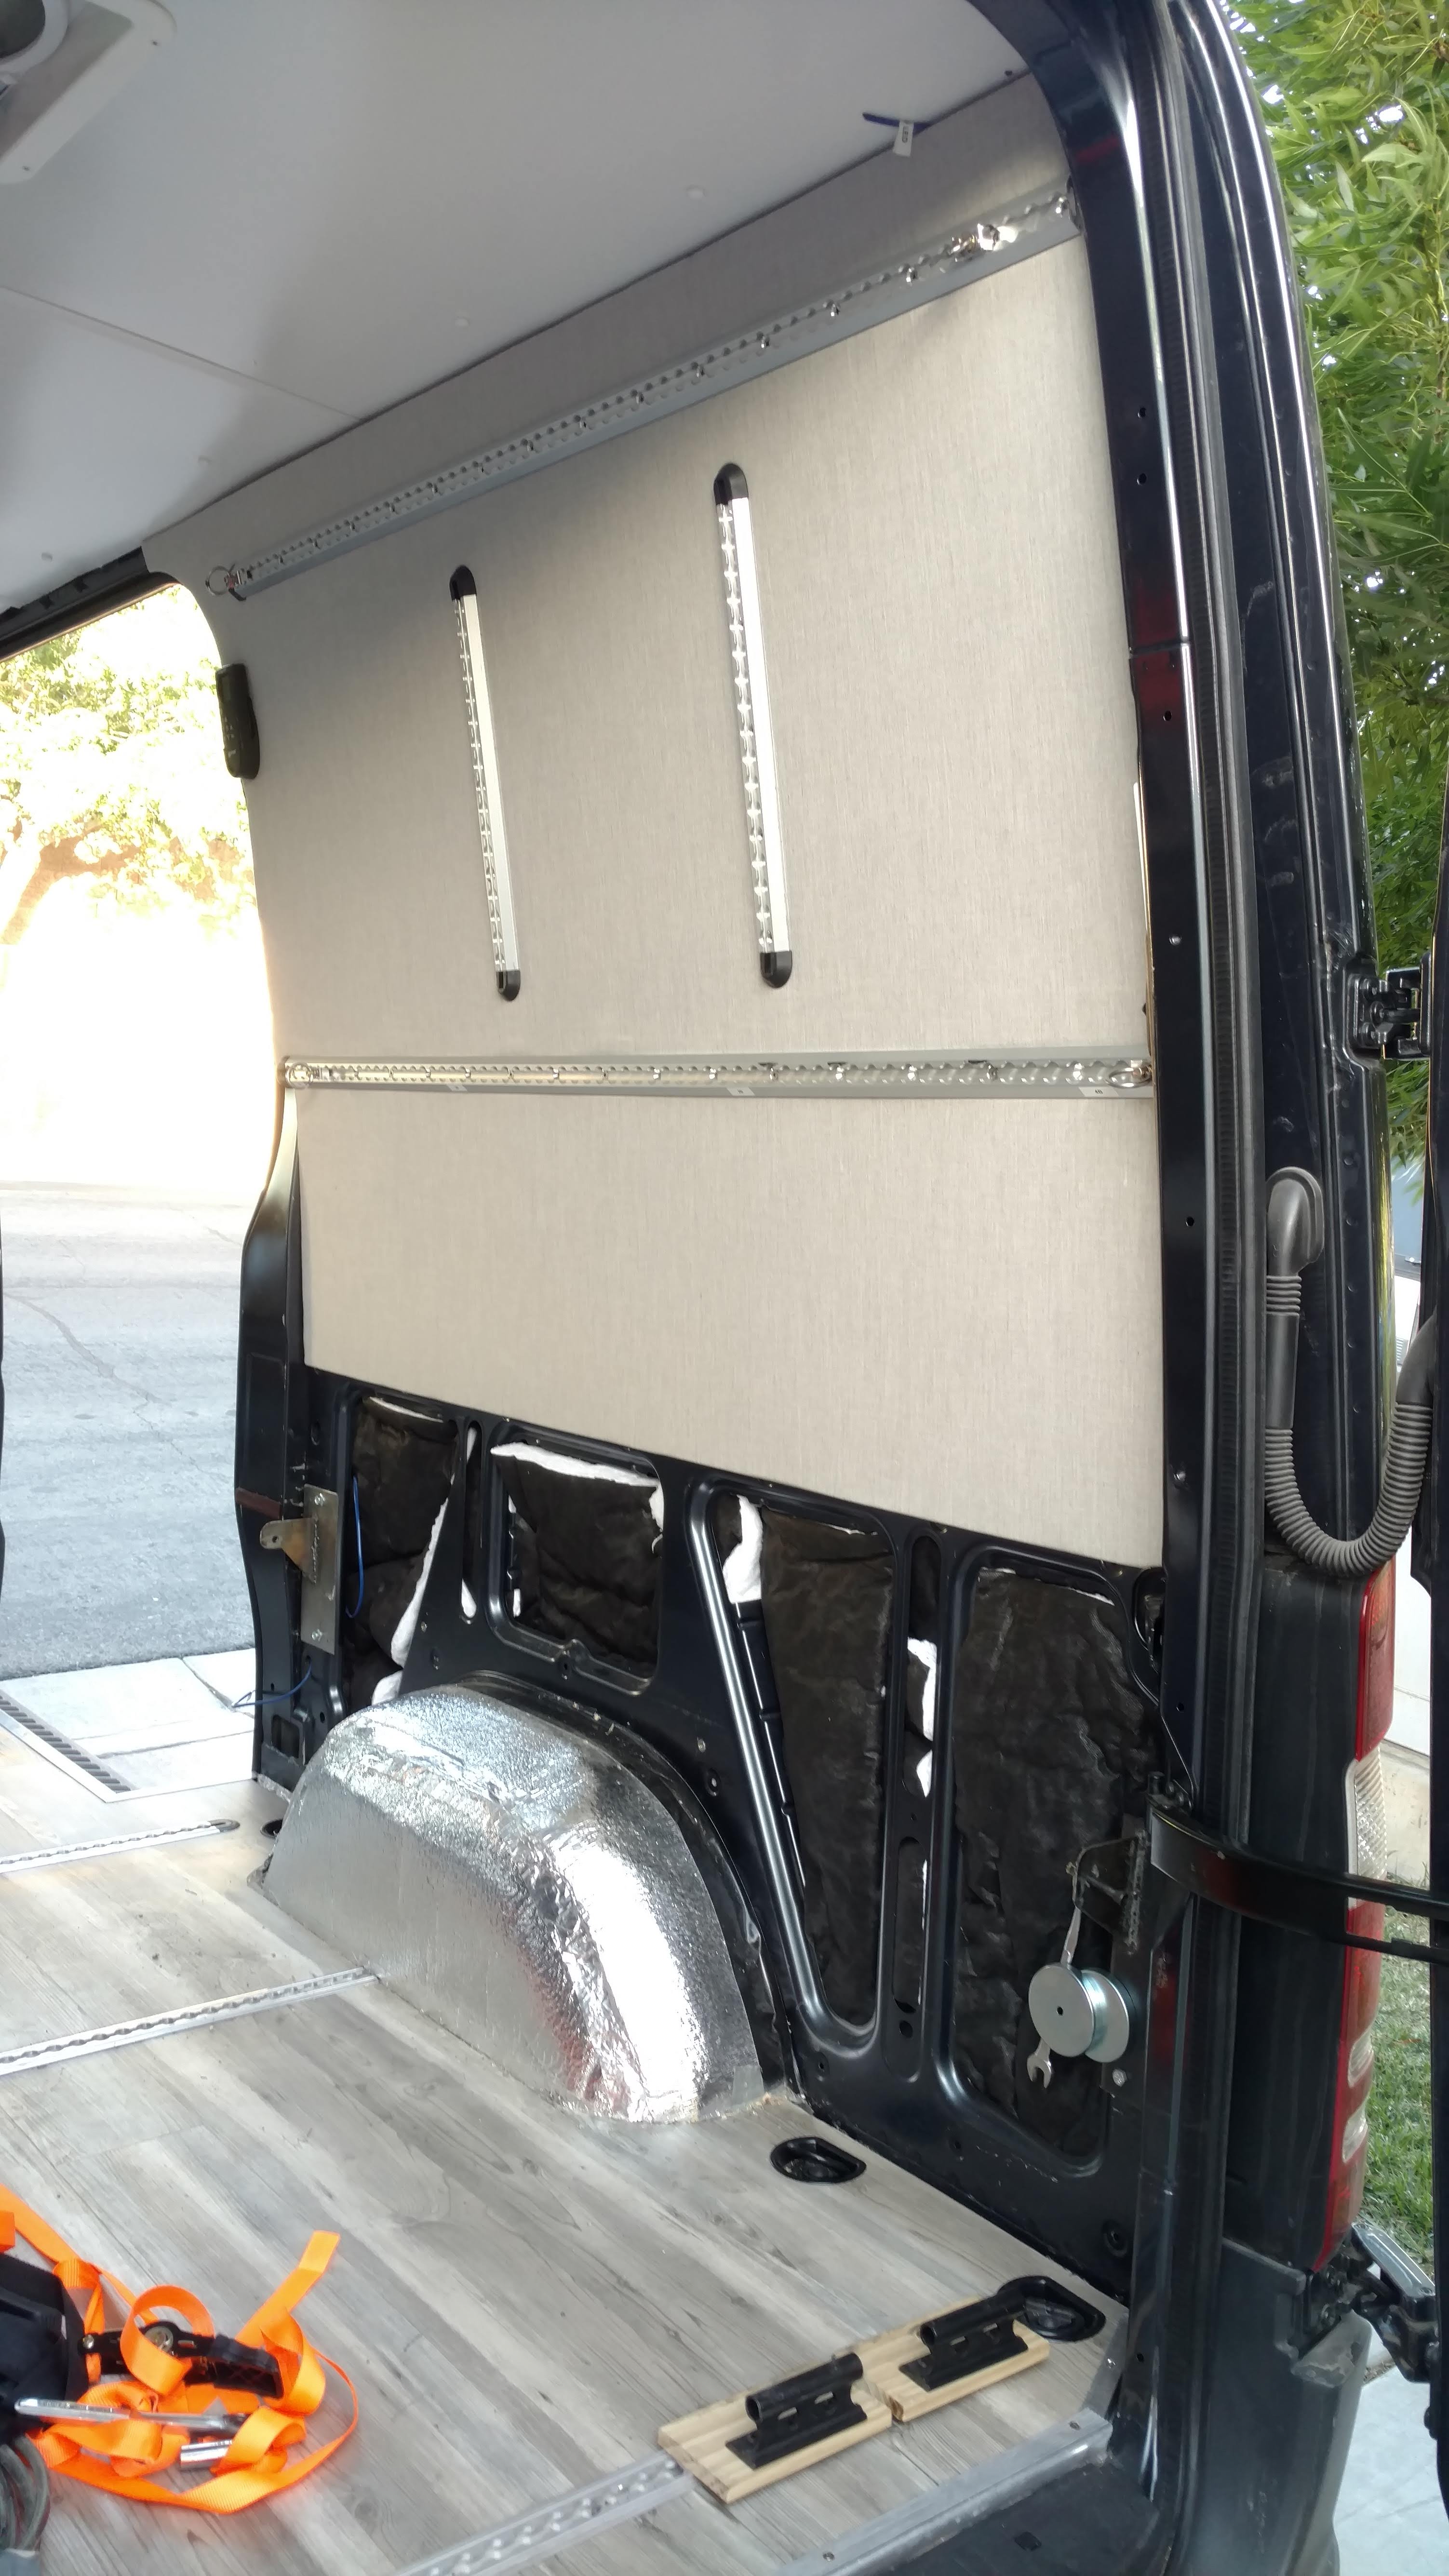
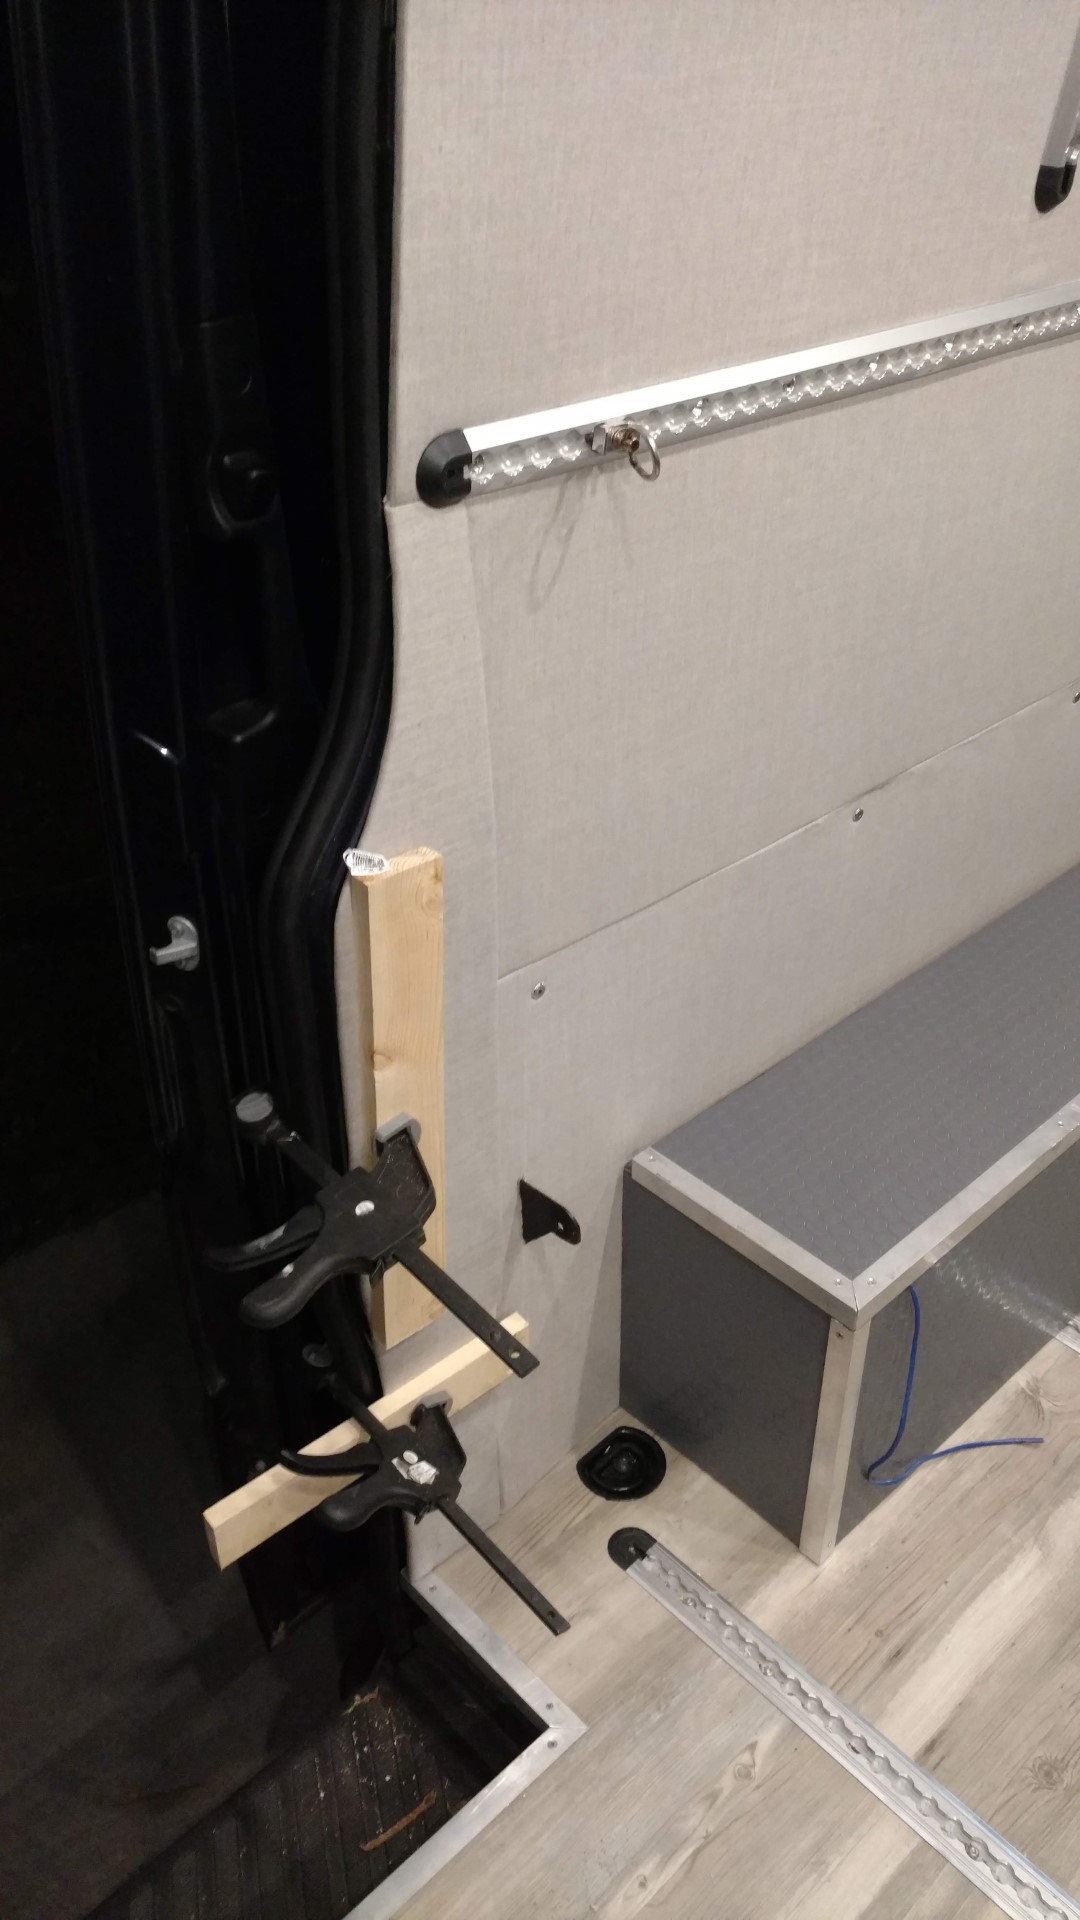
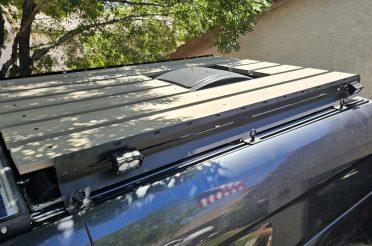
On the rear walls of the van, a little more work would have to go into this part. L track will be installed in places where there is no support, therefore I had to make my own. Using 16 gauge steel from Lowes, I added vertical supports. These will hold the L track for the platform bed as well as two small L tracks on each wall for additional tie-downs and storage.
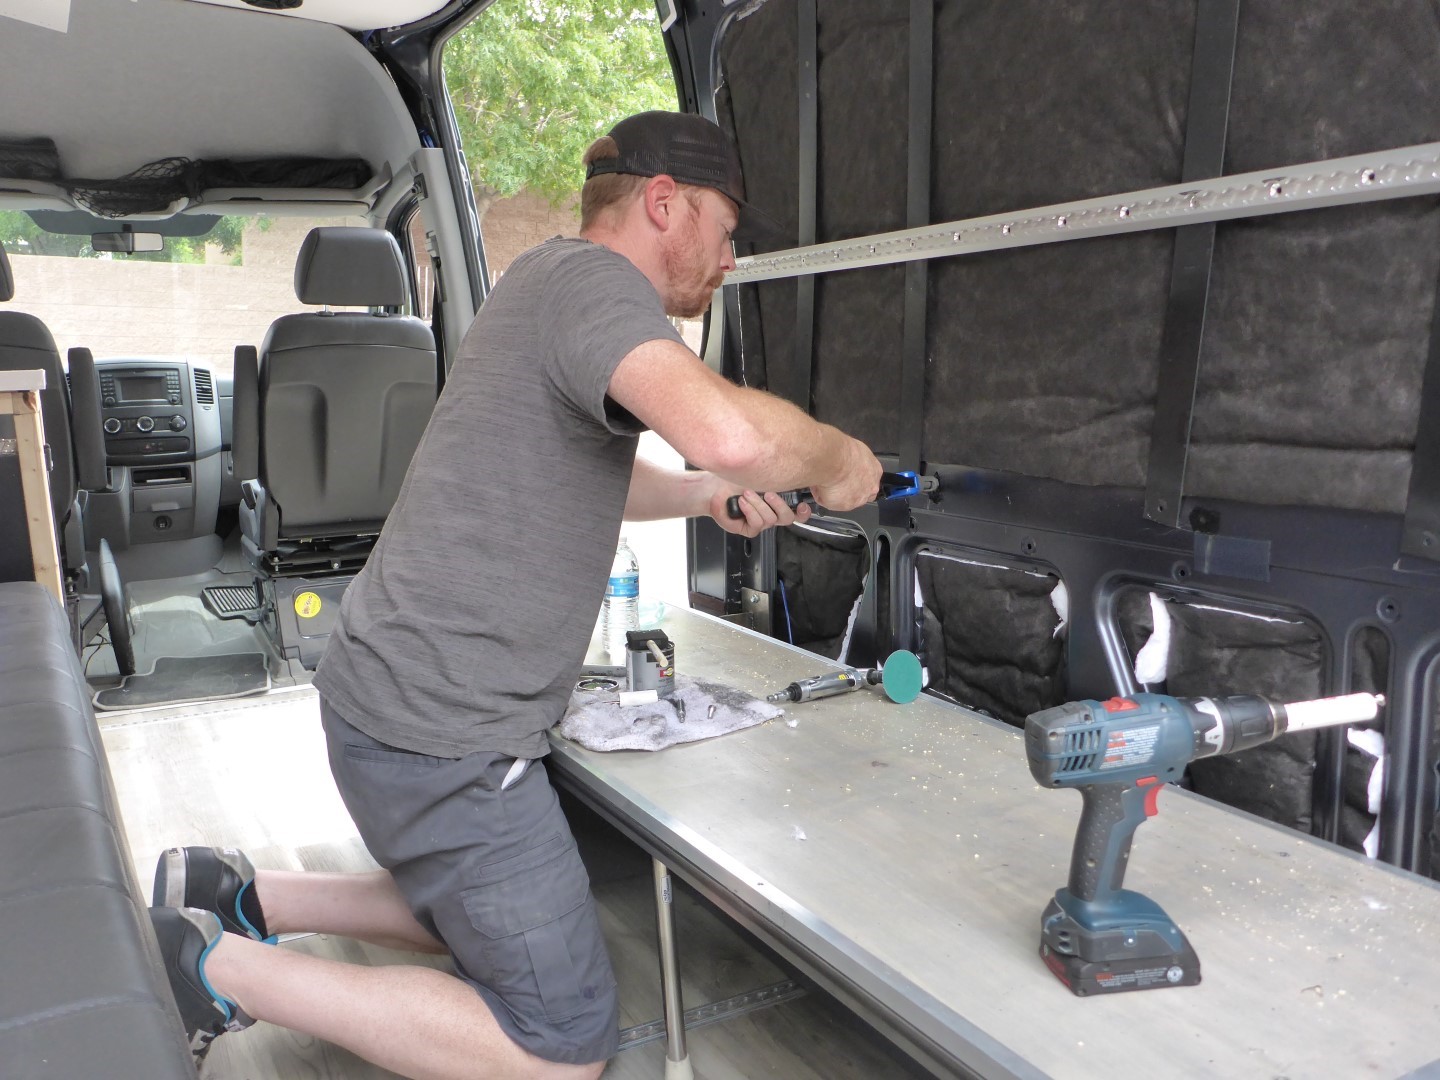

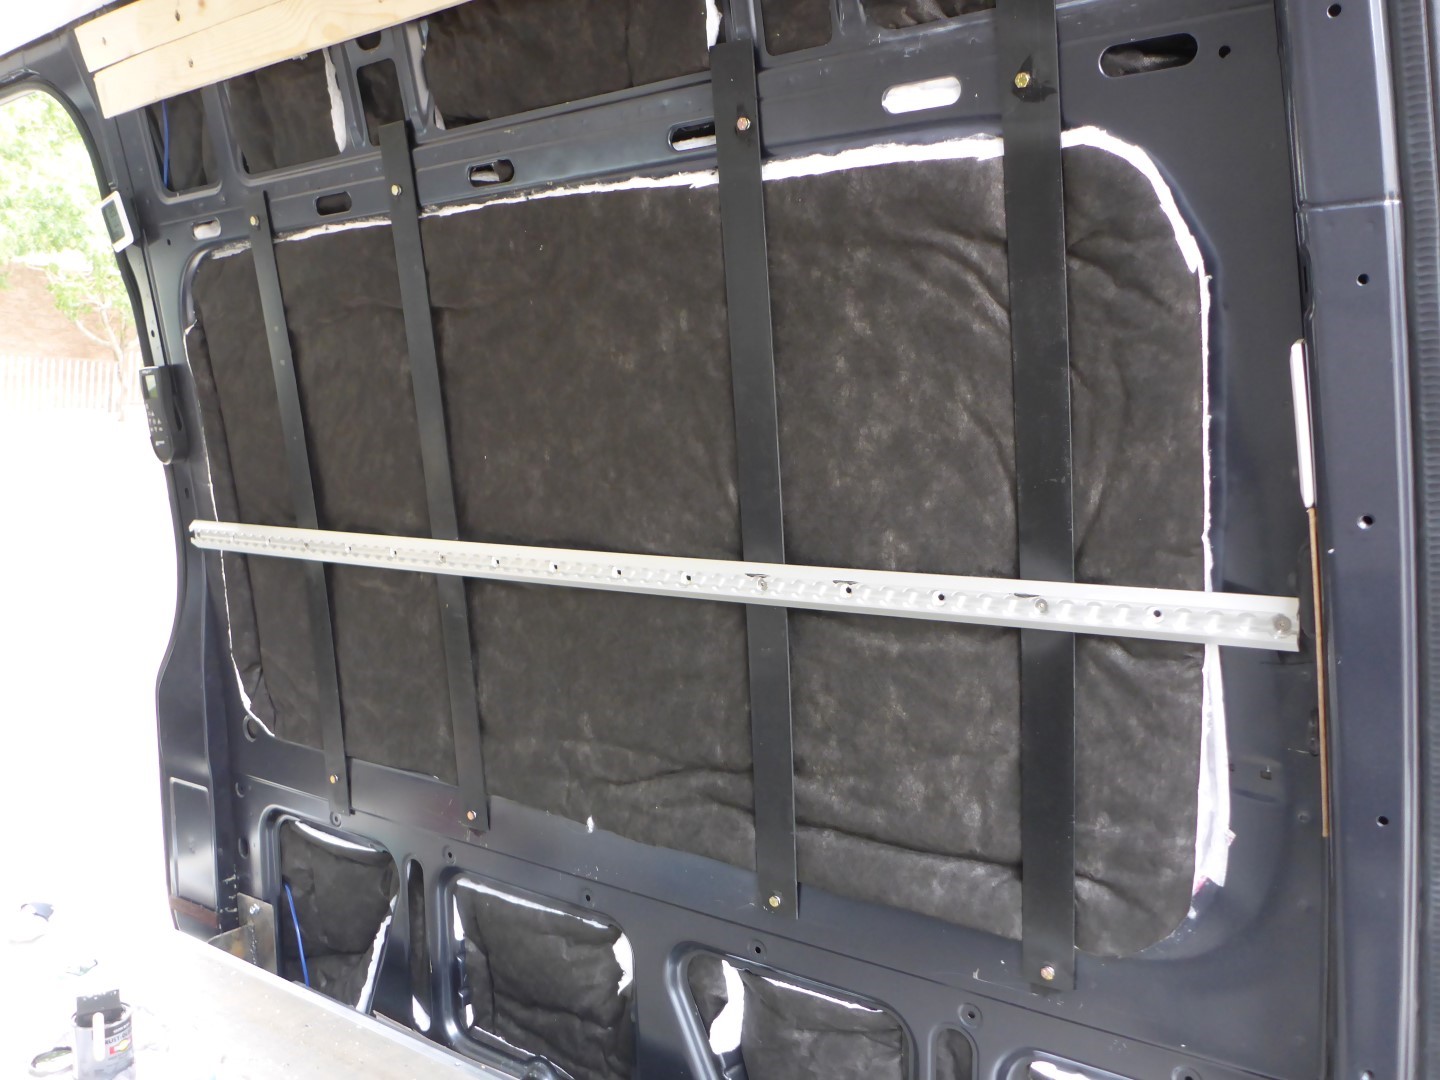
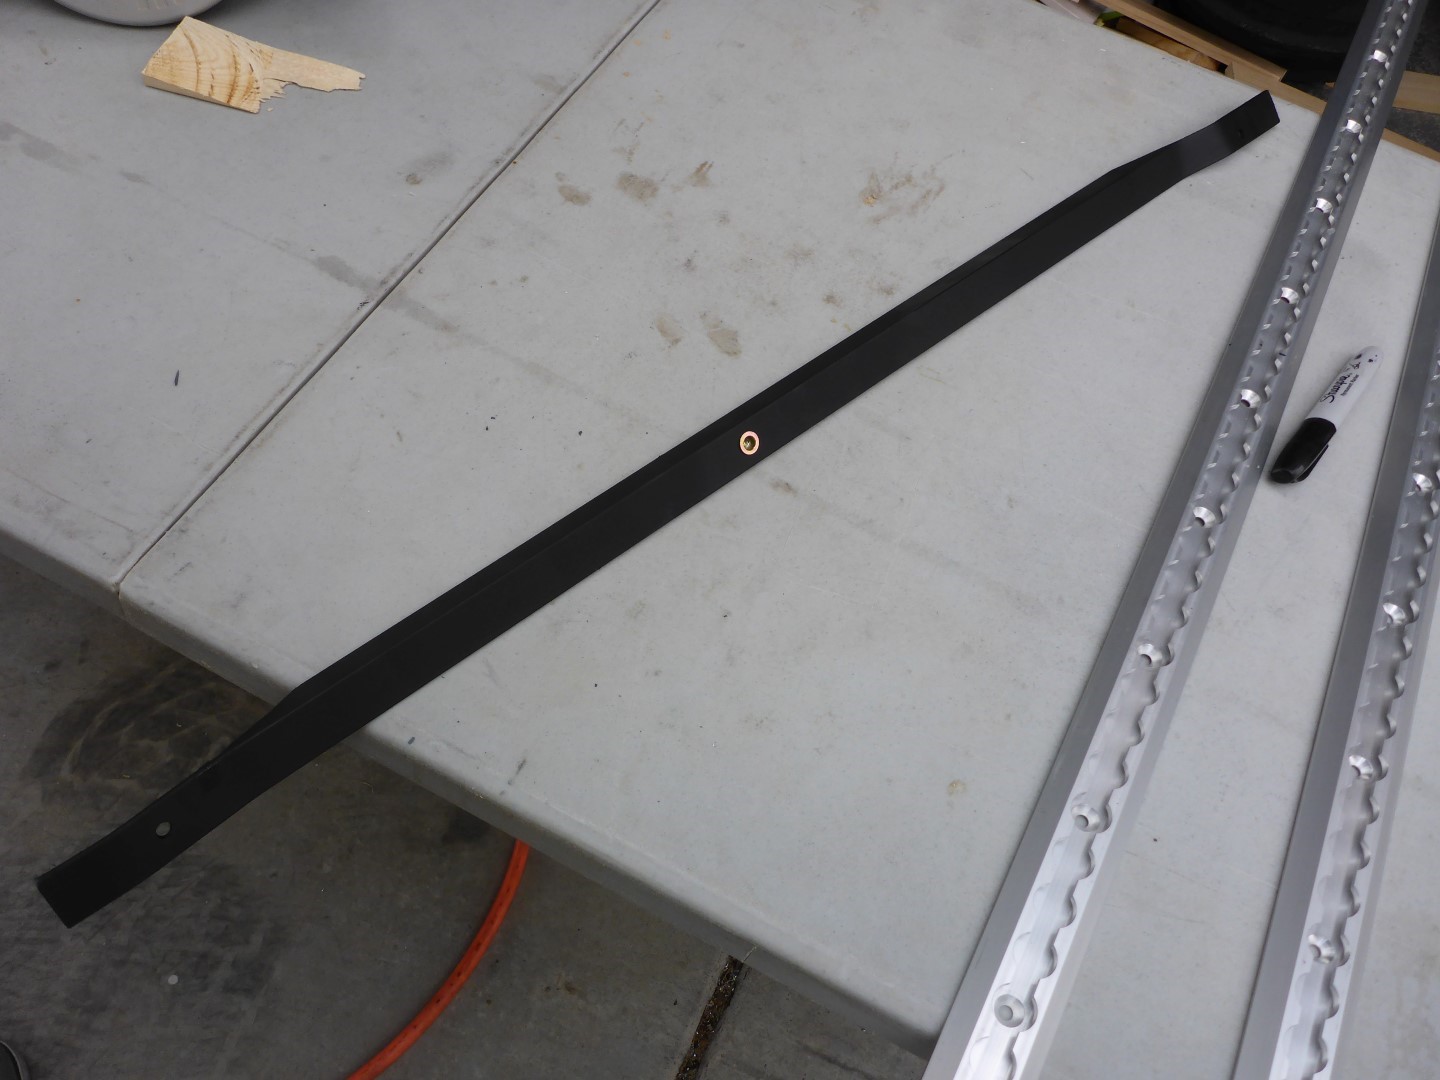
Since these supports were strong enough up and down, but a little flimsy in and out, I ended up installing a custom bent 1″ angle steel as the center support. (I did not take a picture of it installed) Adding this made the L track much more solid and prevented any deflection in the middle of the wall. All the beams were attached to the van’s metal structure using 1/4-20 rivnuts and stainless bolts. Since I installed so many supports, I didn’t need to go very big on the hardware. There were ALOT of holes that required drilling and it was a very time-consuming, tedious process, but worth it in the end. Every hole was primed to prevent rust and all the metal shavings were either vacuumed out of the wall or caught with a towel. I used angled L track for a nice finished look. This stuff is very strong and will support anything I hang off of it in the van.

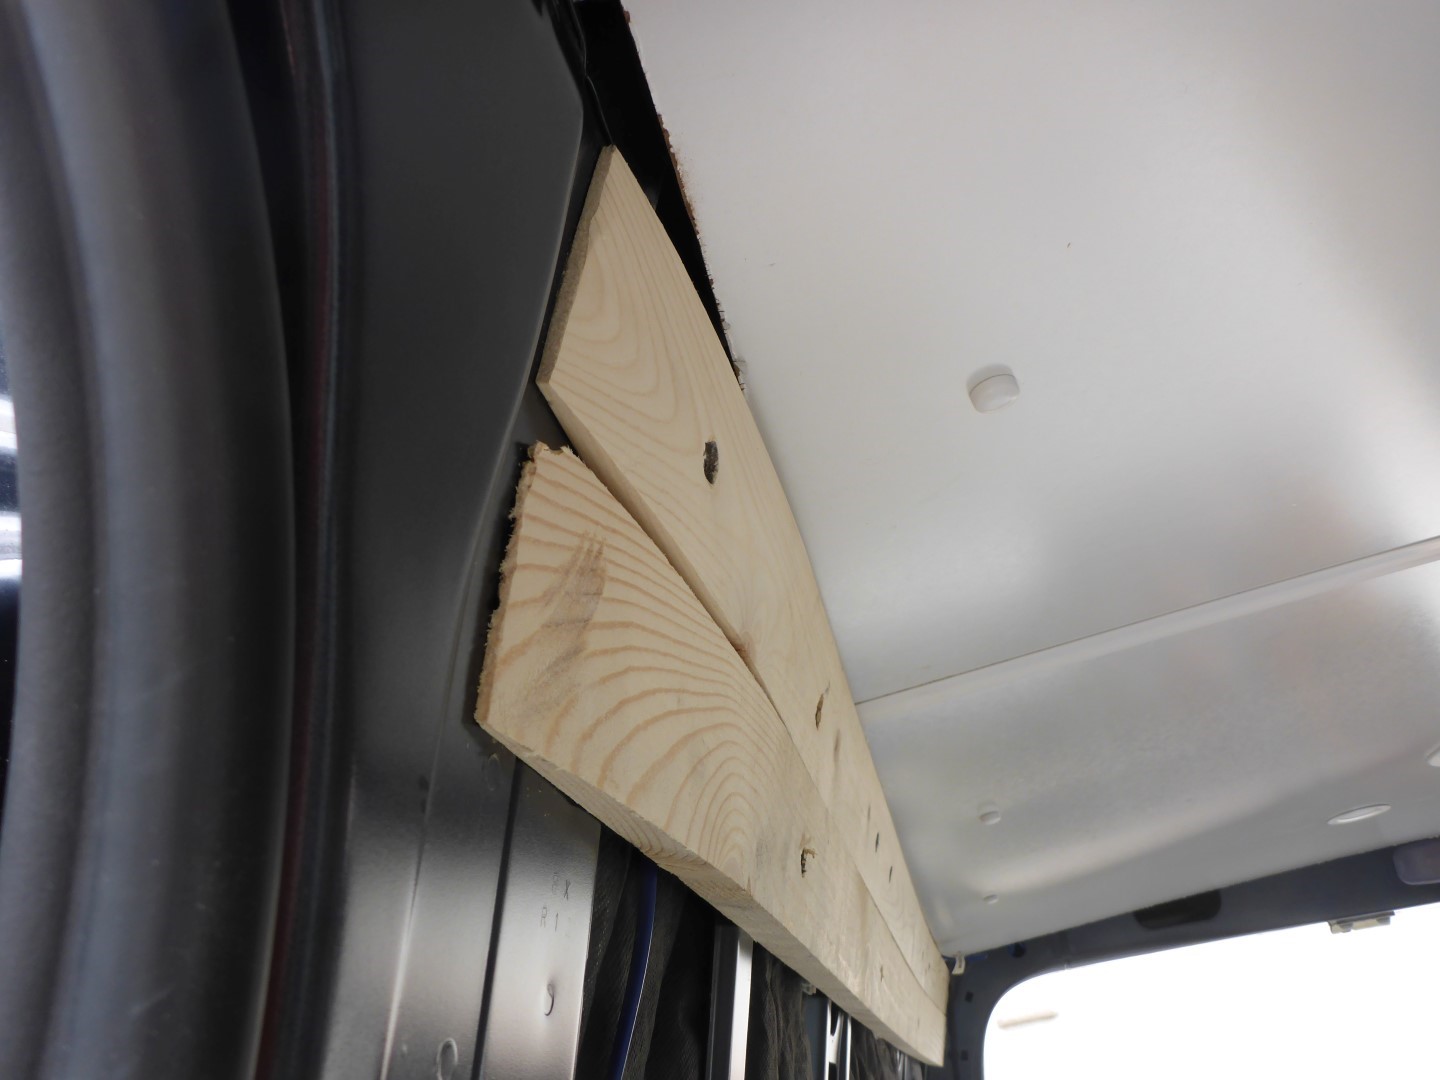
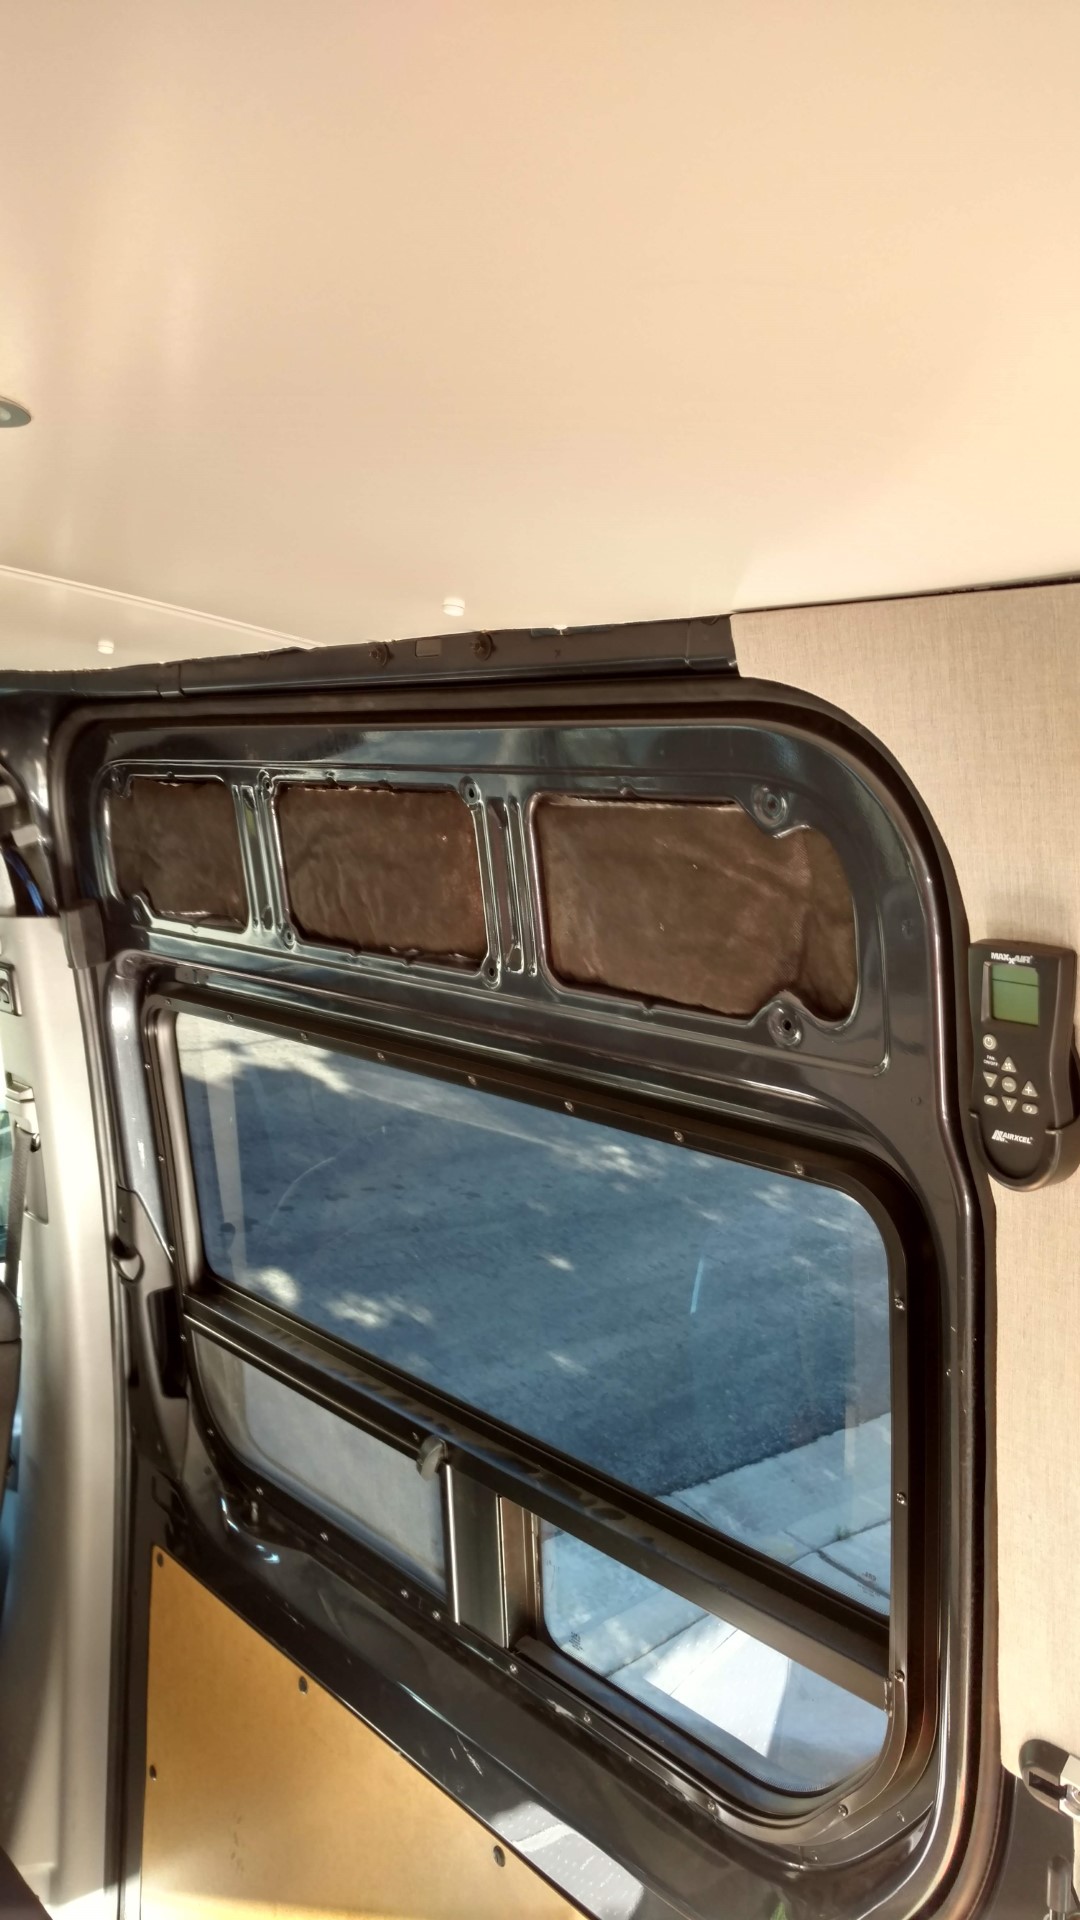
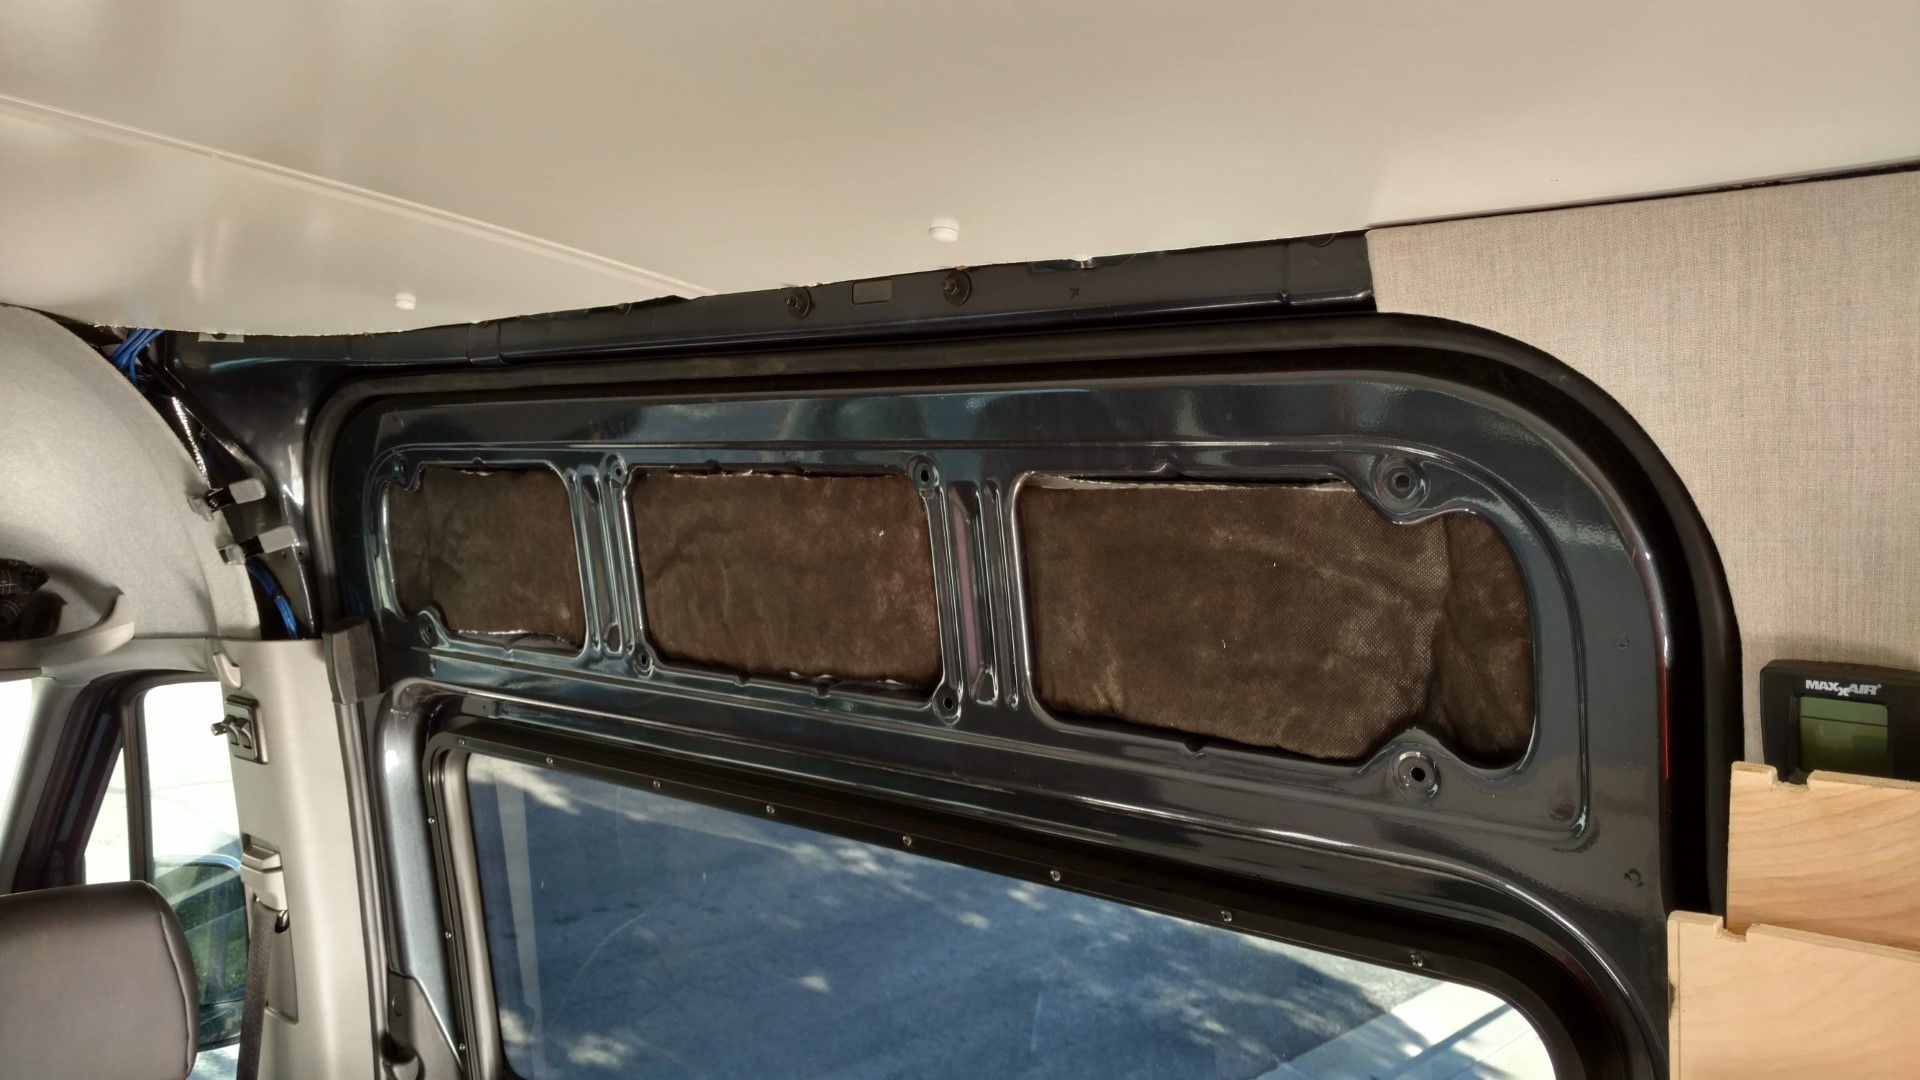
On the tops of the walls, I used 1×3″ pieces of wood to space the top of the wall panels in just enough to cover the ceiling transition but also to have a simple way to secure the upper, horizontal L track.
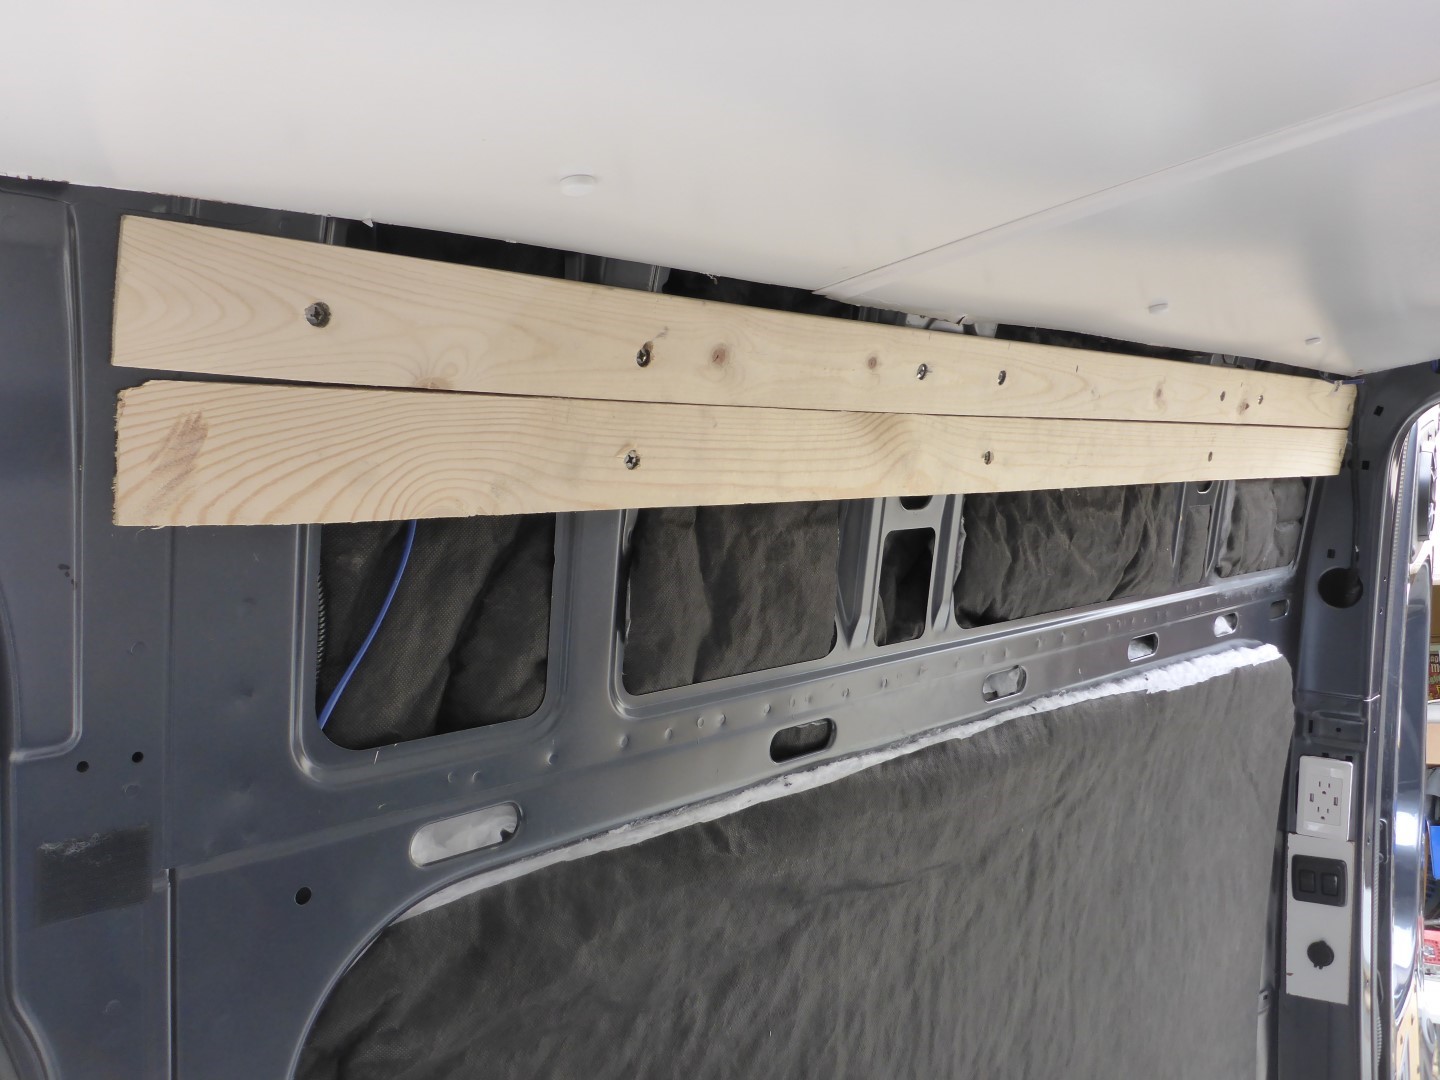
Since the van’s walls are not flat and the wall panel would need to curve slightly to make a smooth transition to the slider door area, I shaved the 1x3s down with a belt sander.
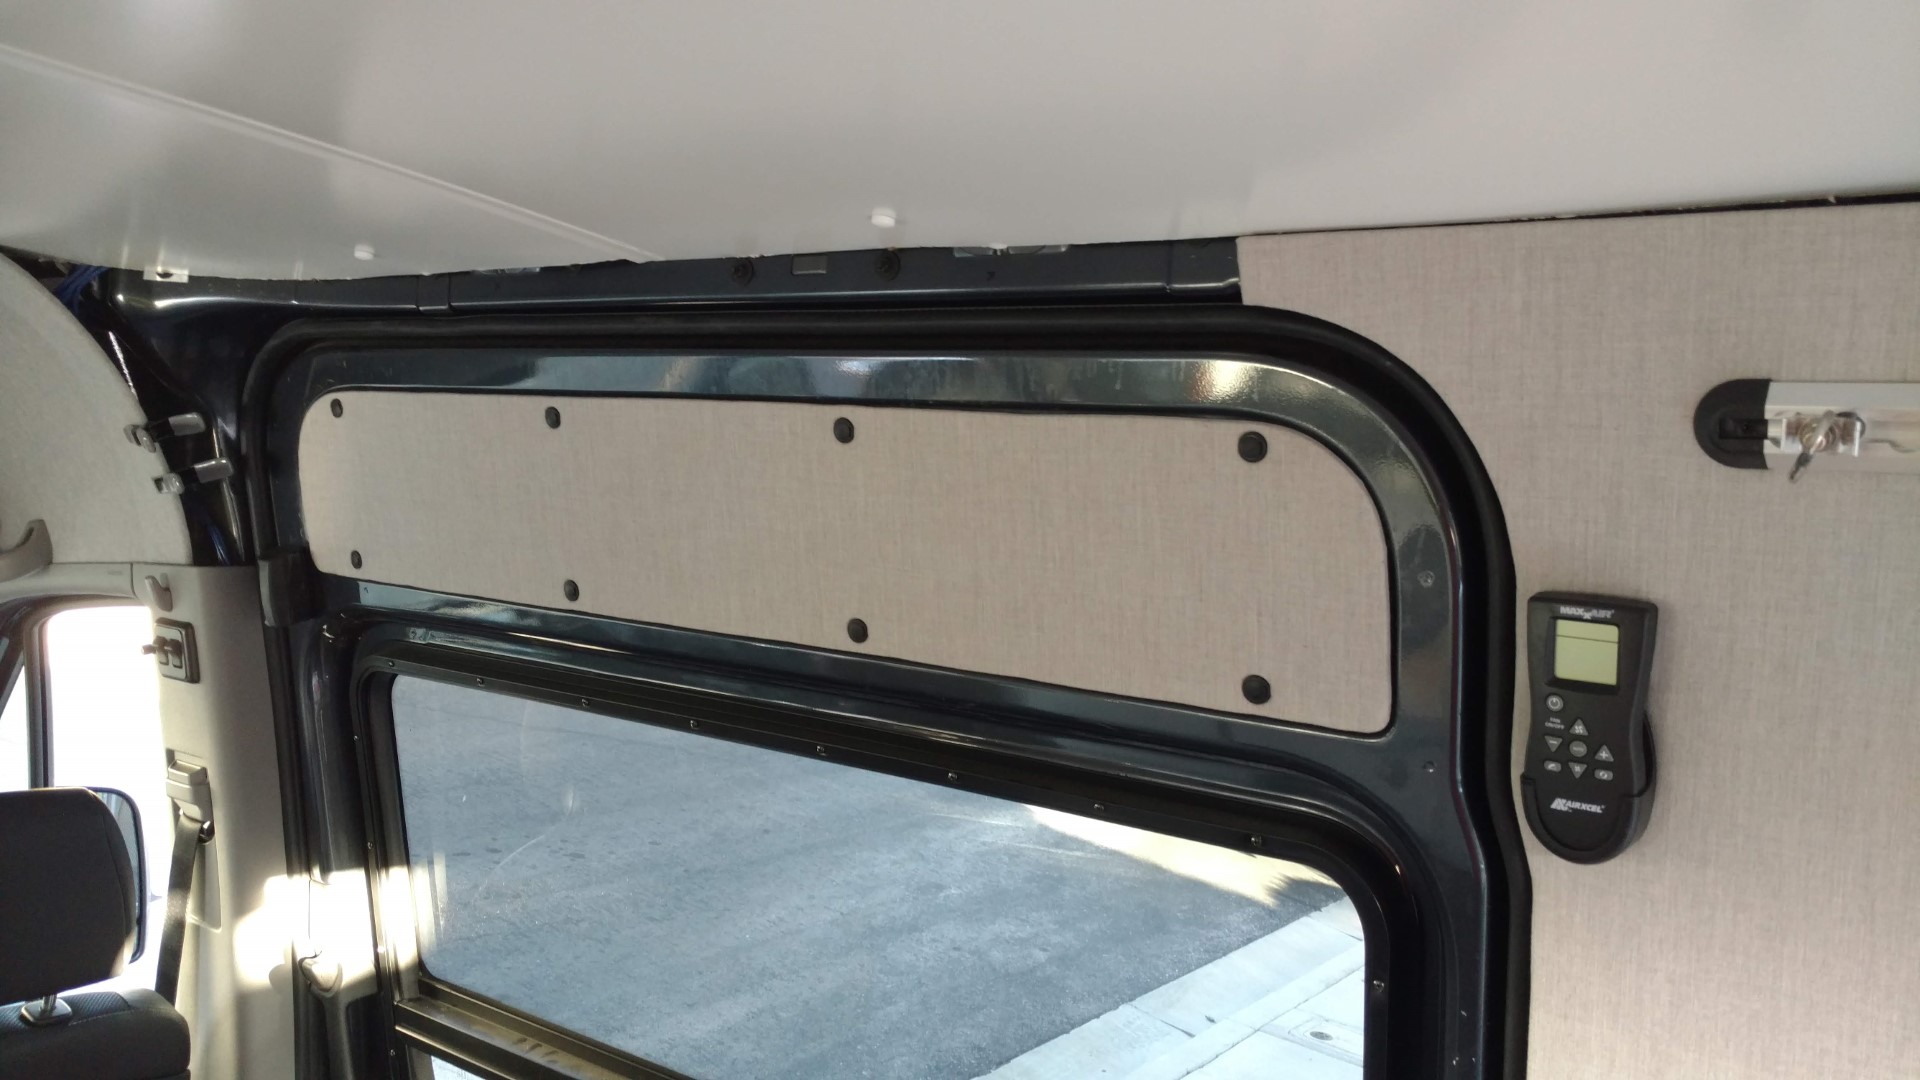
I used 1/4″ plywood for the panels. After measuring and getting the curve just right on the panel at the back of the van, I set the panel up against the wall and traced out the slider door area. Then I measured about 1 1/4″ back and traced a new line to make my cut.
The panel was then ready to drill holes for the L track.
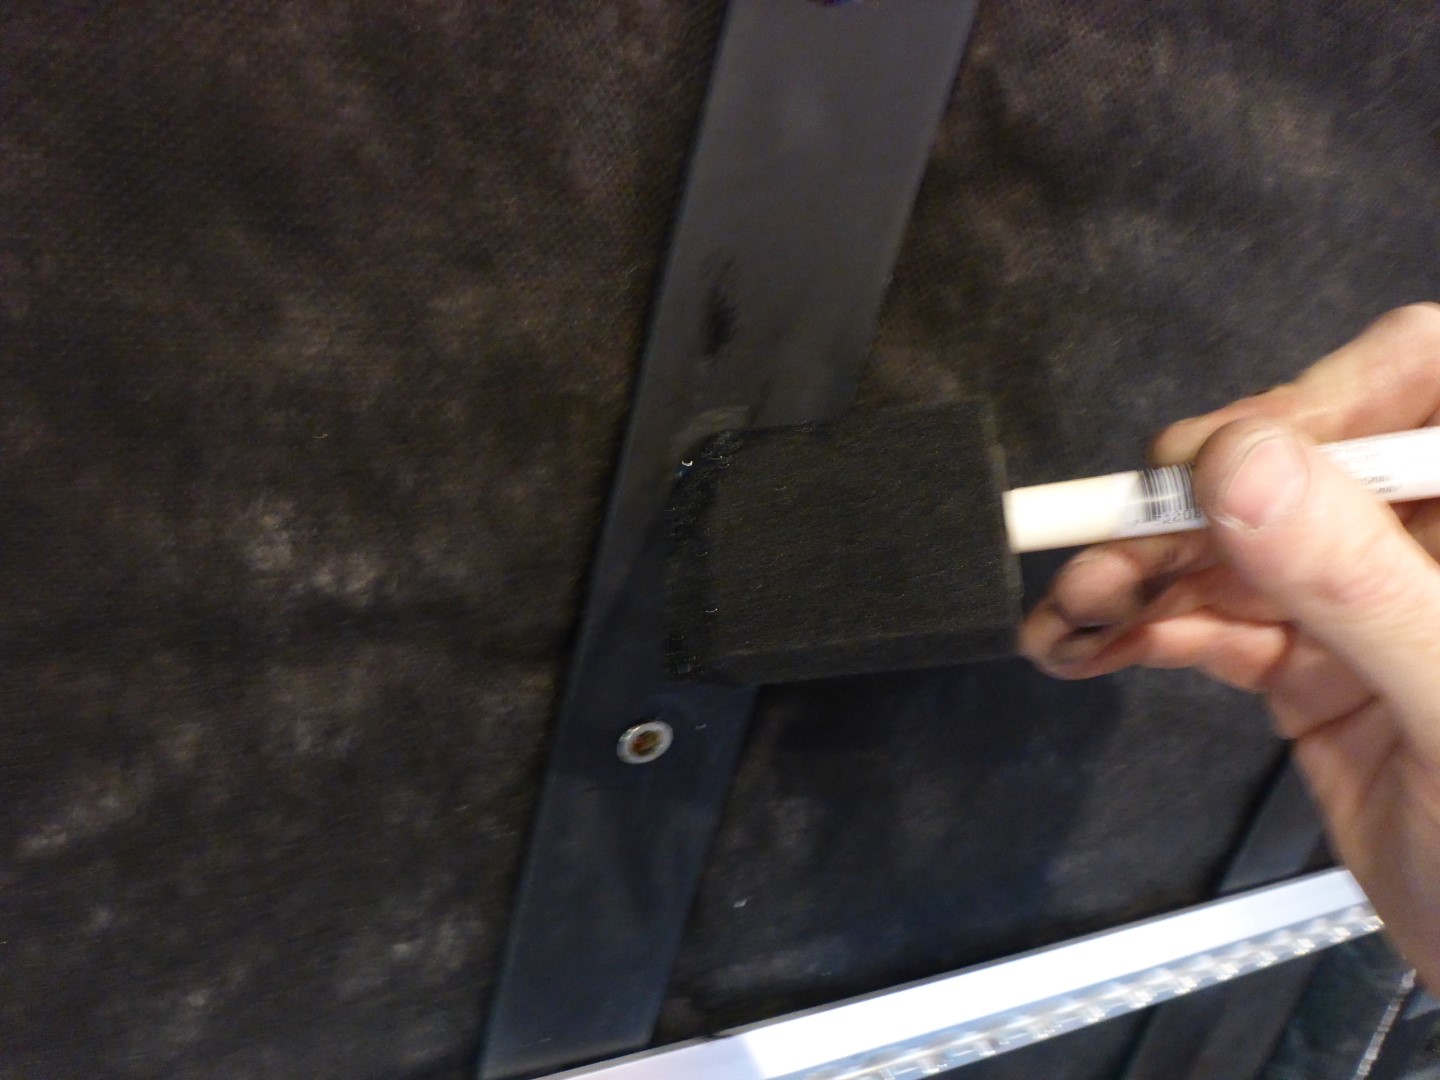
I drilled holes at each threaded rivnut attachment point for the L track.
Upholstering the panels was the same process as earlier except with a couple of extra holes to poke through and cut out for the L track.
- cut out and glue 1/8″ foam with 3M90 spray adhesive
- cut, glue, and staple Sunbrella fabric to the panel
- Attach Low E foil-faced foam to the back.

|
No matter how well you clean the nozzle on the can, it always tends to spray an extra blob here or there. I used a foam paintbrush, spare piece of fabric, or foam to knock down the clumps or puddles of adhesive so it didn’t bleed through the fabric. This spreads it out evenly and avoids a costly mistake.
|
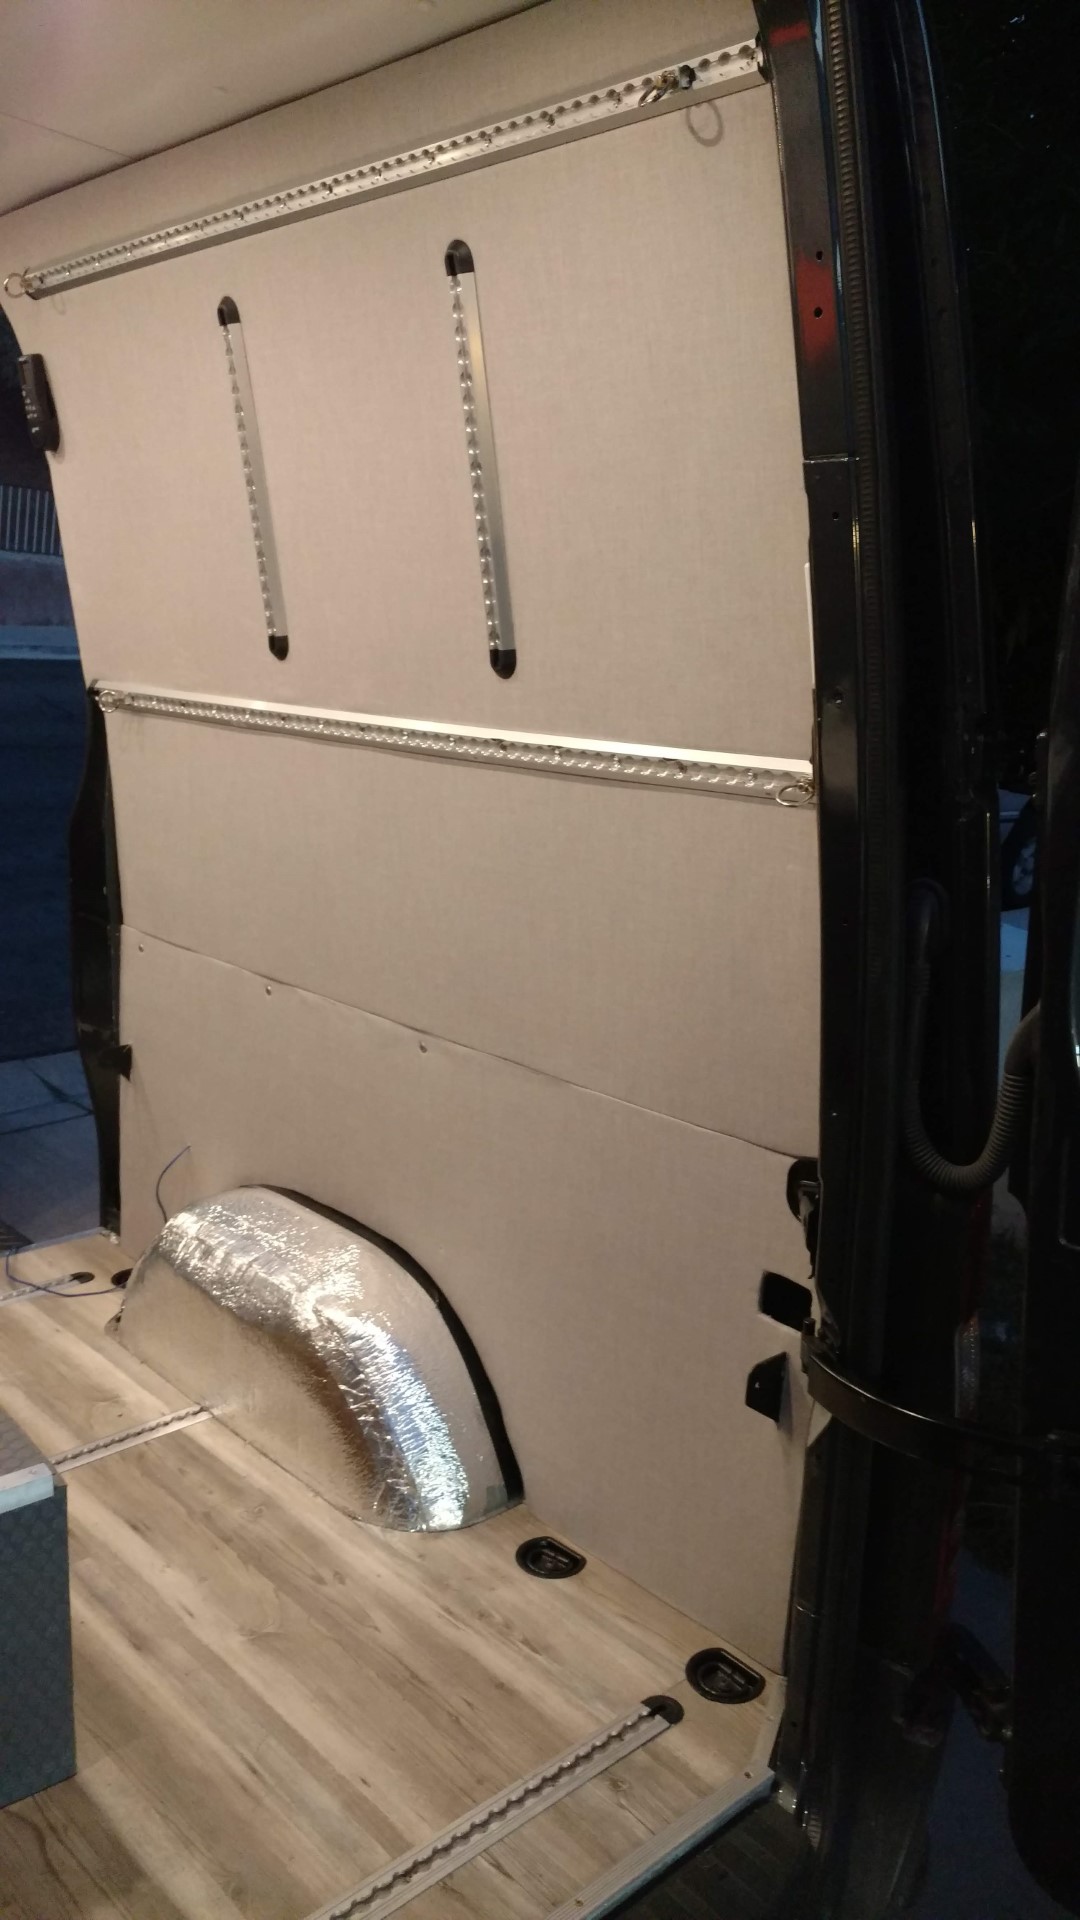
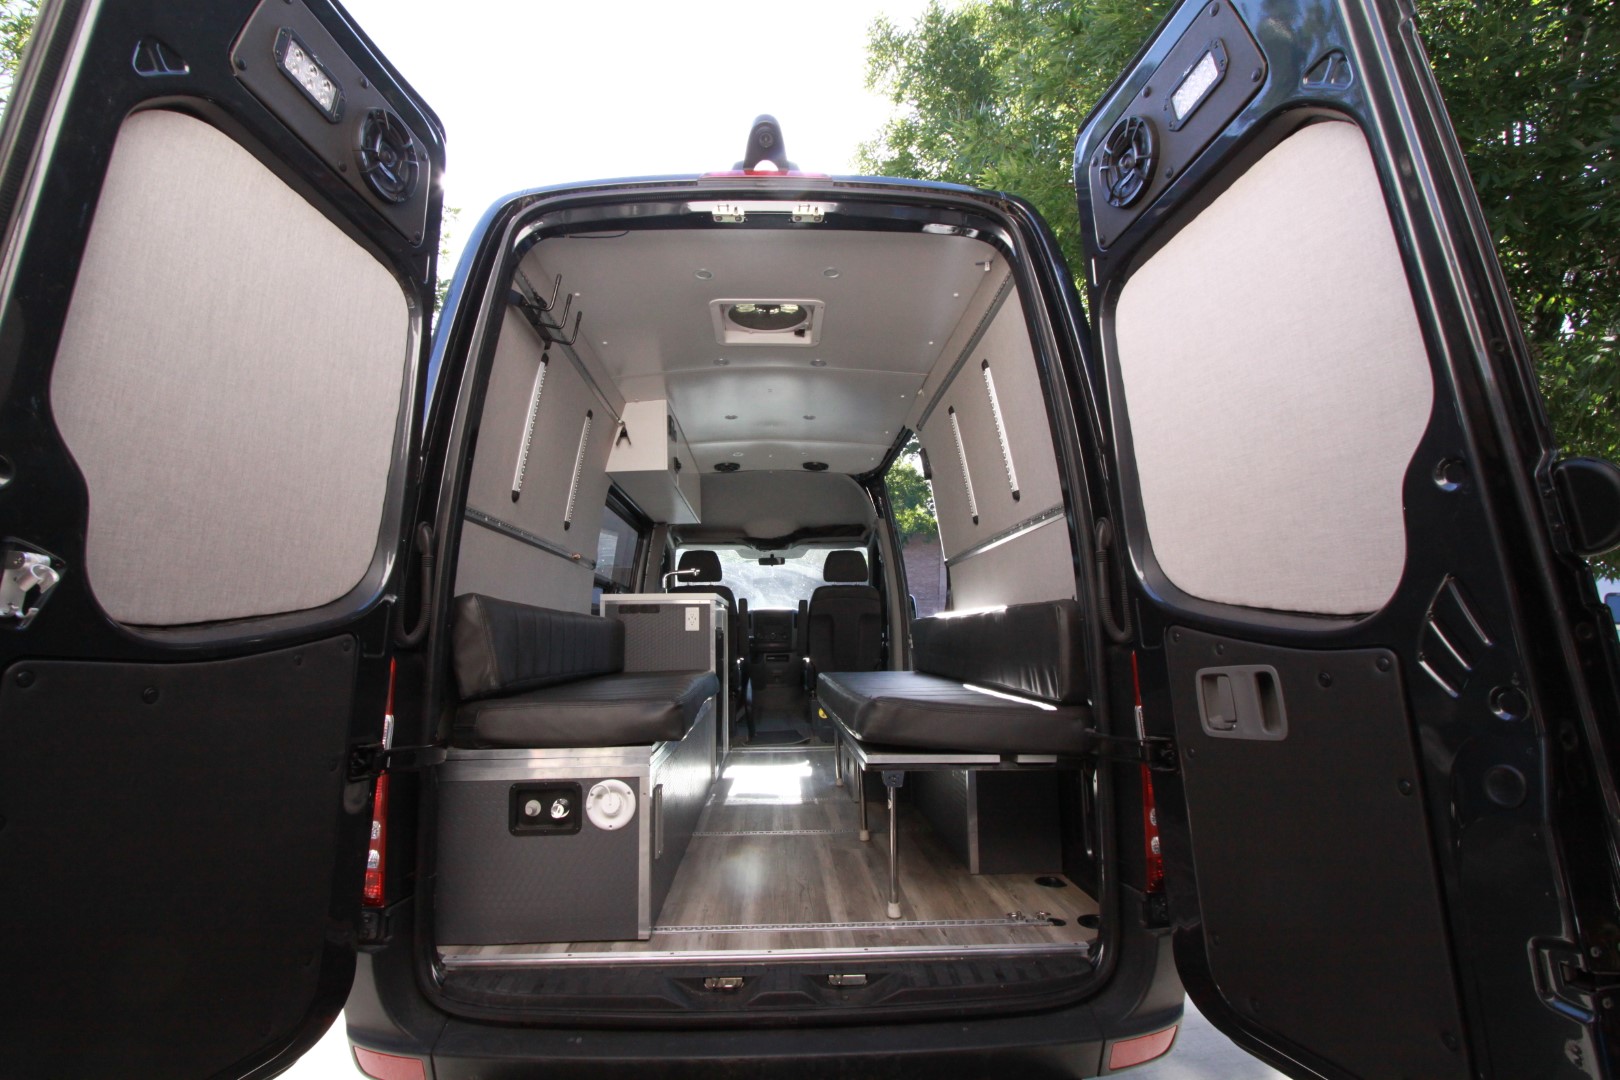
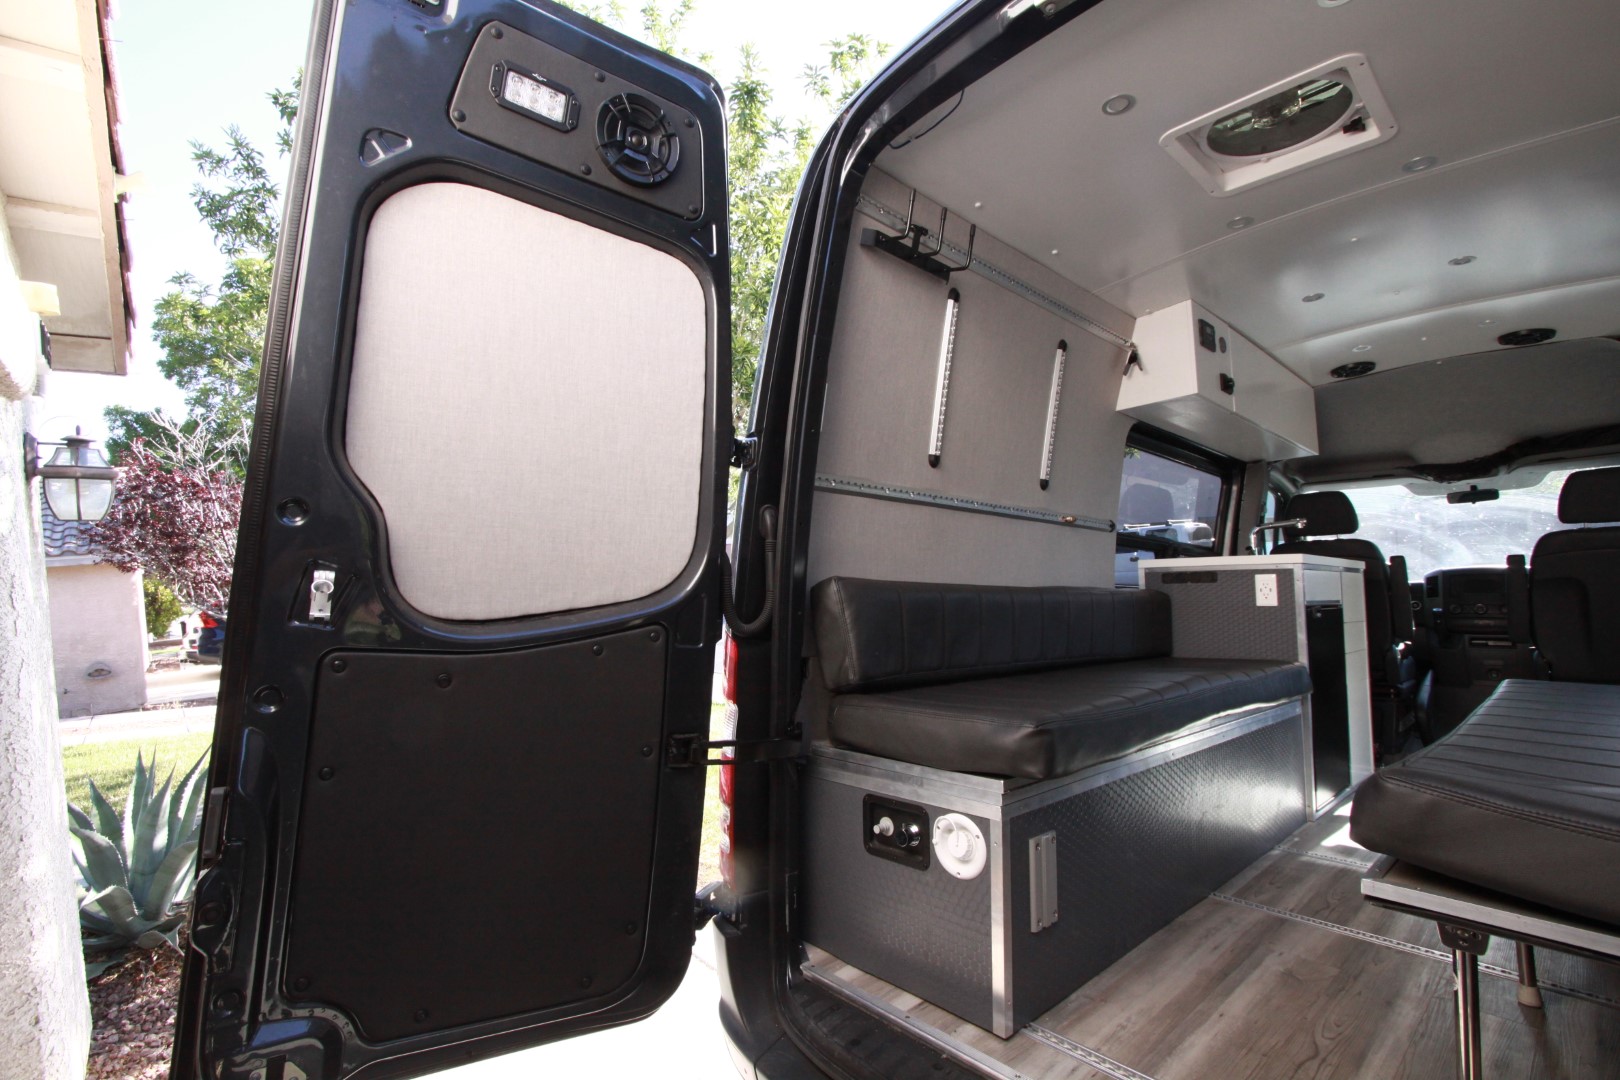
The wall panels and L track were installed. No other fasteners were needed except on the lower wall panels. The L track holds it all up. Angled end caps finished off the L track nicely.
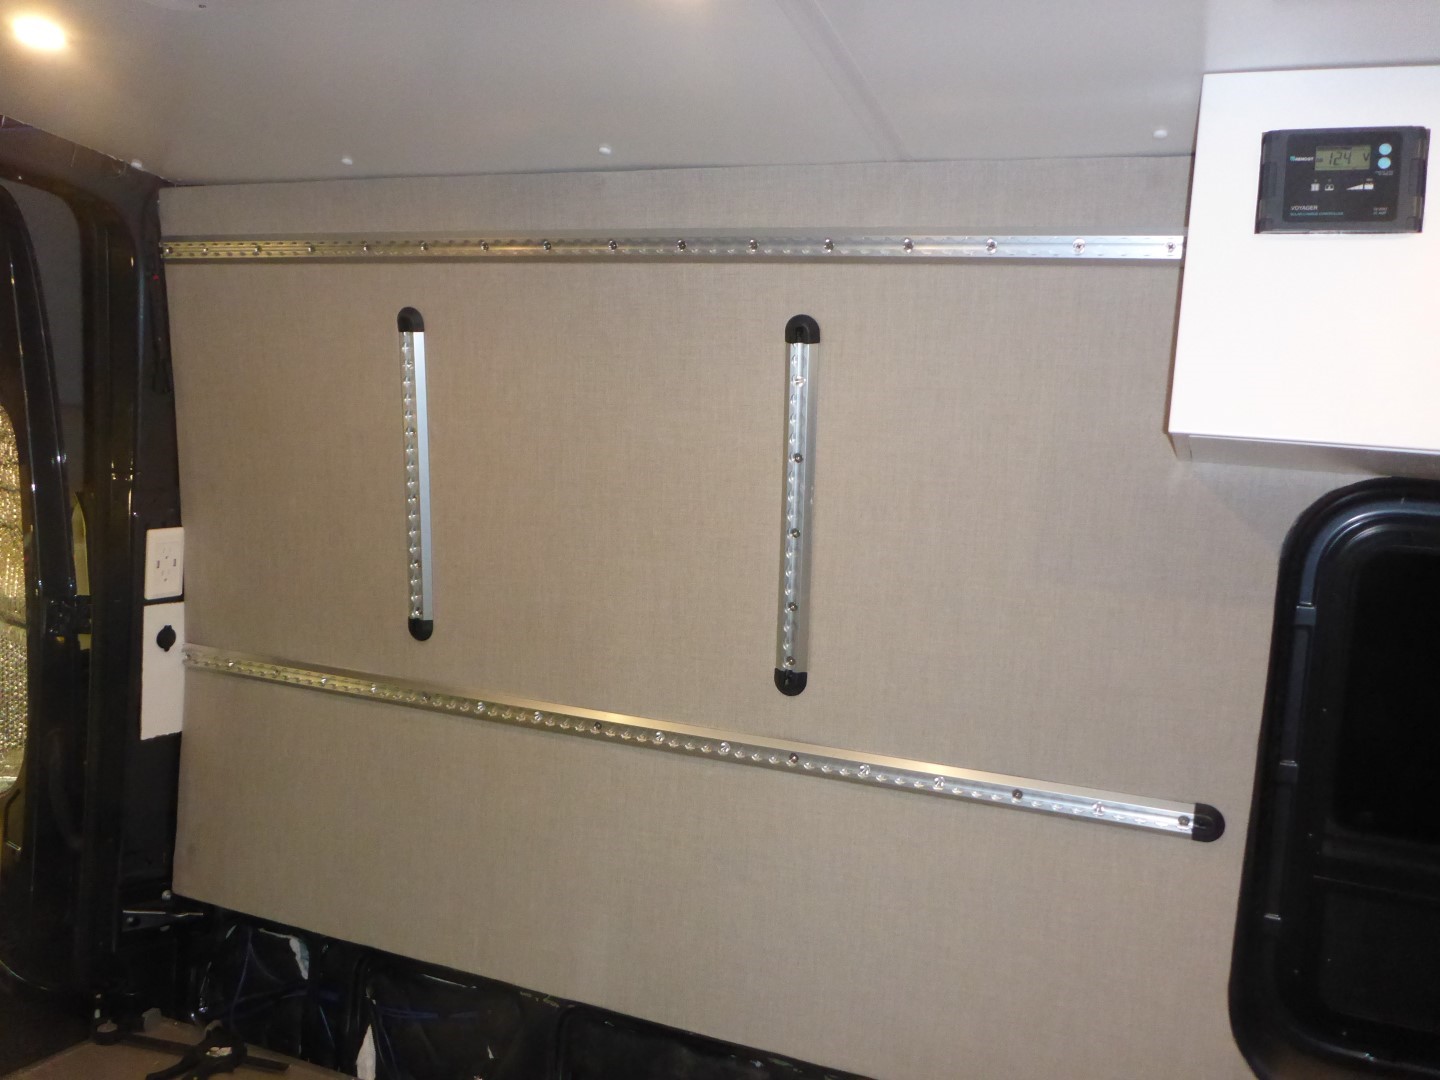
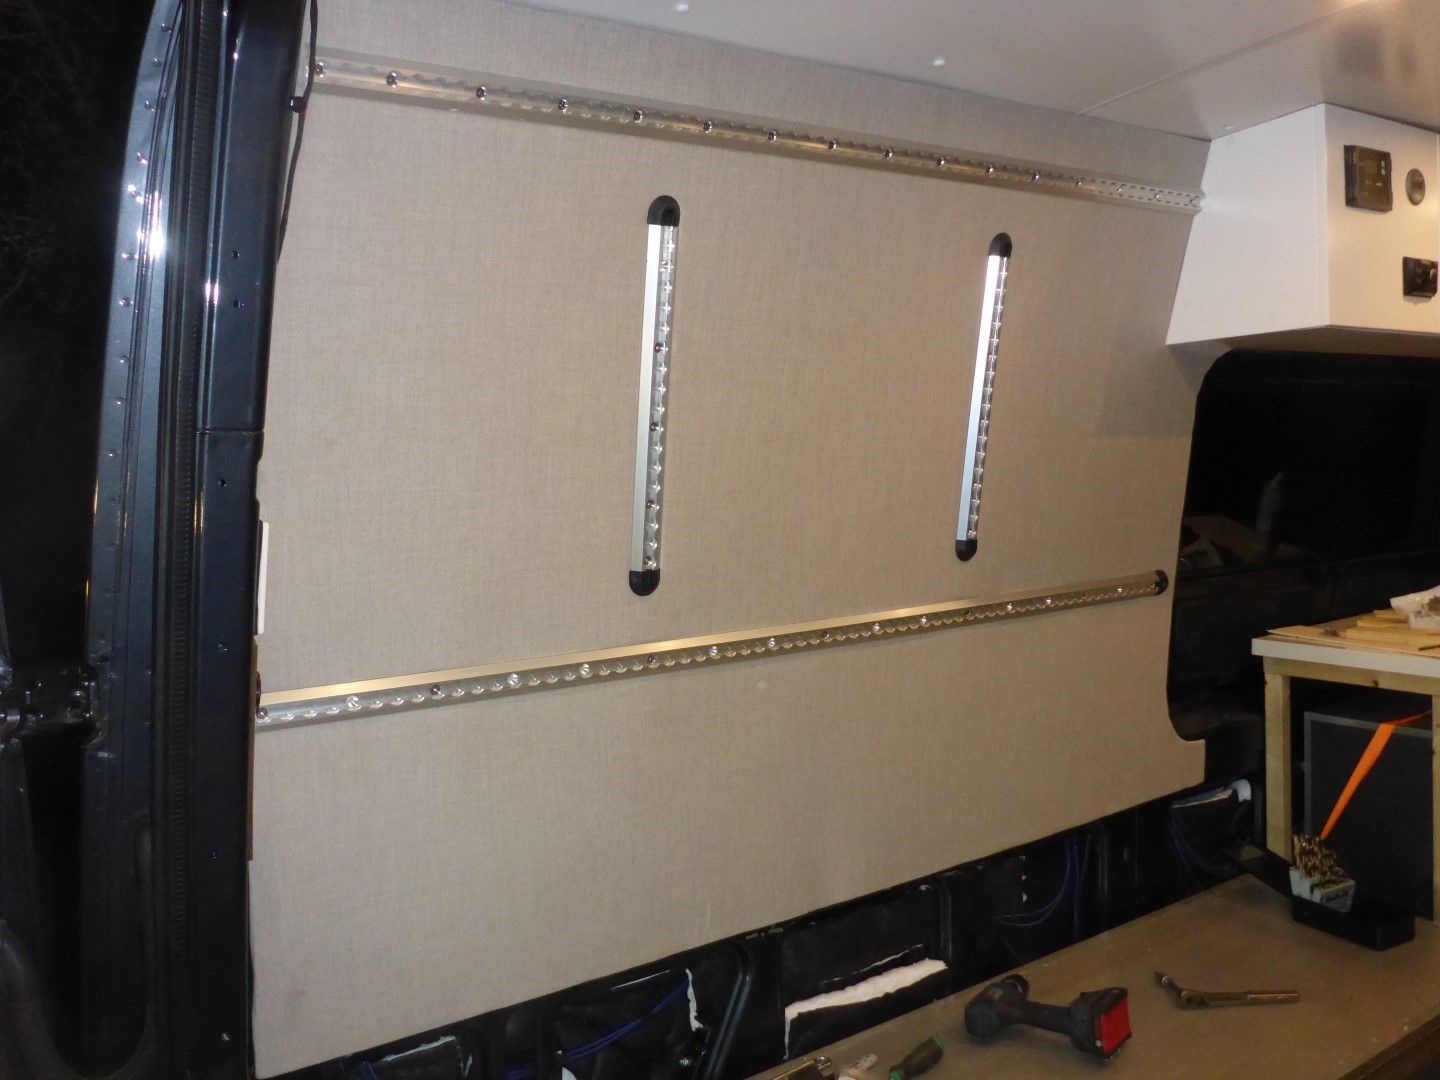
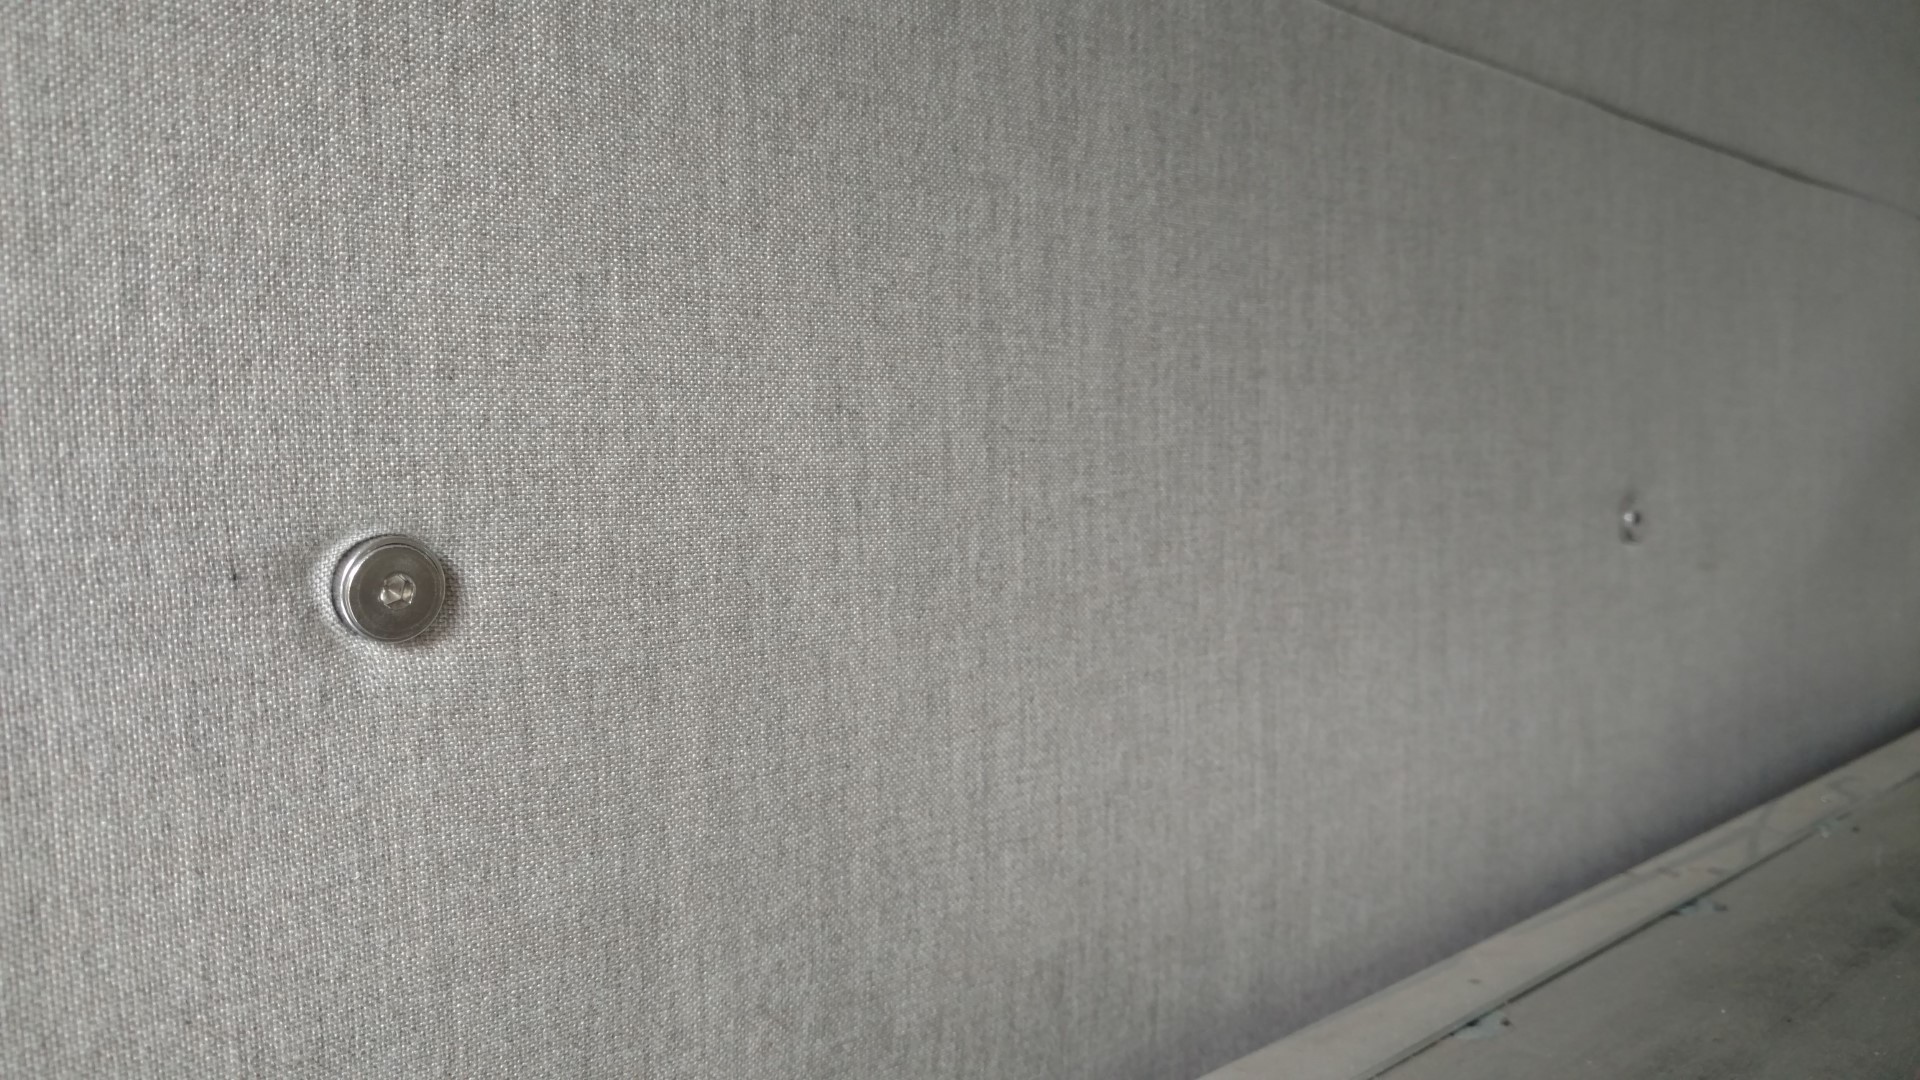
The lower panels were fastened and finished off with aluminum washers and stainless screws into rivnuts.
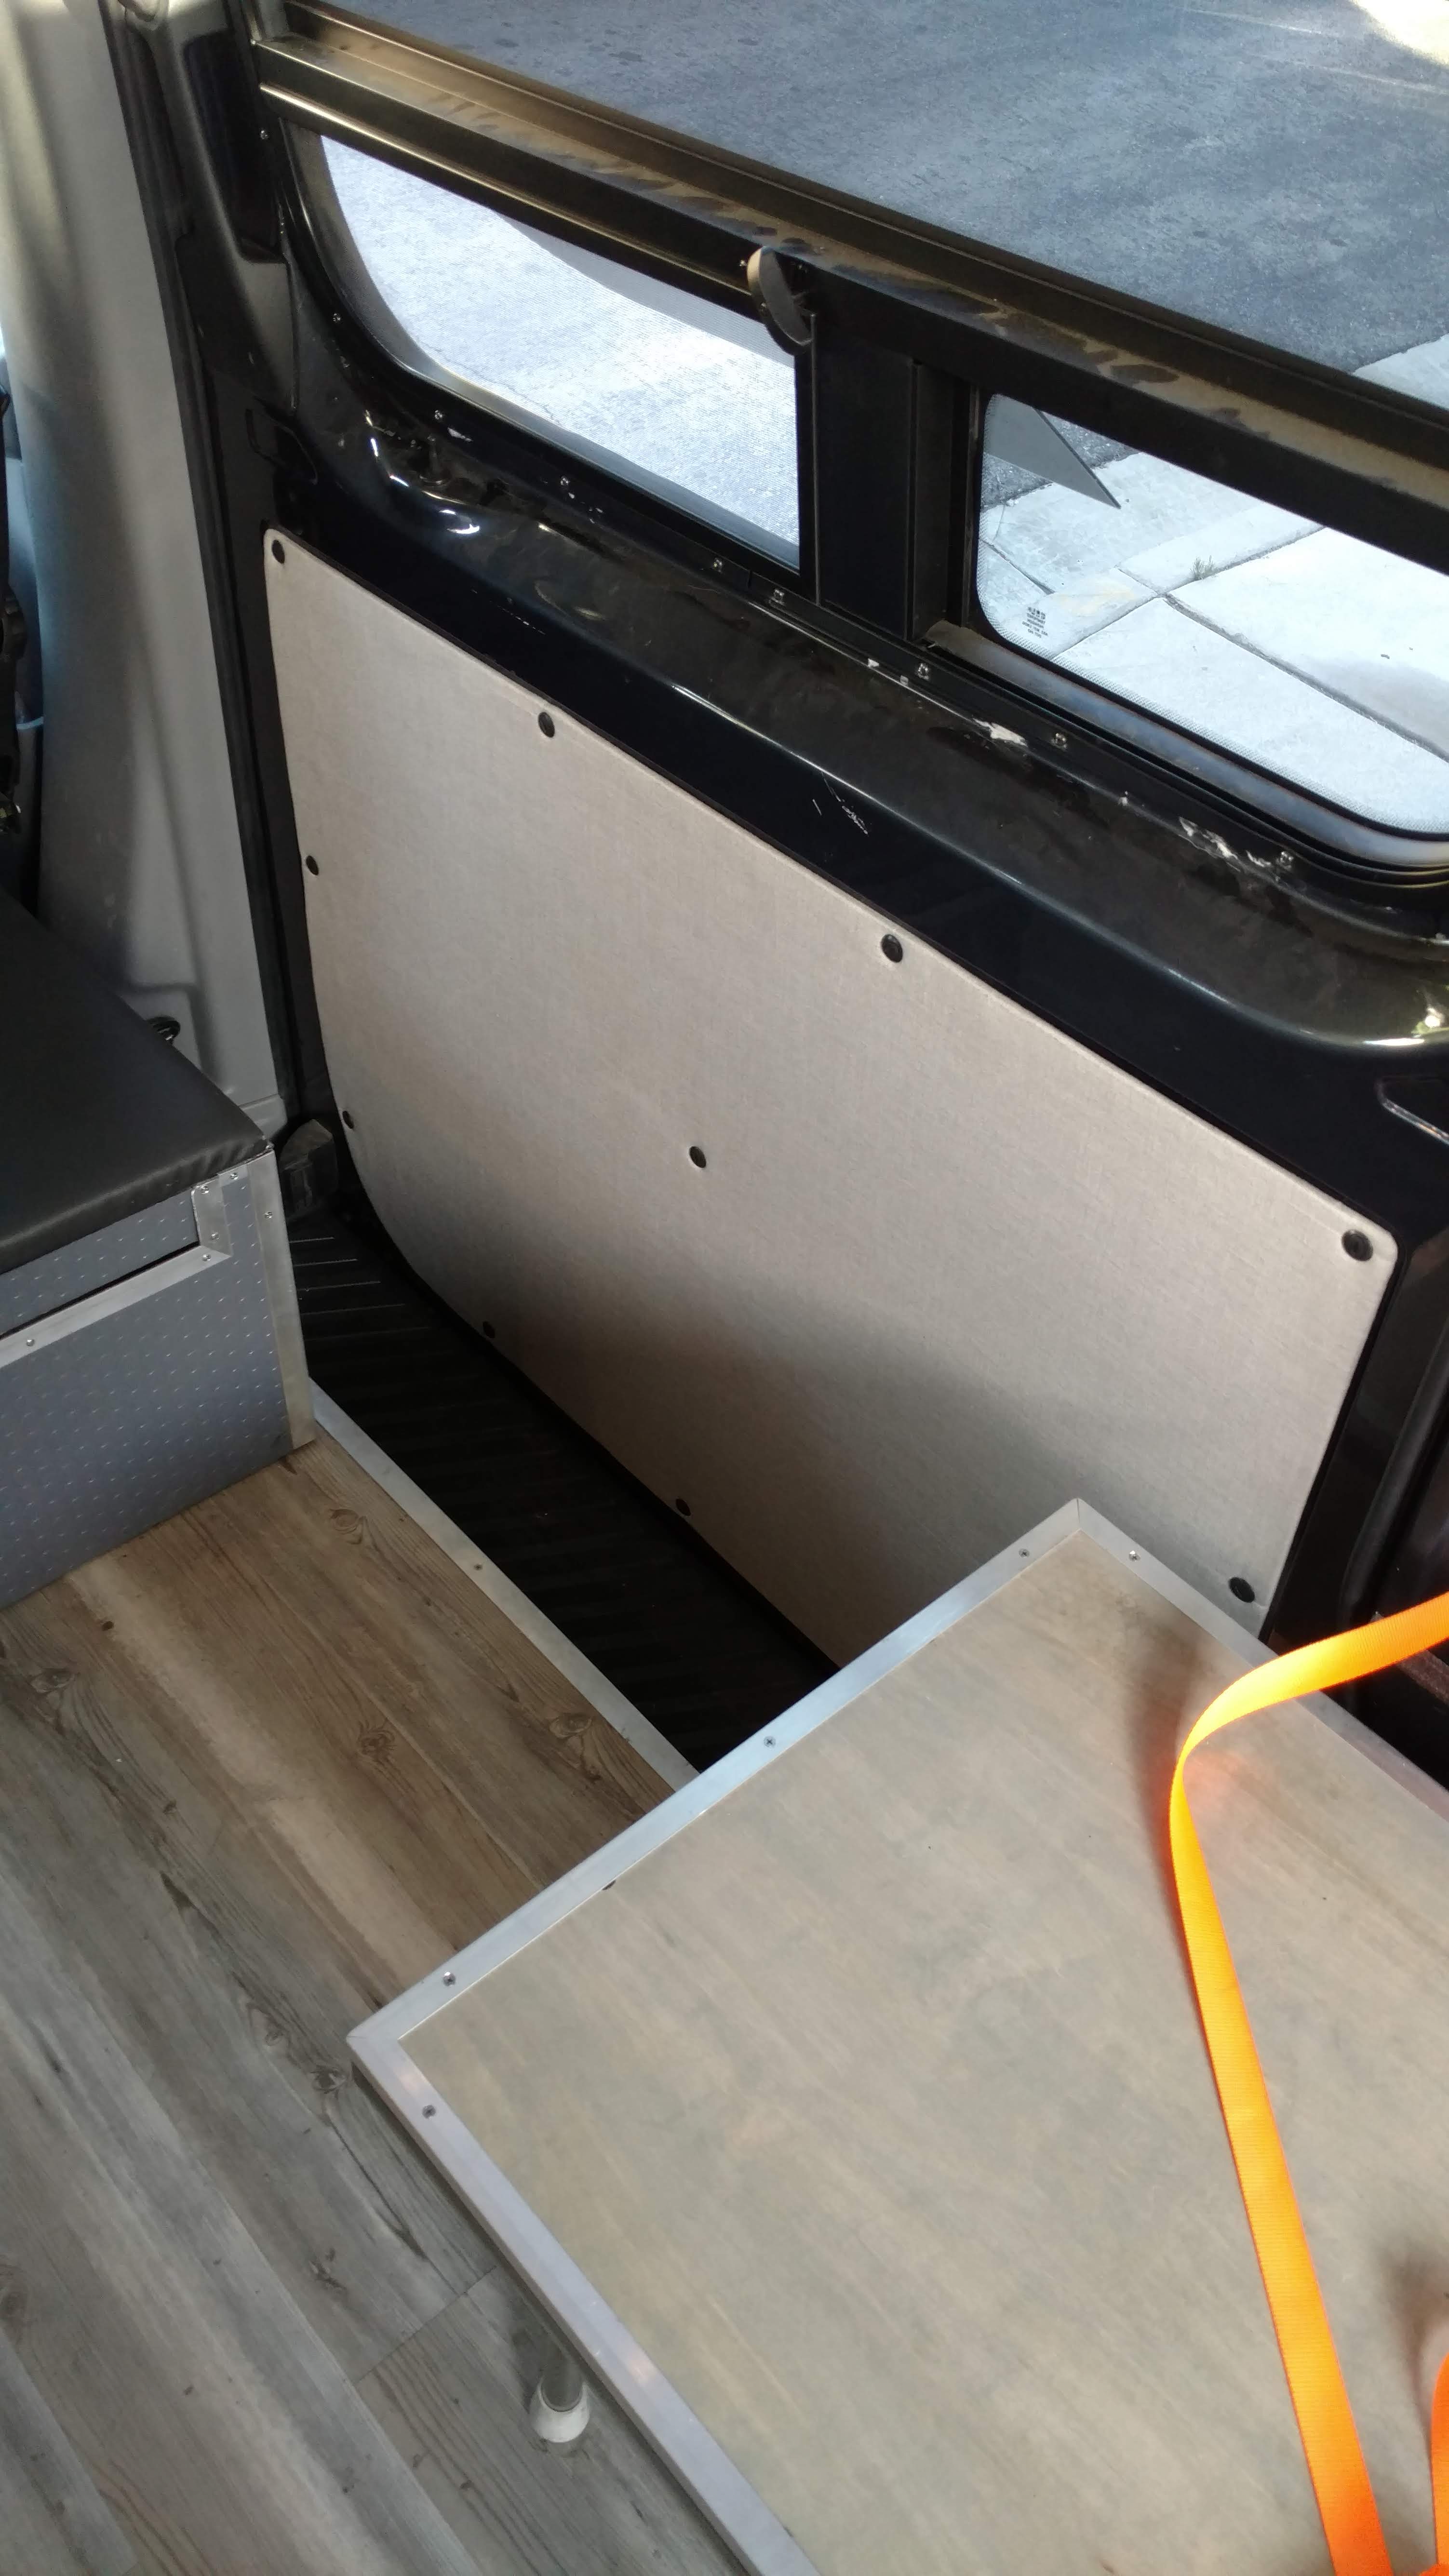
On the slider door, I used the factory wood panel and covered it with the same materials as the walls. I didn’t put the Low E foam on the inside though because it would have made it way too thick and the door panel slips wouldn’t have worked right.
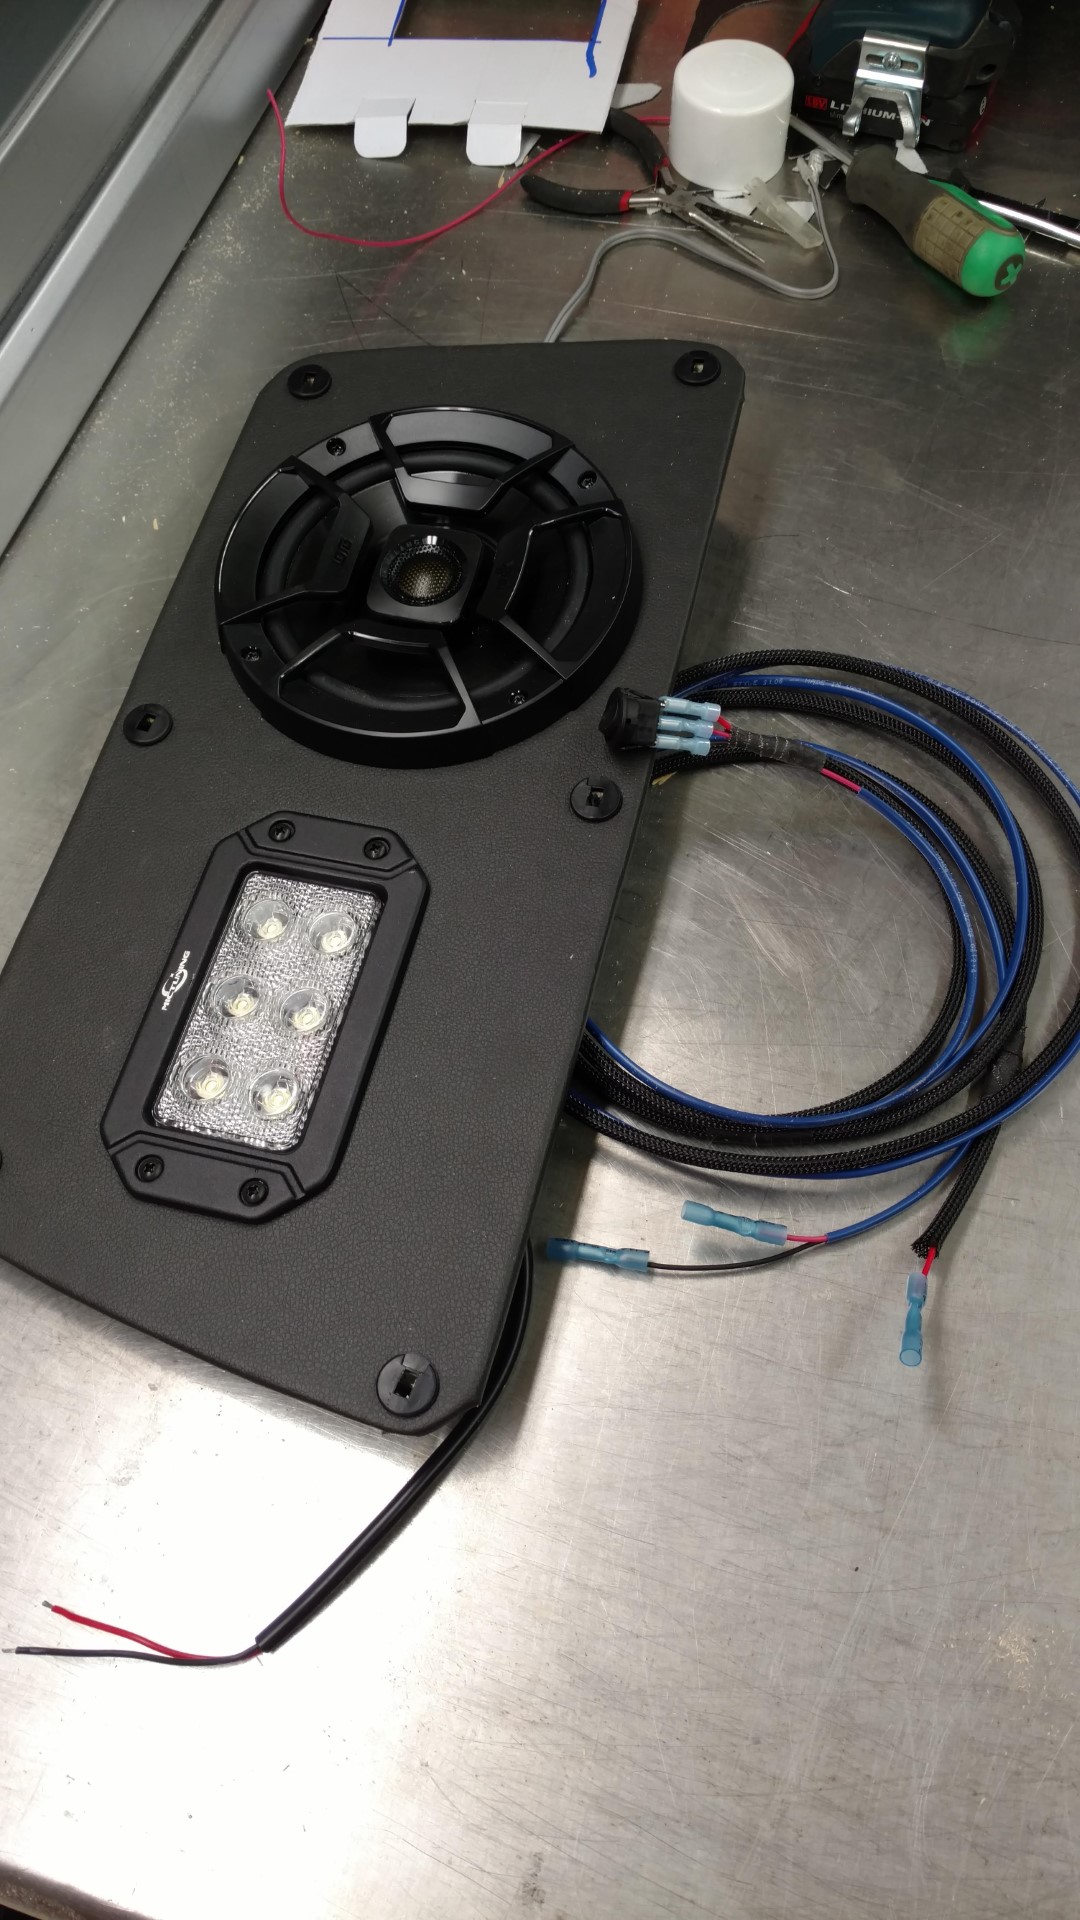
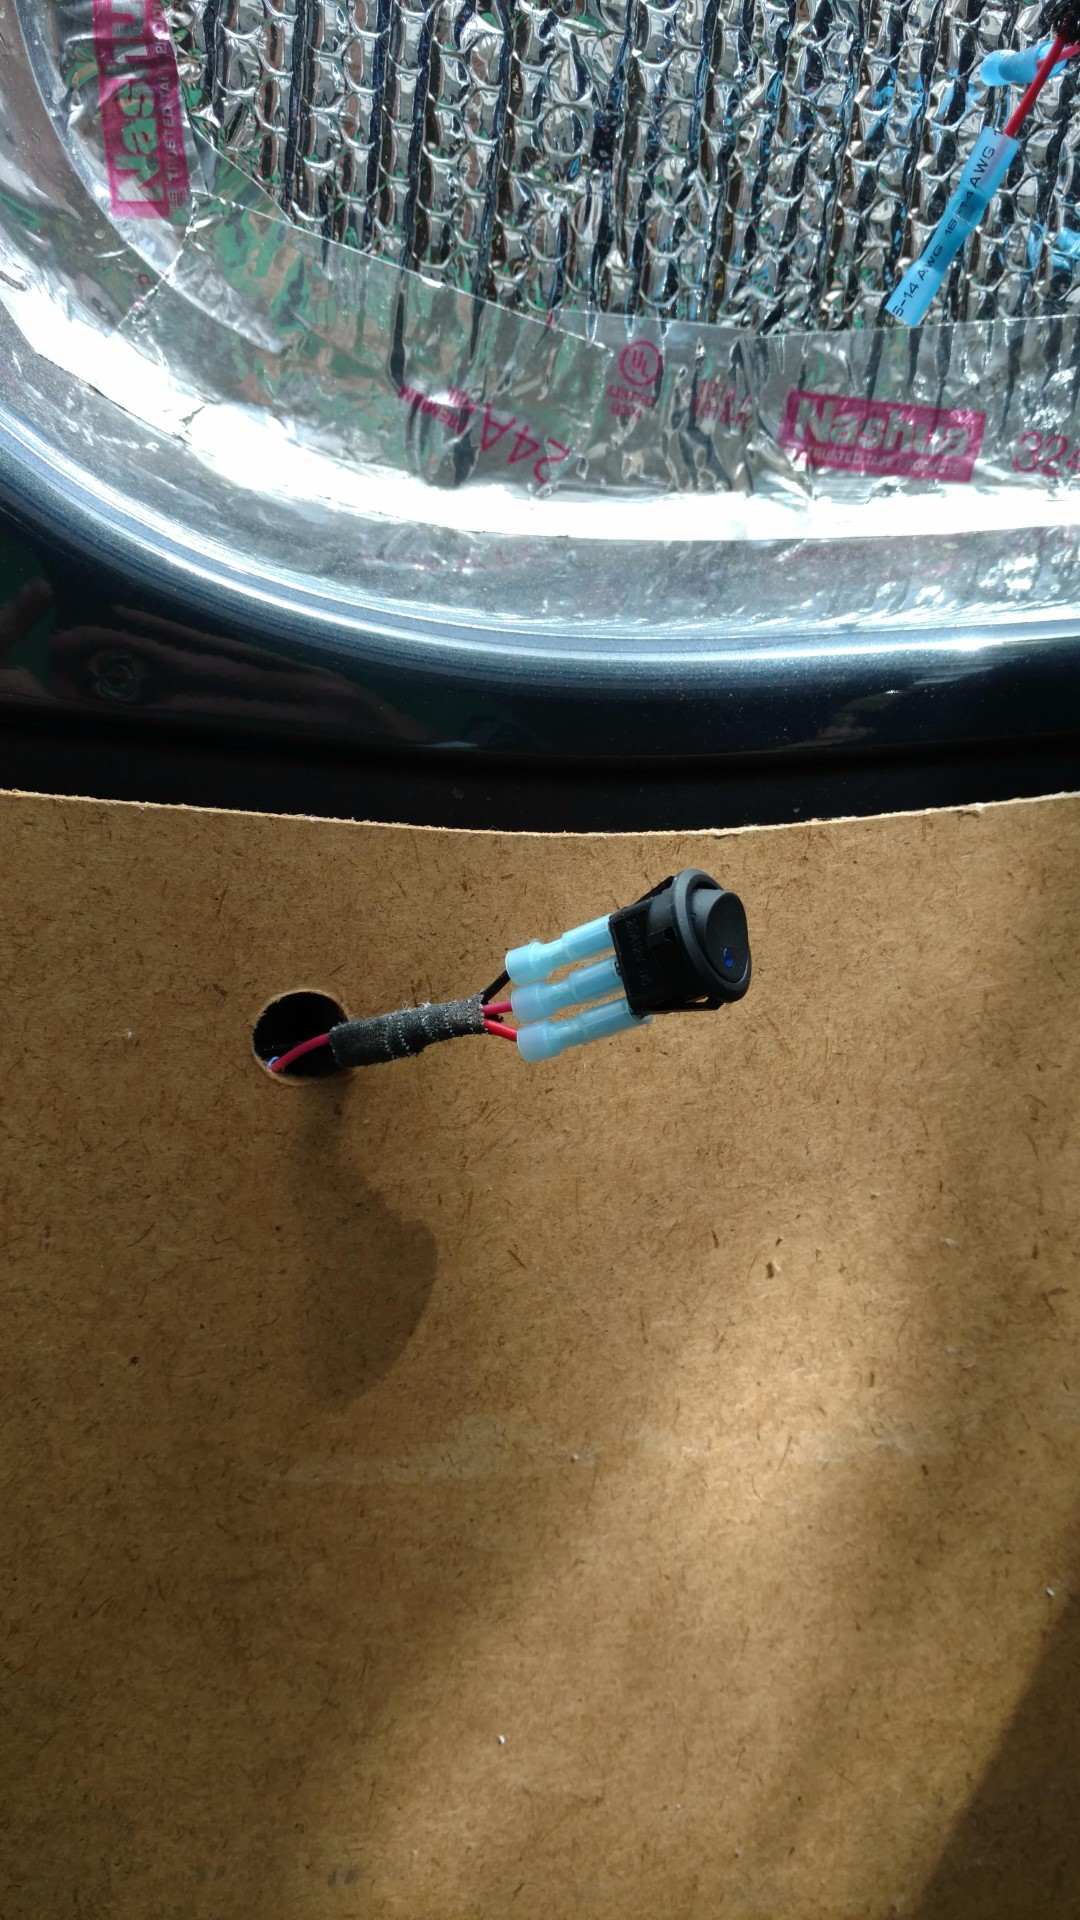
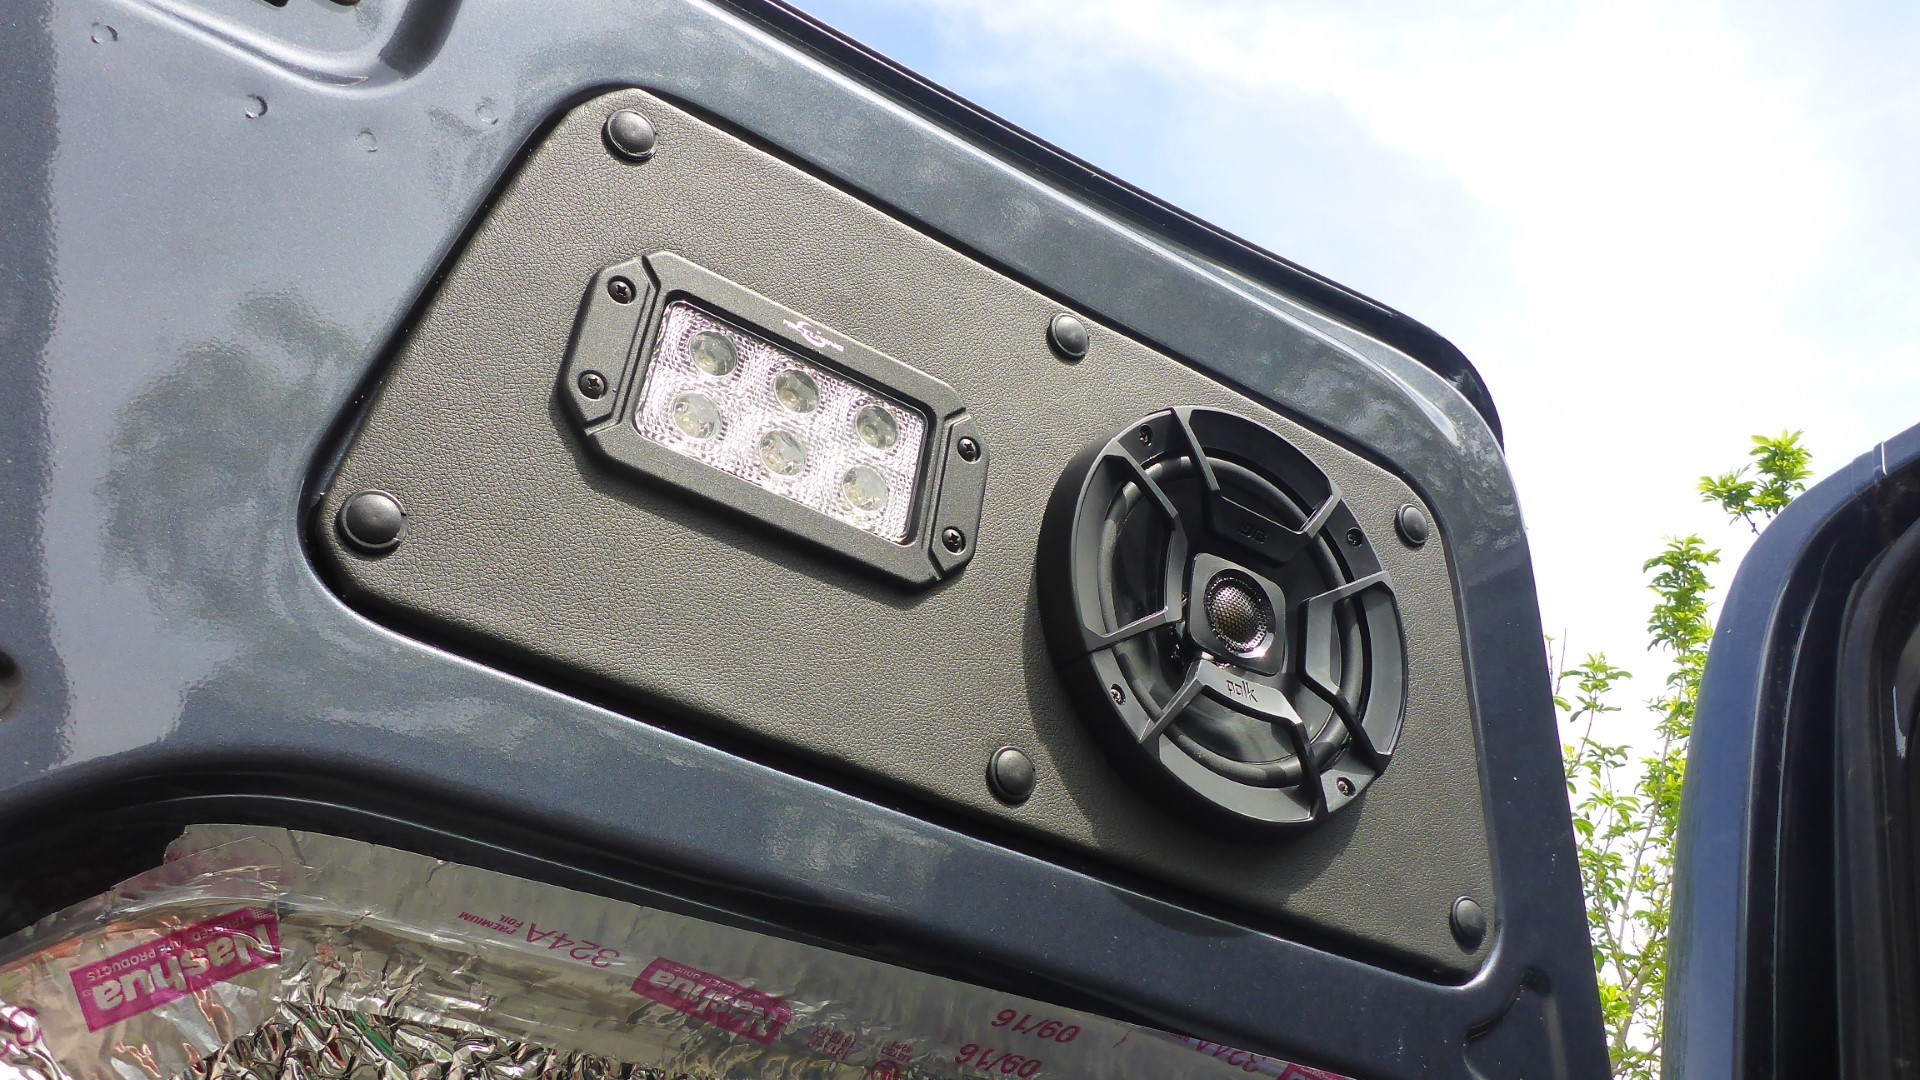
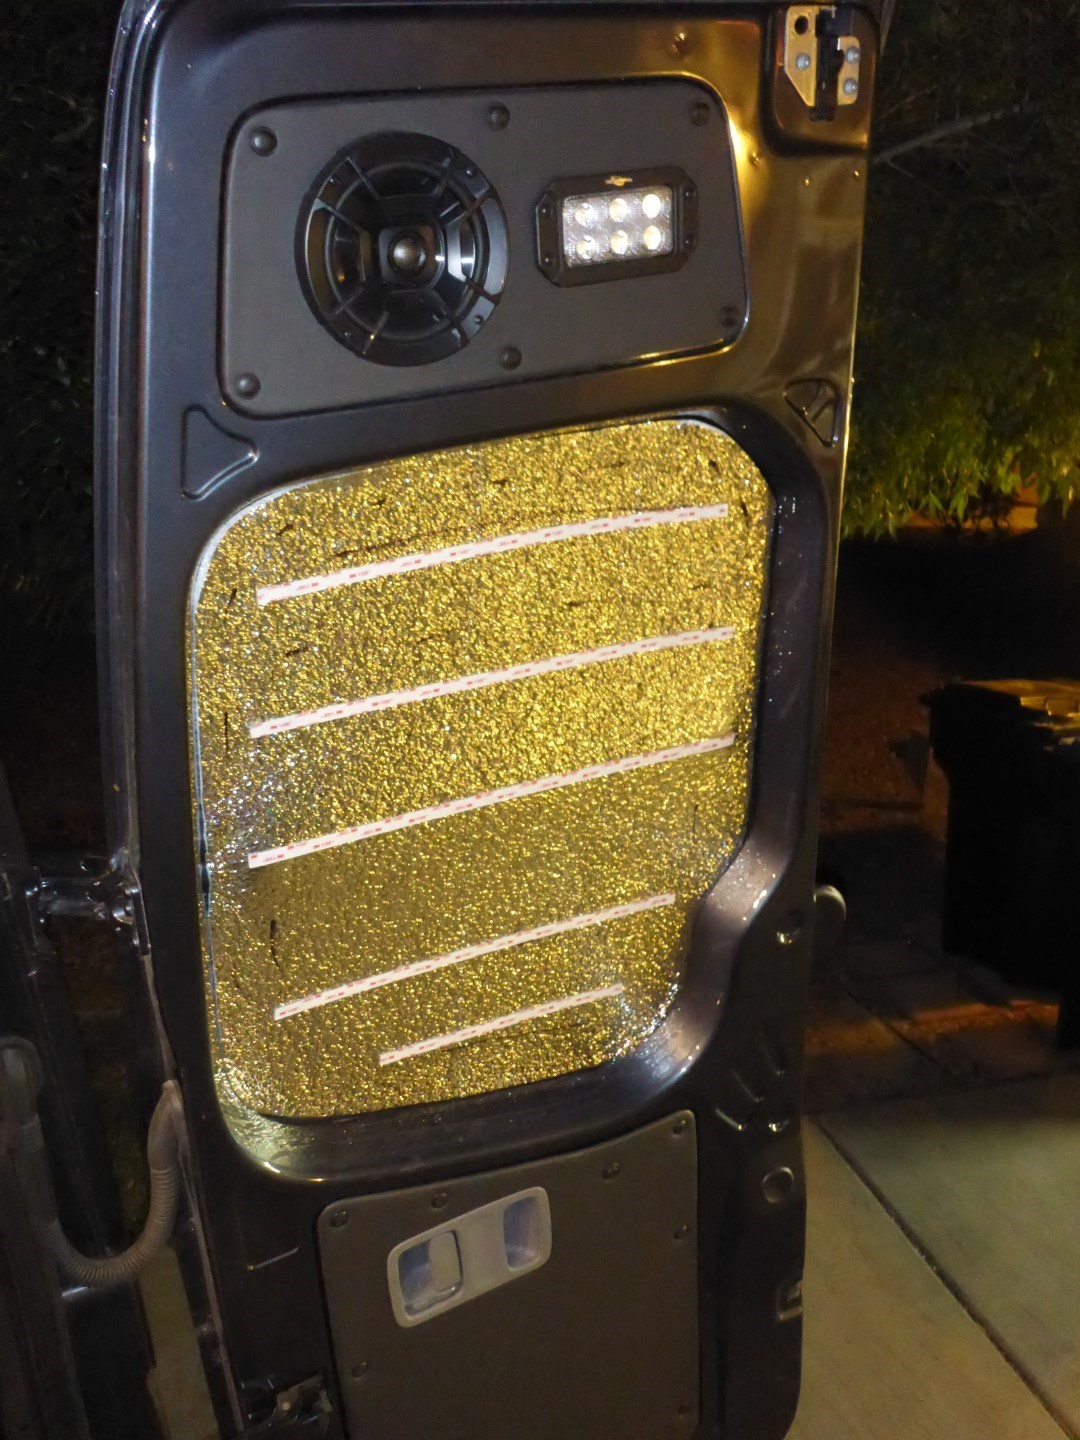
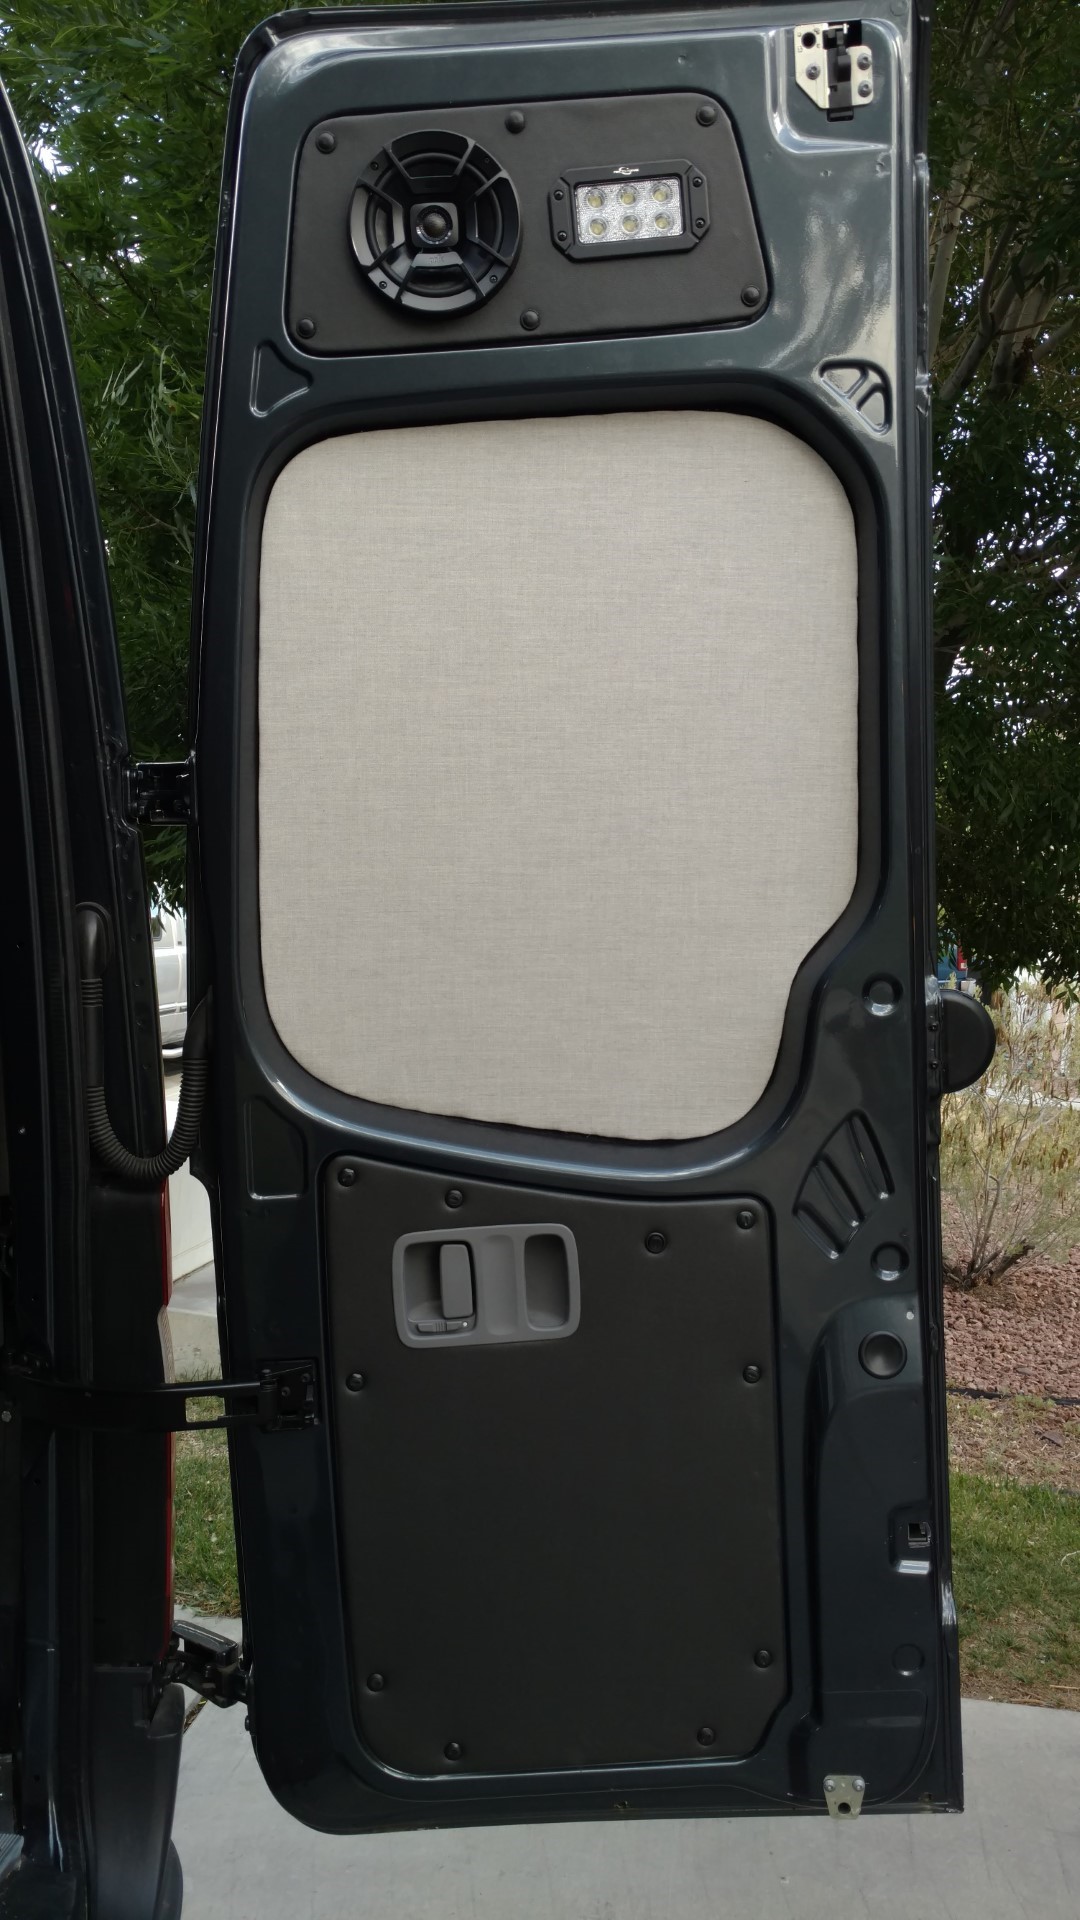
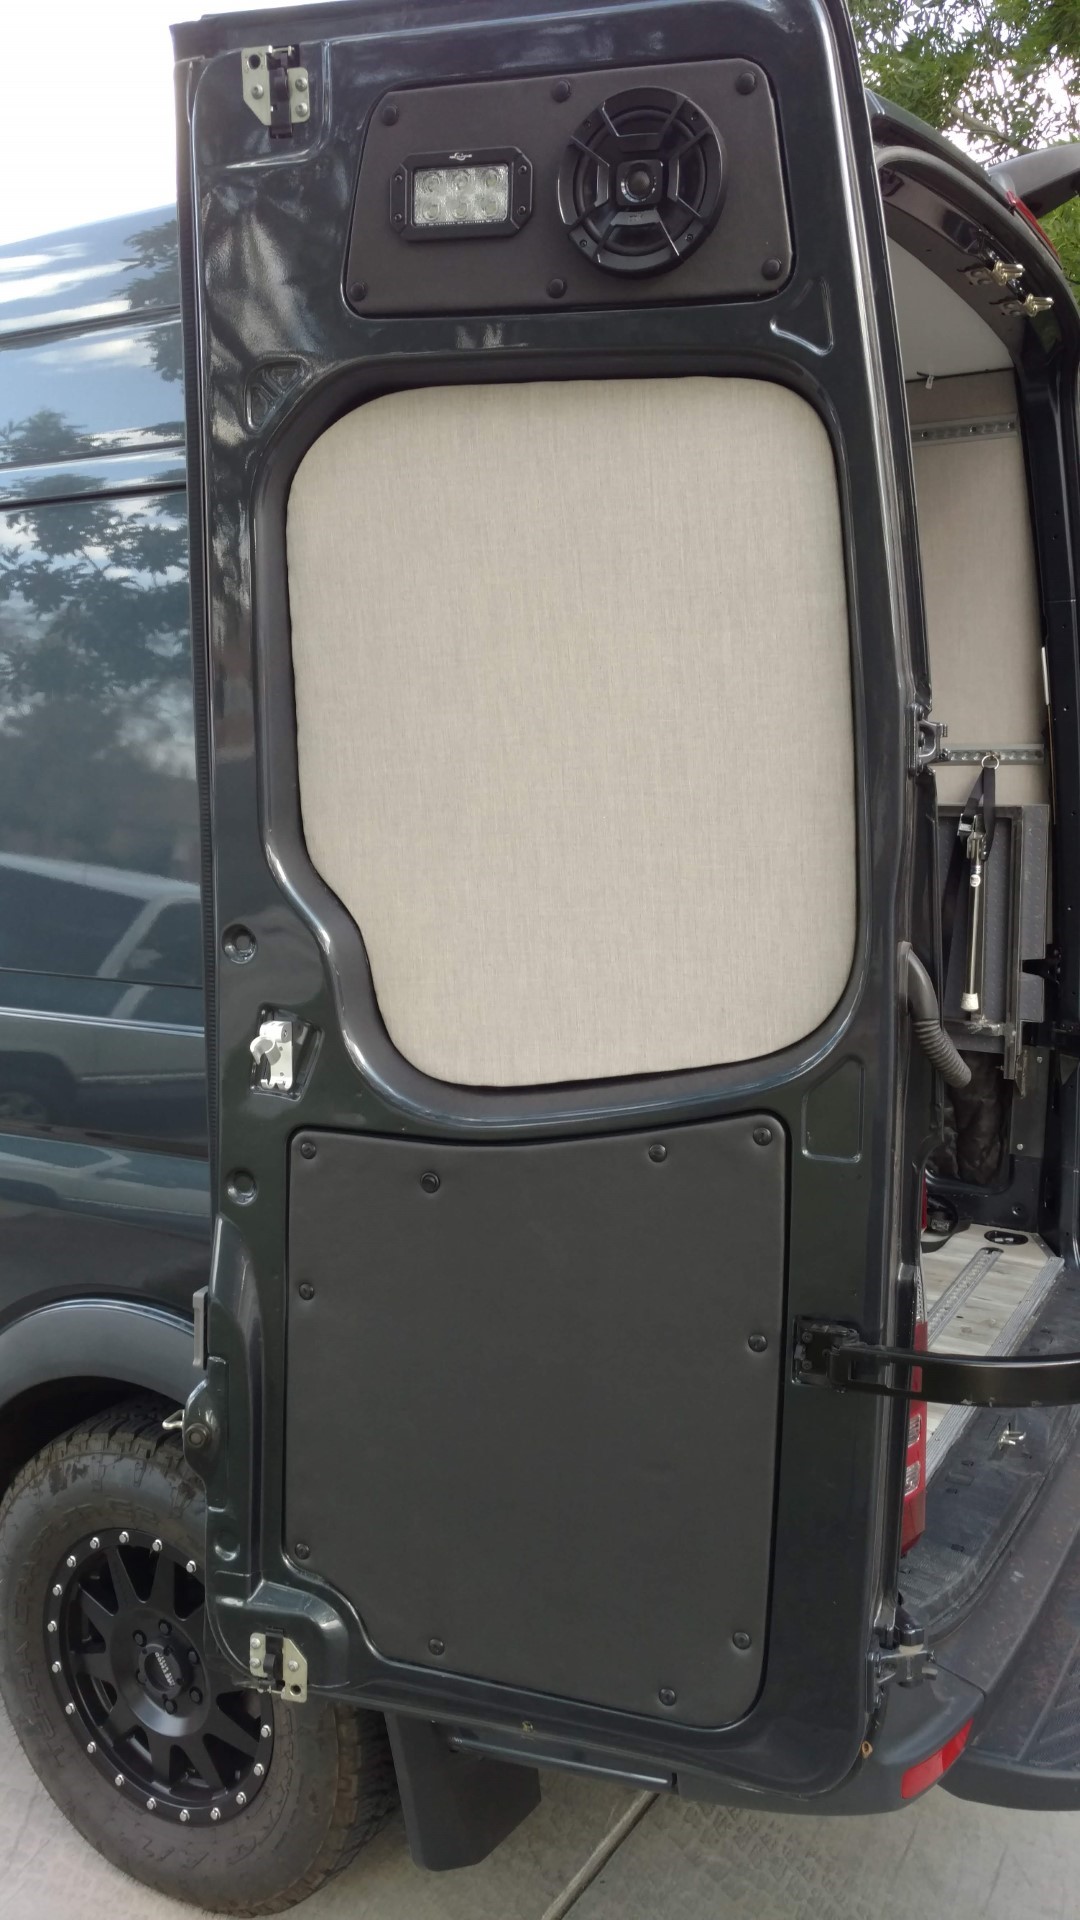
The rear door’s upper-most panels were cut out of 1/4″ ply and housed two Polk Audio 6.5″ speakers and LED lights. A harness and switch were installed in the lower door panel for the LED lights. The switch blends in nicely with the door panel clips.


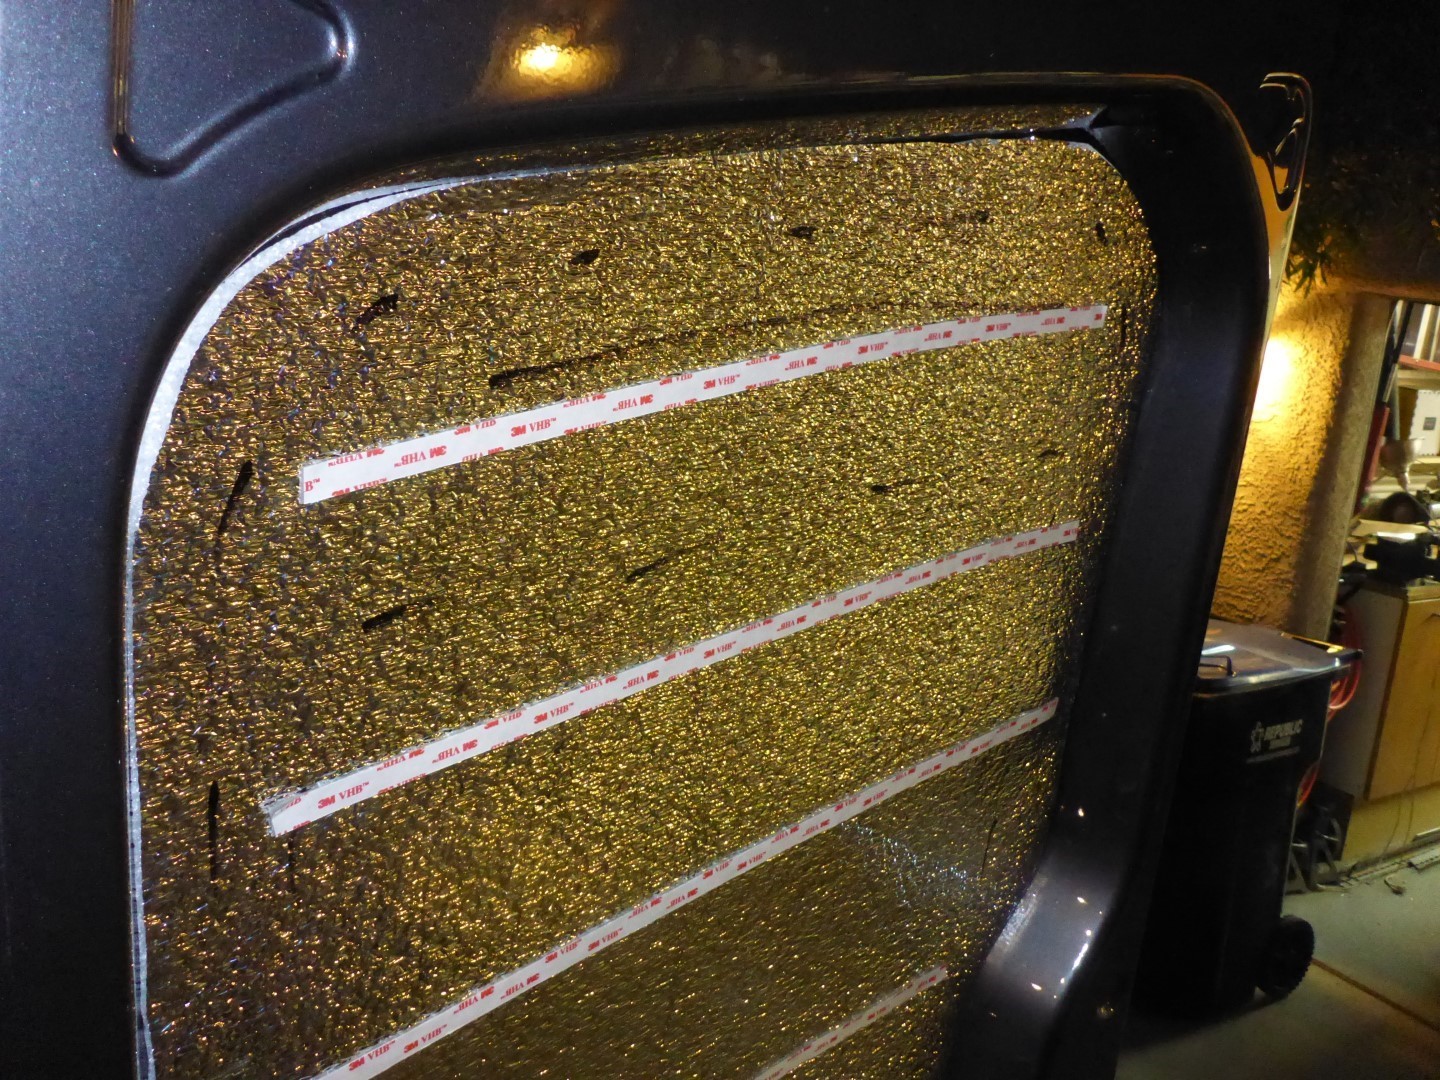
The rear door lower door panels were upholstered in the same vinyl as the cushions and the middle “window” areas were covered in the Sunbrella fabric. I used the factory wood panels for the lowers, and for the middle panels, I used the same material as our ceiling, white hardboard. It was easier to cut and work with. I used 3M VHB tape to hold it up. I also applied a layer of Low E foil face foam on the back since it would get very hot.

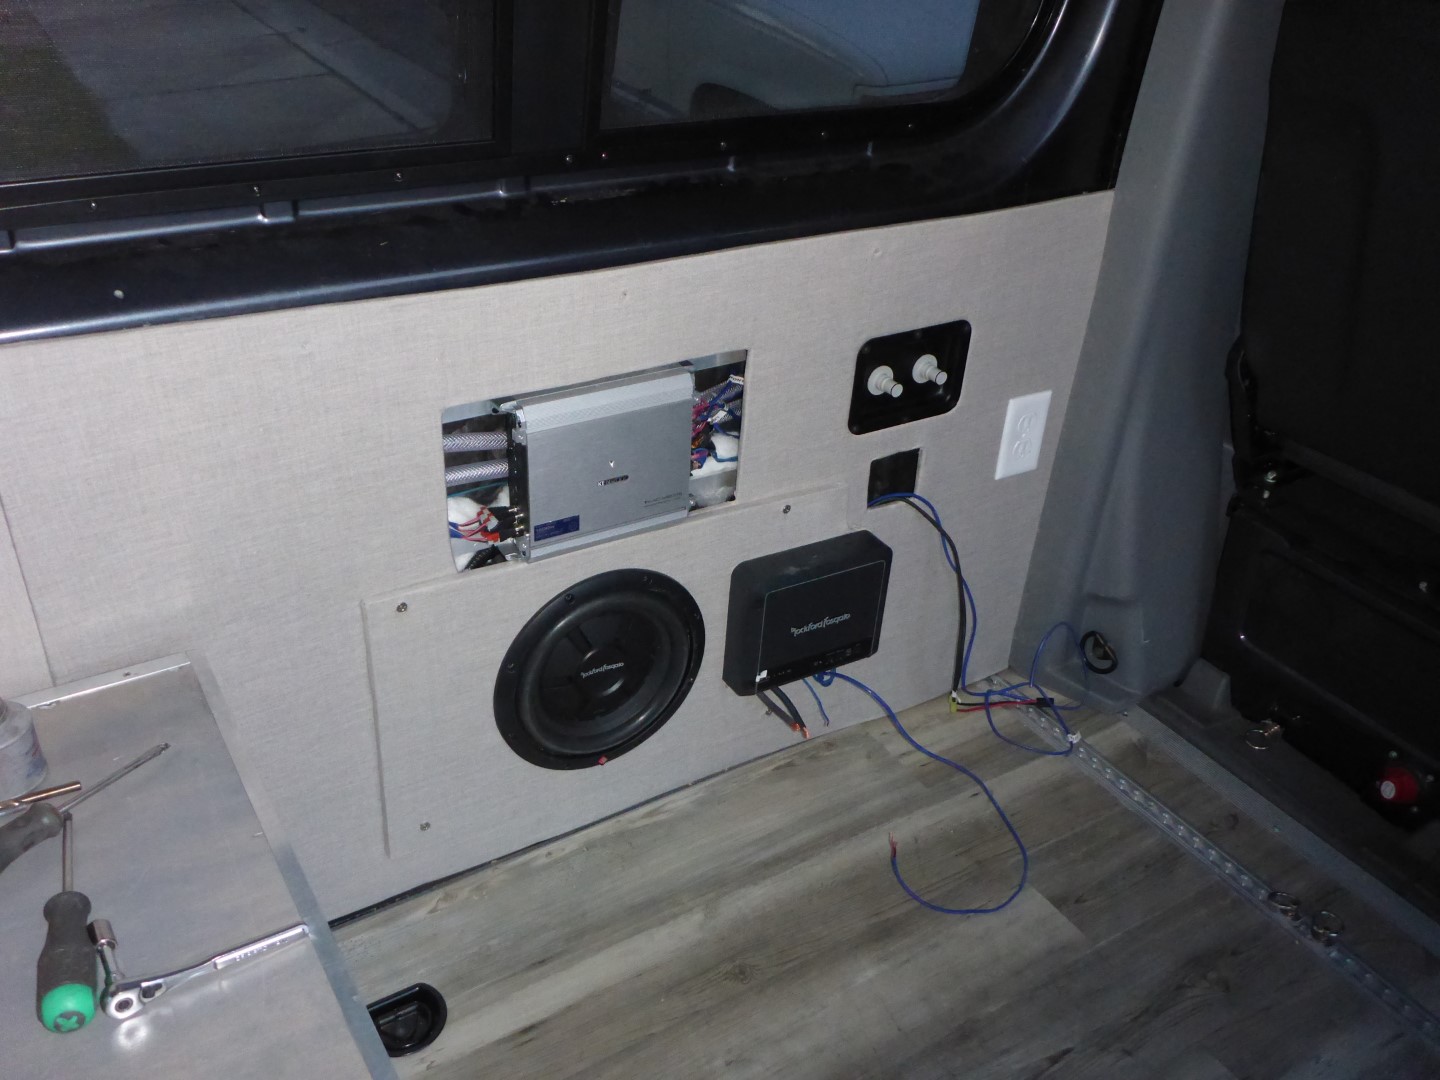
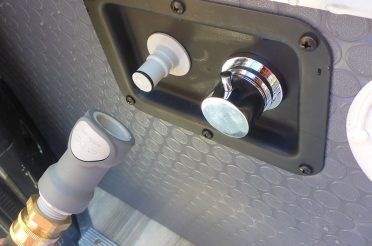
The wall behind the galley took a ton of time and of course, it will be seen the least. This area is where the amps and subwoofer are hidden. It is also where the water lines come through.

Time to sit back and admire the finished product!
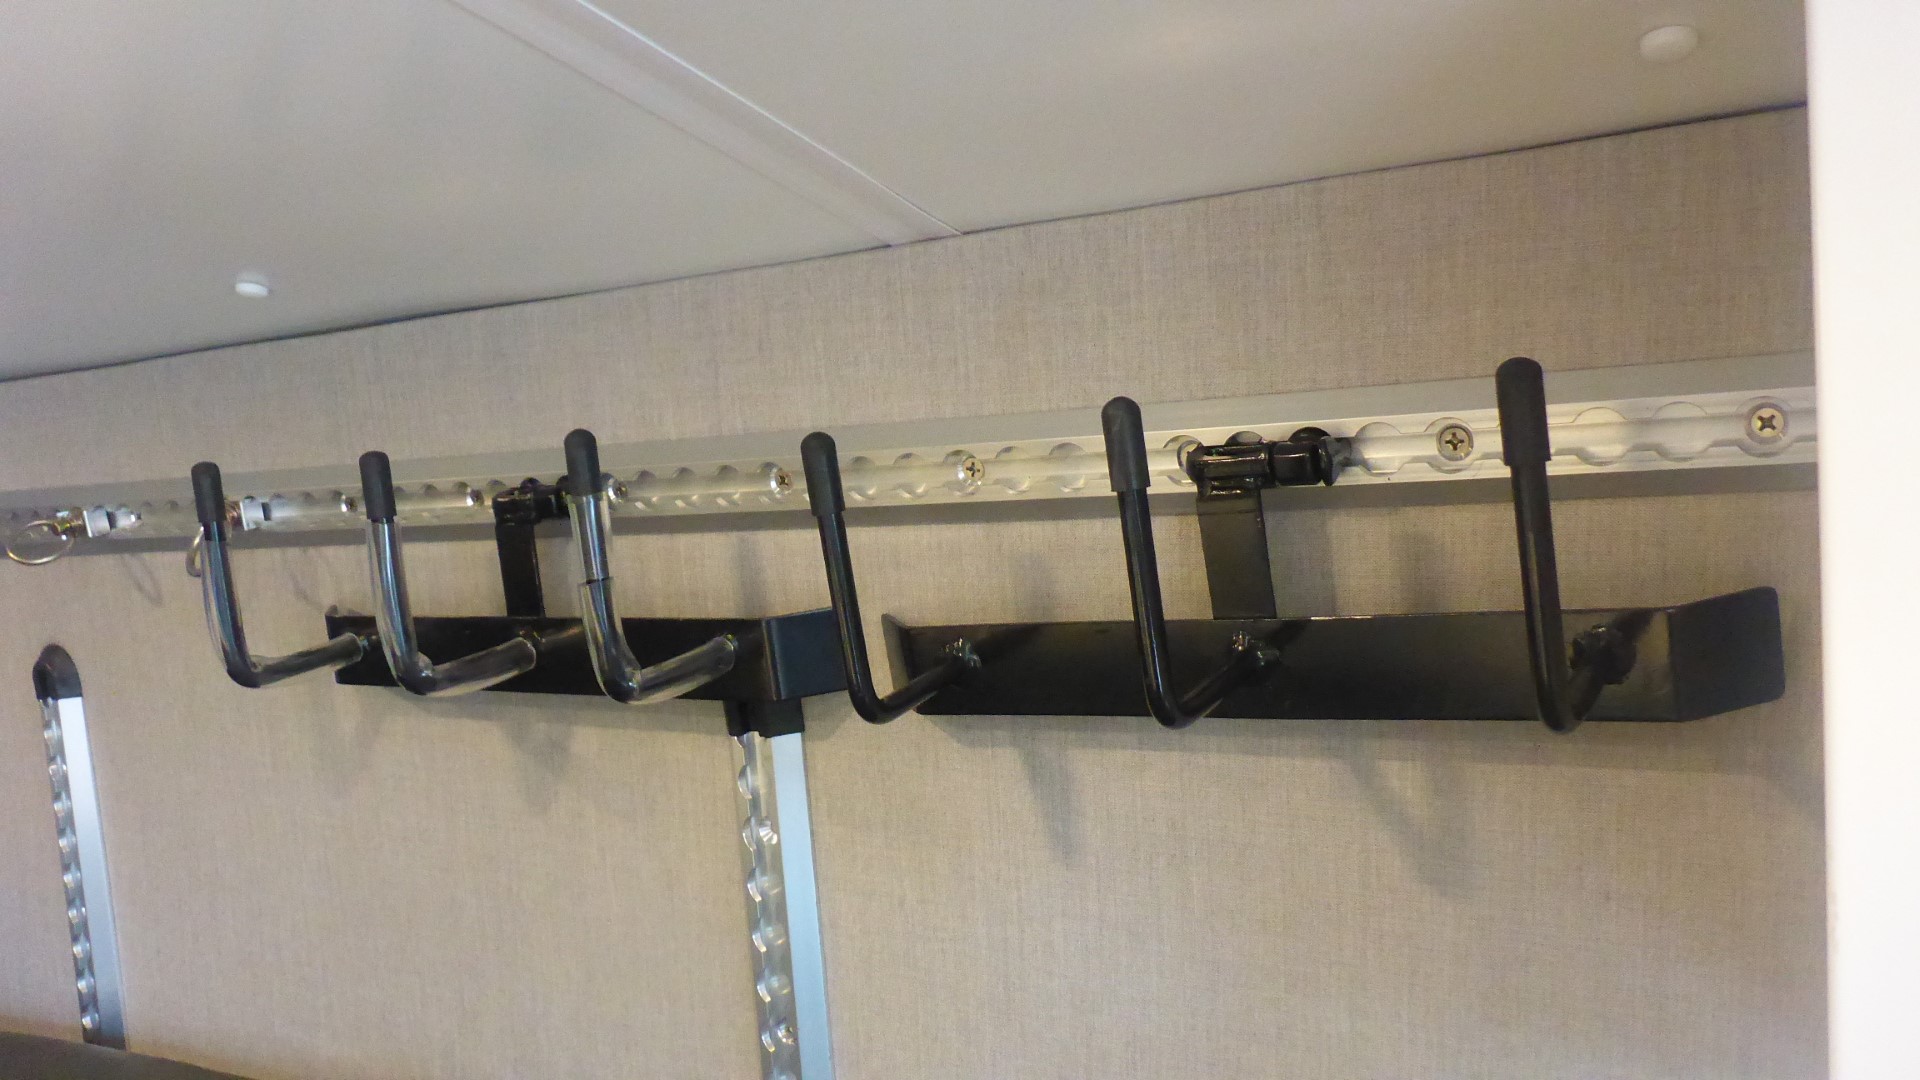
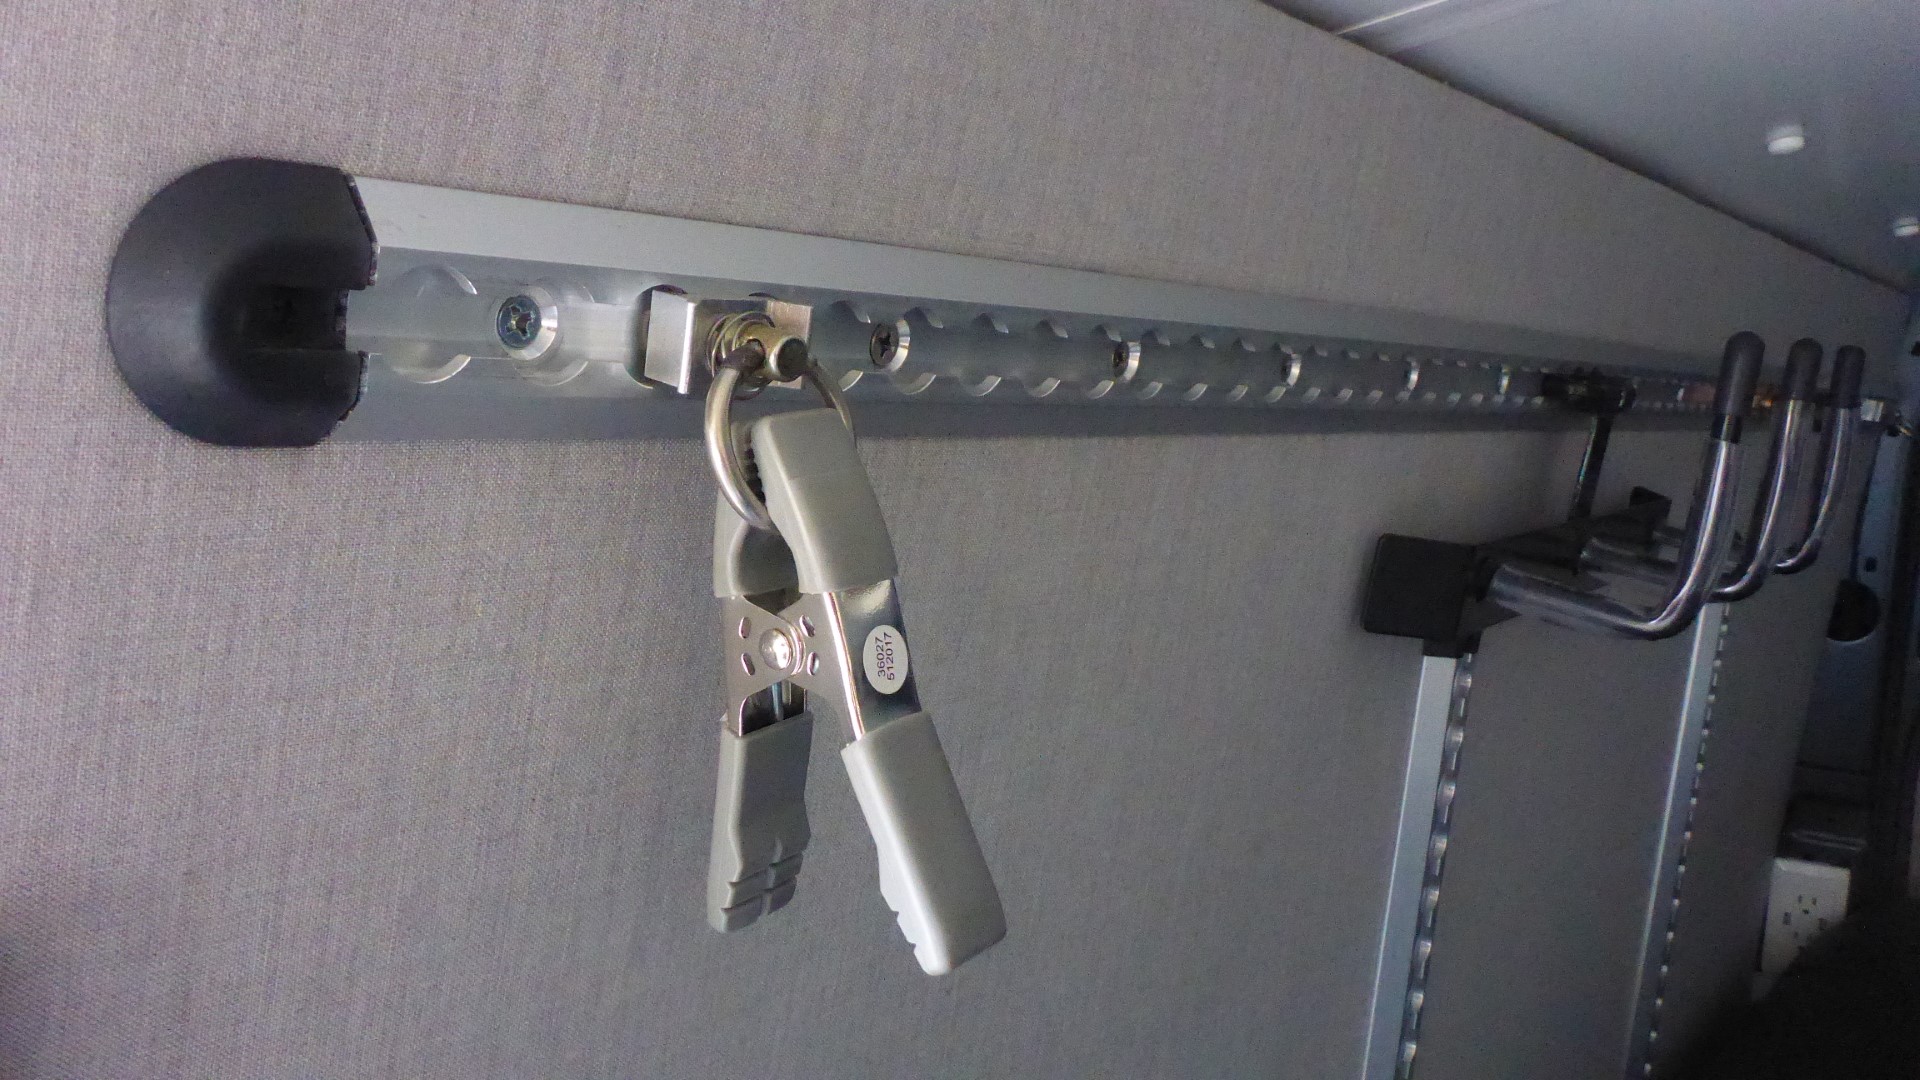
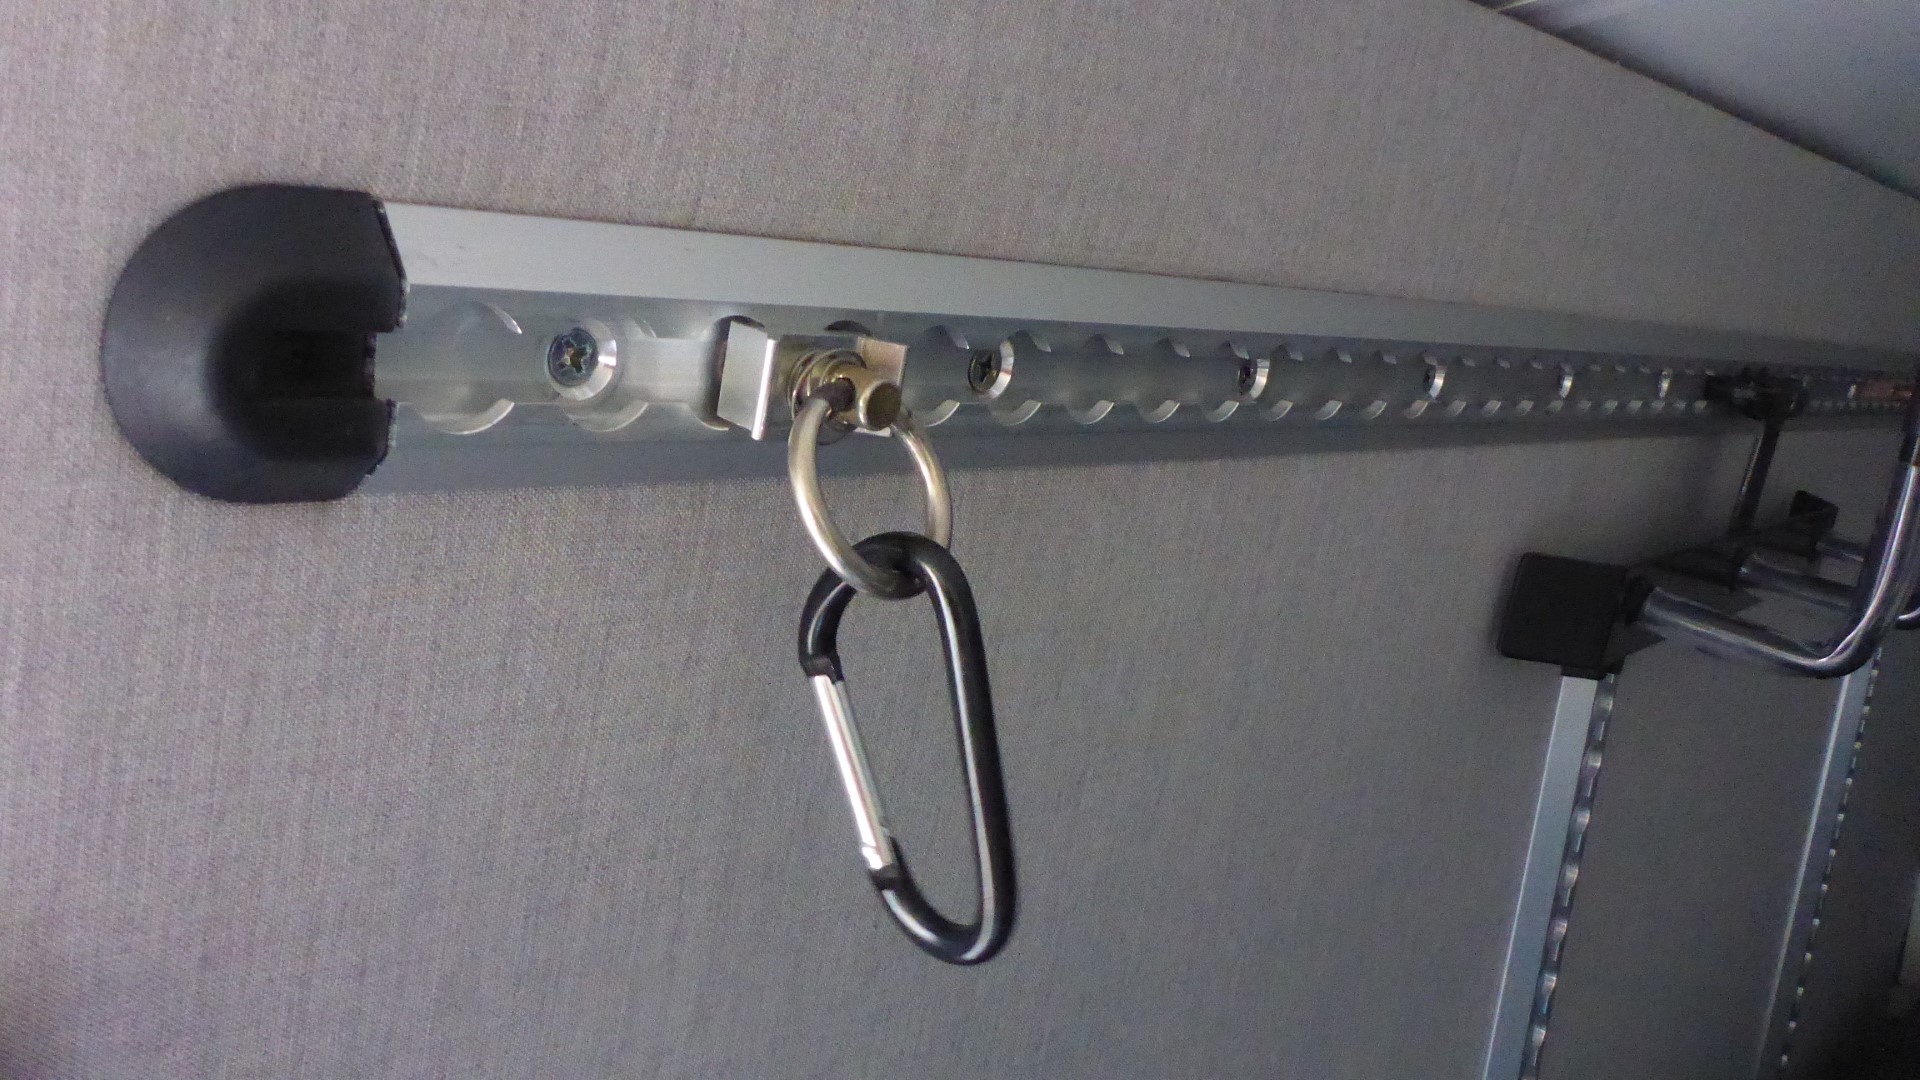
The L track comes in handy more times than I ever imagined it would. Being able to hang our gear, clothing, bags, etc comes in handy since there is limited space in the van. We use the L track tie-down loops with carabiners to hang our stuff. The Cargo Equipment 3 hook hanger is the best so far. We bought like 6 of them! Amazon sells these nice zippered canvas bags for cheap. We use those to store the unused hooks and carabiners.
- Multipurpose Organizer Utility Tool Bag
- Cargo Equipment Corp. Three Hook Hanger for L-Track
- Carabiners
Parts List
- 1/4″ plywood- sourced from Lowes
- 1/4-20 rivnuts
- 1/4-20 stainless screws
- 3M90 spray adhesive
- 3M77 spray adhesive
- 1/8″ 4lb foam
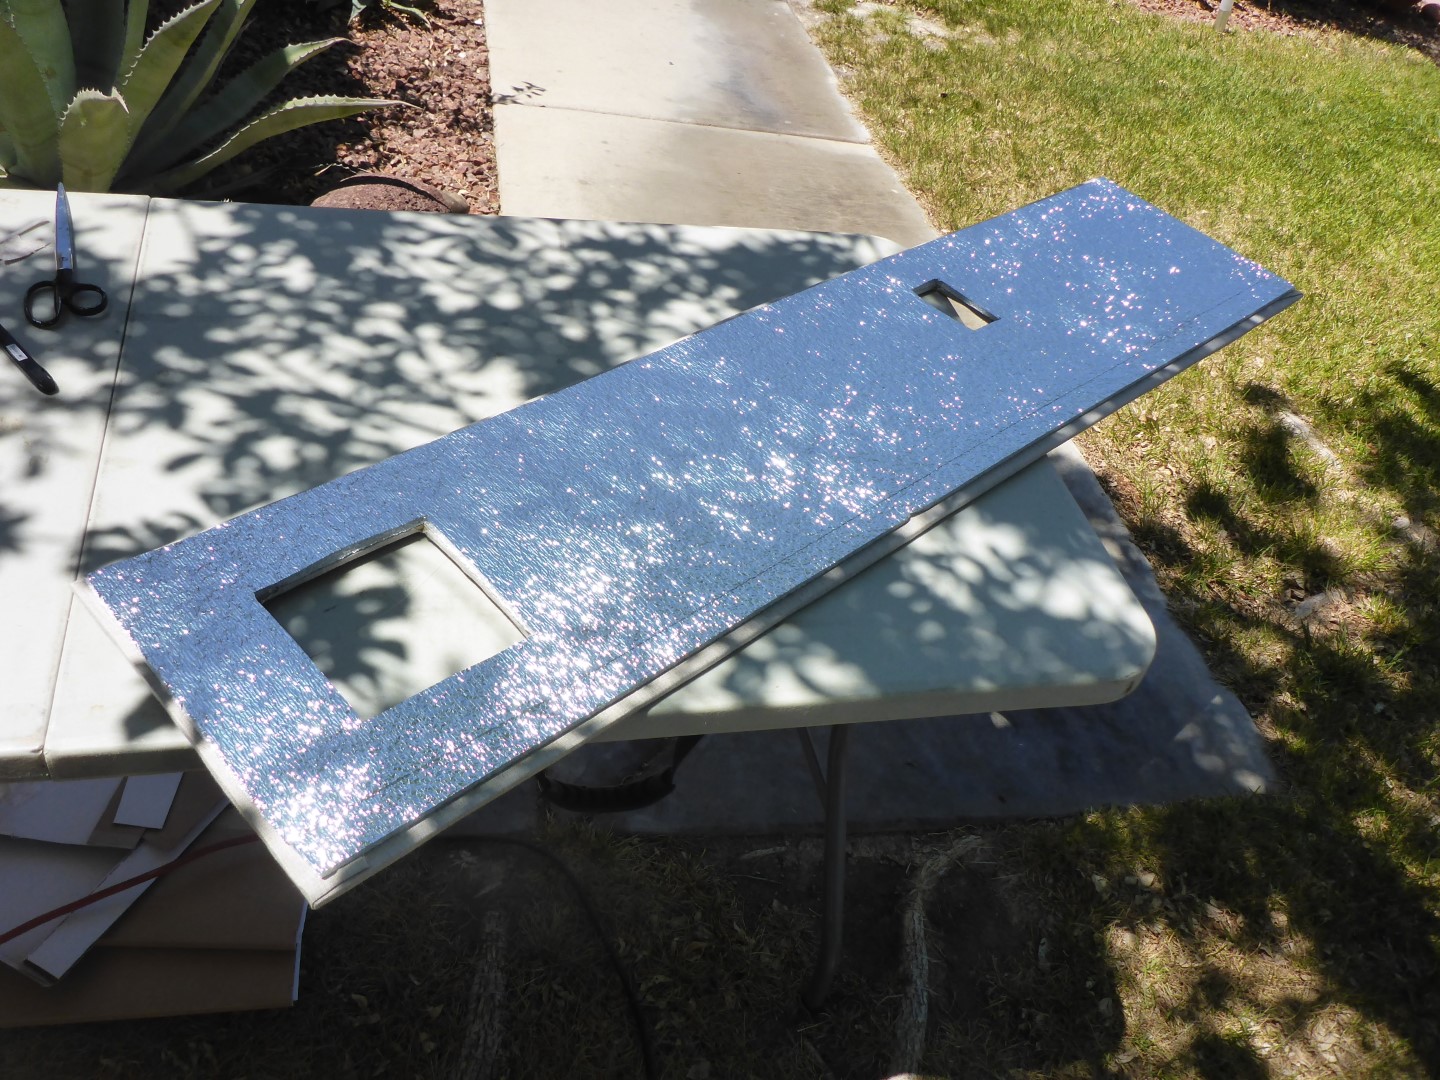
- Sunbrella Cast Silver fabric
- Low E foil-faced foam
- Angled L track
- L track end caps
- 3″ 16GA flat steel- sourced from Lowes
- carabiners
- Cargo Equipment Corp. Three Hook Hanger for L-Track
- canvas bags
- Polk Audio 6.5″ UltraMarine speakers
- Kenwood amplifier
- Rockford Fosgate amplifier
- 10″ shallow mount Rockford Fosgate subwoofer
- LED lights
- lighted rocker switch
21 Responses
David
Great work Mr. Pete. You do all the work so I can just copy it.
David
Pete
Haha thanks, David. Go for it. It’s still a lot of work but oh so worth it.
Peter van Wijk
Wow Pete! That interior is rad! Thank you so much for sharing your expertise with us aspiring vanlifers. I just bought a Dodge Sprinter 144 and your inspiration and information has made planning and executing its transition into ADV van a lot easier.
Pete
Thank you!! We’re very happy with how it turned out. With just a little patience (or alot haha) and some good planning, you can build whatever you can dream of. Good luck on your build. Let me know if you have any questions along the way. I’ll be adding even more from out buildout so make sure you are subscribed to get email notifications when I post up new stuff. Happy van building to ya!
marcin grusznis
Nice job, thanks for all the deets
Pete
Thank you!
JG
Hi Pete, Great Job! How are you liking the Sunbrella fabric so far?
Pete
Hi John! We love it. It cleans easily and feels/looks much nicer than tweed. We still have no complaints about it.
Przemo
Hi Pete,
it’s a lot of experience and practical knowledge what you share with us. Even I’m not a Sprinter owner it is very helpful for other car conversions! Thanks! for one of the best described conversion process!
What is still unclear for me when I’m reading this article, is how you measured/marked the right place on plywood to drill the holes for rivnuts, which were installed first, as i have understood? Your plywood piece is quite big so I guess it was a bit tricky, wasn’t it?
Pete
Thank you and I’m glad it is helpful to you.
As for the holes in the plywood, yes it was a little tricky, but not too bad. I started with the easiest hole which was the on the end/ closest one to the edge of the plywood. I could see where it was if I pulled back the plywood just slightly. Once had that hole drilled, I basically just measured where the next one was and carefully used an awl tool to poke a small hole through the panel. It was all done off measurements. Since the panels were being covered in foam before the fabric, there was a little wiggle room for error. Not every hole was lined up perfectly with each rivnut, but it wouldn’t be visible so it didn’t matter too much.
Cory
Looks great. How many yards of fabric did you use for the walls?
Pete
Thanks Cory. I ordered 17 yards and it was enough for everything. That’s having enough extra to do one wall twice too because I didn’t use enough glue the first time.
Joe
Hey Pete epic build out man. I was curious about the custom piece of sheet metal that was bent..is their anyway you can further detail that out… does it run behind, horizontally between all four vertical pieces? i hope that makes sense..looking forward to it
-joe
Pete
Hey Joe, thanks man! I don’t know what sheet metal you are referring to. The only thing behind the vertical supports is a piece of Thinsulate insulation. There is no sheet metal. The vertical supports span the gap where the window cutout is (if it were a passenger van).
JOe
Thanks for getting back so soon!
ok check it..”Since these supports were strong enough up and down, but flimsy in and out, I added one custom bent 1″ angle steel beam in the middle to prevent any deflection in the middle of the wall and L track. All the beams were attached to the van’s metal structure using 1/4-20 rivnuts and stainless bolts”
where did that custom 1″ metal piece go?
I hope that makes sense.
Cheers
-Joe
Miles
Hey! great work here. Wanting to confirm what layers you have on your mid-rear-door panels. Is it insulation glued to the wood, and then upholstered? Then the entire unit is VHB’d to the panel? Thanks!
Pete
Hey Miles. Thank you! Correct. It’s the same 1/8″ foam sprayed glued to the hardboard then the fabric is glued and stapled over it and to the back of the hardboard. Then the panel is VHB taped to the foil-faced insulation on the door. It’s been holding up great so far (1.5 years).
Denis Kalamar
When you attached the aluminum l tracks to the steel. Did it corrode over time from the reaction? Did you put something in between?
Pete
No, it hasn’t corroded. The L track actually doesn’t even touch the steel. The wall panels are in between the two.
Maia Averett
How have the panels held up? I have seen reports that 3M 90 is not strong enough for large panels (OurKaravan says that). Any thoughts?
Pete
Thoughts? There’s nothing to think about. Lol There’s been zero issues with the fabric or upholstery. I used 3M90 heavily on the foam and 3M77 on the fabric. It’s held up great. 👍