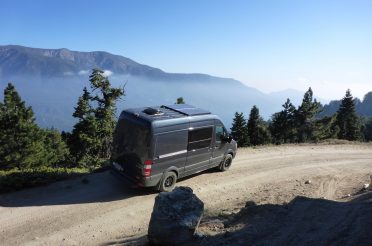
Do you want to start doing longer adventure rides and explore new areas? How about hike a specific trail or mountain that is difficult to find? Maybe you want to go find a cabin in the middle of the desert that you spotted while playing around on Google Earth? GPS tracks will give you guidance that you need so you don’t get lost.
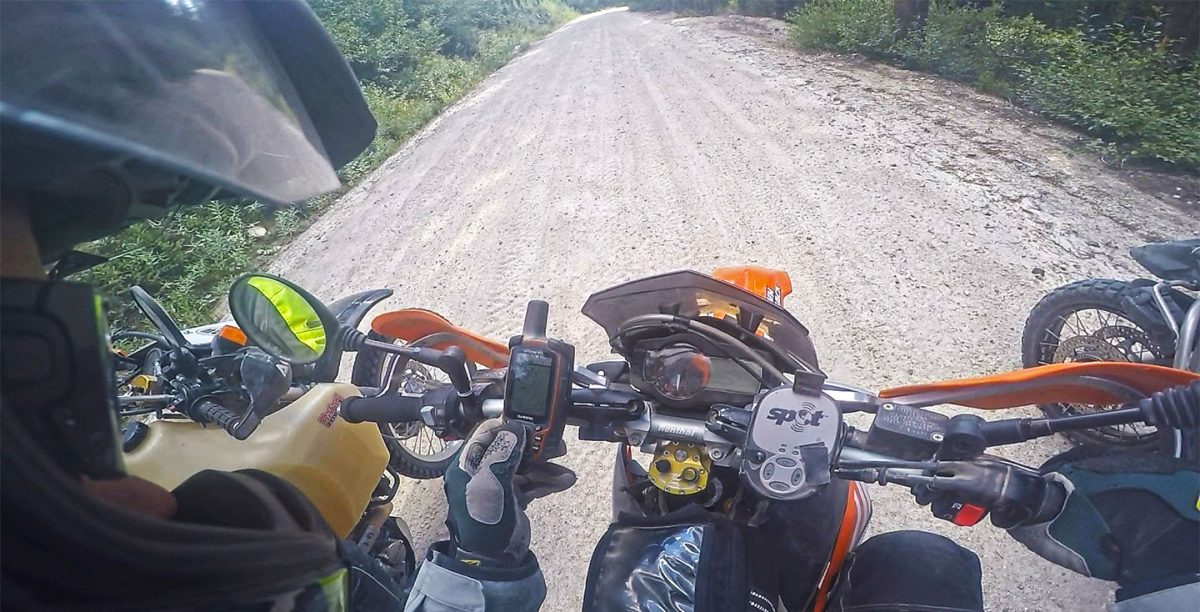
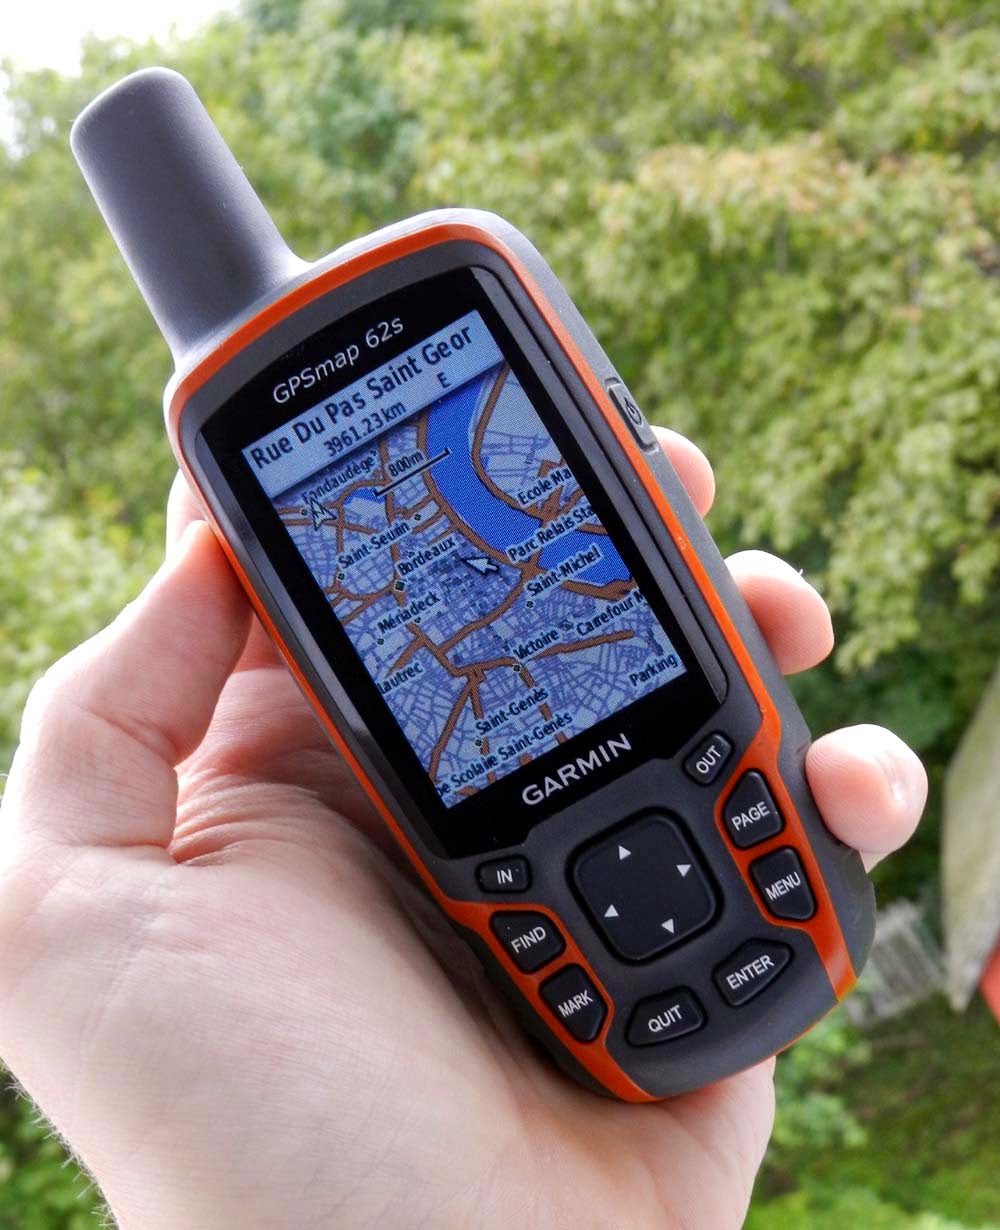 I use a Garmin 62s for navigating on and off the trail. Garmin has since updated the 62s to the Garmin 64s
. I have it mounted to the handlebars of my KTM 690 motorcycle using RAM mounts
. Yes, there are apps for your phone that can easily work offline without cel reception, but there are many reasons you want a rugged and dedicated GPS device that is quick and easy to use on the go.
If you are like me, you play around with Google Earth and scope out new areas that you want to visit. I usually pick a destination, then find what looks like small dirt roads or trails that connect me to them. GE has some pretty amazing imagery these days and you can even spot the difference between dirt roads and double track and even singletrack! So it’s time to create some tracks of your own and start a new ride, hike, or whatever adventure it is you want to do.
Drawing GPS tracks using Google Earth
Open Google Earth and navigate the map to an area where you want to create a track.
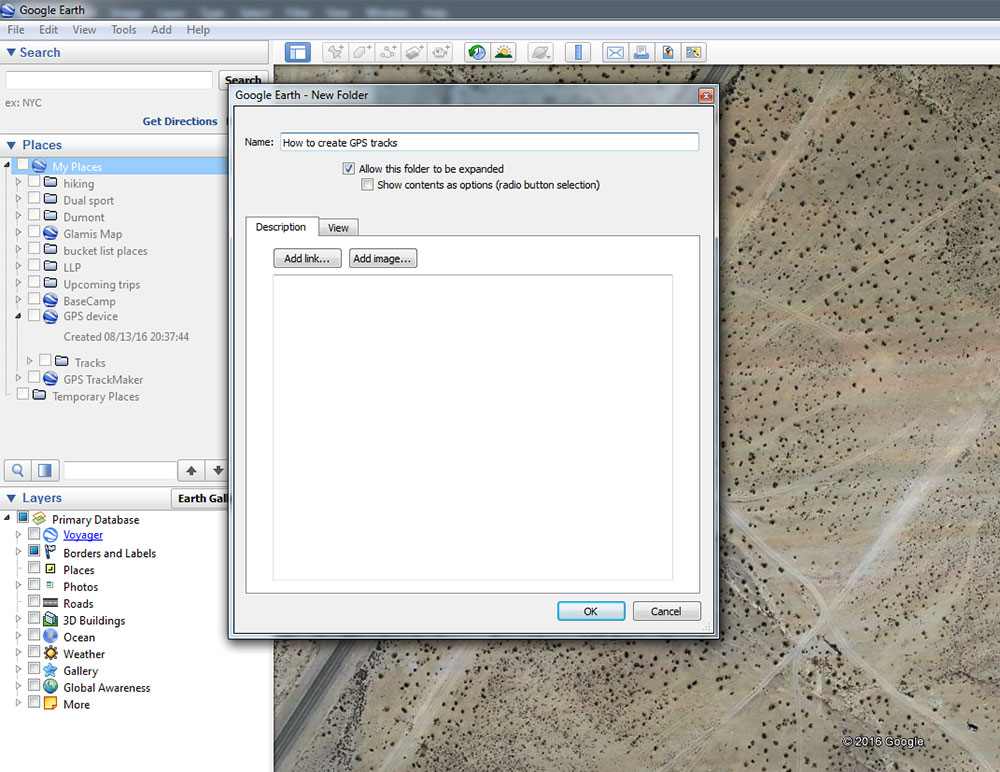
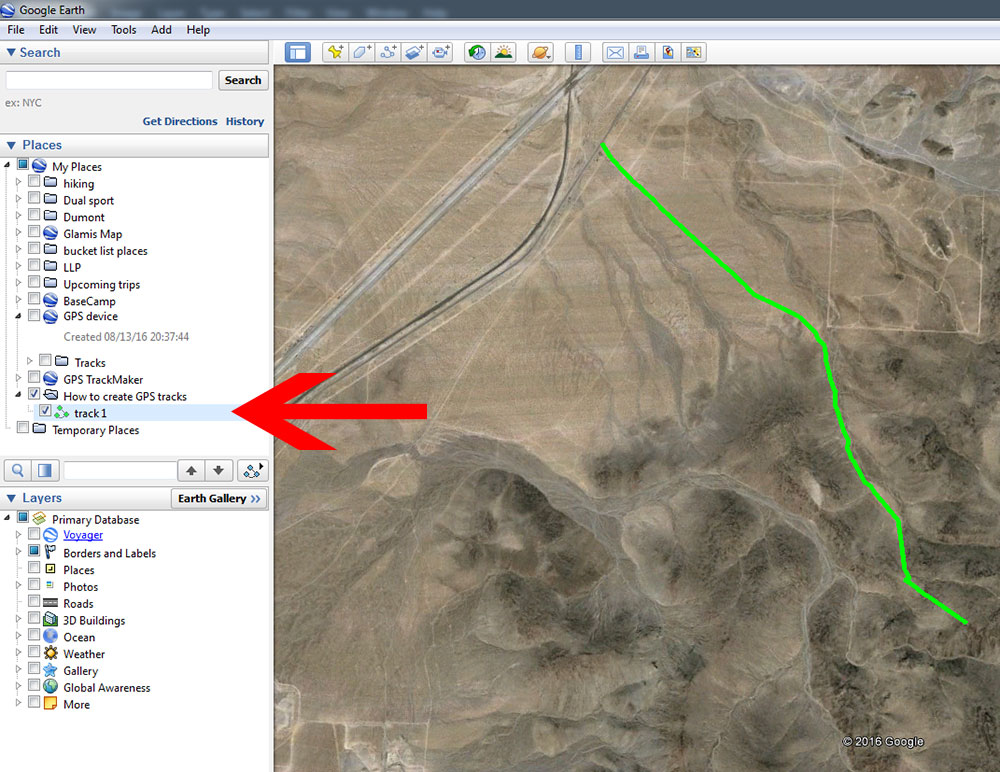
Step 1: Under Places in the left column, you’re going to want to create a folder for your tracks project. Right click My Places and Add Folder.
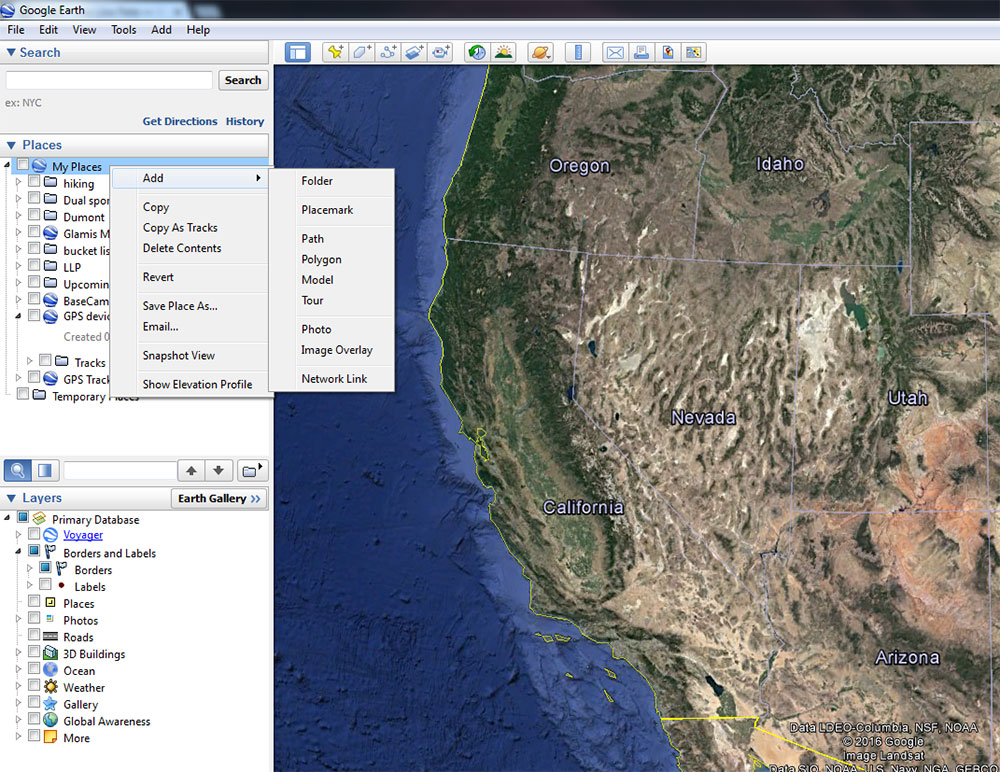
Step 2: Choose a name and click OK. The folder will appear under My Places.
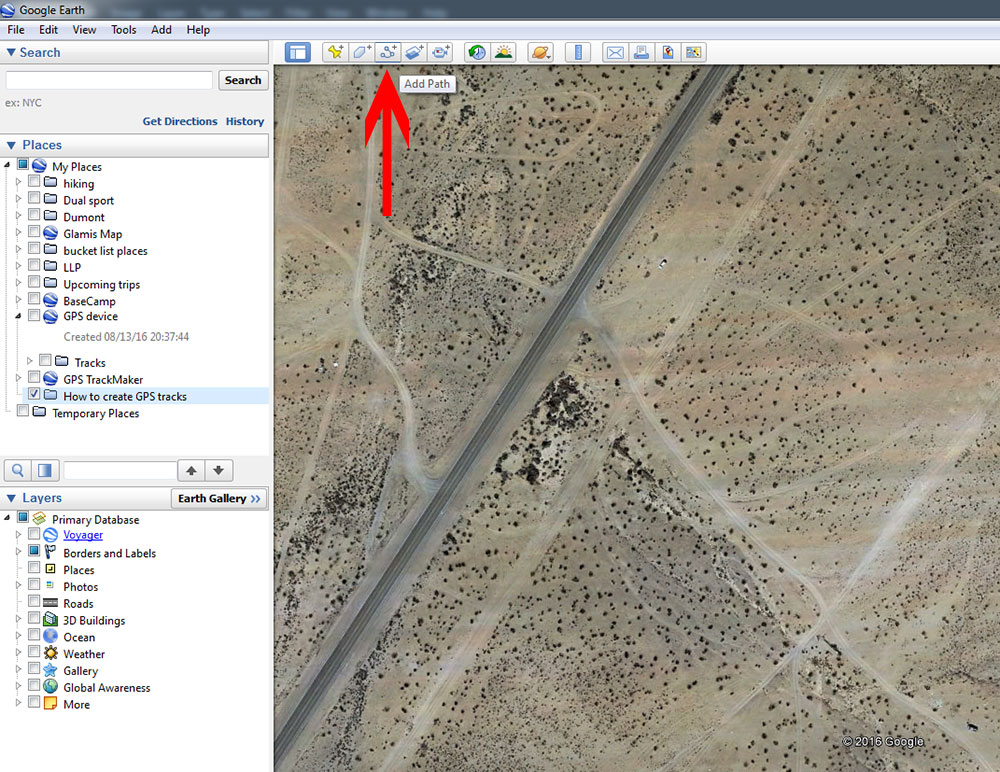
Step 3: Once you have a folder created and it’s highlighted, click the Add Path icon ![]() at the top of the toolbar.
at the top of the toolbar.
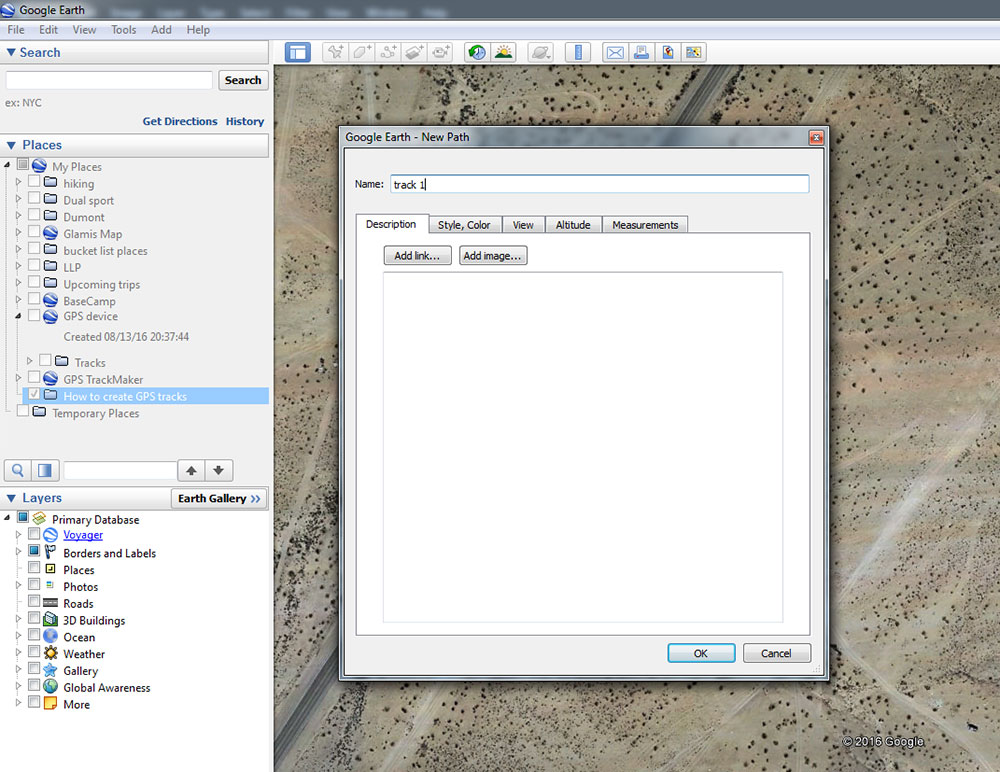
Step 4: A window will open and you’ll enter a name for the track. Once you enter a name, don’t click OK just yet. You need to keep this window open while you make your track. In order to see the map, just drag and move the window down and out of the way but leave it open.
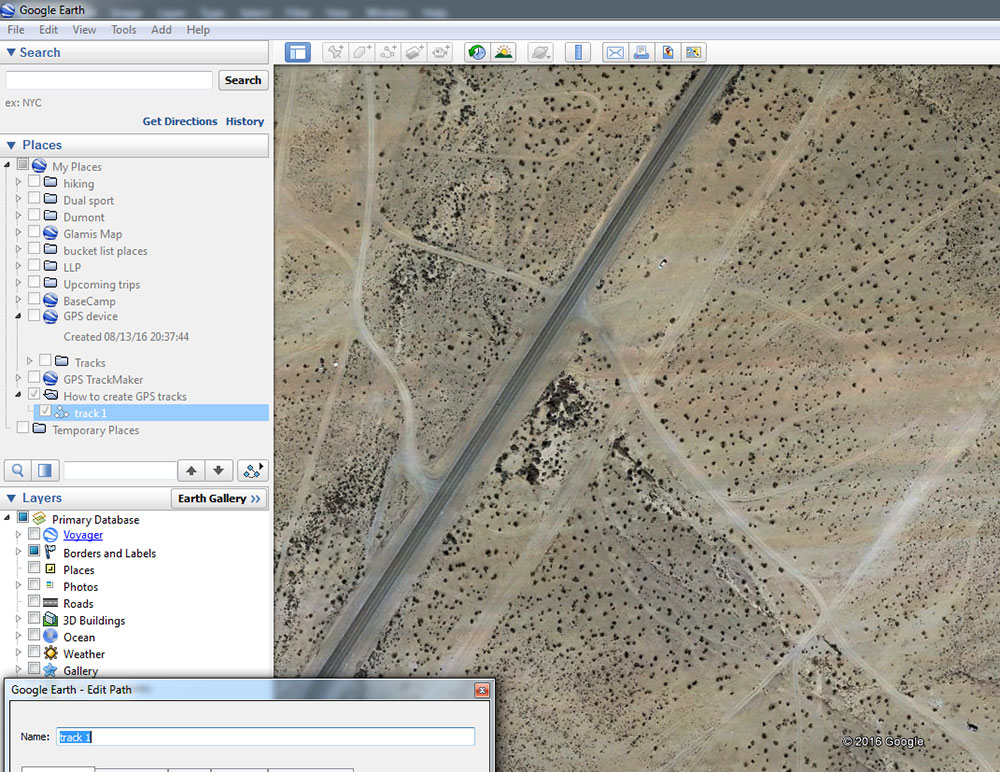
Step 5: Here’s where you will start drawing your track. Click on a spot on the map where you want to begin your track. Continue plotting points along a trail where you want to create a track. You can hold down the mouse clicker and drag, but the fewer the points/ the easier a track is to manage. If you make a mistake, the Delete key on your keyboard will delete the last point that was plotted as long as the Path Window is open. If you closed it and want to go back to edit the track, just right click the track and go to Properties. This will open the window. You can also move a point by positioning the cursor over the point until it changes color, then click and drag to move it.

Step 6: In order to continue drawing a track further on the map, simply use your keyboard arrows to move the map. Don’t forget, you can use the scroller on your mouse to zoom in and out too.
 |
 |
Step 7: Once you are done drawing your track, you can finally click OK in your track window that you previously moved down and out of the way. Your track will be saved and displayed under “Places” in the track folder. If you want to add more to this track at any time, simply right-click the track, then click “Properties”, and when the window pops up, move it out of the way (but keep it open) and continue to draw on your track.

Step 8: You can also add Placemarks or Waypoints to your track file by clicking the “Add Placemark” icon in the toolbar. ![]()
Leave the Placemark window open after naming it, move it aside, and drag your Placemark where you want it go on the map. Then when you are done, name it and click OK.


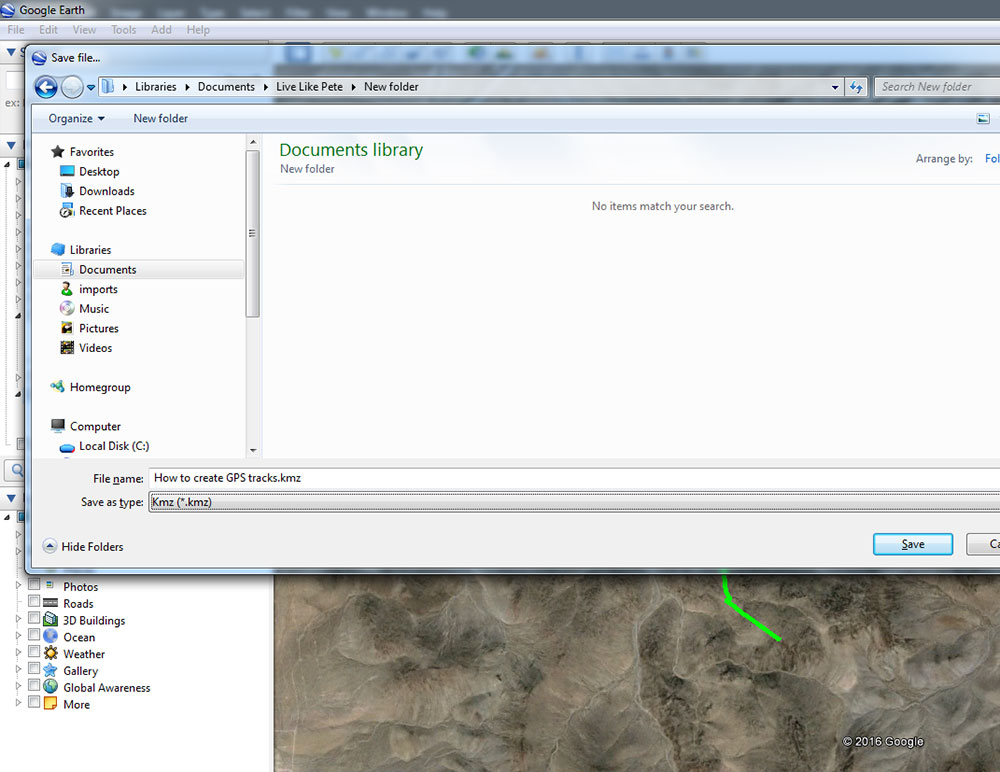
Step 9: Once you are finished drawing tracks and adding placemarks, you’ll want to click the track folder name in order to highlight it, then go up to File> Save> Save Place As. Enter the name and save the file to your computer. It will save as a .KMZ file. Google Earth uses this file type and it can be imported into Basecamp which is what you’ll use to add the tracks to your GPS device.

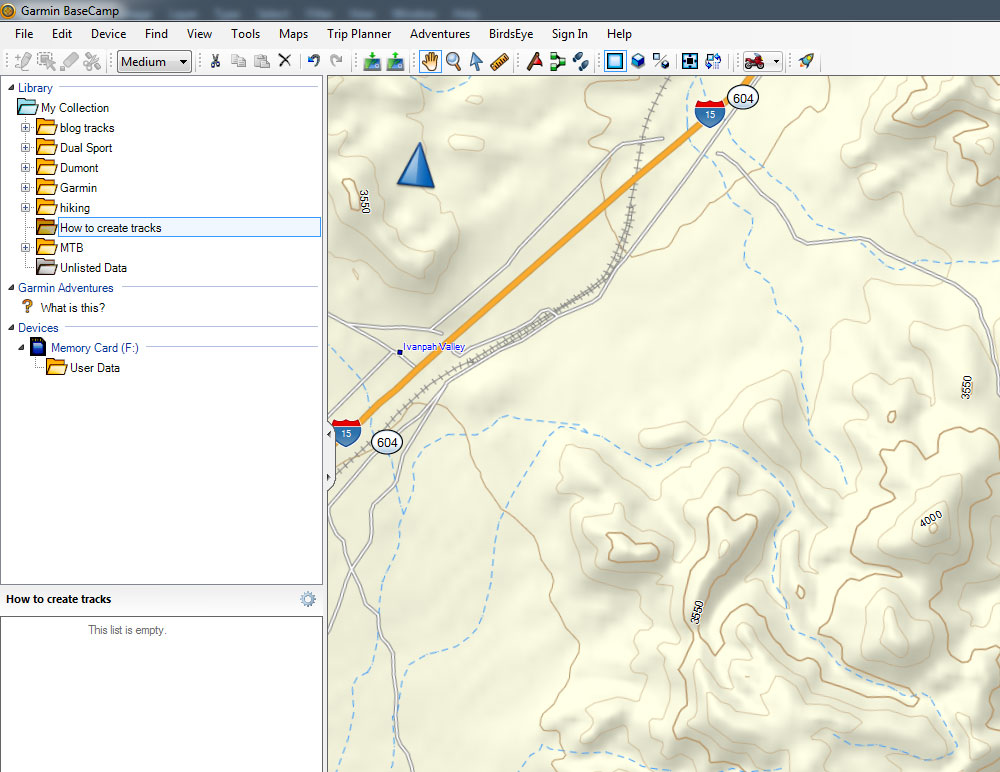
Importing Google Earth Tracks Into Garmin BaseCamp
Garmin BaseCamp is a free mapping program that allows you to more thoroughly create and adjust your tracks before importing them into your Garmin device. It works similarly to Google Earth, but has more functions.
Step 1: Right click My Collection, then click New List Folder and name it. This will be the name of your entire track file including tracks and waypoints. To demonstrate, I labeled mine “How to Create Tracks”. Your track folder will appear under My Collections.

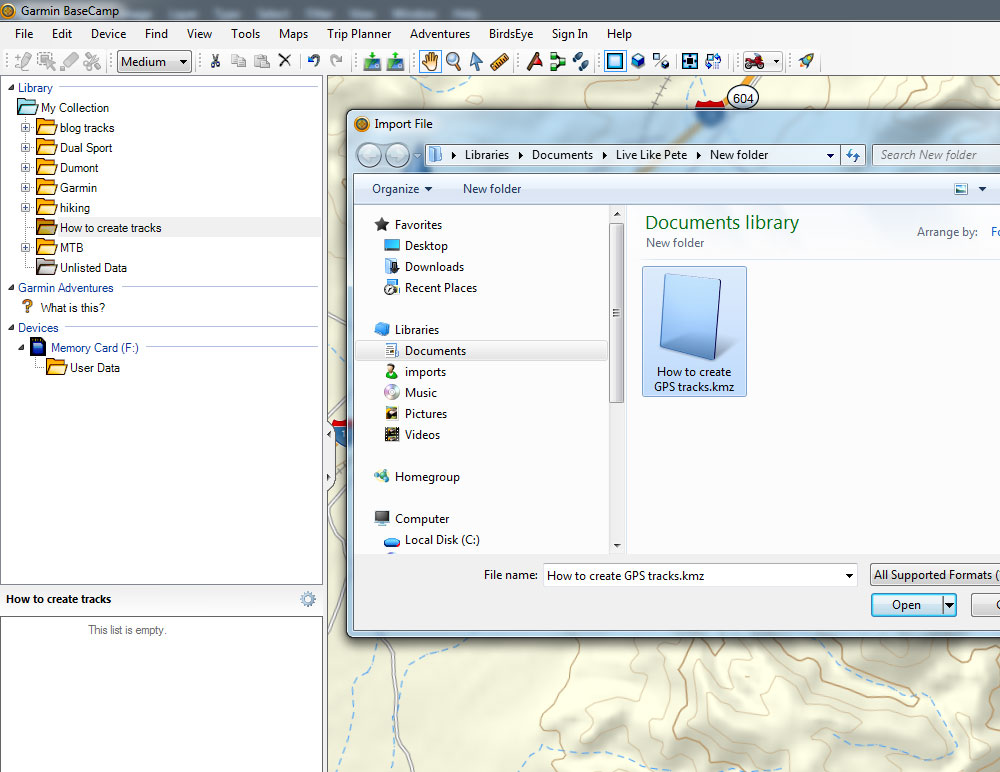
Step 2: Next, you will import your Google Earth tracks. Click your tracks folder to highlight it. Then go up to File > Import into [your tracks folder name]. Select your .KMZ tracks file from your computer.

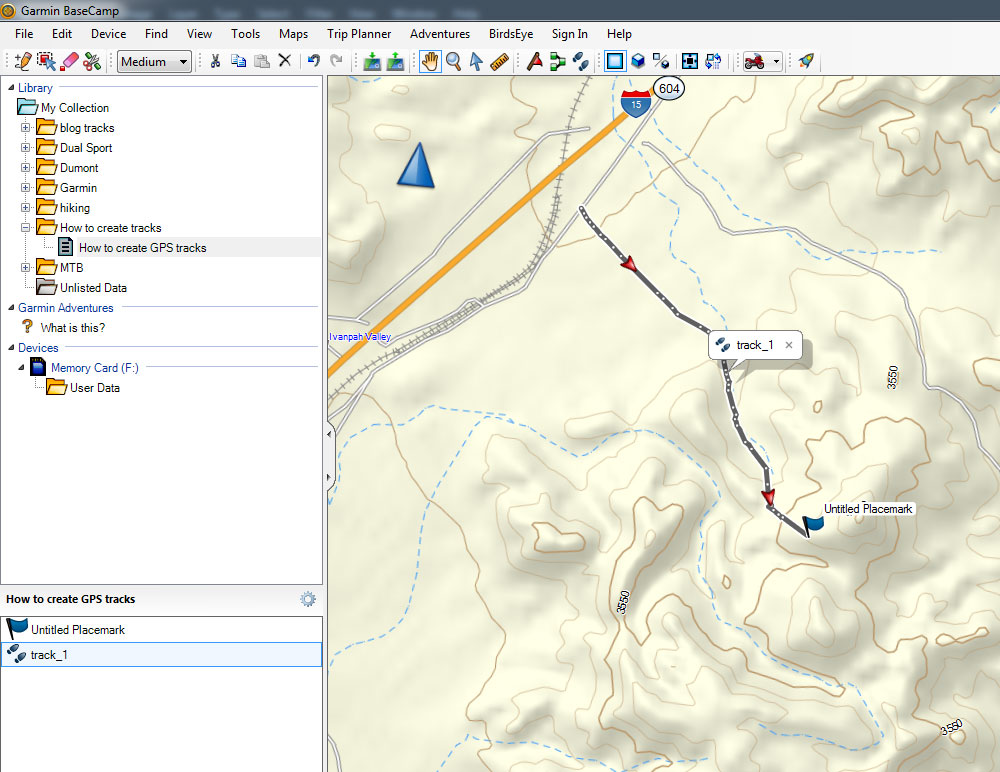
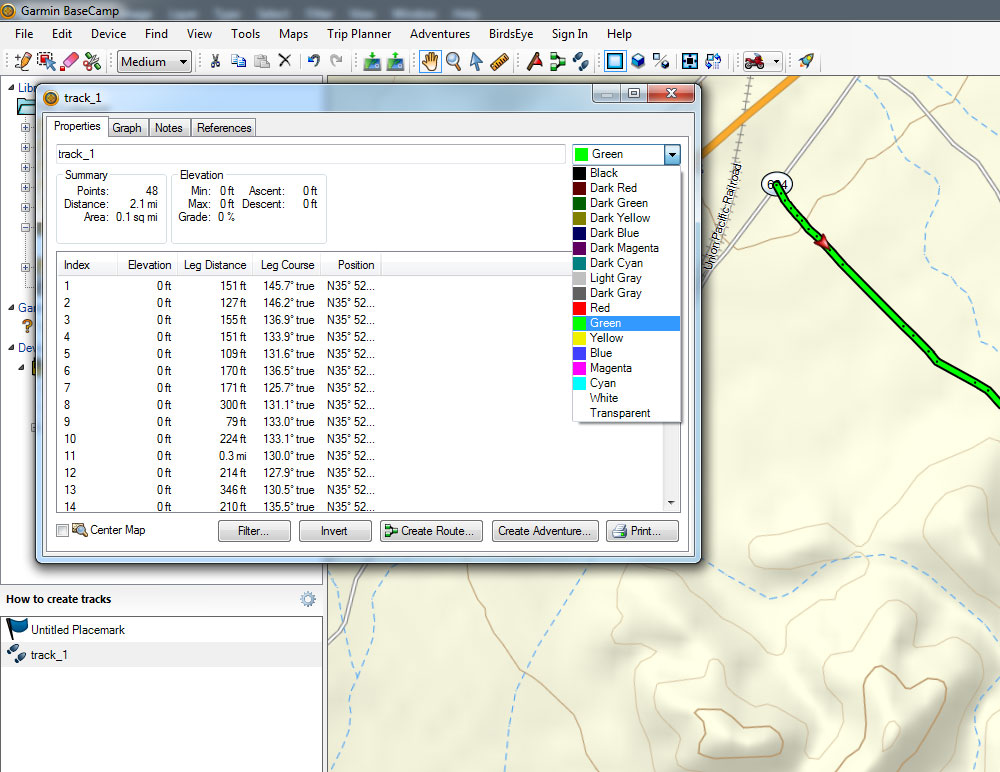
Step 3: Your tracks and waypoints will now show up on the map in BaseCamp as well as listed separately on the bottom left pane. The track color and name may differ slightly than your original. You can edit this by double clicking the track and selecting the color. You can also rename your waypoint or track the same way.
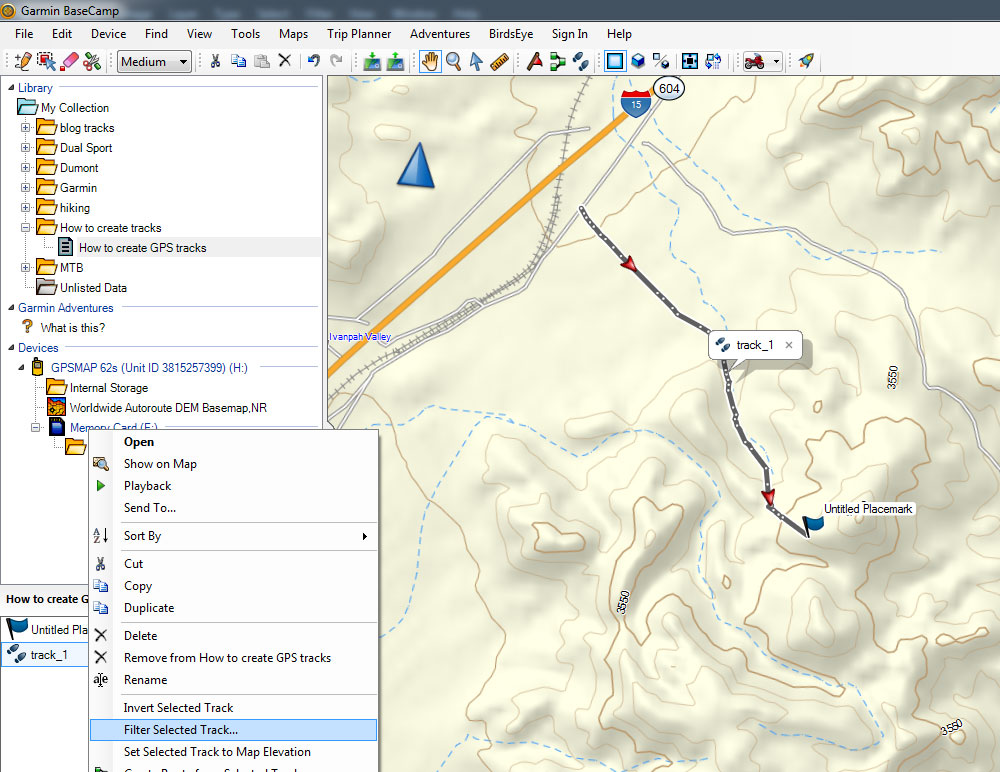
Step 4: One thing that I like to do, mostly because it was required on my older Garmin 60CSX, is to filter each track down to 500 points each. There is no need to have 20,000+ points for a track. BaseCamp has the ability to filter or simplify your track if there are a ton of plot points that you don’t need. You can select how many to filter them down to.
In the lower left pane, right click your track, then click Filter Selected Track. You can choose how many the maximum points should be. I always go with 500 because that is the magic number that will work for all Garmins, new and old. My 62s is capable of many more, but if I want to share my tracks with my buddy who has a 60csx, he won’t be able to upload them until he filters them down to 500 points.

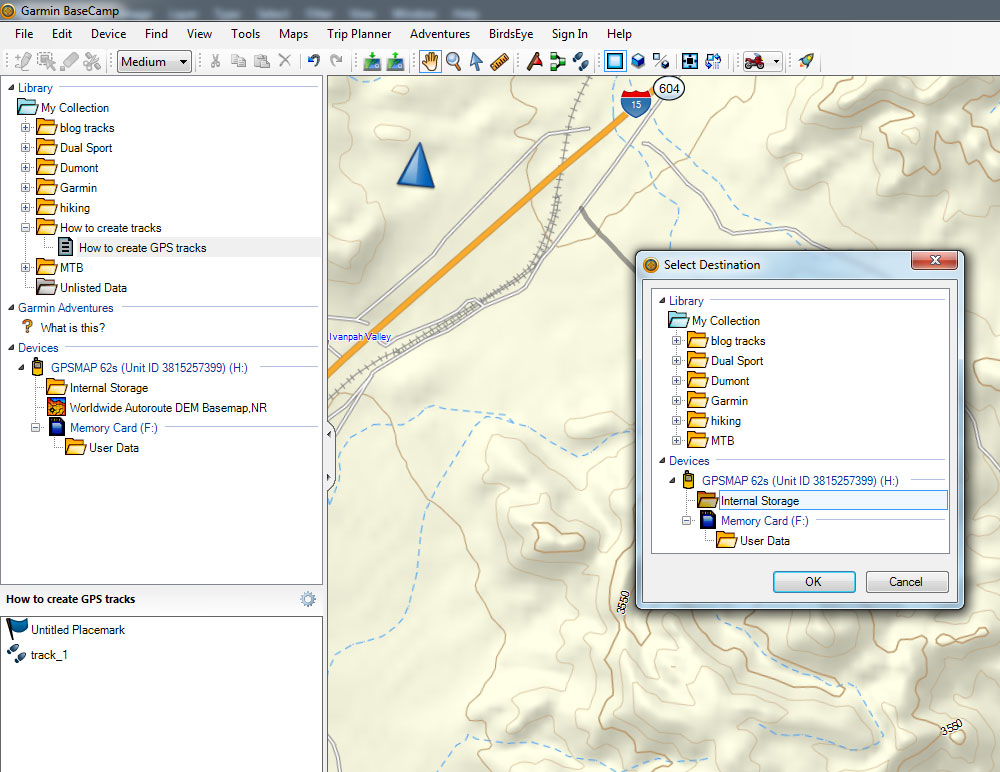
Step 5: Next, connect your Garmin GPS device to your computer using the USB cable. Your device name will show up under Devices to the left.
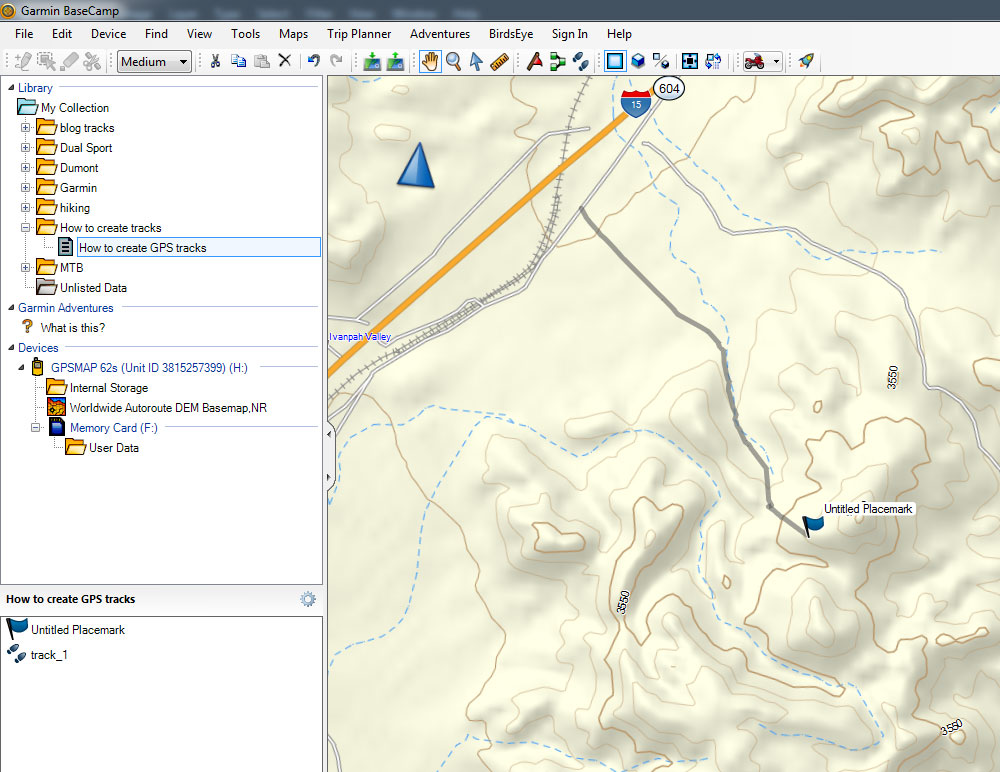
Step 6: When you are ready to transfer the tracks and waypoint(s) to your GPS device, right click the tracks folder or list and click Send To…
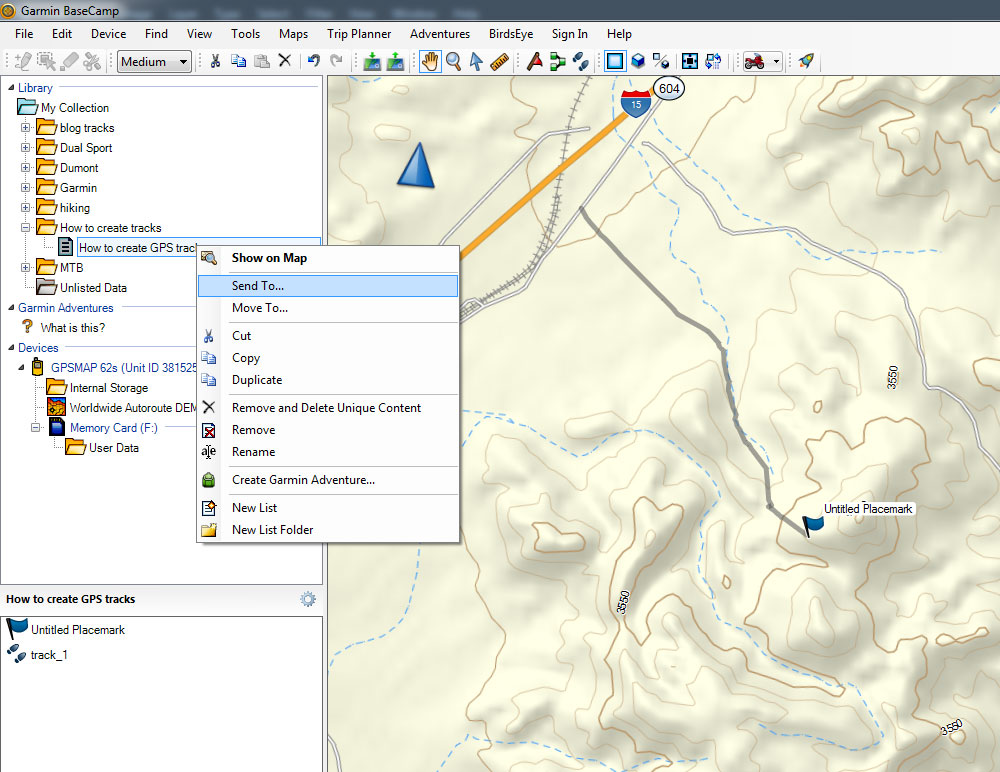
Step 7: A device window will pop up and your Garmin will show up. Some units have the option of internal storage or memory card. Click where you want to store your files on your GPS. Your tracks will now show up on your device map. Be sure to go to the track manager and click the box that says “show on map” so you can see it.
Downloads
Google Earth, download it for free> https://www.google.com/earth/
Garmin BaseCamp, download it for free> http://www.garmin.com/en-US/shop/downloads/basecamp
Many websites such as GPSXChange offer free GPX files for download. A GPX file is basically the universal GPS file type. It easily imports into Google Earth or BaseCamp. This is an easy way of planning a trip and using your GPS with a track that has been explored before.
Question or comments?
Obviously this is a very quick overview of the most basic steps to creating a track. You have to start somewhere though. My best advice is to start with one simple track. Find something that is off the beaten path on Google Earth, create a track for it, upload it to your GPS device and go see if you can follow the track in the real world. Once you figure that part out, you’ll be ready to map out a multi-day adventure.
Still confused? Leave a reply below and I will be glad to help or answer any questions.


2 Responses
Bo Byrd
Hi – your article was the best one Ive seen online as far as great instruction goes, but Im trying to do something a bit different; is it possible to use GoogleEarth and a NMEA GPS device to then walk a trail (that is not shown on GoogleEarth) with the goal of creating KML of the trail itself? Id then use the KML to import into GoogleMaps “My Maps” for a private map of some trails.
OR there very well may be a better way of doing this? I have a bluetooth GPS puck that outputs NMEA.
Pete
Hey Bo, I replied to the FB comment above. Check it out. Hope that helps!