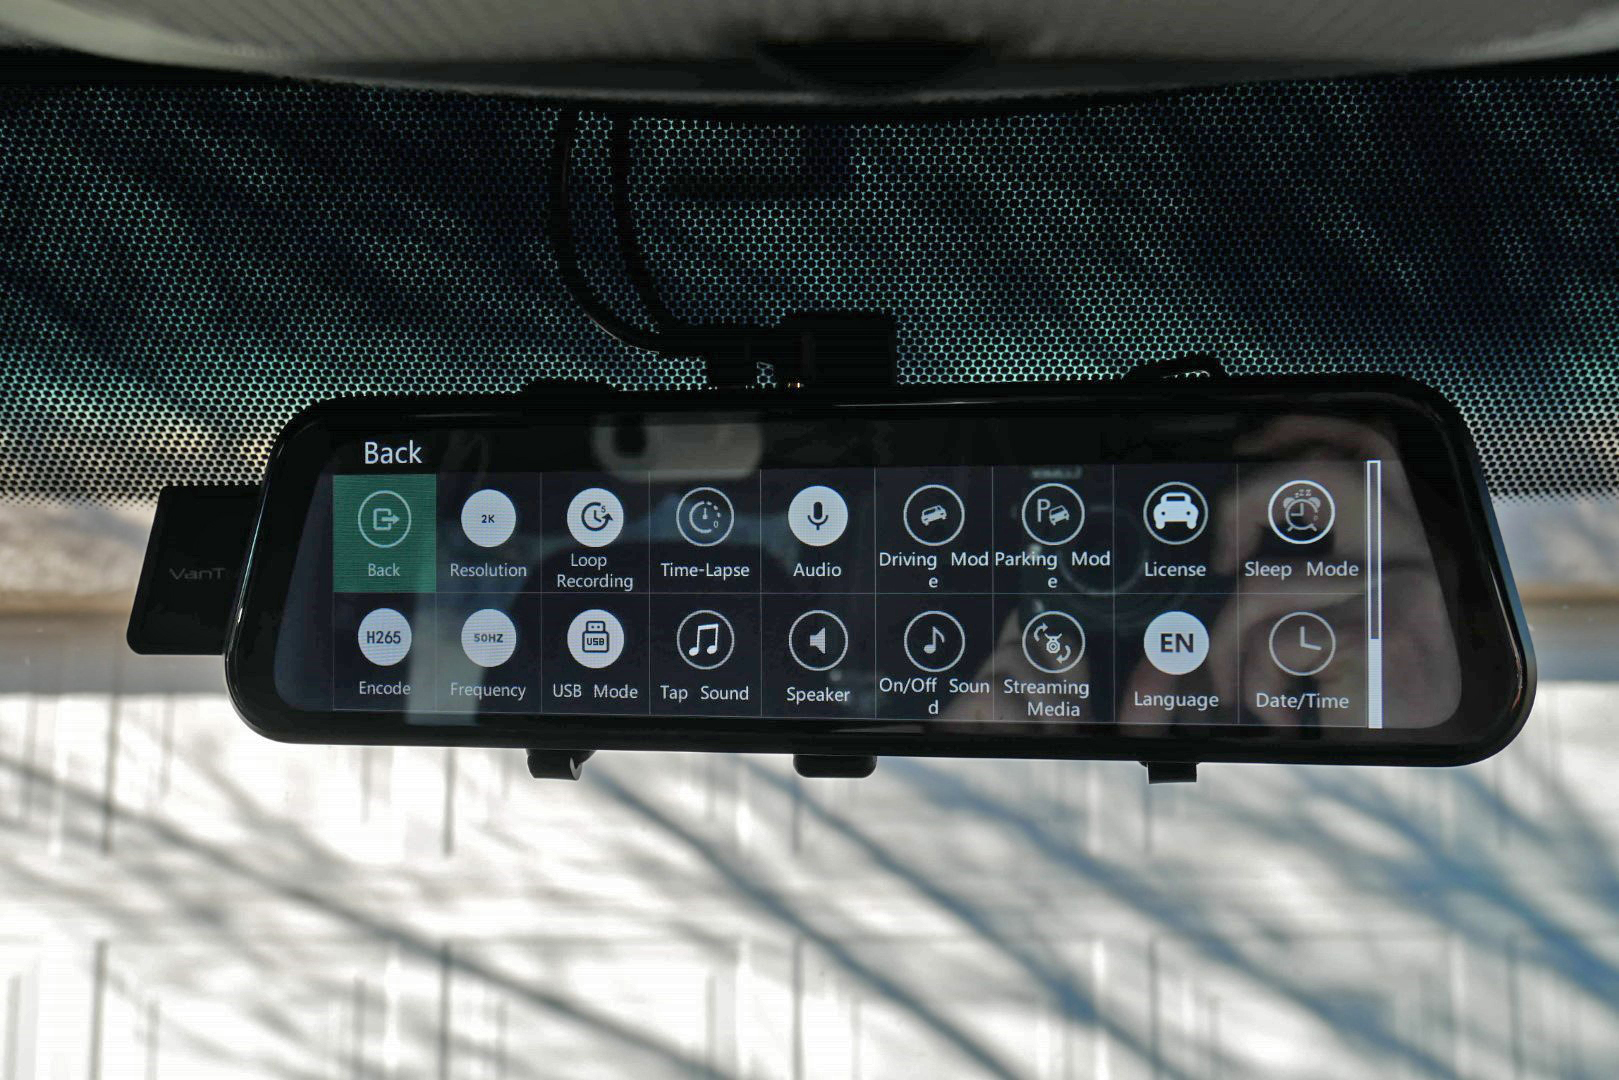
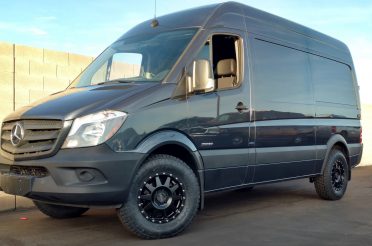
Anna and I recently had the idea of adding a dash cam to our Sprinter van. With all the places we go, I thought it would be nice to capture some traveling shots as well as have the camera always rolling just in case. Throughout my Amazon searches, I came across a mirror that has an integrated front camera as well as a remote rearview camera that you can mount wherever you’d like. I thought this would be especially handy since we don’t have rear windows in our van. The screen is integrated right into the mirror face and uses touchscreen technology to adjust the brightness, settings, camera views, etc all for under a hundred bucks! This thing has night vision, good quality camera sensors, and a wide field of view. It uses a micro SD card for recording and continuously loops. Accessing the footage is easy. You can either use the mirror screen to play it back or you can plug the card into a phone or computer to view or transfer. There are lots of other cool options like timelapse, photo capture, timestamp, and more.
2021 Update: The Vantop mirror that I purchased is no longer available on Amazon,
but there are plenty of other upgraded models that are similarly priced.
12“ Mirror Dash Cam Backup Camera
What’s Included?
- Mirror with straps to attach to the factory mirror. A small plastic wedge tool is included too. This helps with installing the cables behind your weatherstrip, headliner, etc.

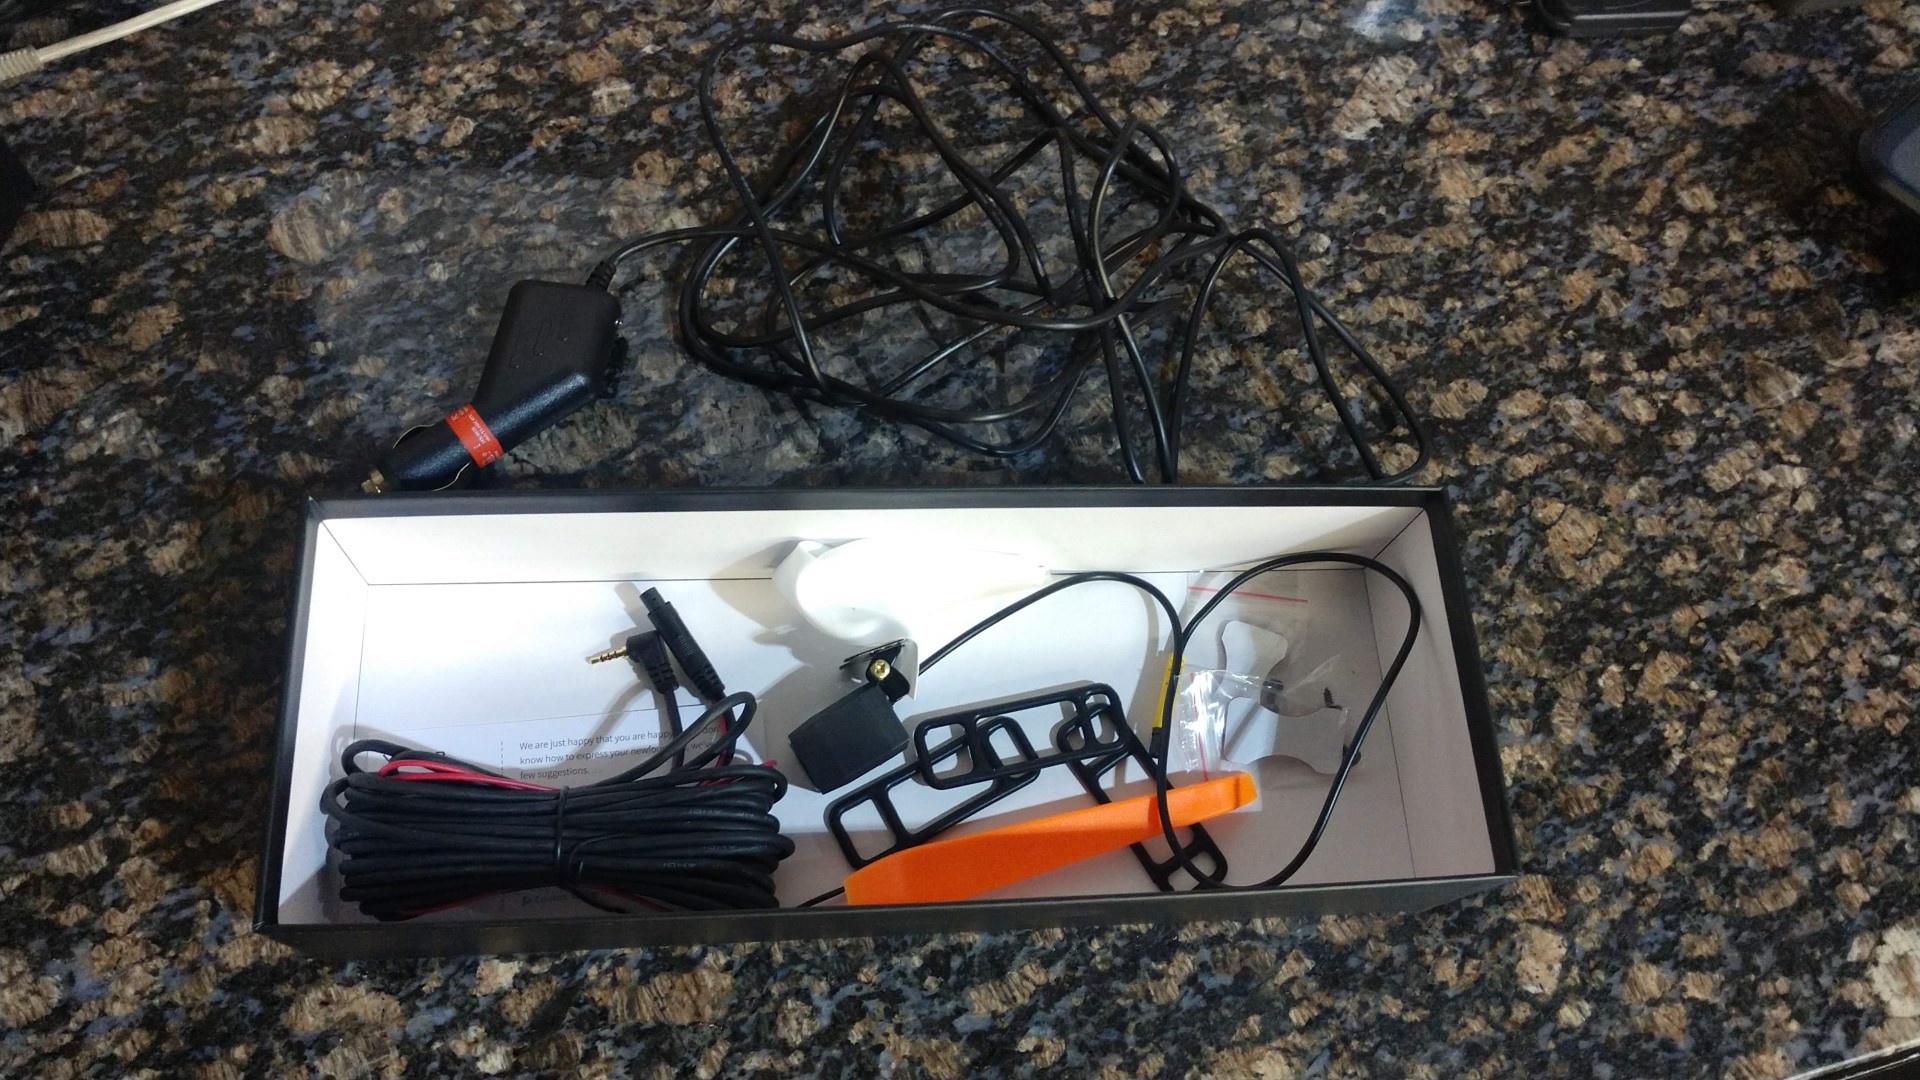
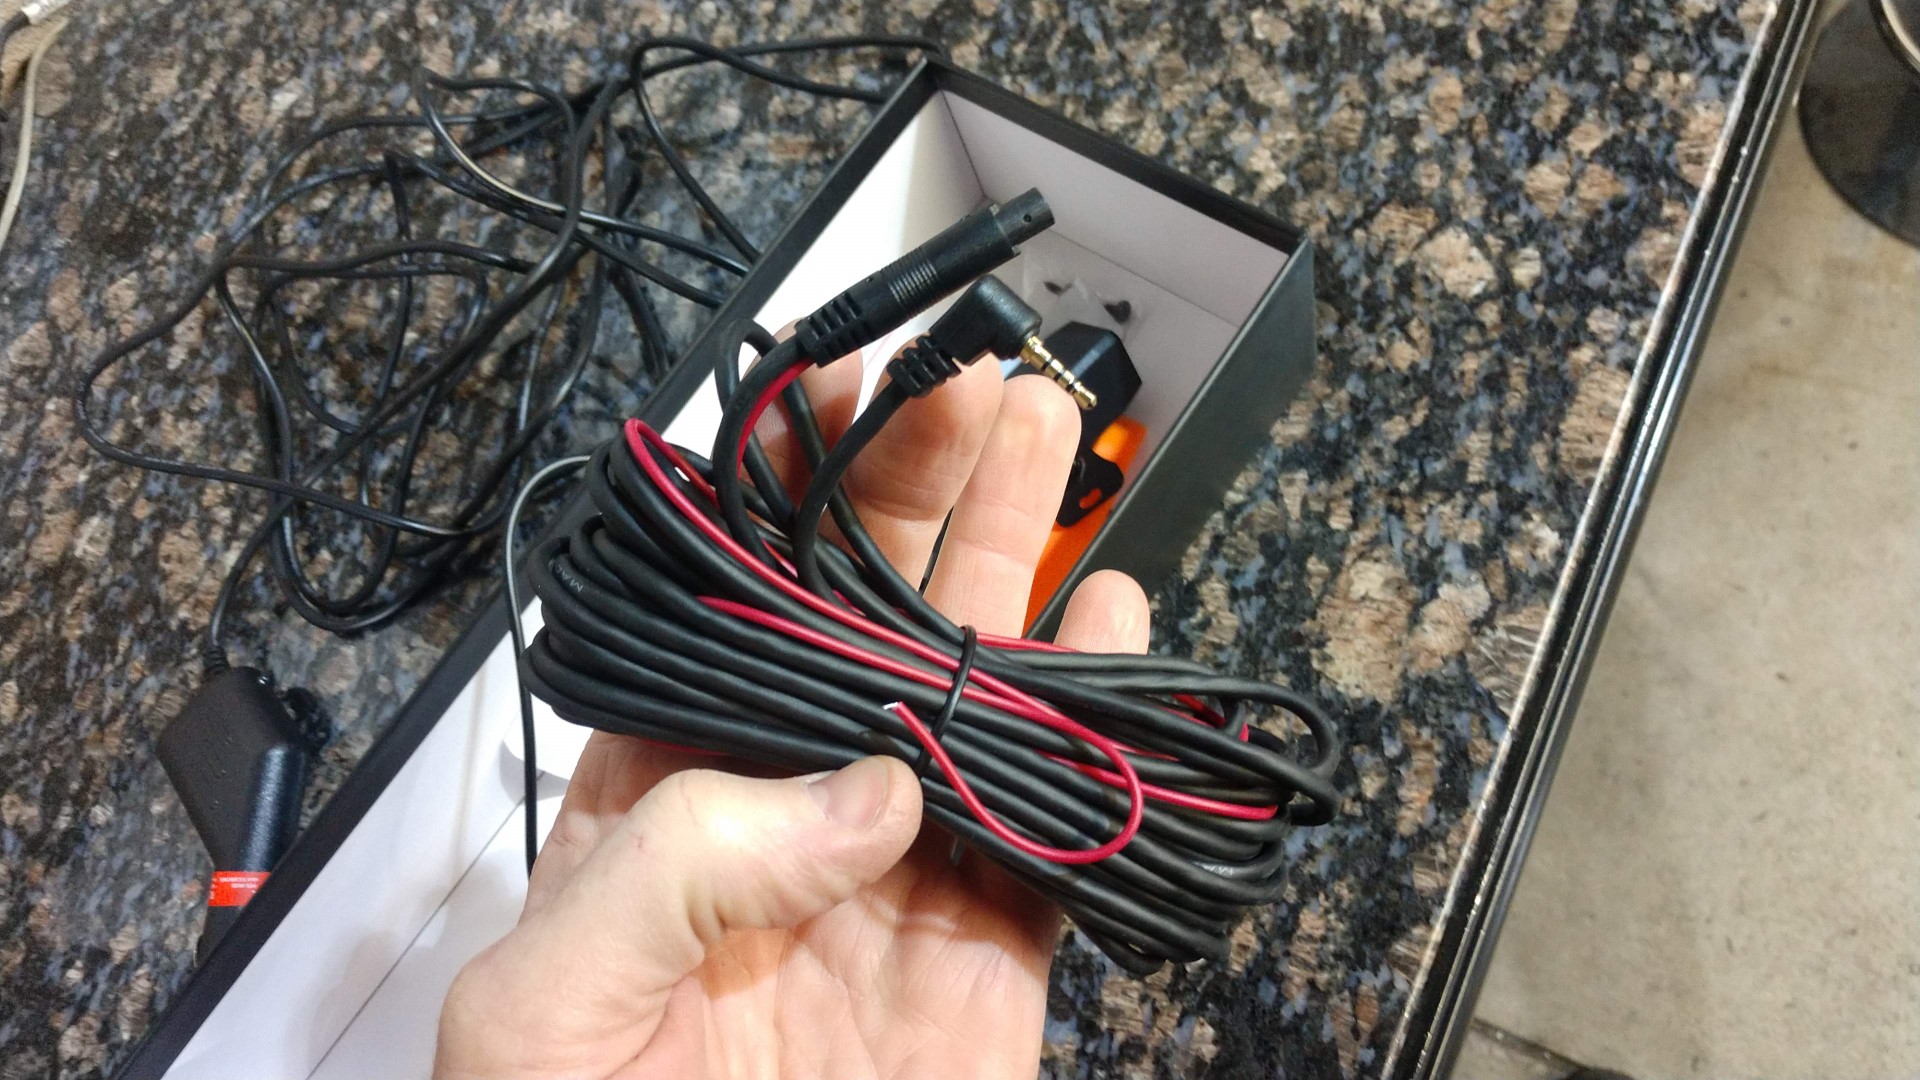
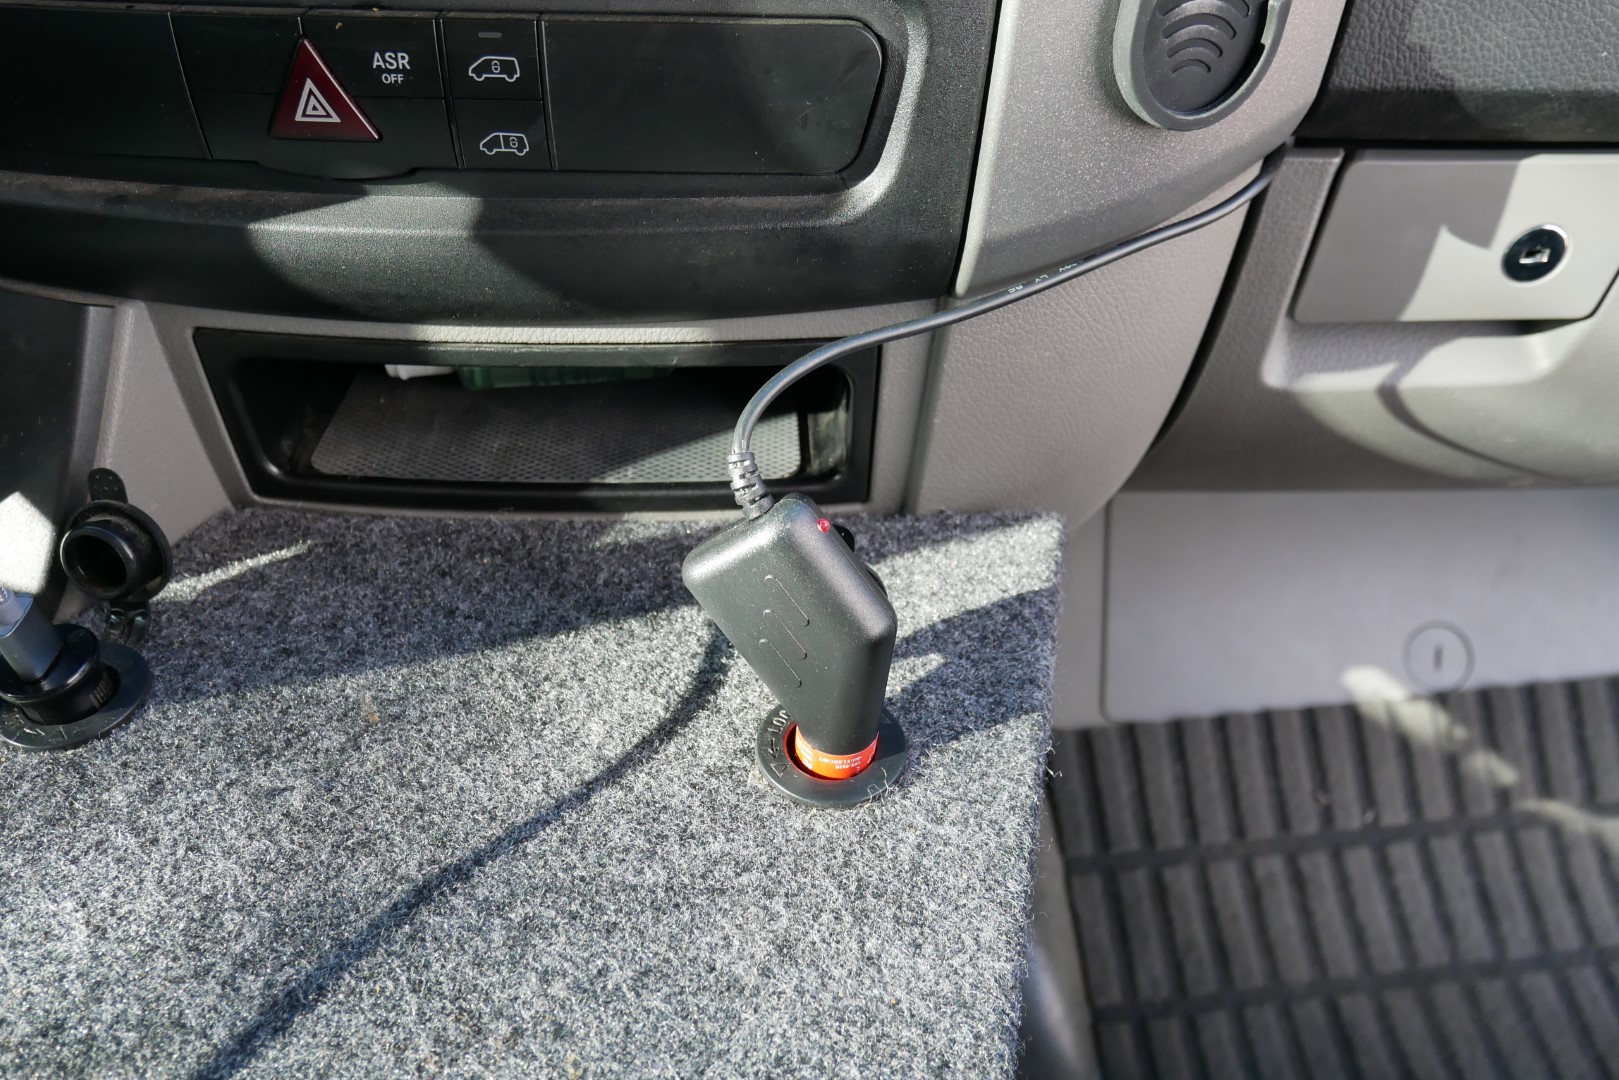
- Power adapter & 18 ft video cable. The power cable is long enough to route from the mirror, tuck into the headliner, go around the dash, and back down to the cigarette outlet. The video cable is long enough to run behind the headliner to the top/ rear of a 144 Sprinter, but if you are going under the van with it or have a longer 170 model, you’ll need an extension video cable.

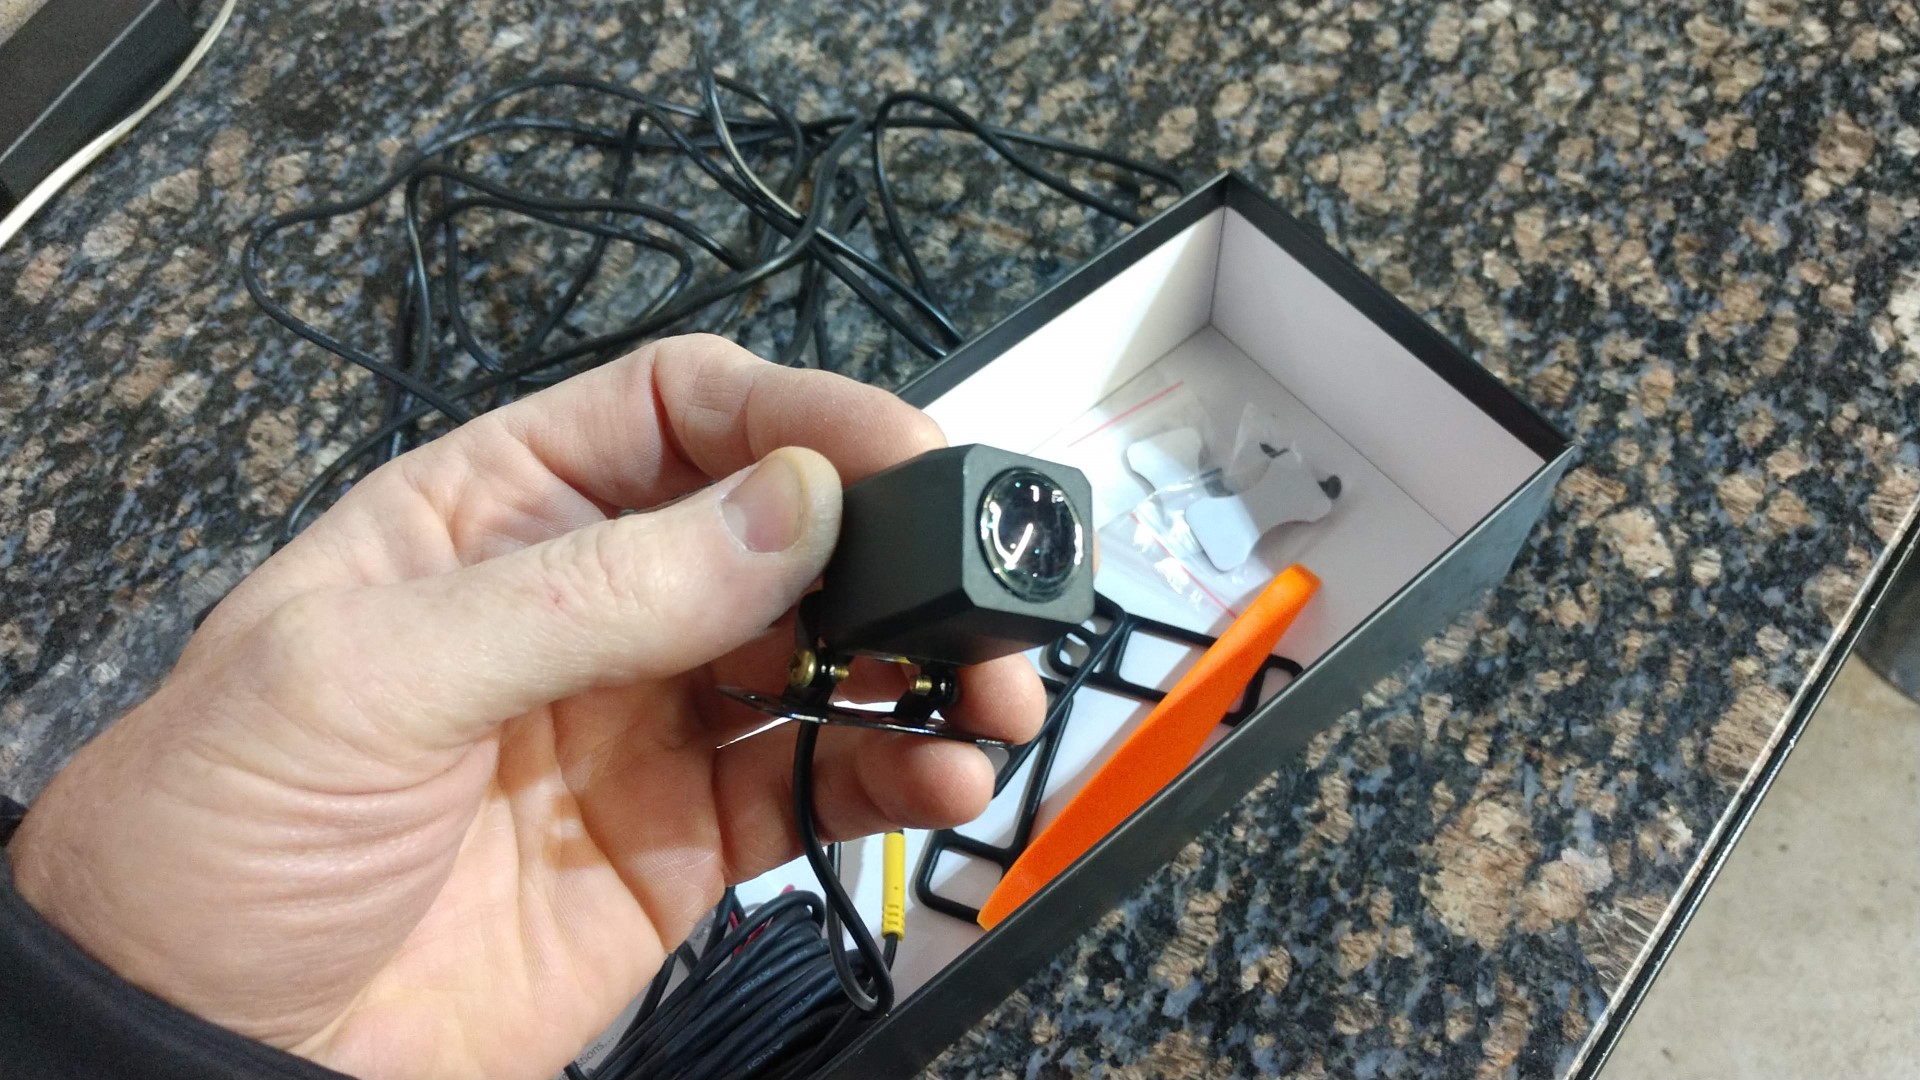
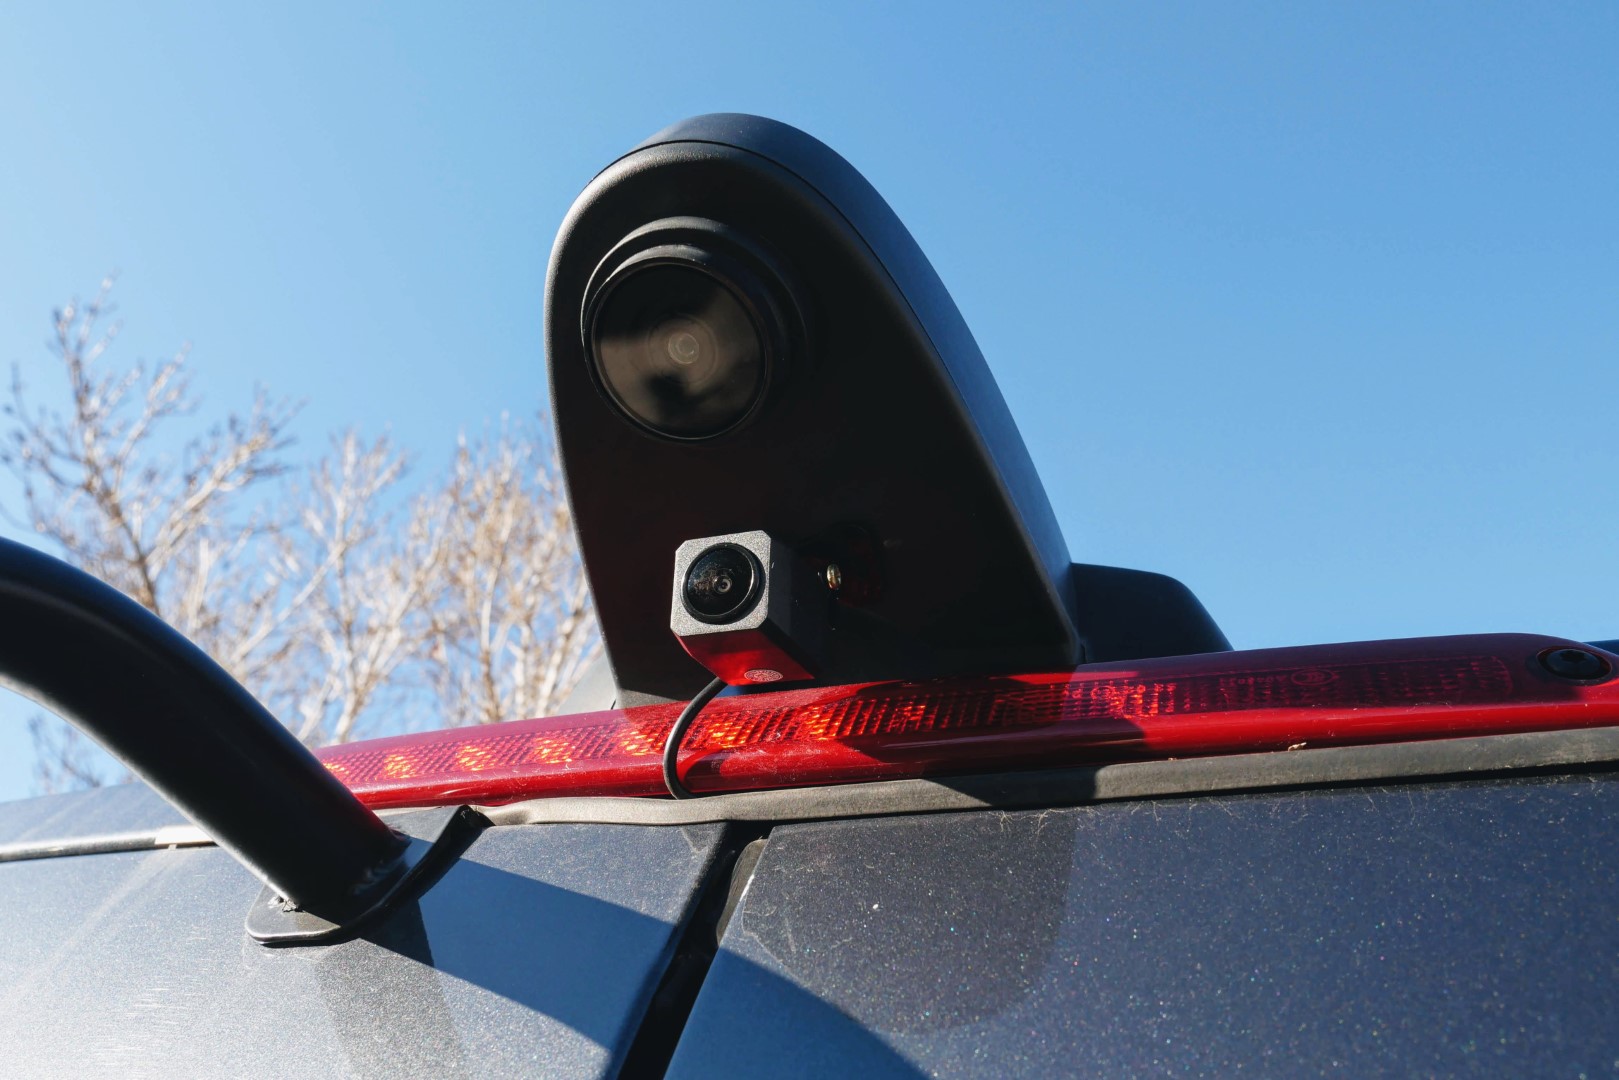
- Rear camera and bracket
Installation
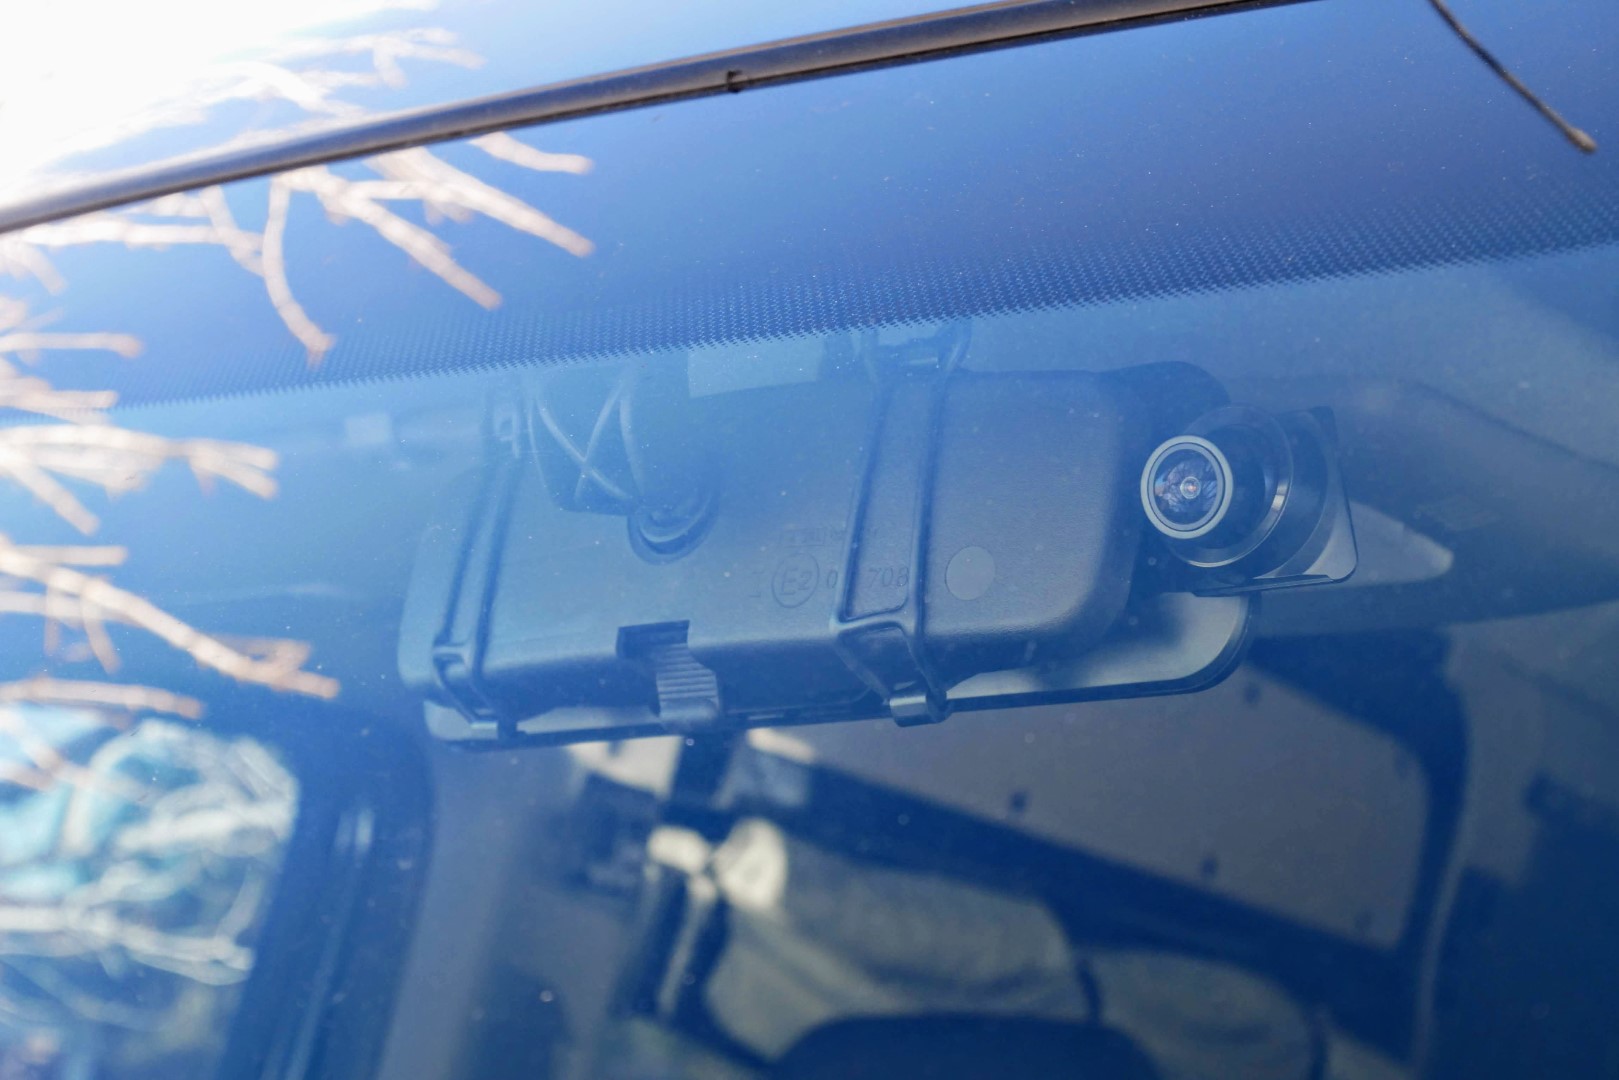
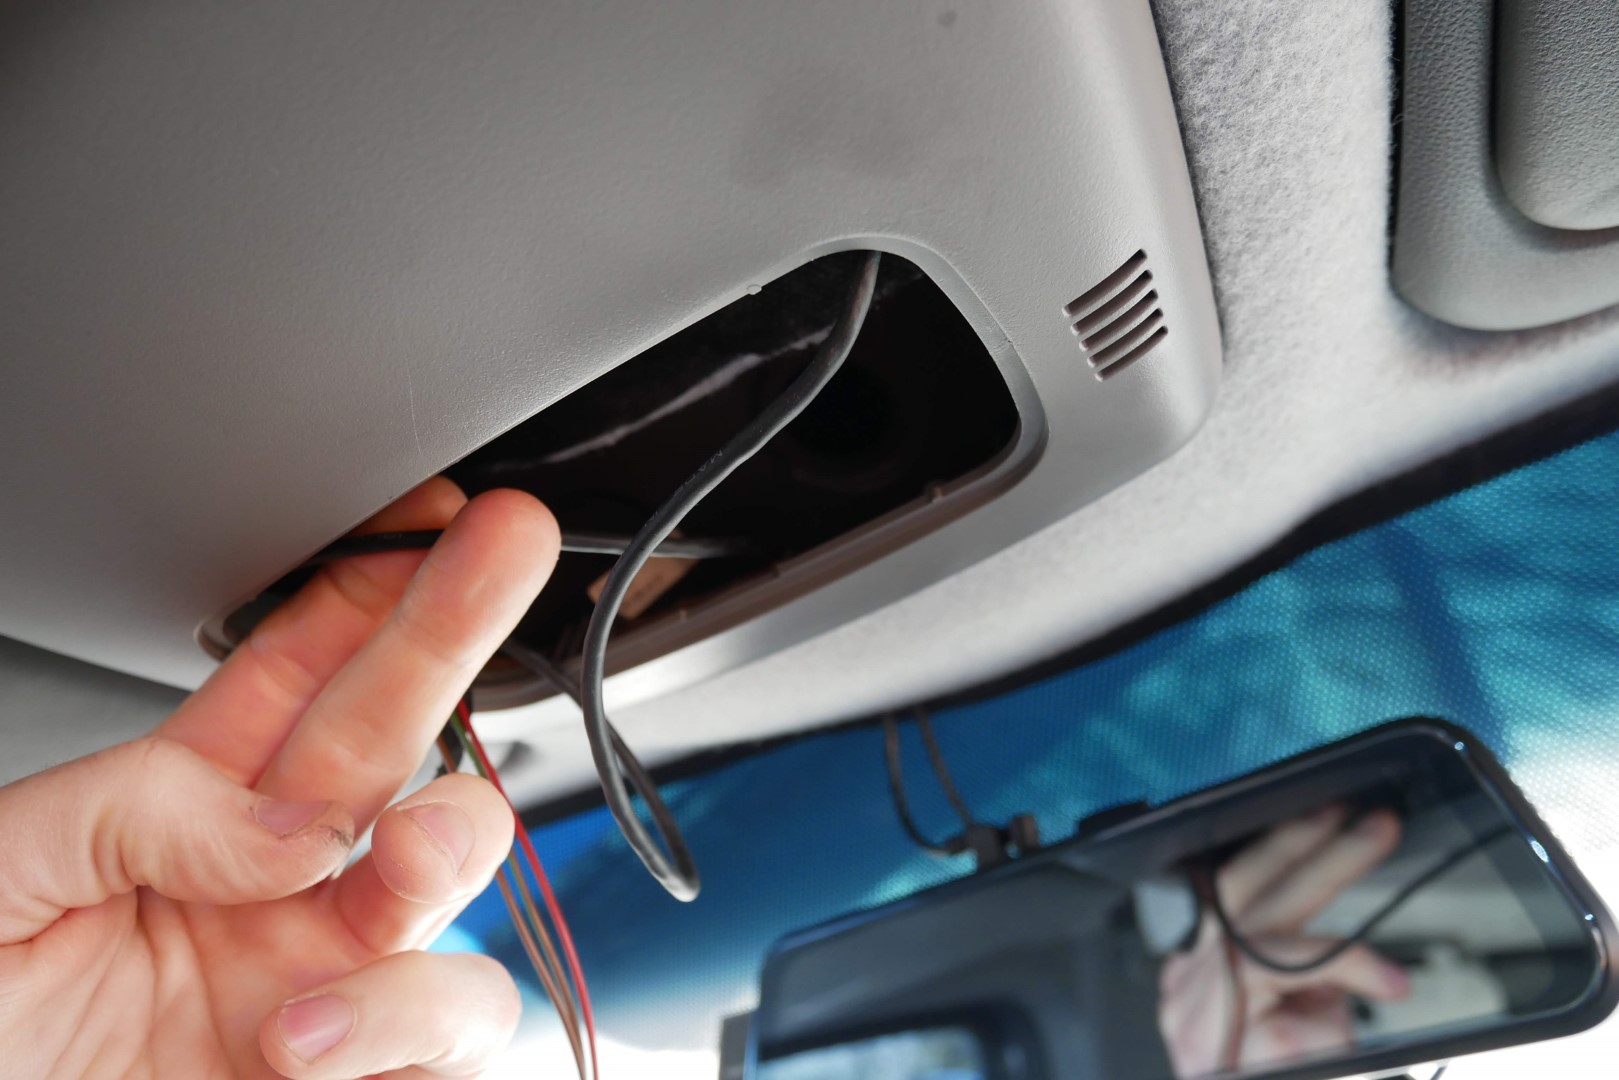
Mounting the mirror/ front camera was very simple. Just slide the front camera out and then strap it over the existing mirror with the included rubber straps.
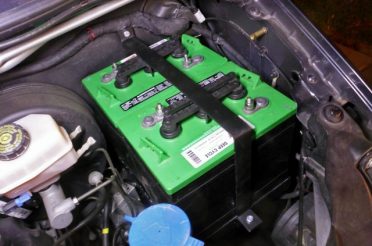
They give you a long enough cord to route it up and around the dash and into the 12v outlet. We plugged ours into our custom console outlets for now.
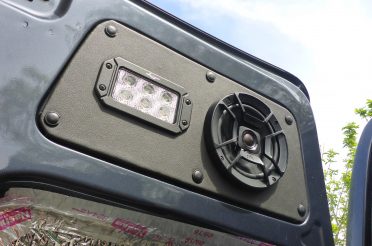
I mounted the rear camera just below the factory camera facing more backward instead of down. I was going to screw it into the plastic housing but decided to just use VHB tape instead. That tape is strong! I never like drilling holes unless I absolutely have to.
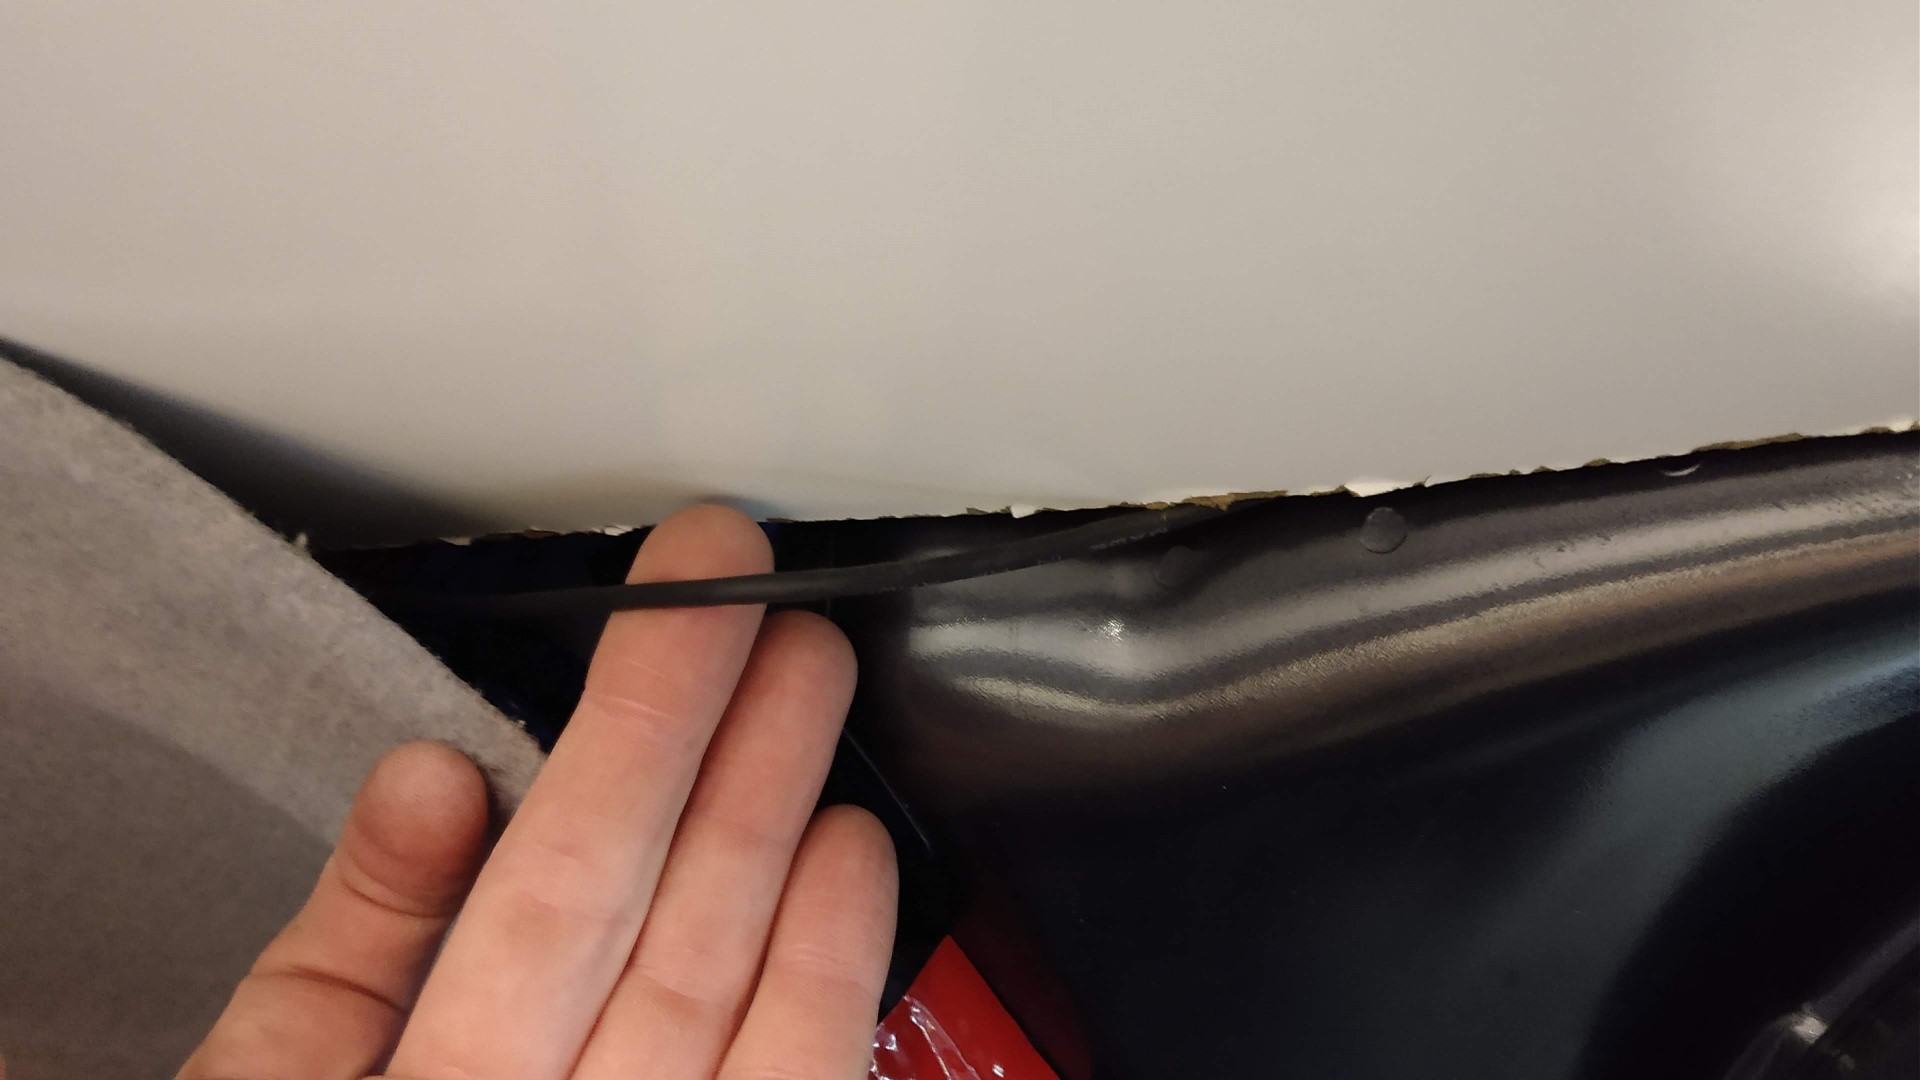
Routing the 18 ft video cable to the rear camera ended up being pretty easy. Since our rear ceiling/headliner is still easily accessible on the sides, I just tucked the wire up behind it and ran it above the front factory headliner. I popped out the dome lamp to access the wire and ran it out the front to where the mirror is. Super easy!
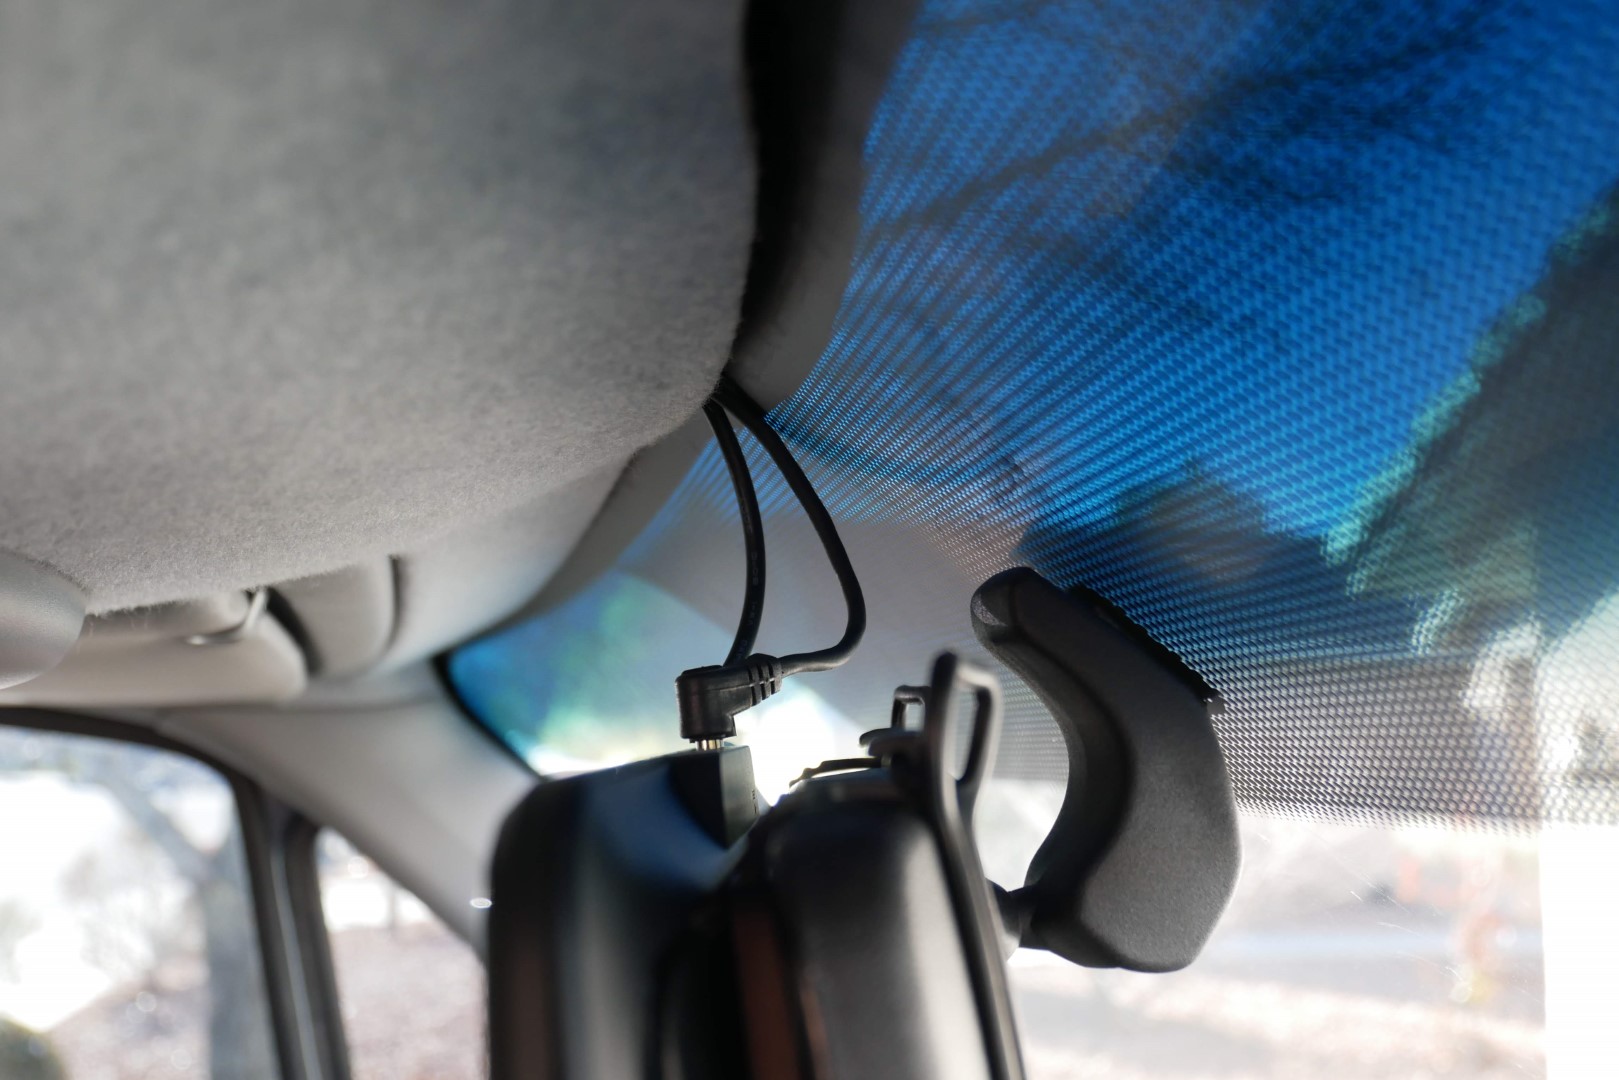
If you need a longer video cable, Amazon sells 4-pin video cables in many different lengths that should do the job. Just remember the longer the cable, the more latency/ lag the video will have.
Performance Review
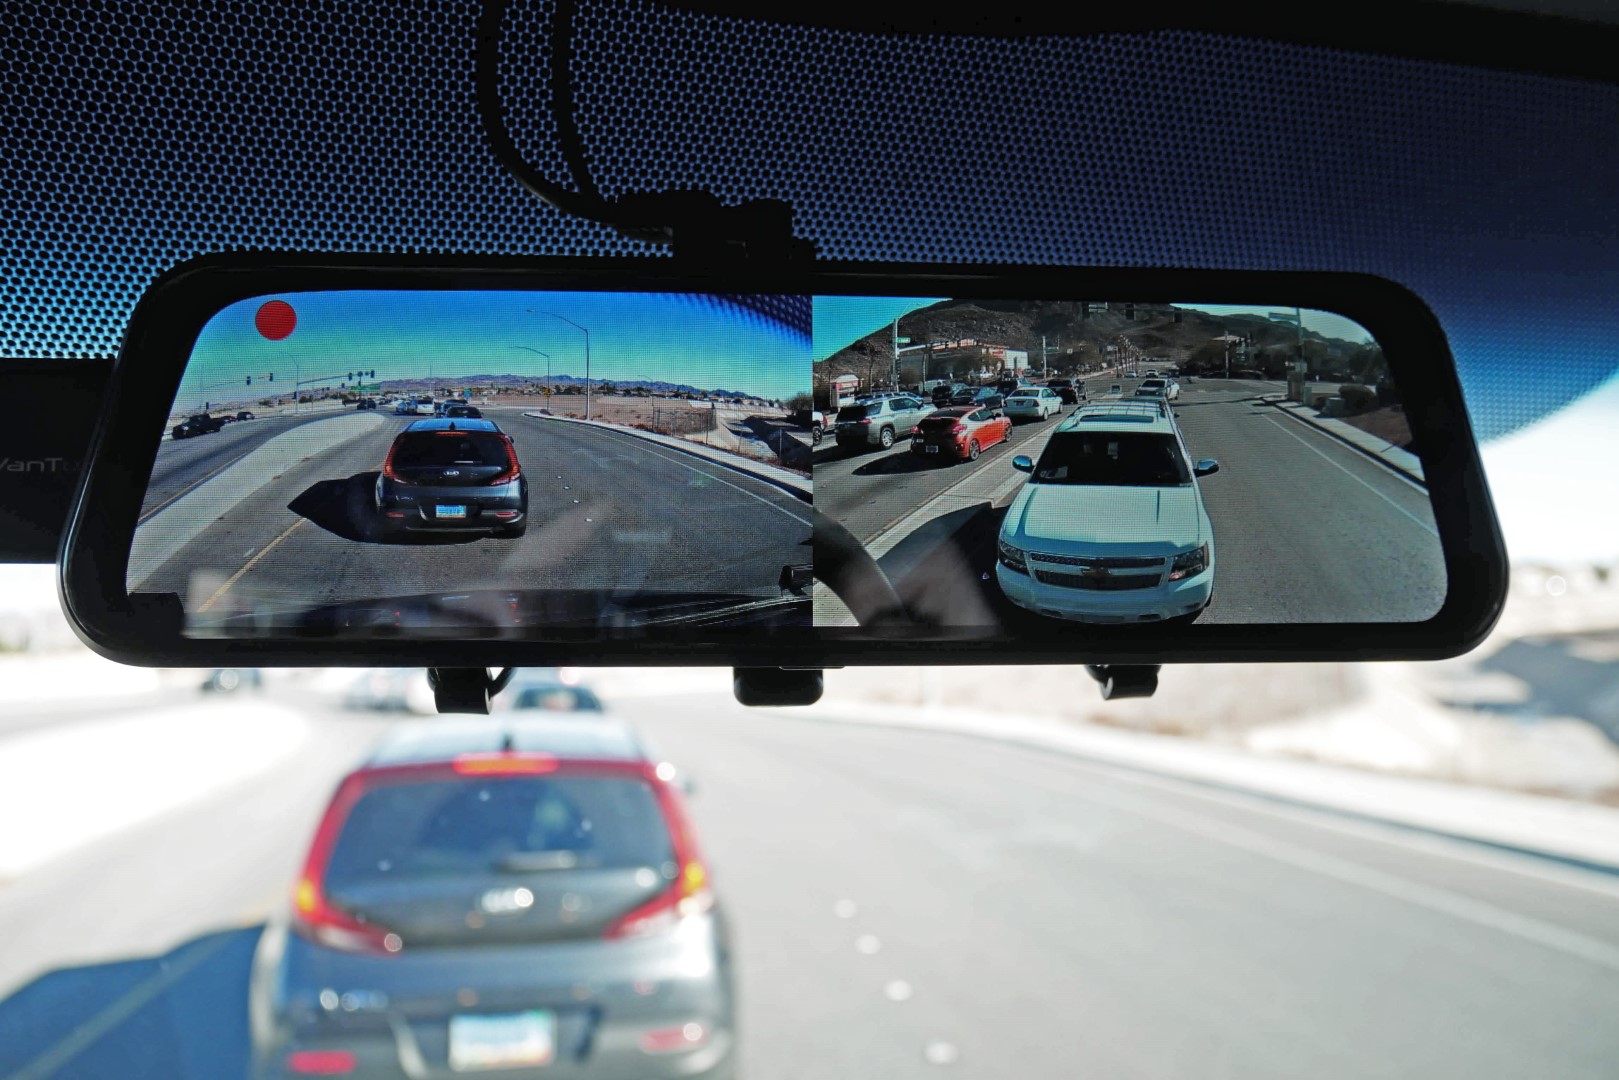
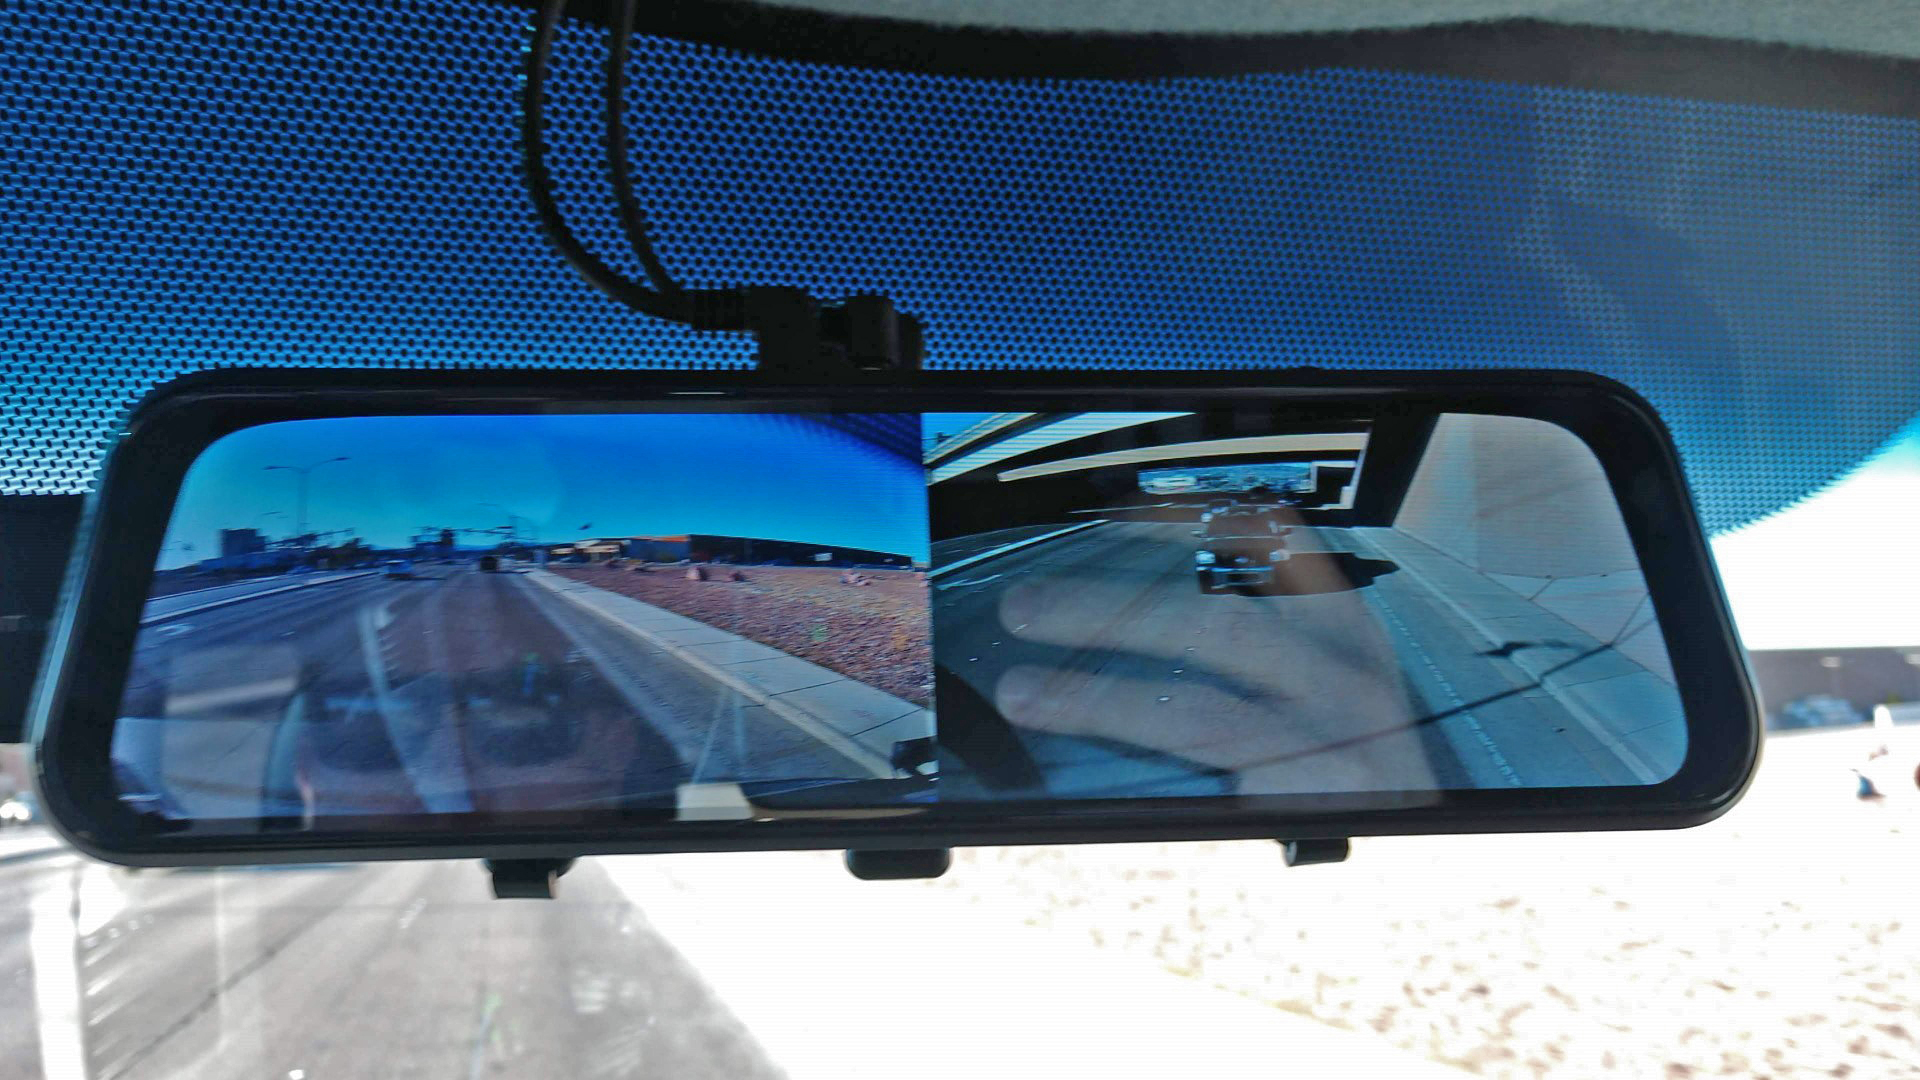
This thing rocks. This mirror has come in handy when driving. The screen can show either just the front, just the rear, or both wide angles (front & rear) at the same time. Of course, you can turn it off completely (button on the bottom of the mirror) and just use it as a mirror as well.
The one thing I noticed is when you have it on the full rear view, you can adjust it! I didn’t even realize this until months after installation and using it. If the view is too low or high, you can touch the left side of the screen and swipe or slide up or down and it changes the position of the rearview.


The rearview camera helps show blind spots. You can see cars that are just out of view from the side mirrors.
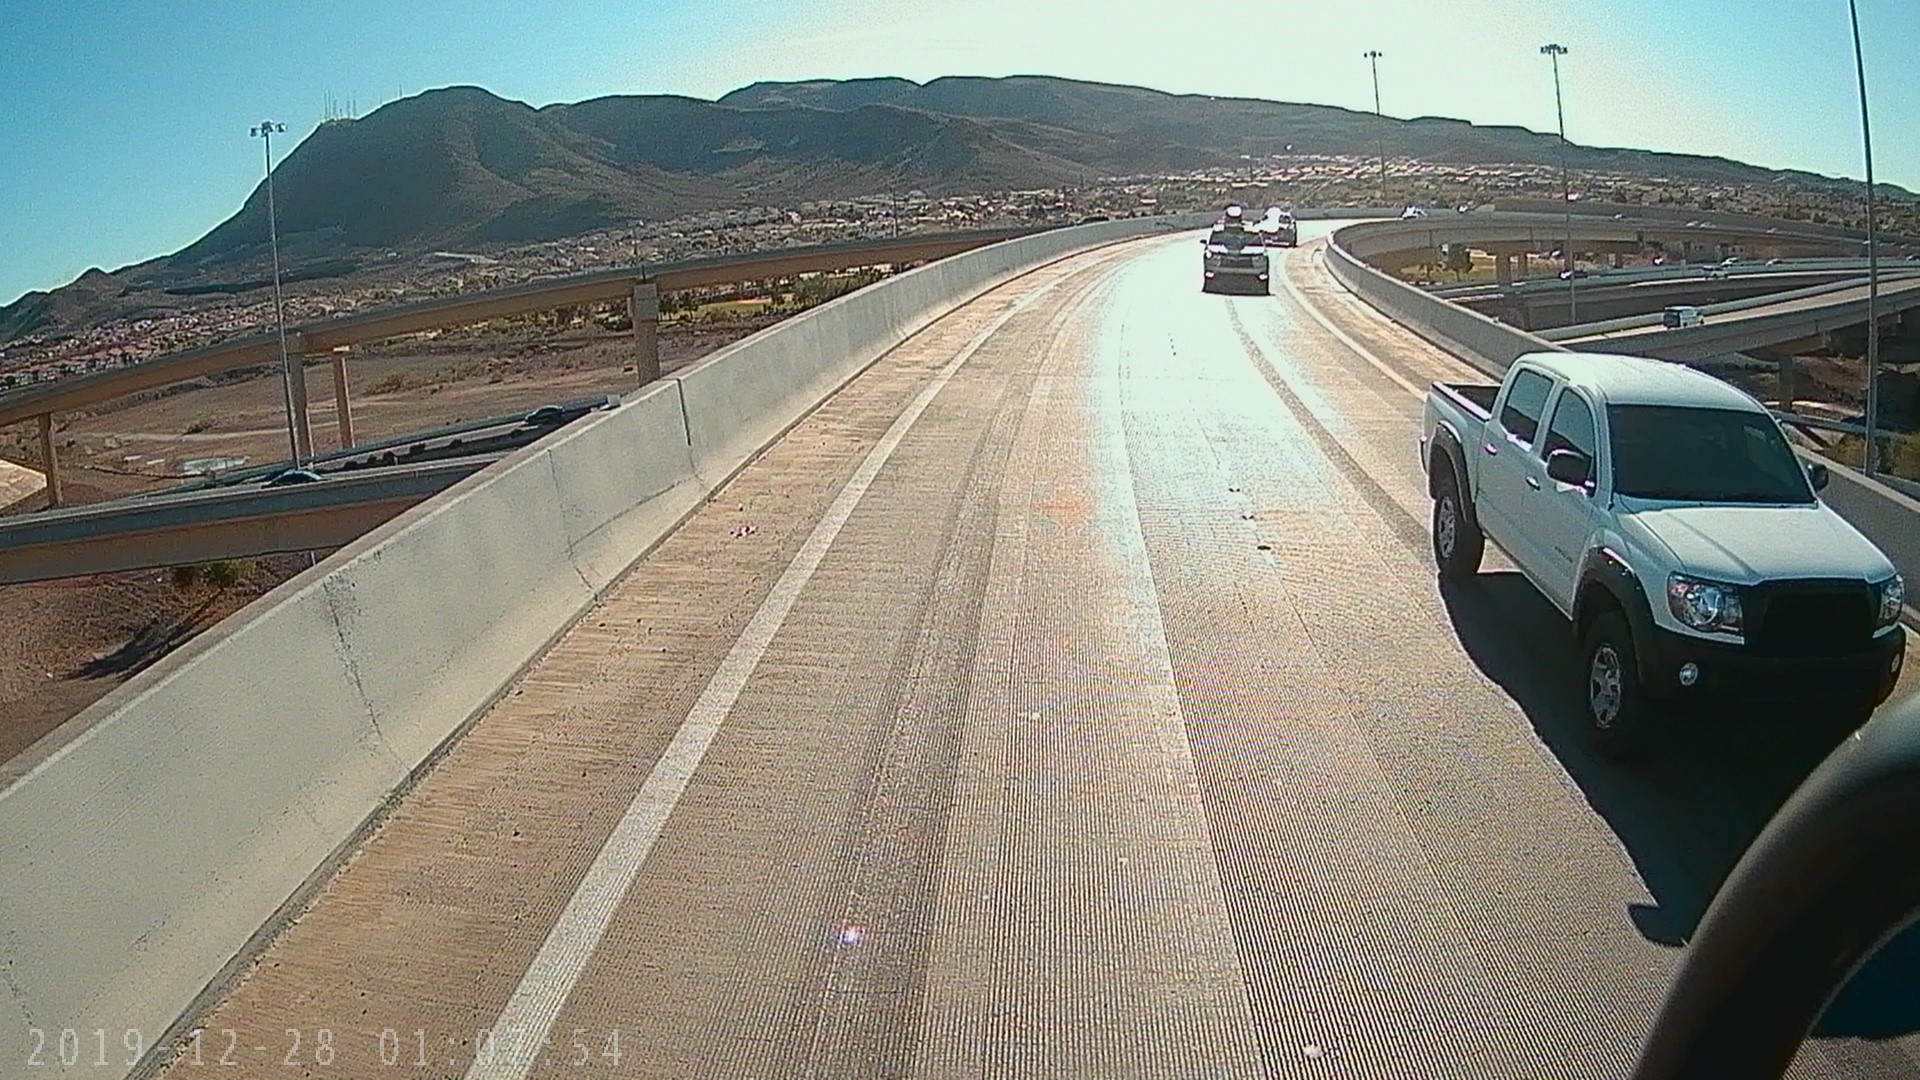
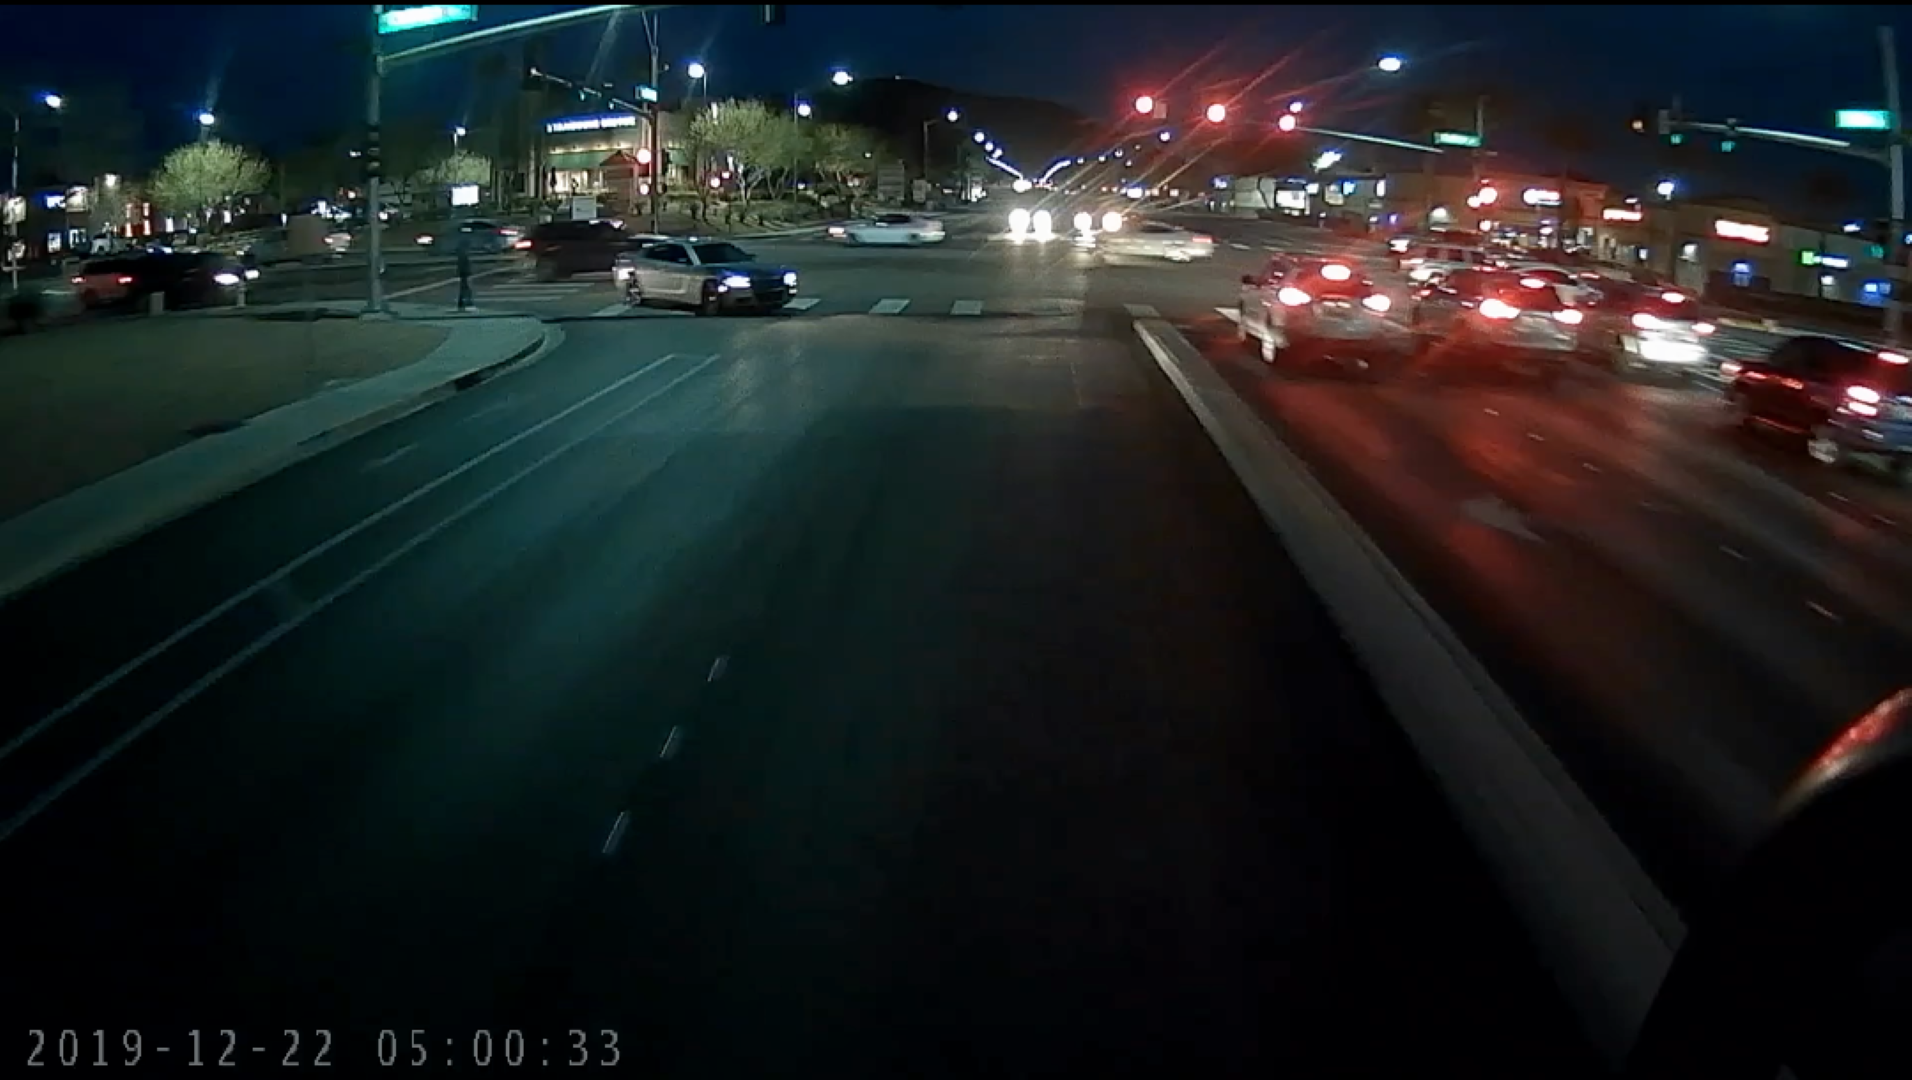
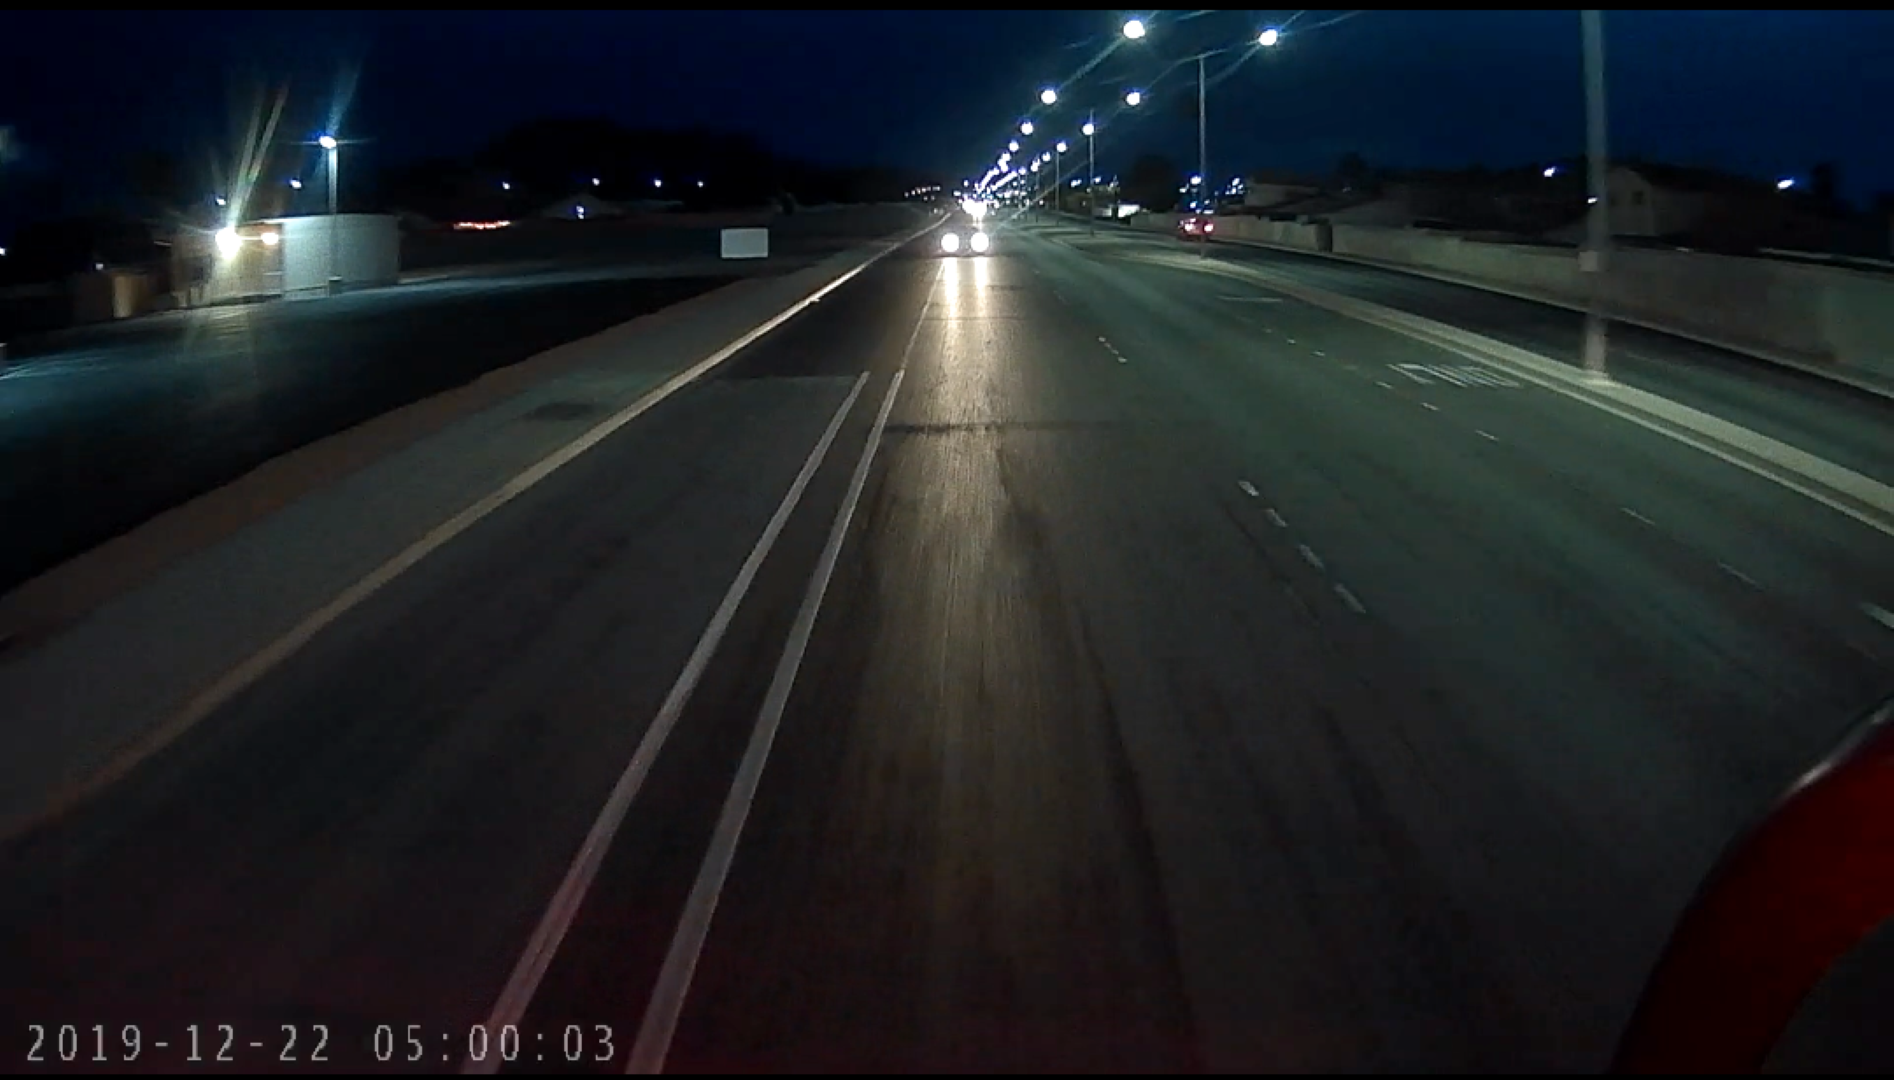
The night vision and camera quality of the camera are pretty awesome. It’s very clear and shows a perfect live view of whats going on in front or behind you.

We are very happy with the performance, quality, and value of this mirror/ camera system. Keep an eye out on Amazon and there are usually coupons for this product. I managed to pick one up for just $75. It’s crazy how cheap things like this are getting nowadays.
Great for Security or Stealth Camping too!
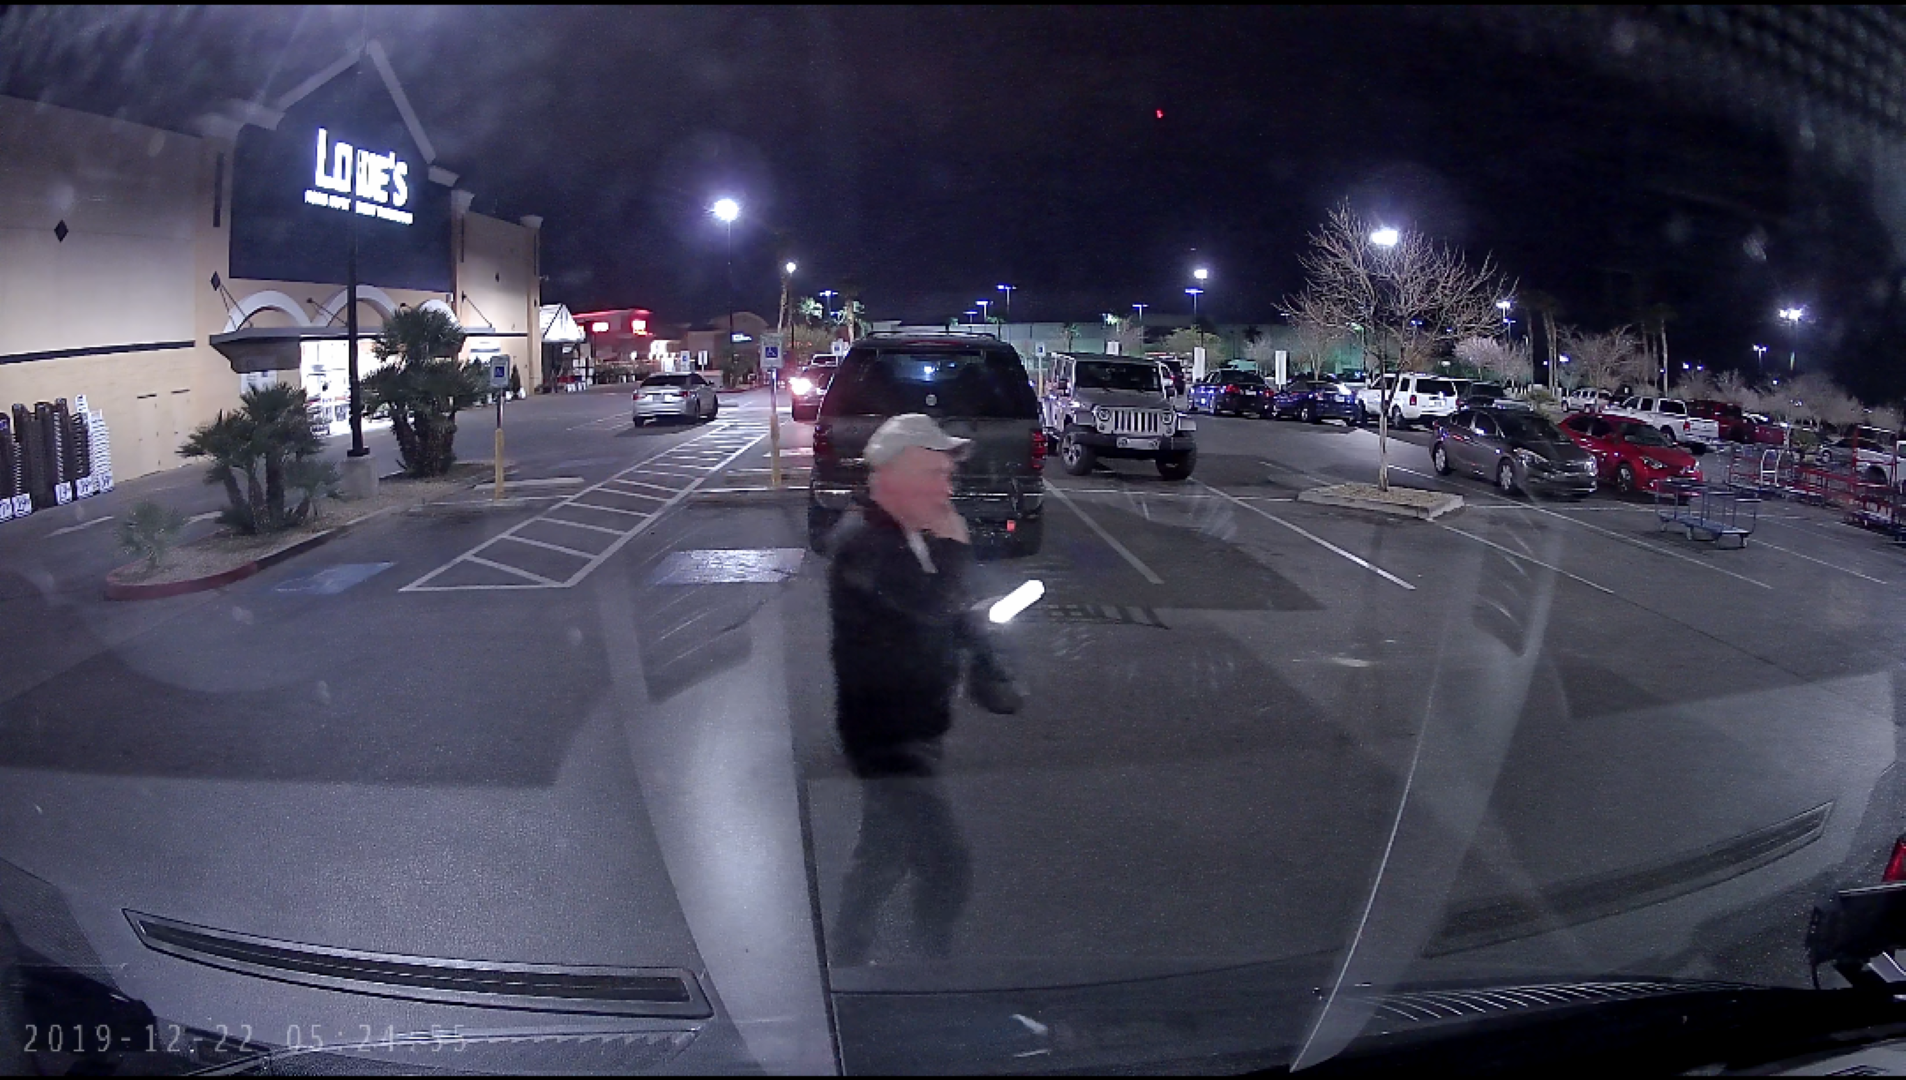
This camera system also comes in handy as a security system when stealth/parking lot camping. When we have our window covers up but would like to peak out without making it look like anyone is inside, we can just turn our cameras on and view the screen.
Transferring Footage On The Go!
When on vacation or any van trip, I don’t like having to bring a ton of photo/video/computer stuff. I picked up a mini card reader that works with my phone. You just have to make sure your phone is OTG capable. Most phones are these days. I can simply pop the card out of the mirror and plug it into my phone with this reader to transfer a cool photo or video clip that the van captured along the way.
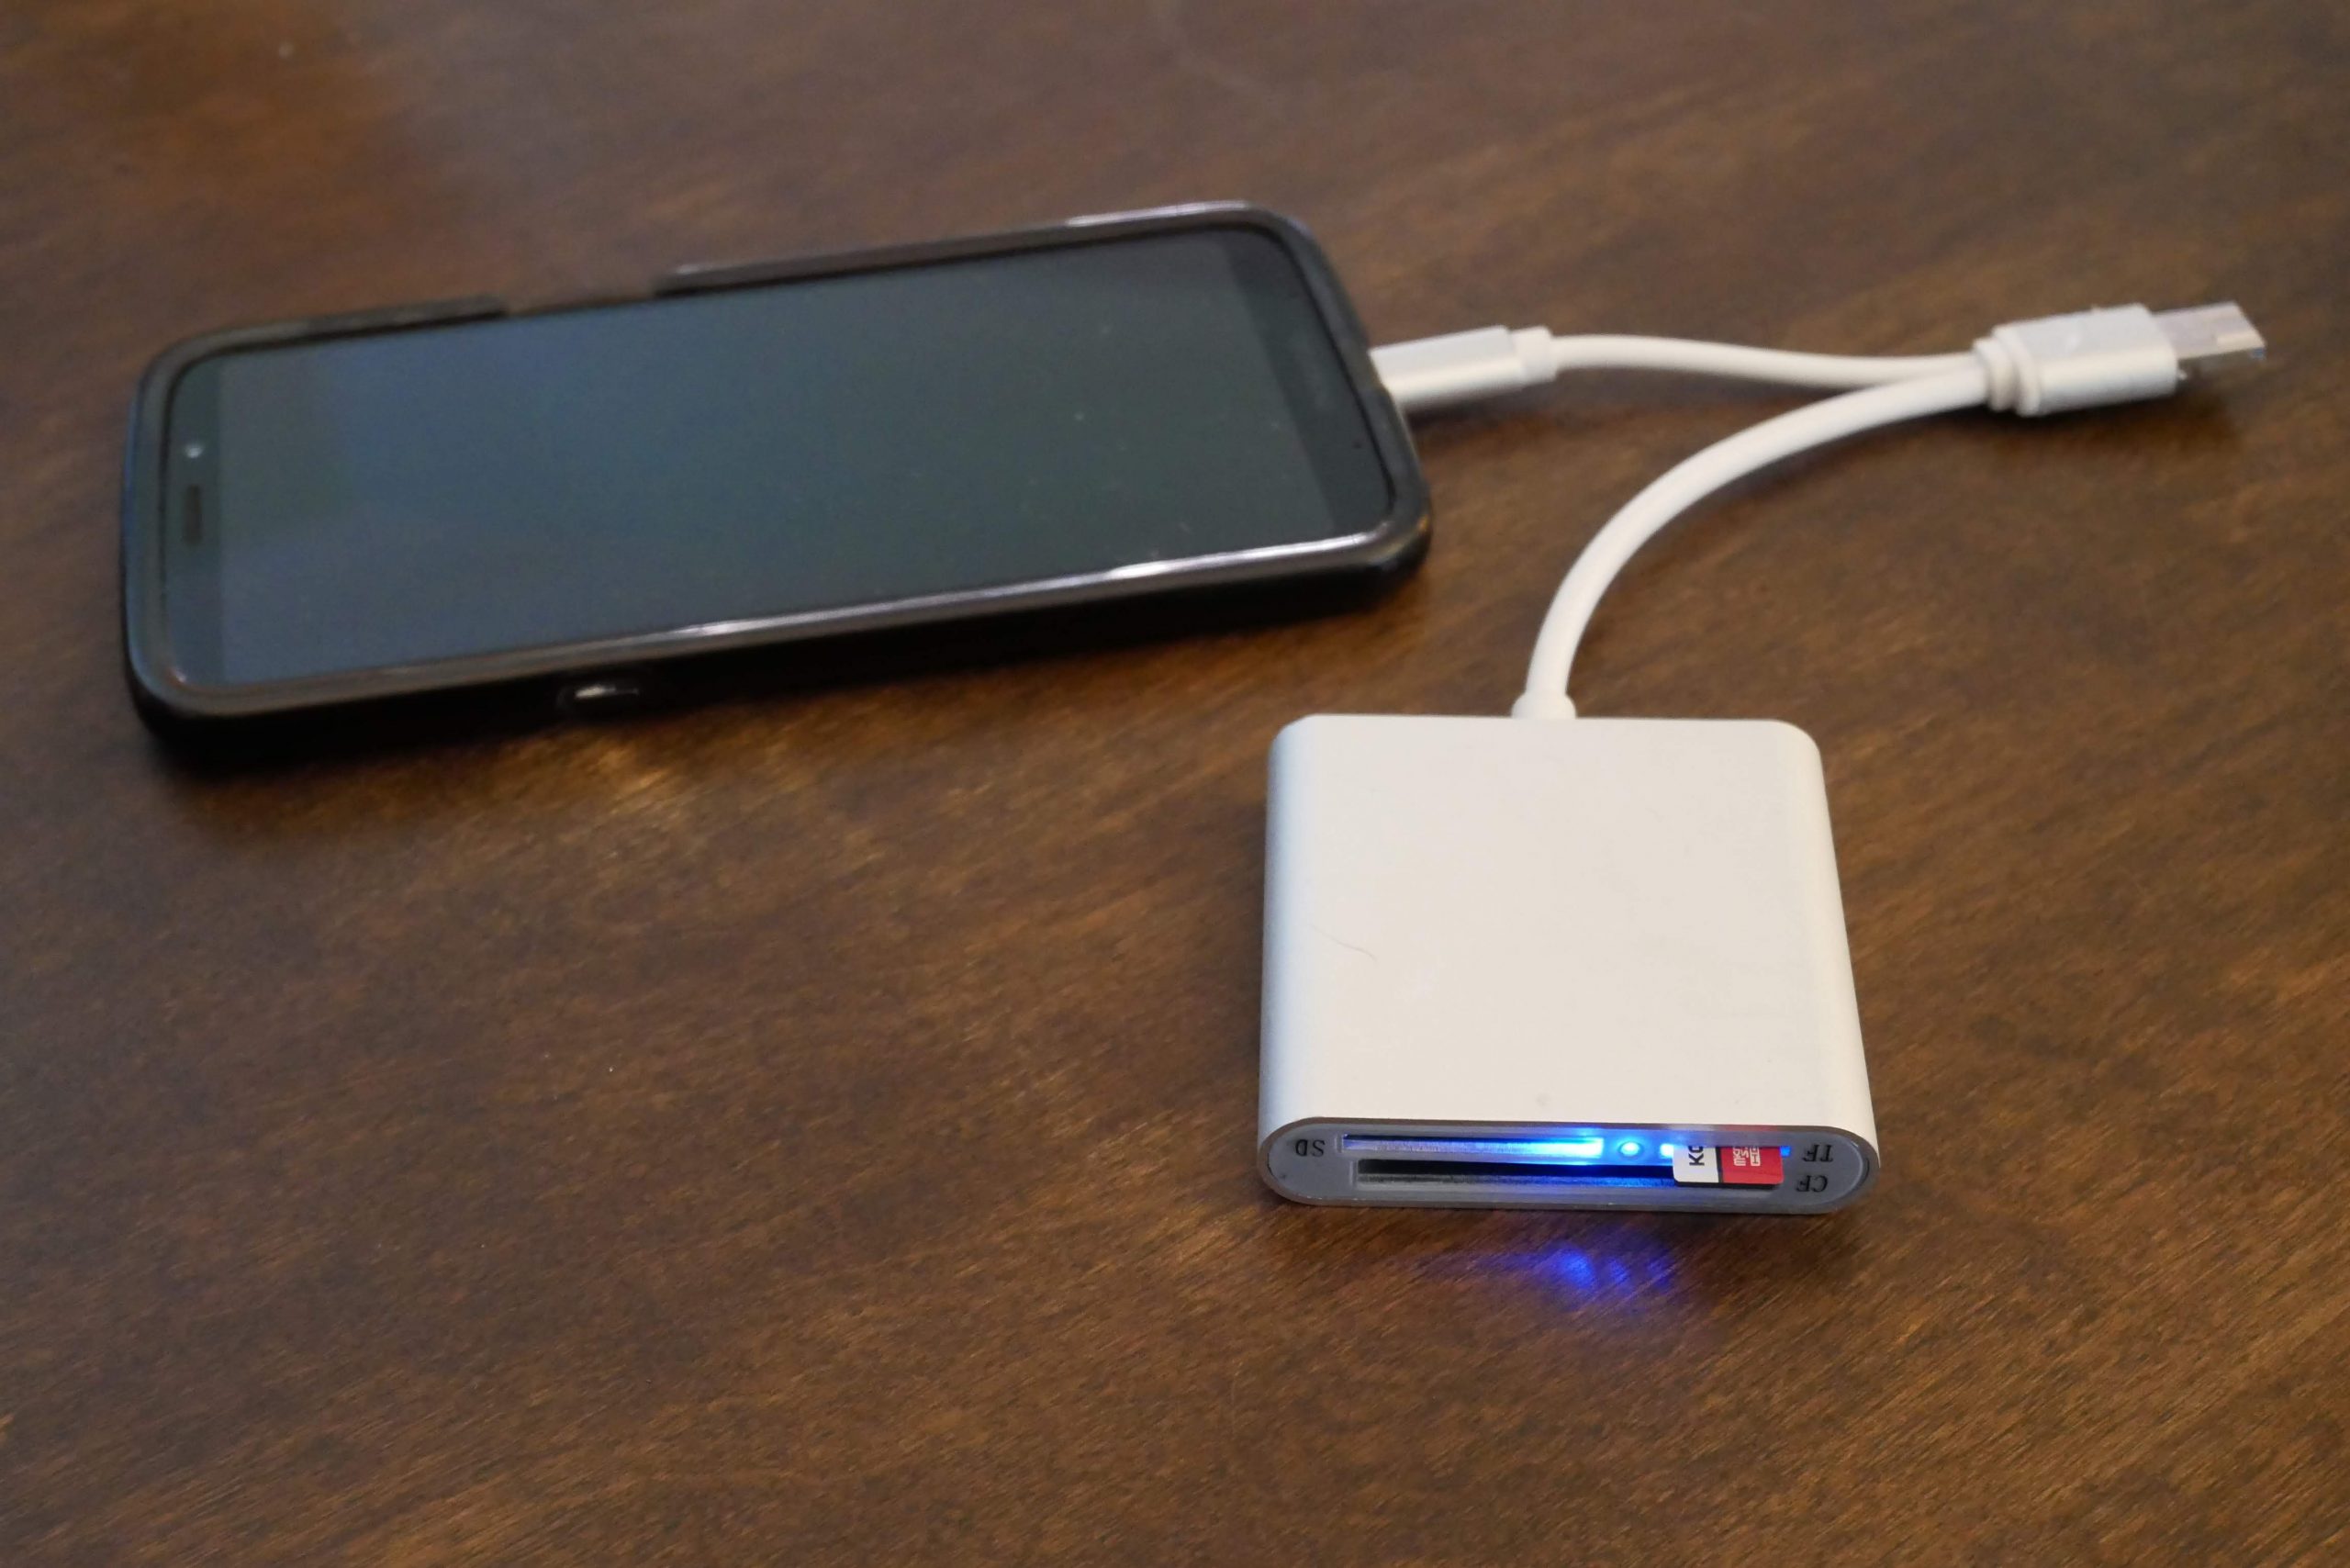
They make these card readers for many different phones & devices.
Android/ micro-USB or USB C/ USB 3.0
Parts/ Materials Summary
Van Top H610 mirror (no longer available)12“ Mirror Dash Cam Backup Camera- 12V power outlet
- VHB tape
- mini SD card reader for phone
- optional: camera video cable extension

9 Responses
Bill LeFever
Great job Pete. Informative, well written and easy to understand.
Edward Garson
“Just remember the longer the cable, the more latency/ lag the video will have”. For cable lengths that span vans (!) this is not a worry, you can remove this.
Pete
I just had put it out there for the longer vans that require an extension cable. Wasn’t sure if there was any lag adding one. The manufacturer stated it so I thought it was worth adding.
Dan
What made you pick the 610 over 609? I primarily just want the backup cam feature as I don’t plan on recording footage with it. Thanks!
Pete
Hi Dan. Well, the 610 is just the one I found on Amazon first, but looking at them the only difference I see is the resolution. The 610 has a bit more which is good for recording and photos. So if you don’t want it for that, the 609 would save you a few bucks.
Eve
Thanks for the detailed post! Any water leaking inside from below the rear camera where the cable enters the van?
Pete
Welcome! Thanks for following. No, no leaks as of et. It’s a pretty small cable and hasn’t caused any problems.
Kevin
Any issues with leaking since you ran it under the rear door seal? Also did you put the wire into any type of loom to protect it from the sharp edges of the body and seal? Great post!
Pete
Hey Kevin! Thanks. Very minor leaks if any. I’ve never noticed any water come through. It doesn’t rain much where I live though. The only type of leak I have seen is a little dust that collects on the inside of the back door from going down dirt roads. I did not install any loom to protect the wire because it already had an outer loom or sheath to protect it. I always wanted to route it a little nicer, but I do not want to drill any holes back there. It works. 🙂