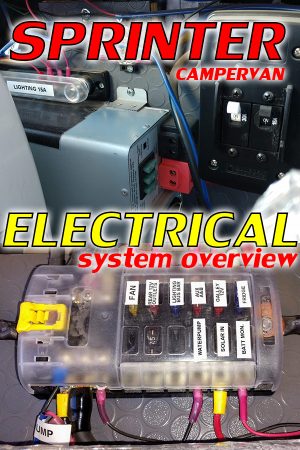
 Planning out a campervan electrical system can be a bit overwhelming. It doesn’t have to be though. Once you figure out your power consumption needs, you will have an idea of how big and in-depth you need to go. Whether you plan on camping in your van part-time or full-on living out of your van, you can figure out what kind of battery bank, charging system and electrical system will fit your needs. Chances are you have developed some sort of minimalist practices, otherwise, you’d be “camping” out of a diesel pusher coach at this point. In this post, I will cover the basic components and layout of our electrical system. I’d like to think we are fairly low power and resource consumers, but the fact is things add up and you always want to be sure your battery bank doesn’t leave you dead in the water in the middle of an epic trip.
Batteries
Battery Basics
There are basically three different types of deep cycle batteries that can be used in a campervan build: lead-acid, AGM or lithium. There are pros and cons to all of them, but it mostly comes down to cost, weight savings, and performance.
Lead-acid: These are the least expensive, but you get what you pay for. They have the lowest performance and require maintenance. They’re heavy and they must be stored outside.
AGM: These are middle of the road as far as price. They are still very heavy, however, AGM batteries are sealed and can be stored inside and have better performance than lead-acid due to their design. You just need to be careful not to overcharge or undercharge AGM batteries. They can only discharge to 50% capacity before needing a charge, otherwise, damage will occur.
Lithium: Without a doubt, lithium batteries offer the best performance and weight savings. They are a fraction of the weight and you can use 100% of their charge. This means you get twice as much battery capacity. The downfall is their high upfront cost and the fact that must be insulated or mounted inside. They don’t like cold weather.
Determining How Much Battery You Need
This is a very helpful calculator I used when determining how many amp hours of battery we needed.
https://www.batterystuff.com/kb/tools/calculator-sizing-a-battery-to-a-load.html
Understand Your Power Consumers
Since we are almost ALWAYS off-grid without a generator or place to plug in, we try to limit how much power we use. There are a few constant power consumers that you can forget about. Although they don’t draw much, they are running more often than others such as the vent fan and refrigerator. Below is a list of the usual battery suckers while on our adventures.
- refrigerator: Our 12V TF130 Truck Fridge is very efficient, however, it is always on, therefore it is pretty much the biggest consumer. The compressor comes on frequently (less in cold weather of course), but it never draws more than 3-6 amps.
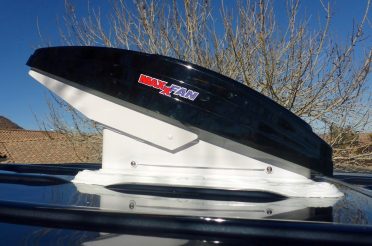
- vent fan: the Maxx Air vent fan is always less than 2 amps. In the summer it obviously gets used more often. Even at 2 amps, it can use plenty of power if left on 24/7.
- phone chargers: Our phones are usually always plugged in at night or when hanging out in the van. Our Motorola turbo chargers can pull up to 2 amps.
- lights: Everything in our van is LED and uses very little power. We still use dimmers to limit power consumption. Light usually pulls about .2-2 amps depending on how many are on and the brightness.
These are other loads that pull more power but are used less frequently.
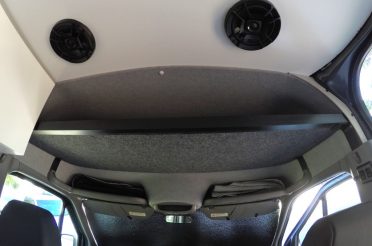
- rear stereo (and amps): We have a separate stereo in the back of our van. Although we have two amplifiers (one for the four 6.5″ Polk speakers and 1 for the 10″ sub), they are class D amps. This means they use less power than tradition amplifiers. The head unit is also a low power unit. There is no fancy display and it only acts as an input/ output source controller. The entire stereo system can pull up to 5-6 amps, depending on how loud we have it cranked.
- water heater: This is our largest power consumer. It pulls a whopping 135 amps when it kicks on. The load lasts for usually no more than 10 minutes. It can suck out 40 amp hours from our battery bank in one tank heating. There are definitely more efficient ways to heat water, but this works for our application. We usually do a shower every other day and do very quick military style showers. The 4-gallon tank is plenty of hot water for even slightly extended showers between the two of us. The large draw on our system doesn’t last that long (about 10-15 minutes) and the size of our battery bank allows us to go this route.
- inverter loads (110V): Our inverter doesn’t draw much if left on with no AC power being used, but it is about .25 amps or so. This adds up so we usually just leave it off. The 110V outlets rarely ever get used, but we wanted to have them as an option. Amperage totally depends on what you have plugged in.
Our Batteries
In our build, we have two battery banks totaling 400 amp hours. Therefore, we have 200 usable amp hours since they cannot go below 50% state of charge.
We went with AGM batteries instead of lithium because I had a hookup and we didn’t want to spend thousands of dollars on batteries. We may upgrade to lithium eventually, but maybe after the prices come down some more. In the meantime, AGM is working just fine for us.
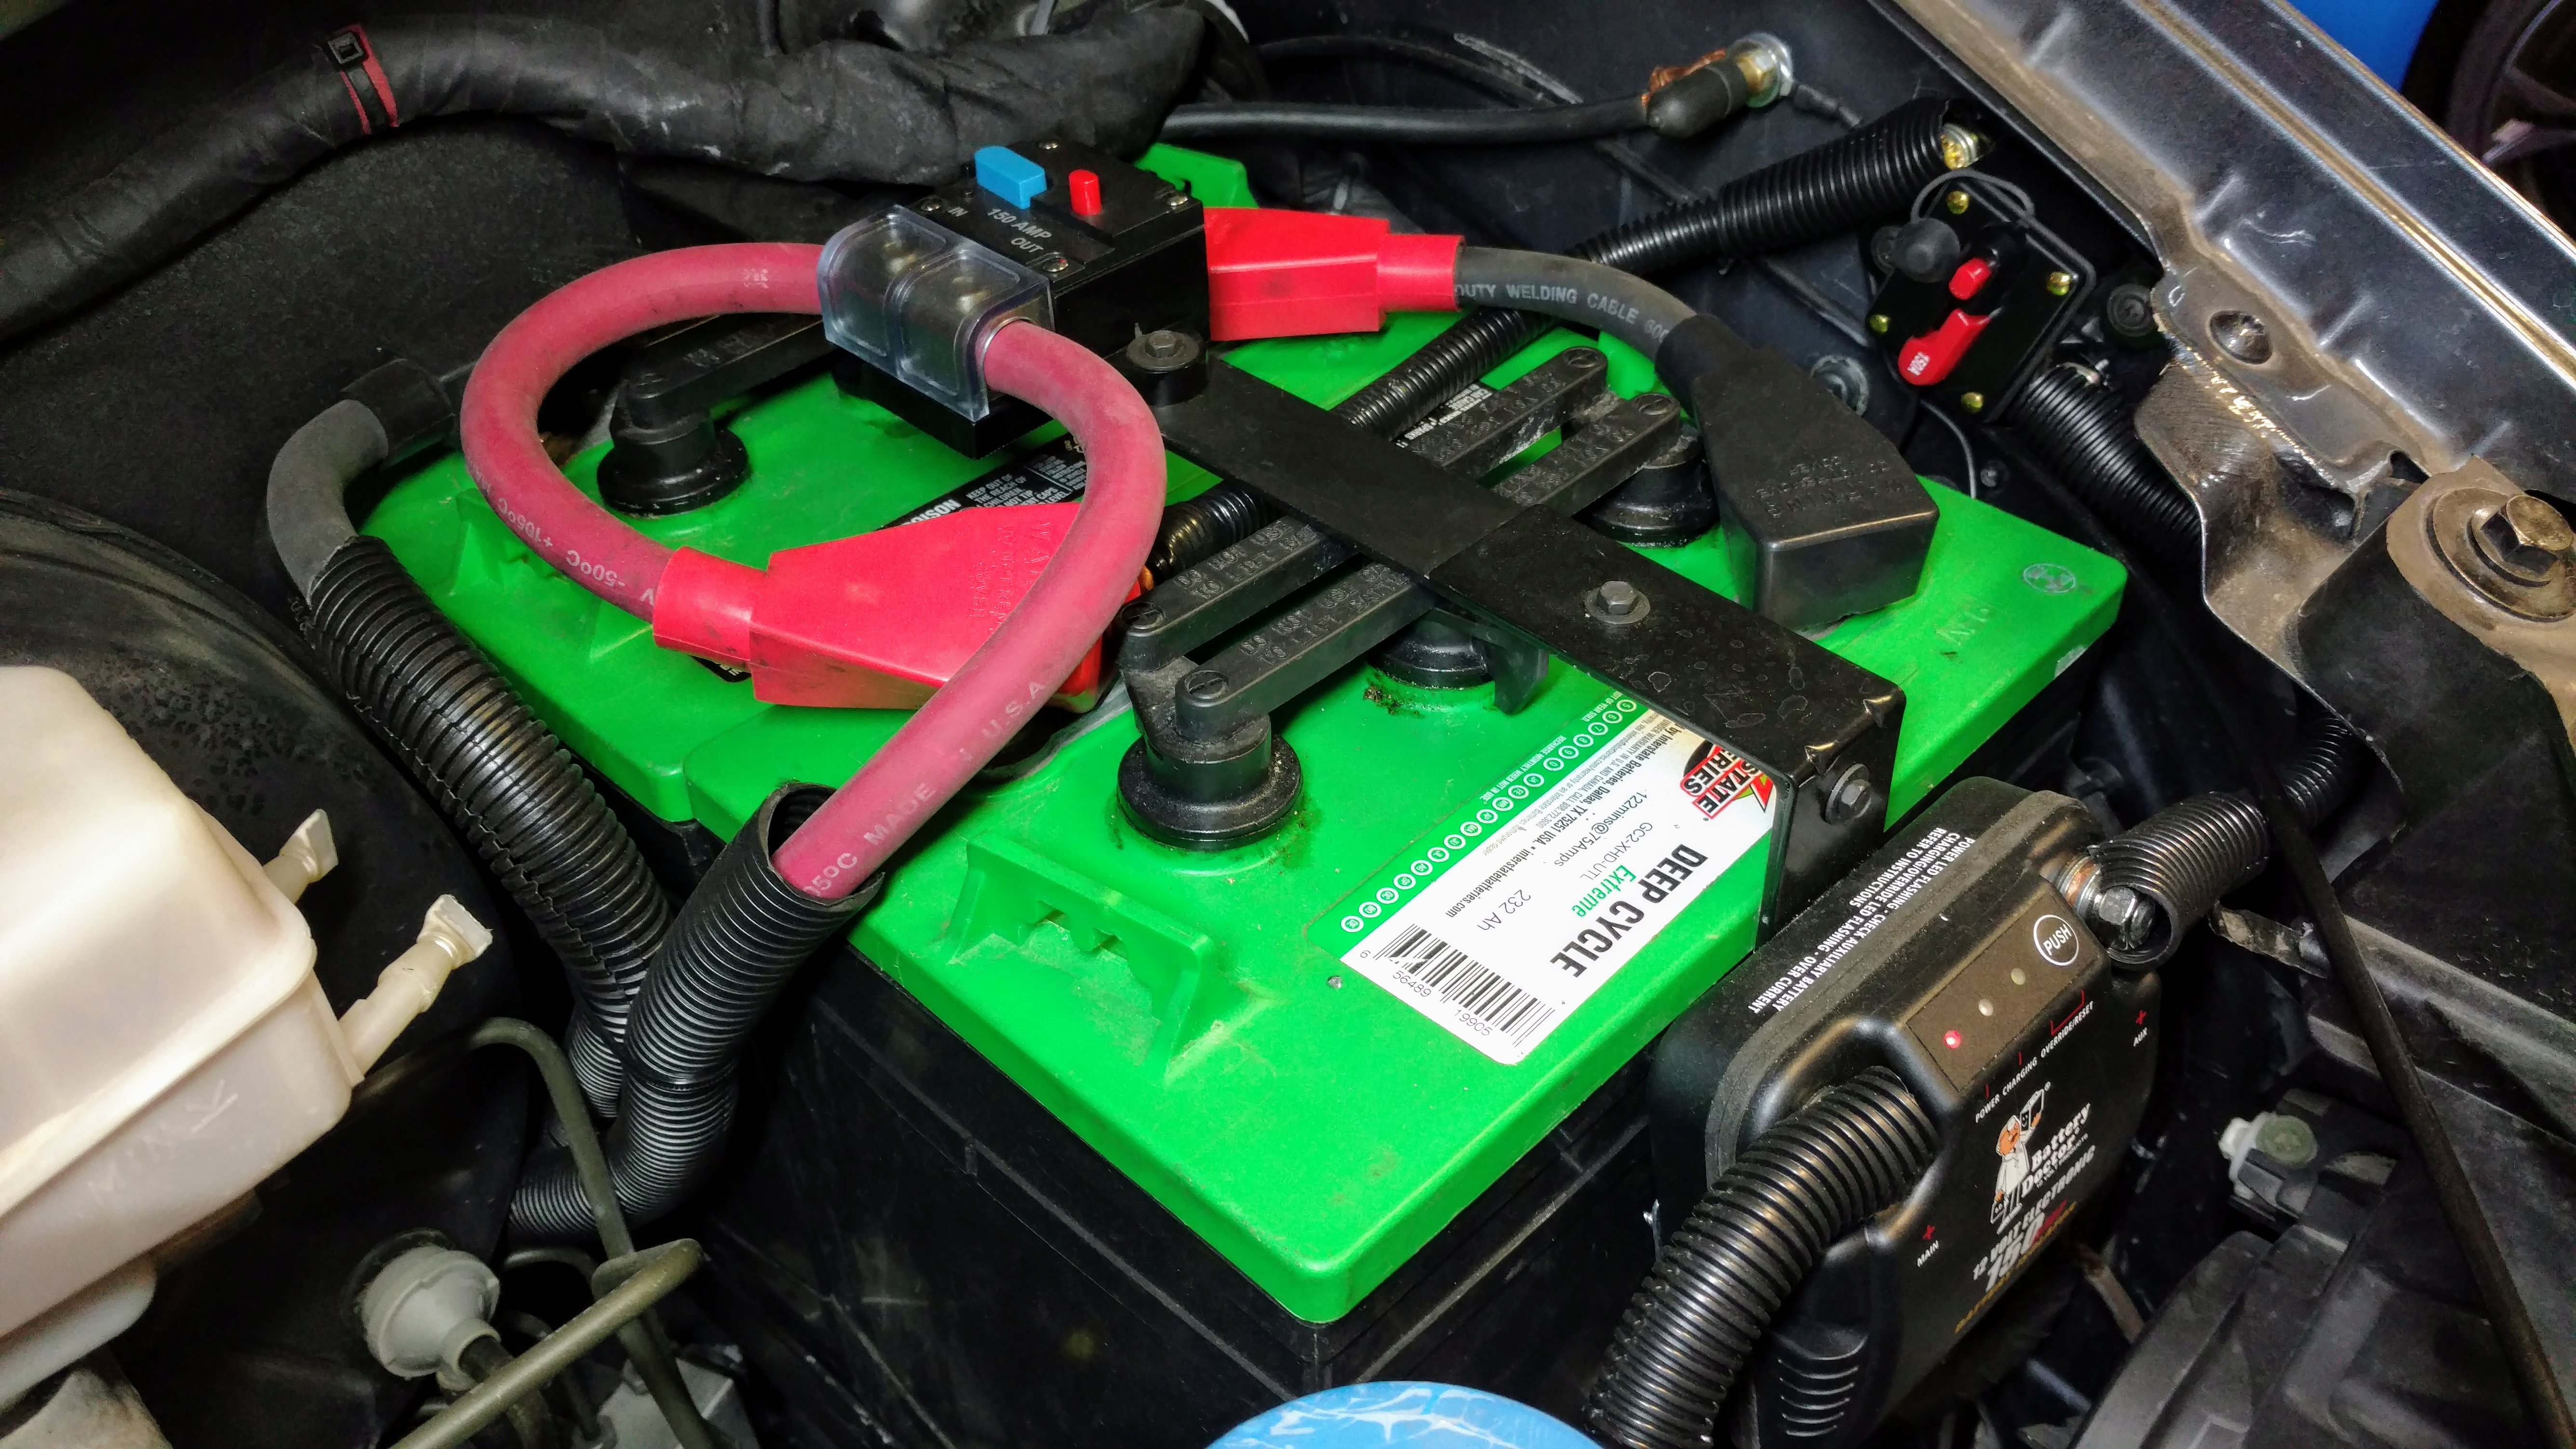
Battery Bank 1
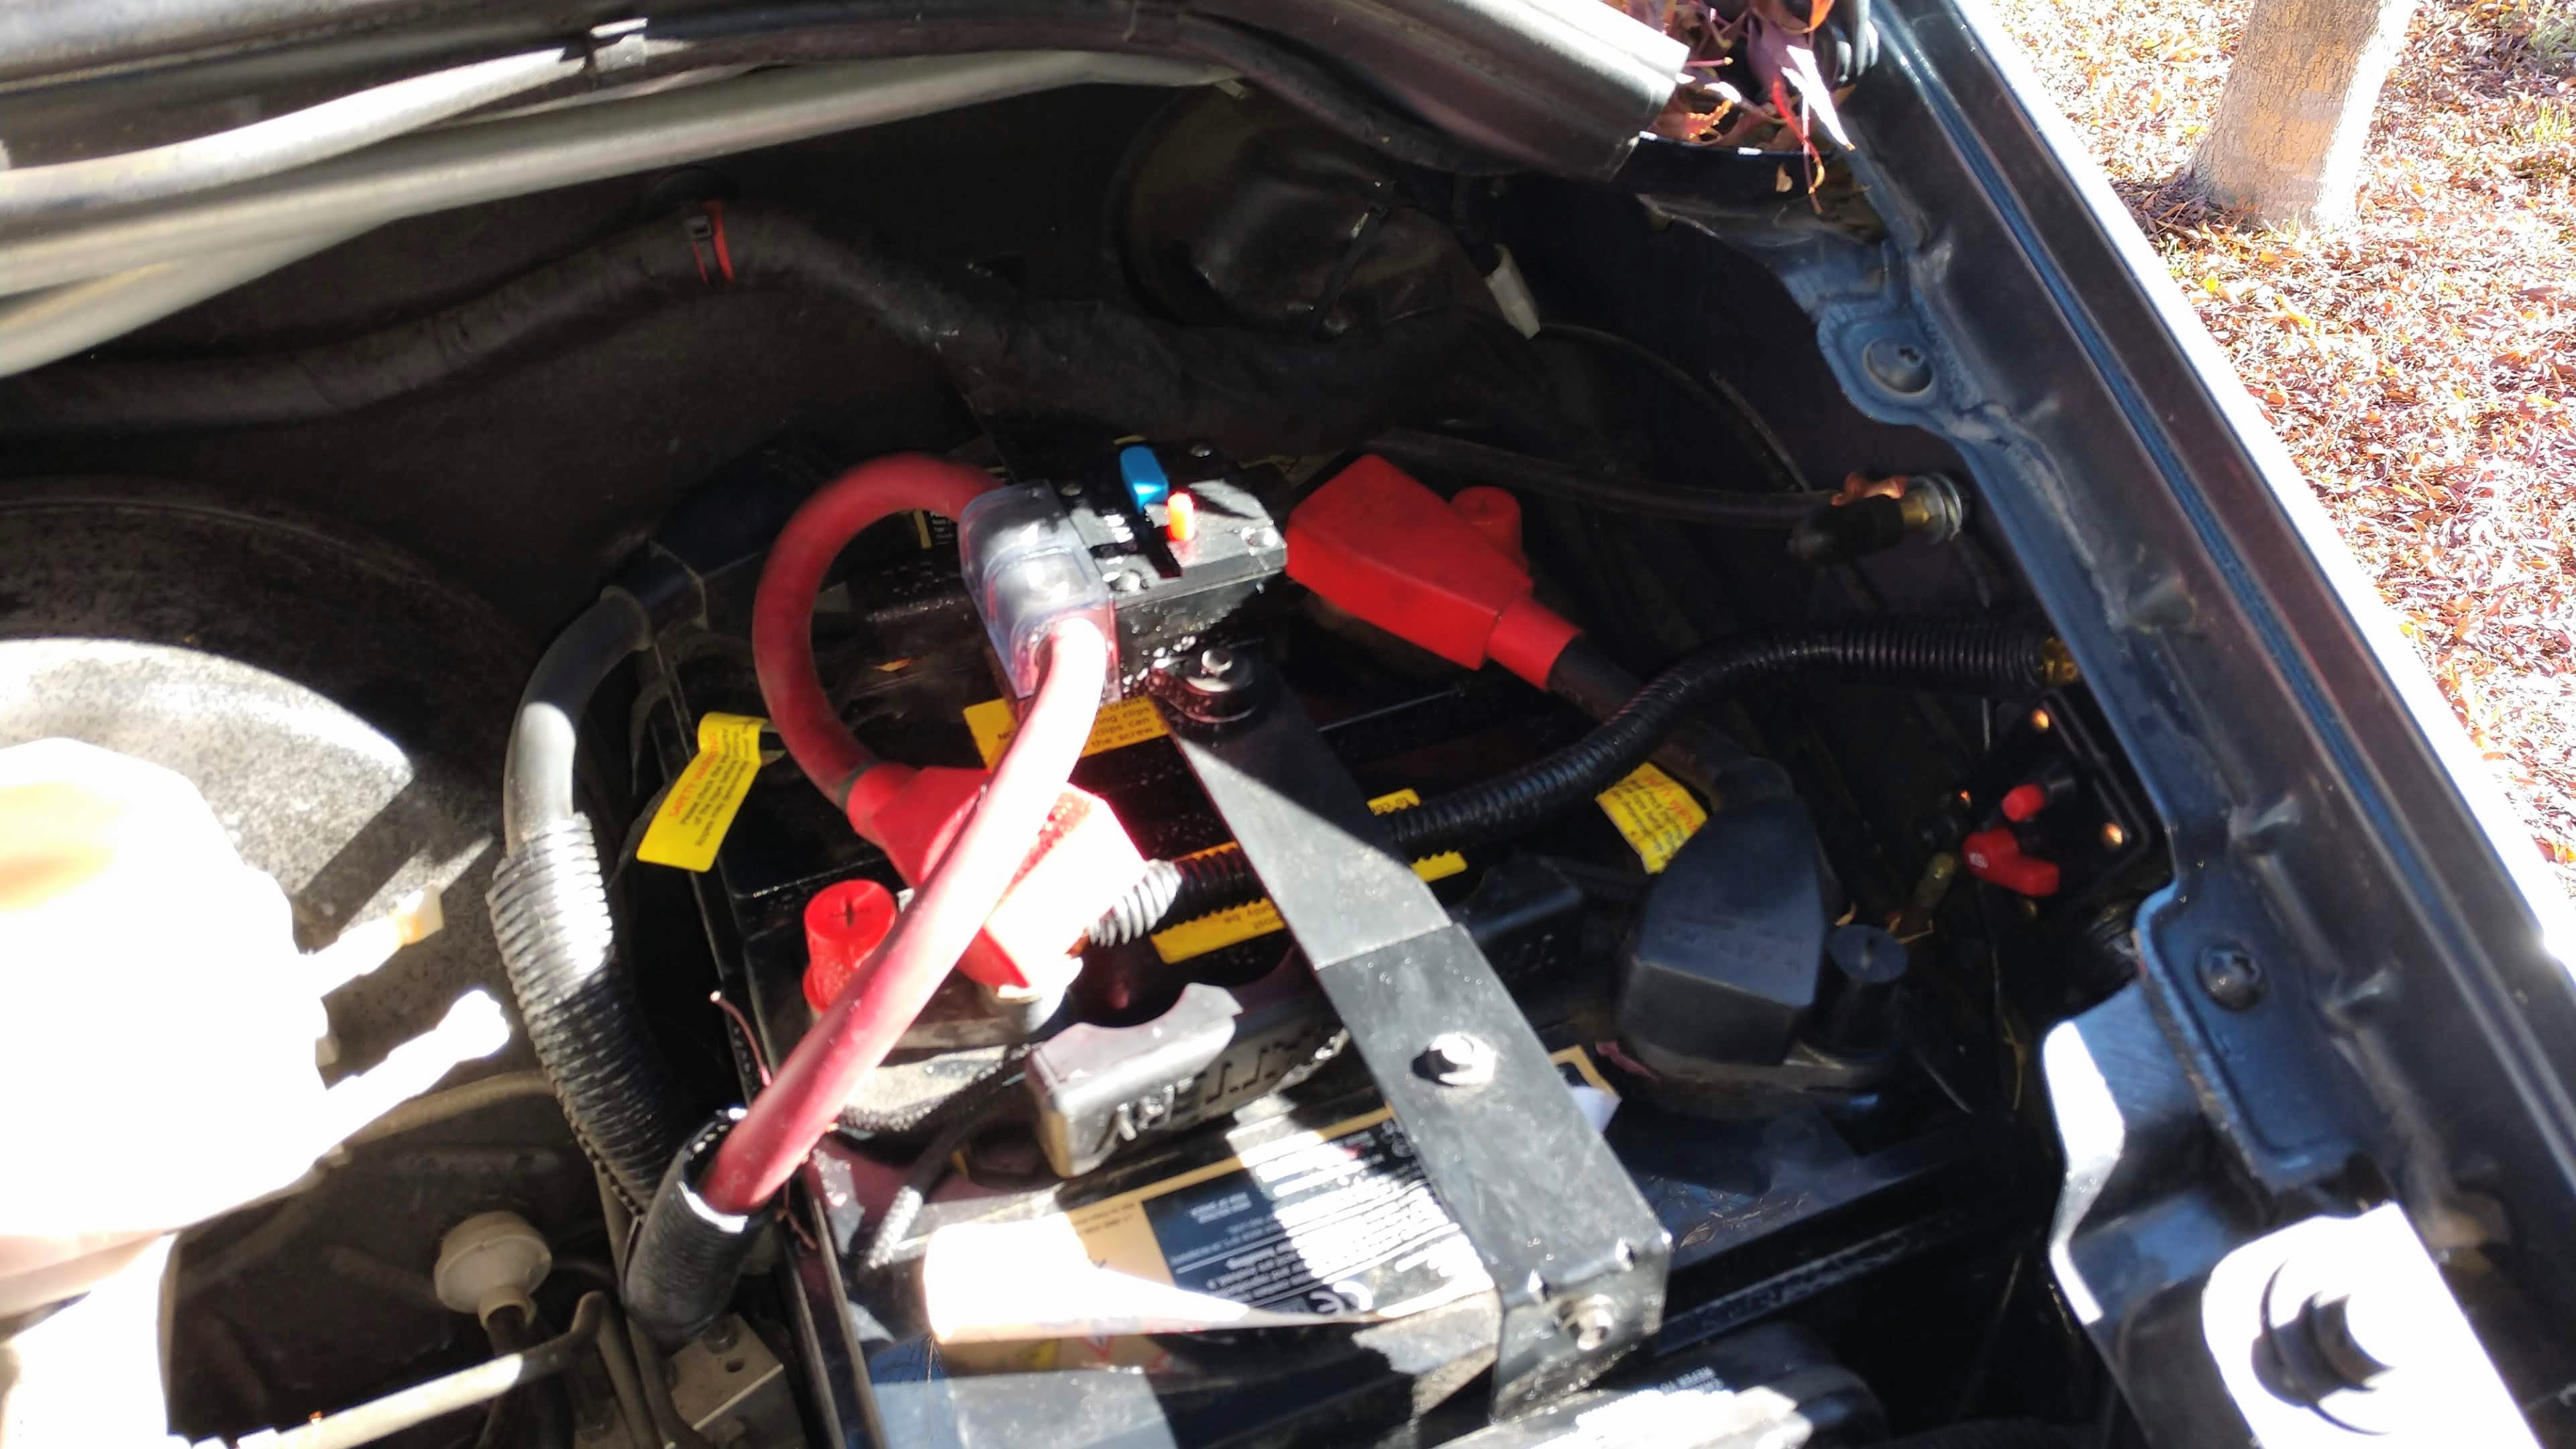
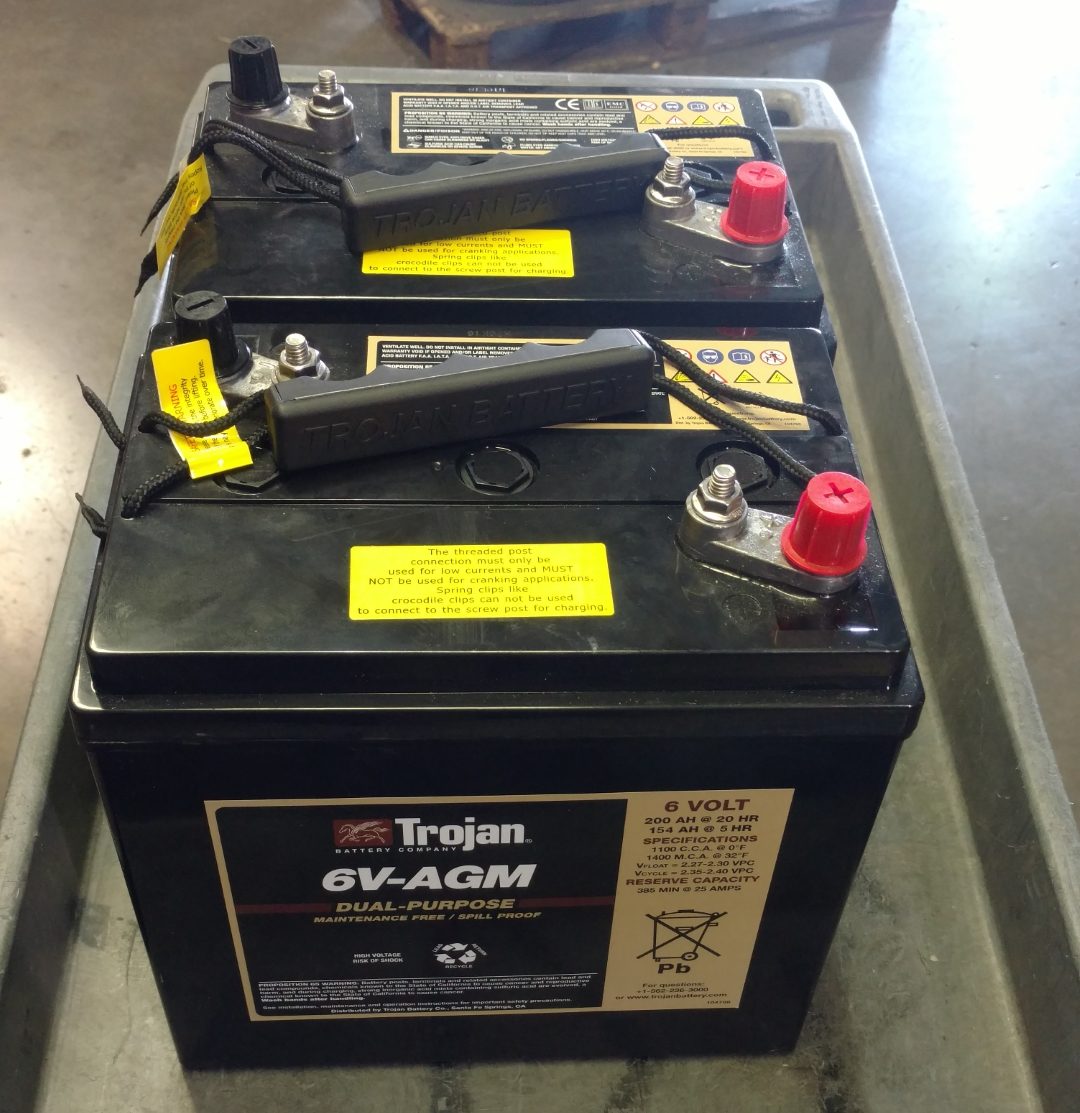
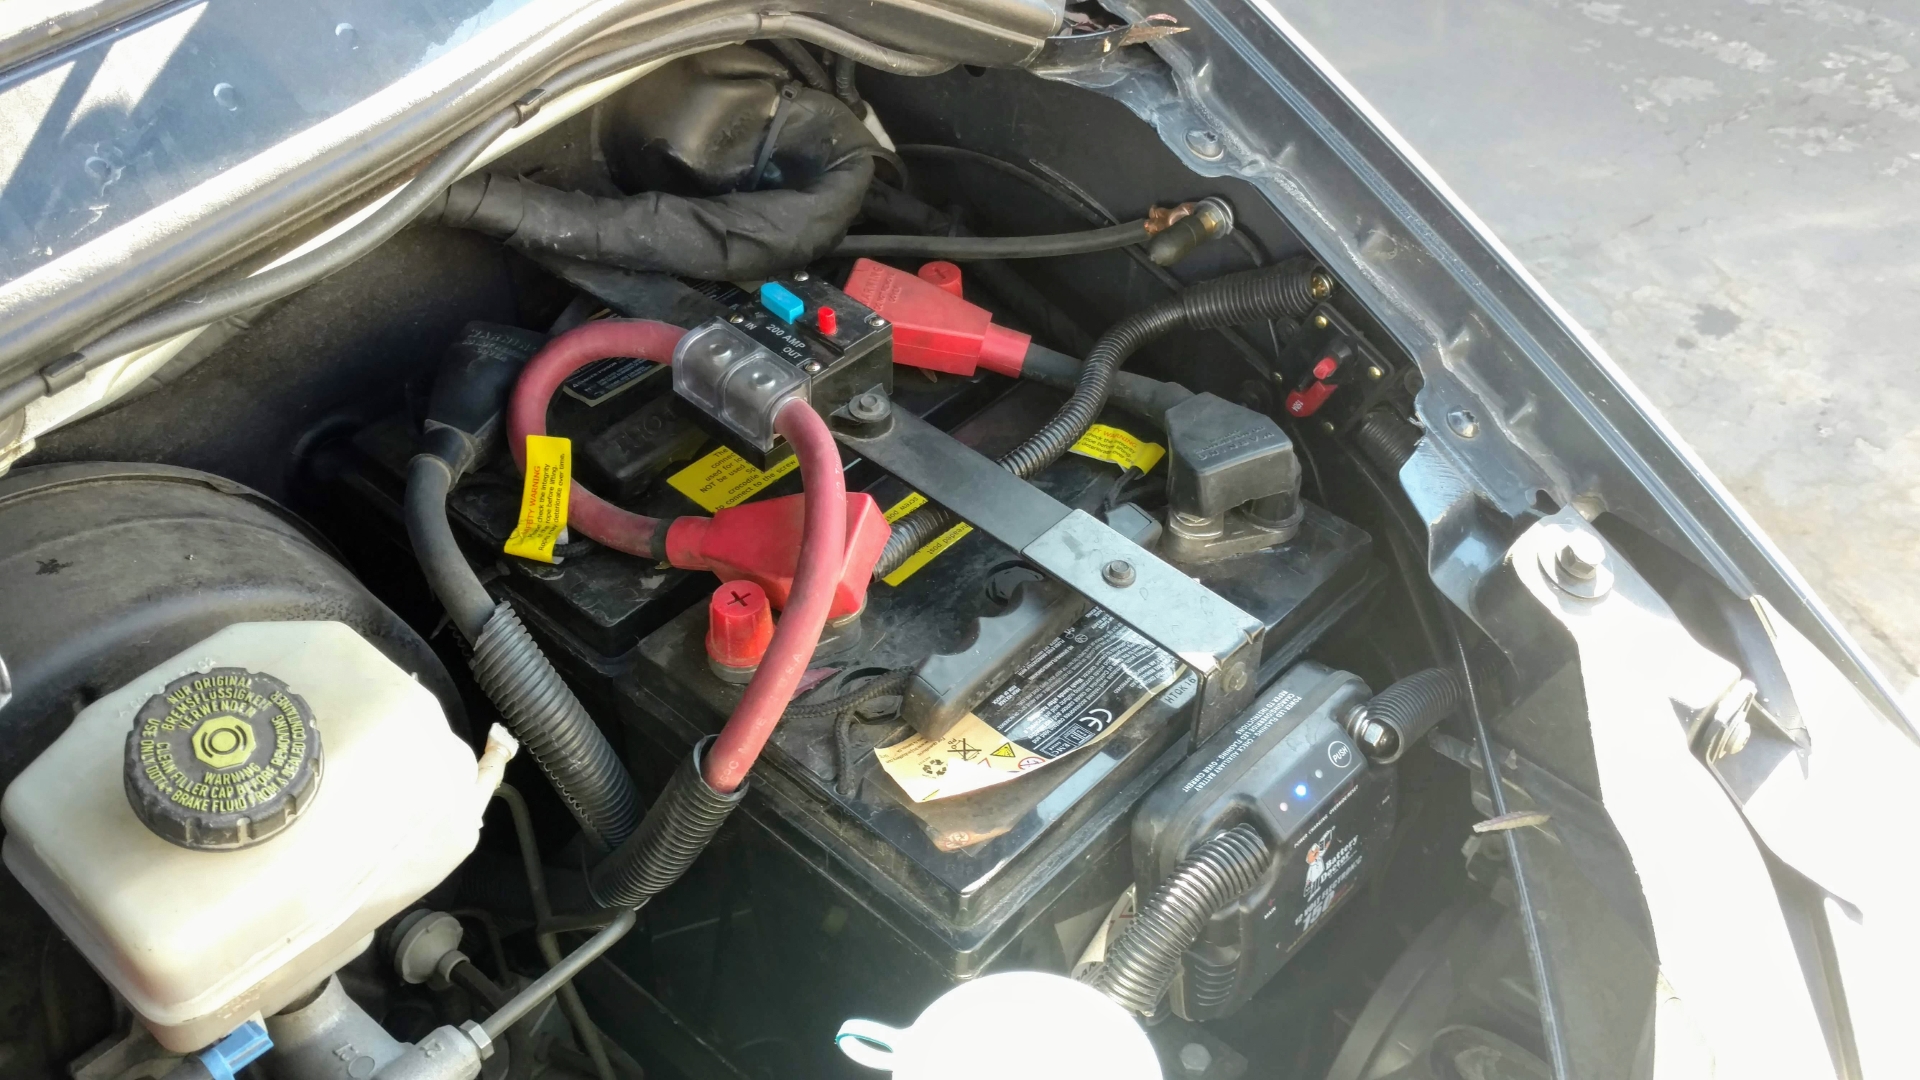
Under the hood, we have two 6V Trojan 200ah AGM golf cart batteries. Why? Because they are smaller than 12V deep cycle batteries and they also handle constant charge/ discharge better than traditional batteries. When wired in series, they provide 12V but do not double capacity. Together they offer 200ah. In order to get the same capacity in a 12V battery, it would be much larger and wouldn’t fit under the hood. I fabricated my own battery tray to hold the 6V batteries and it has worked out great. If you don’t have a welder or the skills to make your own, Adventure Wagon and RB Components sell 6V underhood battery trays for a pretty penny.
At the beginning of our build, we installed two 6V lead-acid golf cart batteries but ended up switching to AGM mostly because we needed to add another battery inside and that battery needed to be sealed (AGM). You should never mix different types of batteries in a system for charging efficiency reasons.

Battery Bank 2
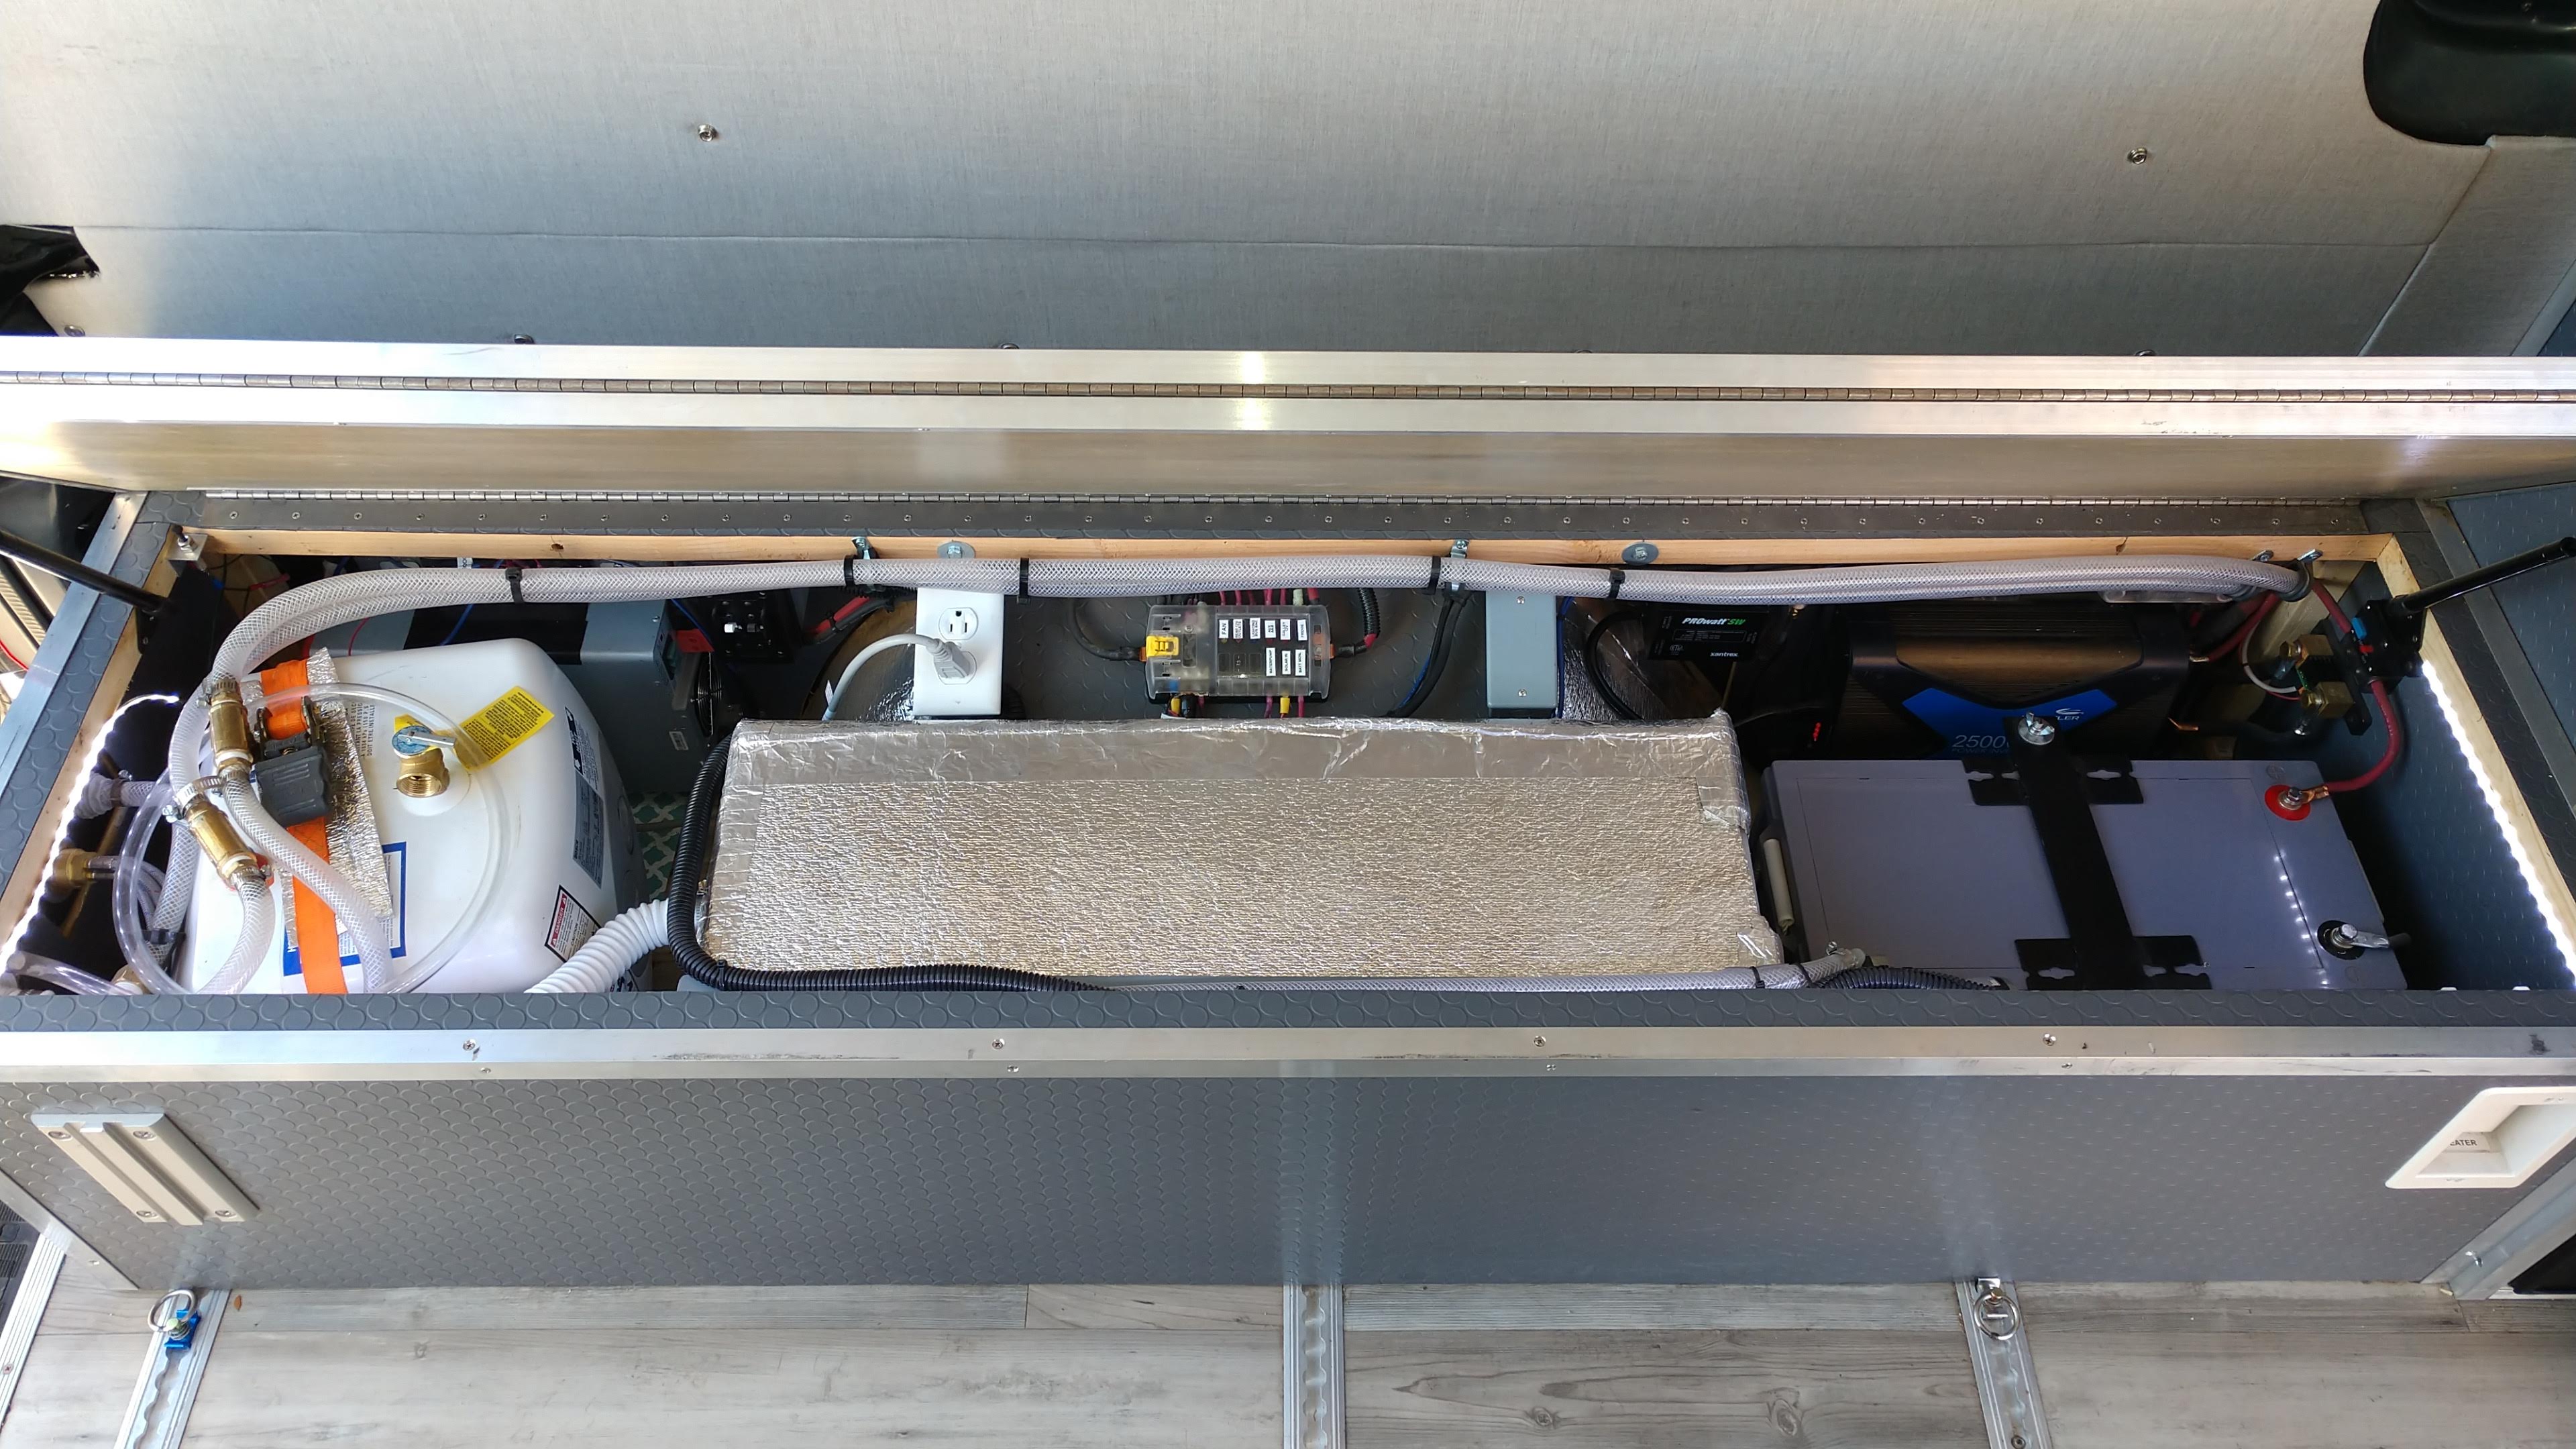
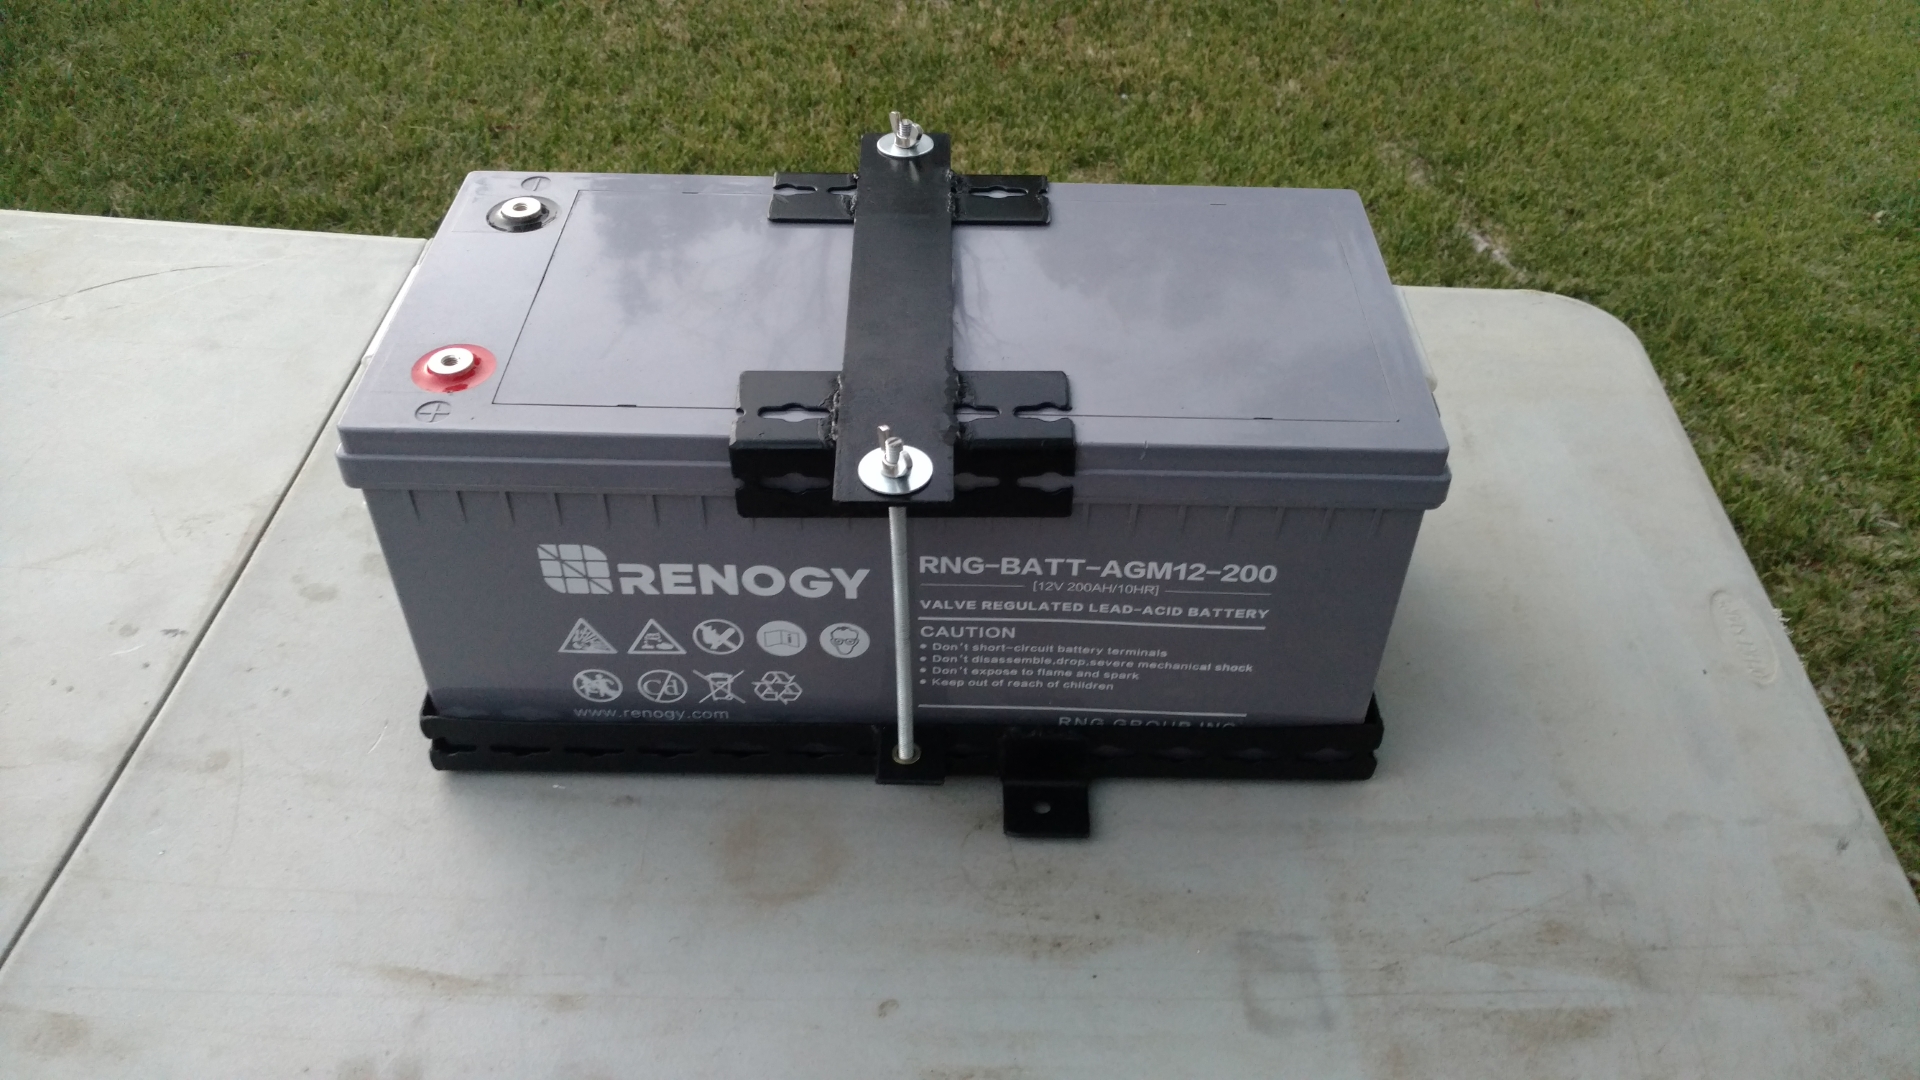
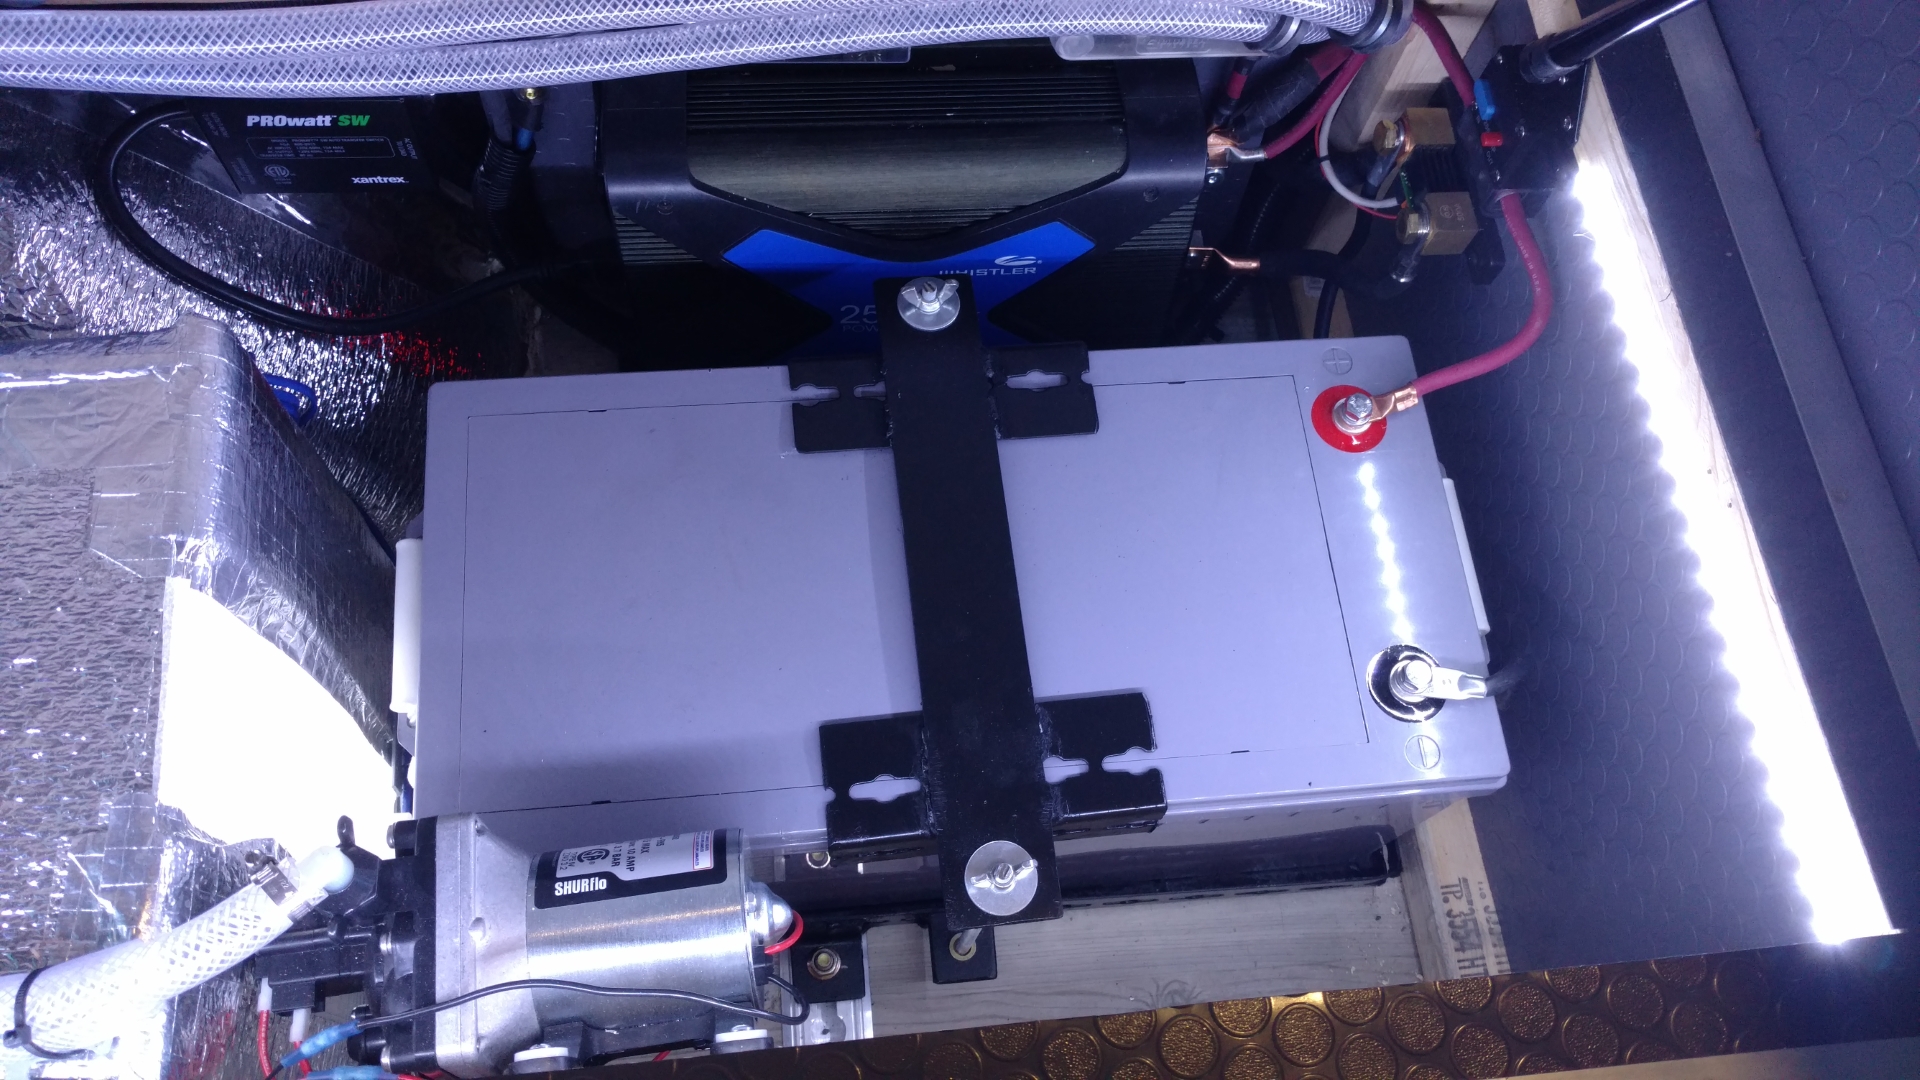
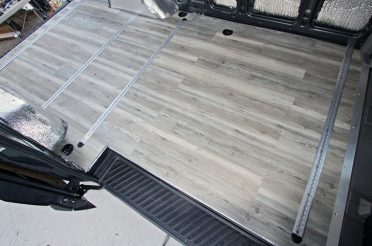
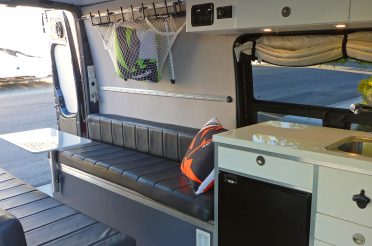
Inside the van’s utility box (left side bench), we have a second AGM battery. It is a Renogy 200ah battery. This battery is quite massive and weighs a ton (130 lbs), but it is necessary for the load that our water heater pulls and it provides the extra battery capacity required for being off-grid. I fabricated my own tray and mount for this battery. It mounts to the floor utilizing the L track in the floor.
Parts Used
- (2) 6v Trojan AGM batteries. I purchased through Factory Motor Parts locally. Other options on Amazon are Renogy and NPP
- 12V 200ah Renogy battery
Charging

Any power that you use needs to be replaced. Think of your battery bank as a gas tank. When it’s low, it needs to be refilled. If you use 150 amp hours in a day, 150 amp hours needs to be reproduced. We use both solar power and the van’s alternator power to charge our house batteries. Having enough charging ensures our batteries are always in a safe, usable state.
Solar Charging
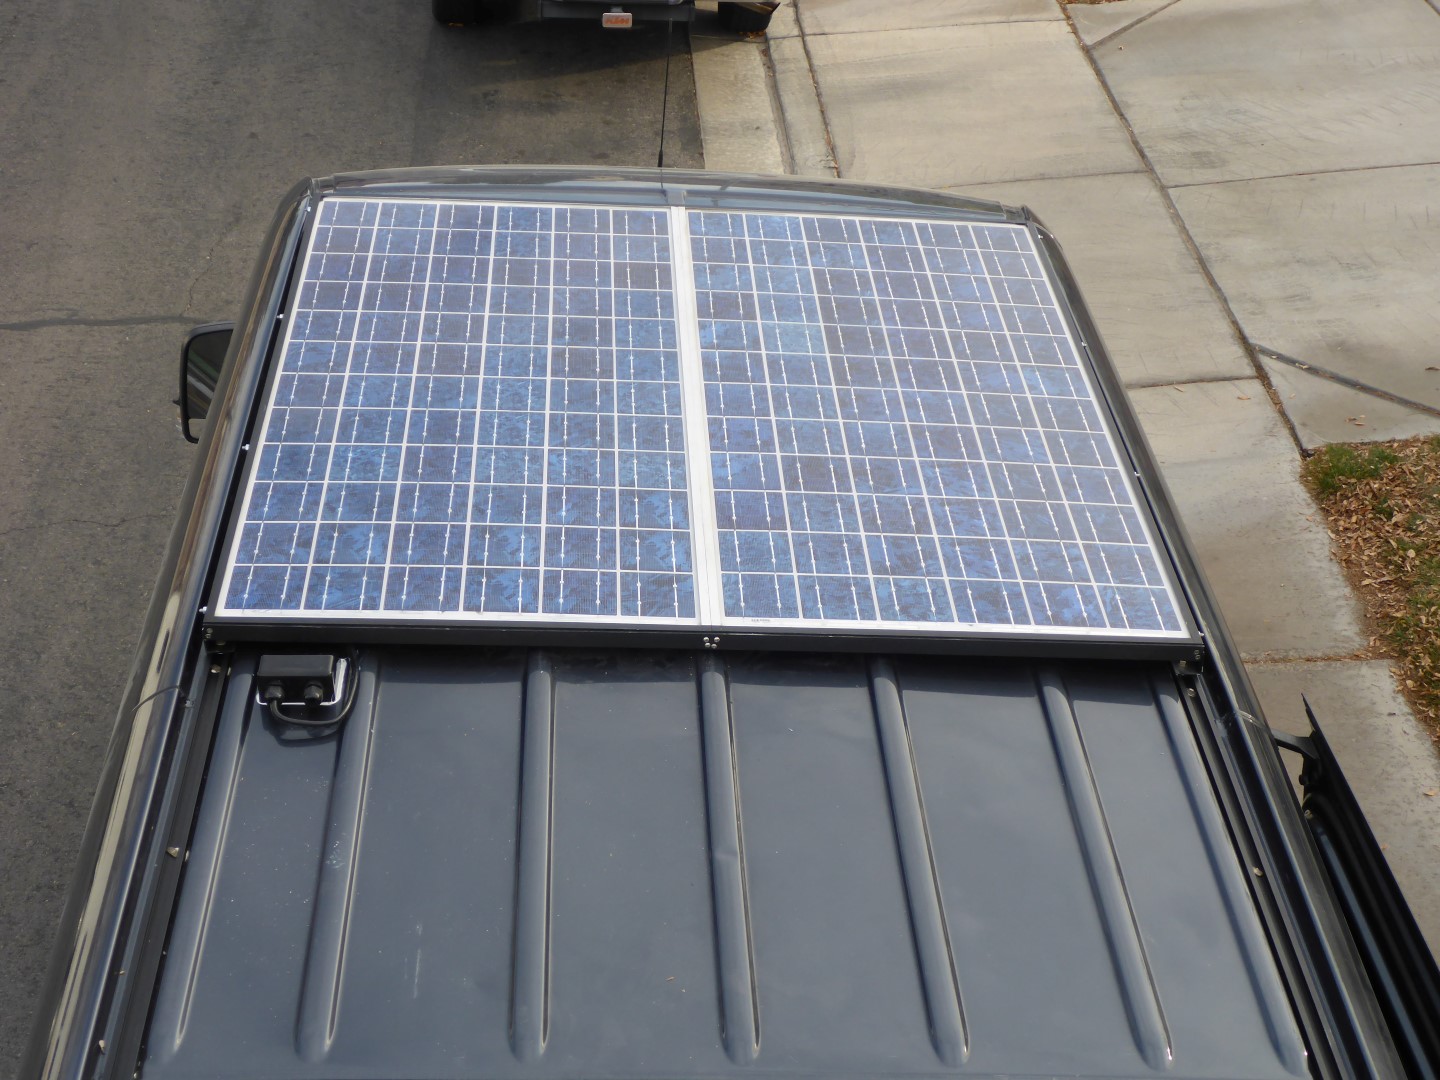
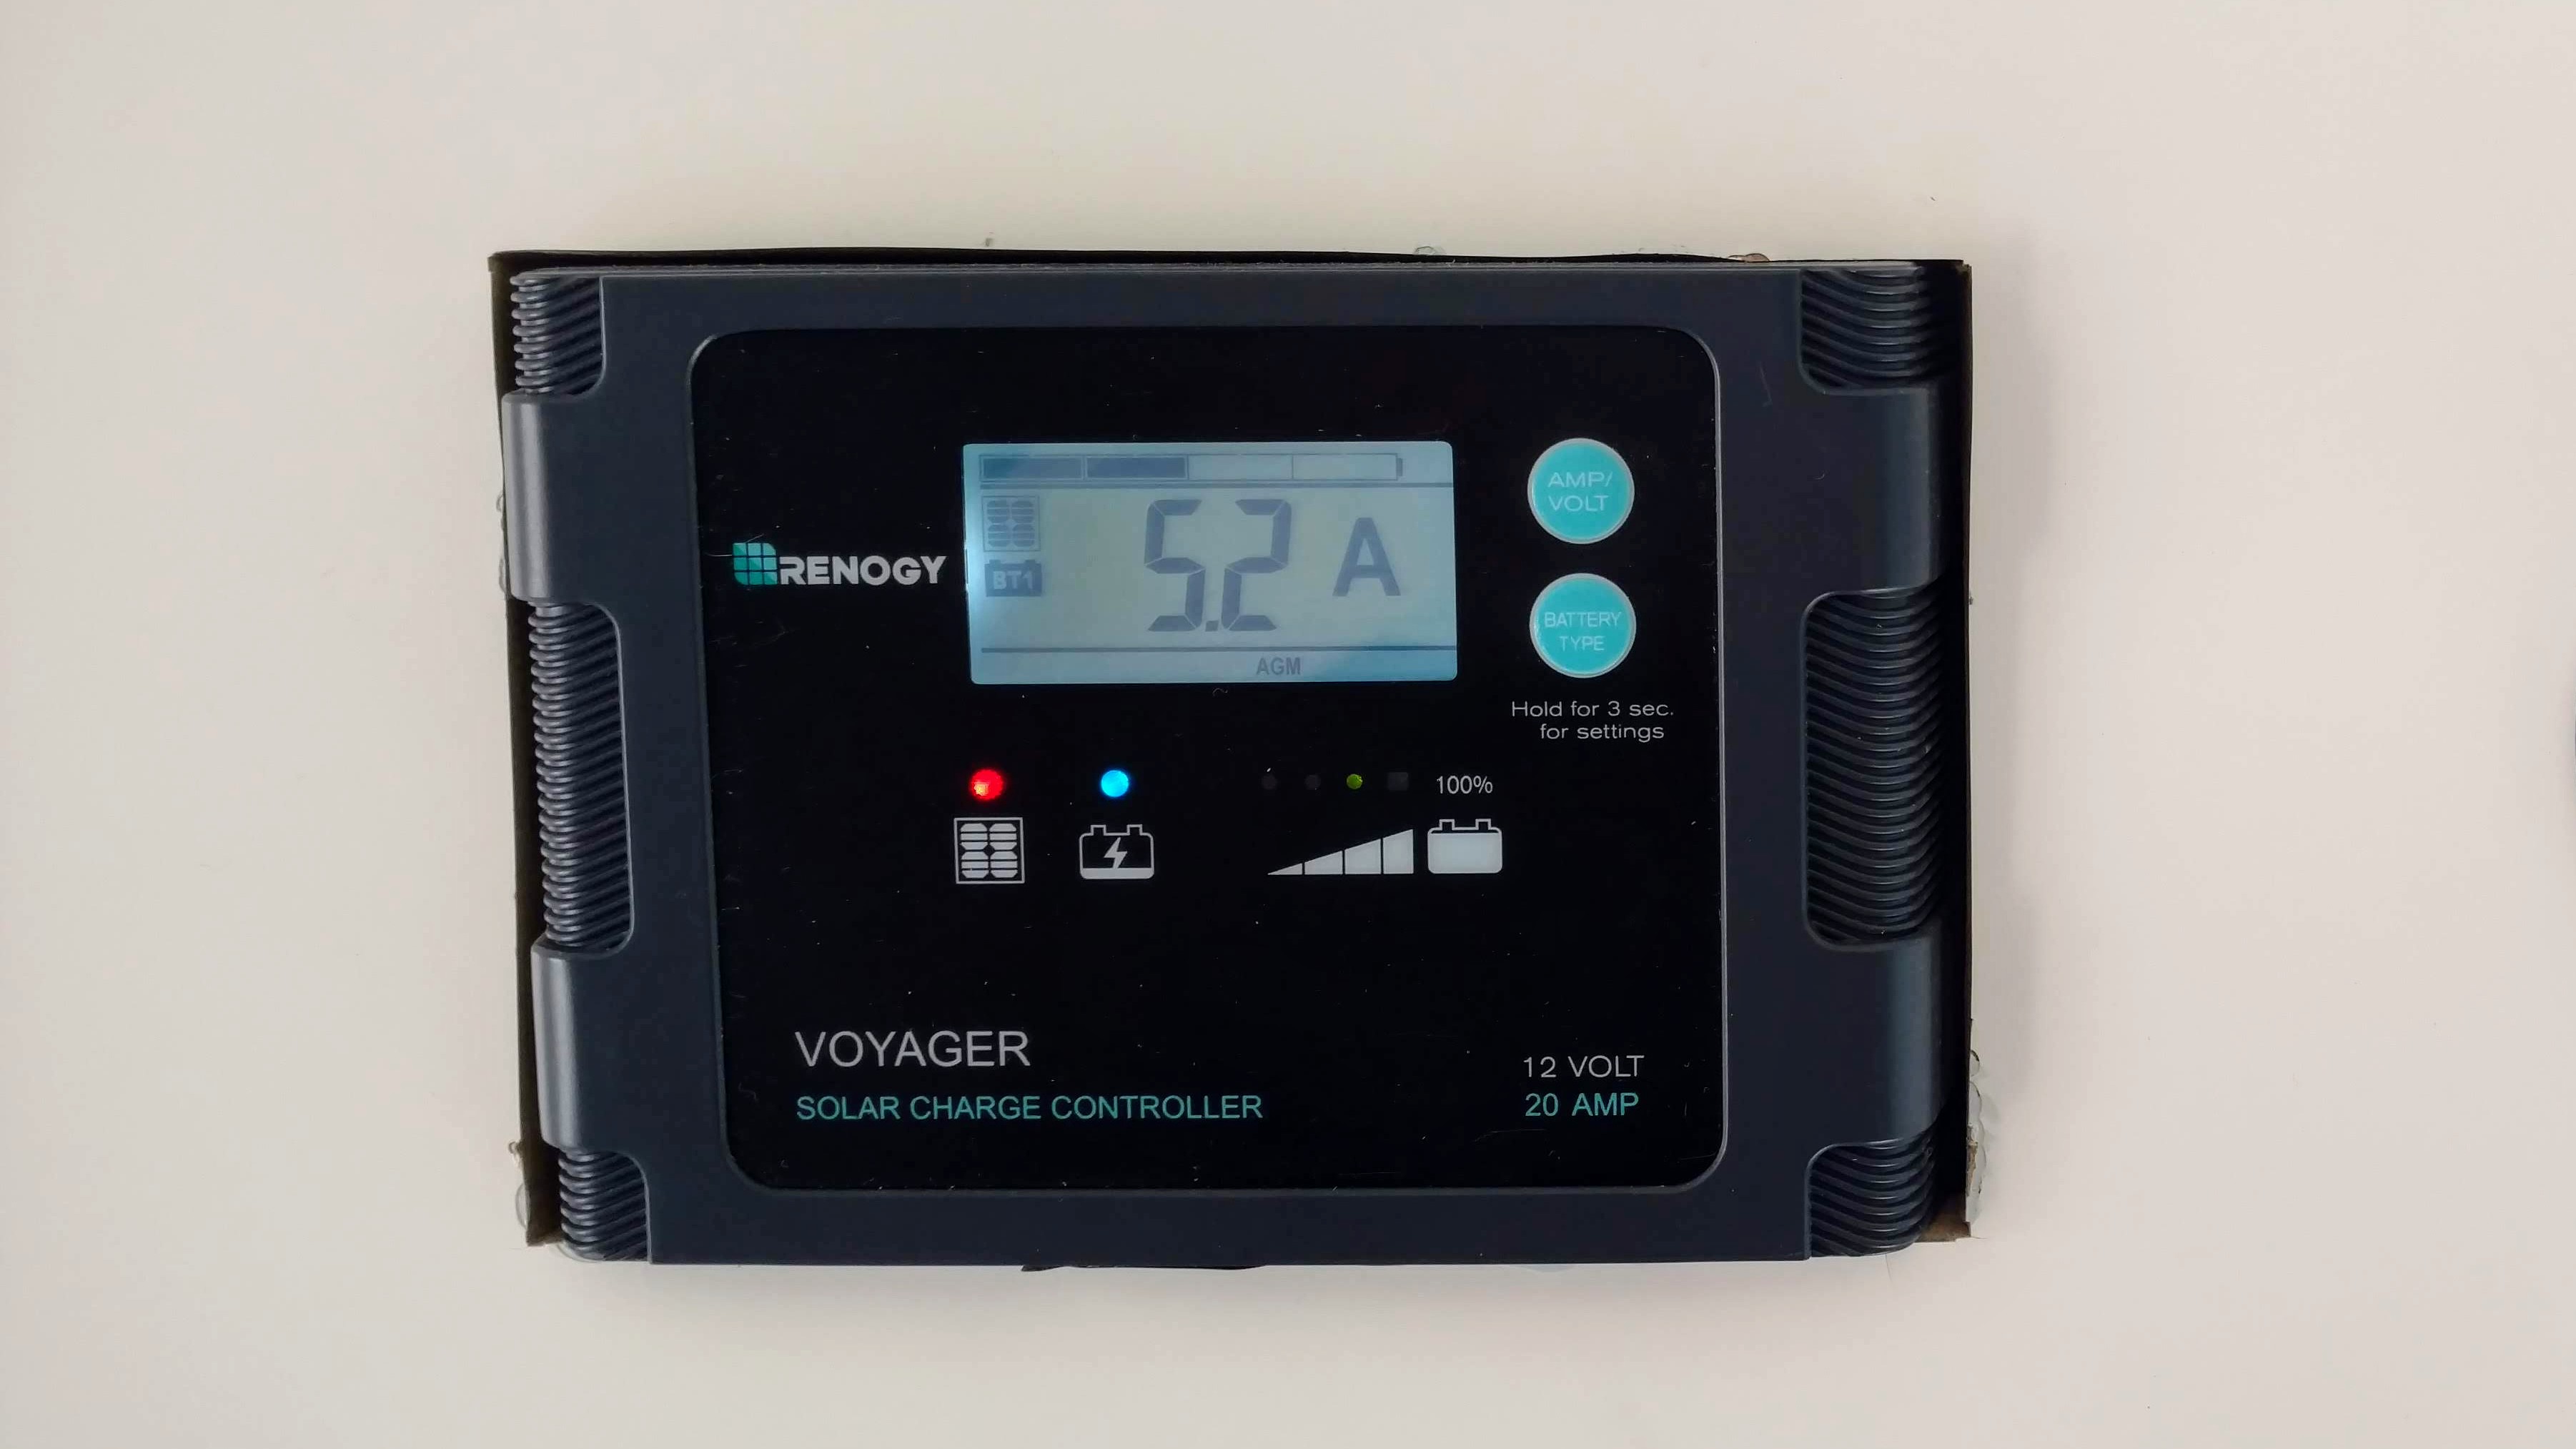
Solar is the best way to keep batteries topped off. Installing solar is relatively easy and the power from the sun is free. We installed two 100W solar panels on our roof. The power cables feed through a waterproof gland in the roof and into our Renogy solar controller. There are two types of controllers: MPPT and PWM. MPPT is more efficient, but also more than twice as much for most controllers. I didn’t feel we needed to go that route. PWM controllers work just fine. From the solar controller, the wiring ties right into our DC fuse box. The fuse box is rated at 30 amps, way more than anything we will produce from the sun.

Parts Used
- We used some solar panels that were given to us, but many inexpensive panels out there do the same great job. Several other van builders have reported good reviews and experience when using Grape Solar and Renogy.
- Renogy Voyager Solar Controller
- cable gland– water sealed and routes wiring through the roof
- Solar cable– sunlight resistant
- solar disconnect switch (rarely used, but nice to have if the system needs to be shut down)
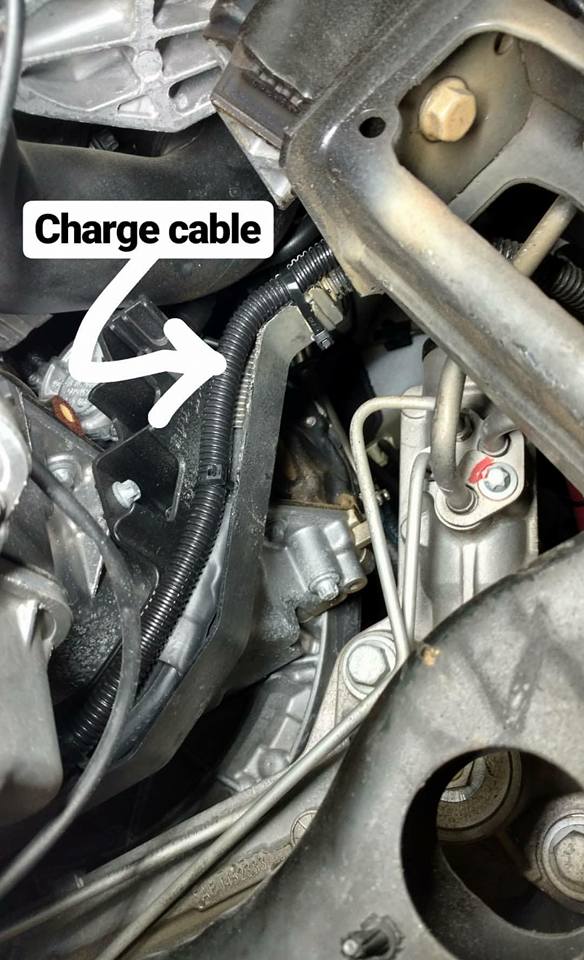
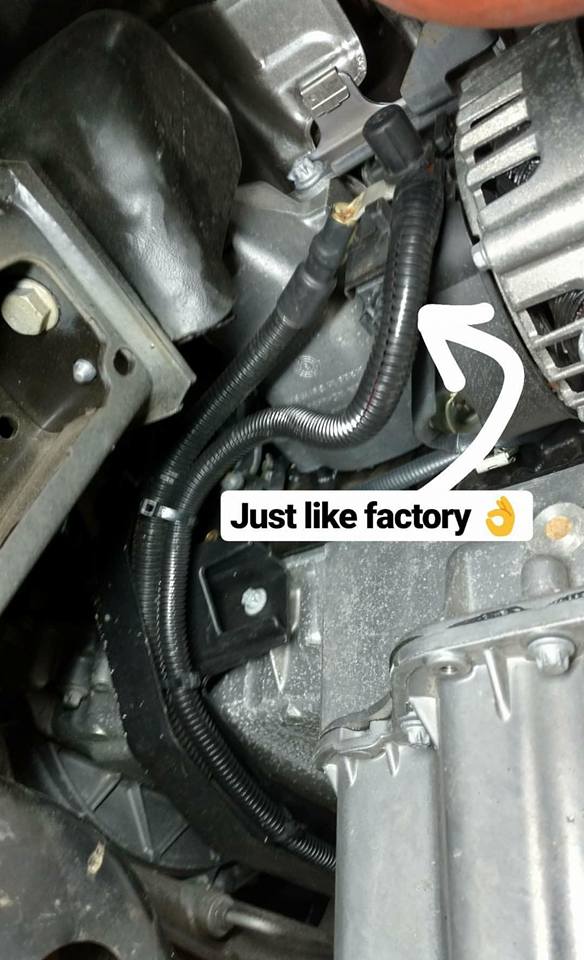
Alternator Charging
When the van is running, a smart controller connects our alternator power to our house batteries. This helps keep our batteries charged up while driving. The controller automatically disconnects to protect the starting battery in the event the house batteries were to run low.

Parts Used
- Battery Doctor Battery Isolator
- 4GA wire to run from alternator to controller
- 150A circuit breaker between the controller and underhood batteries
- cable ends
110V AC Power

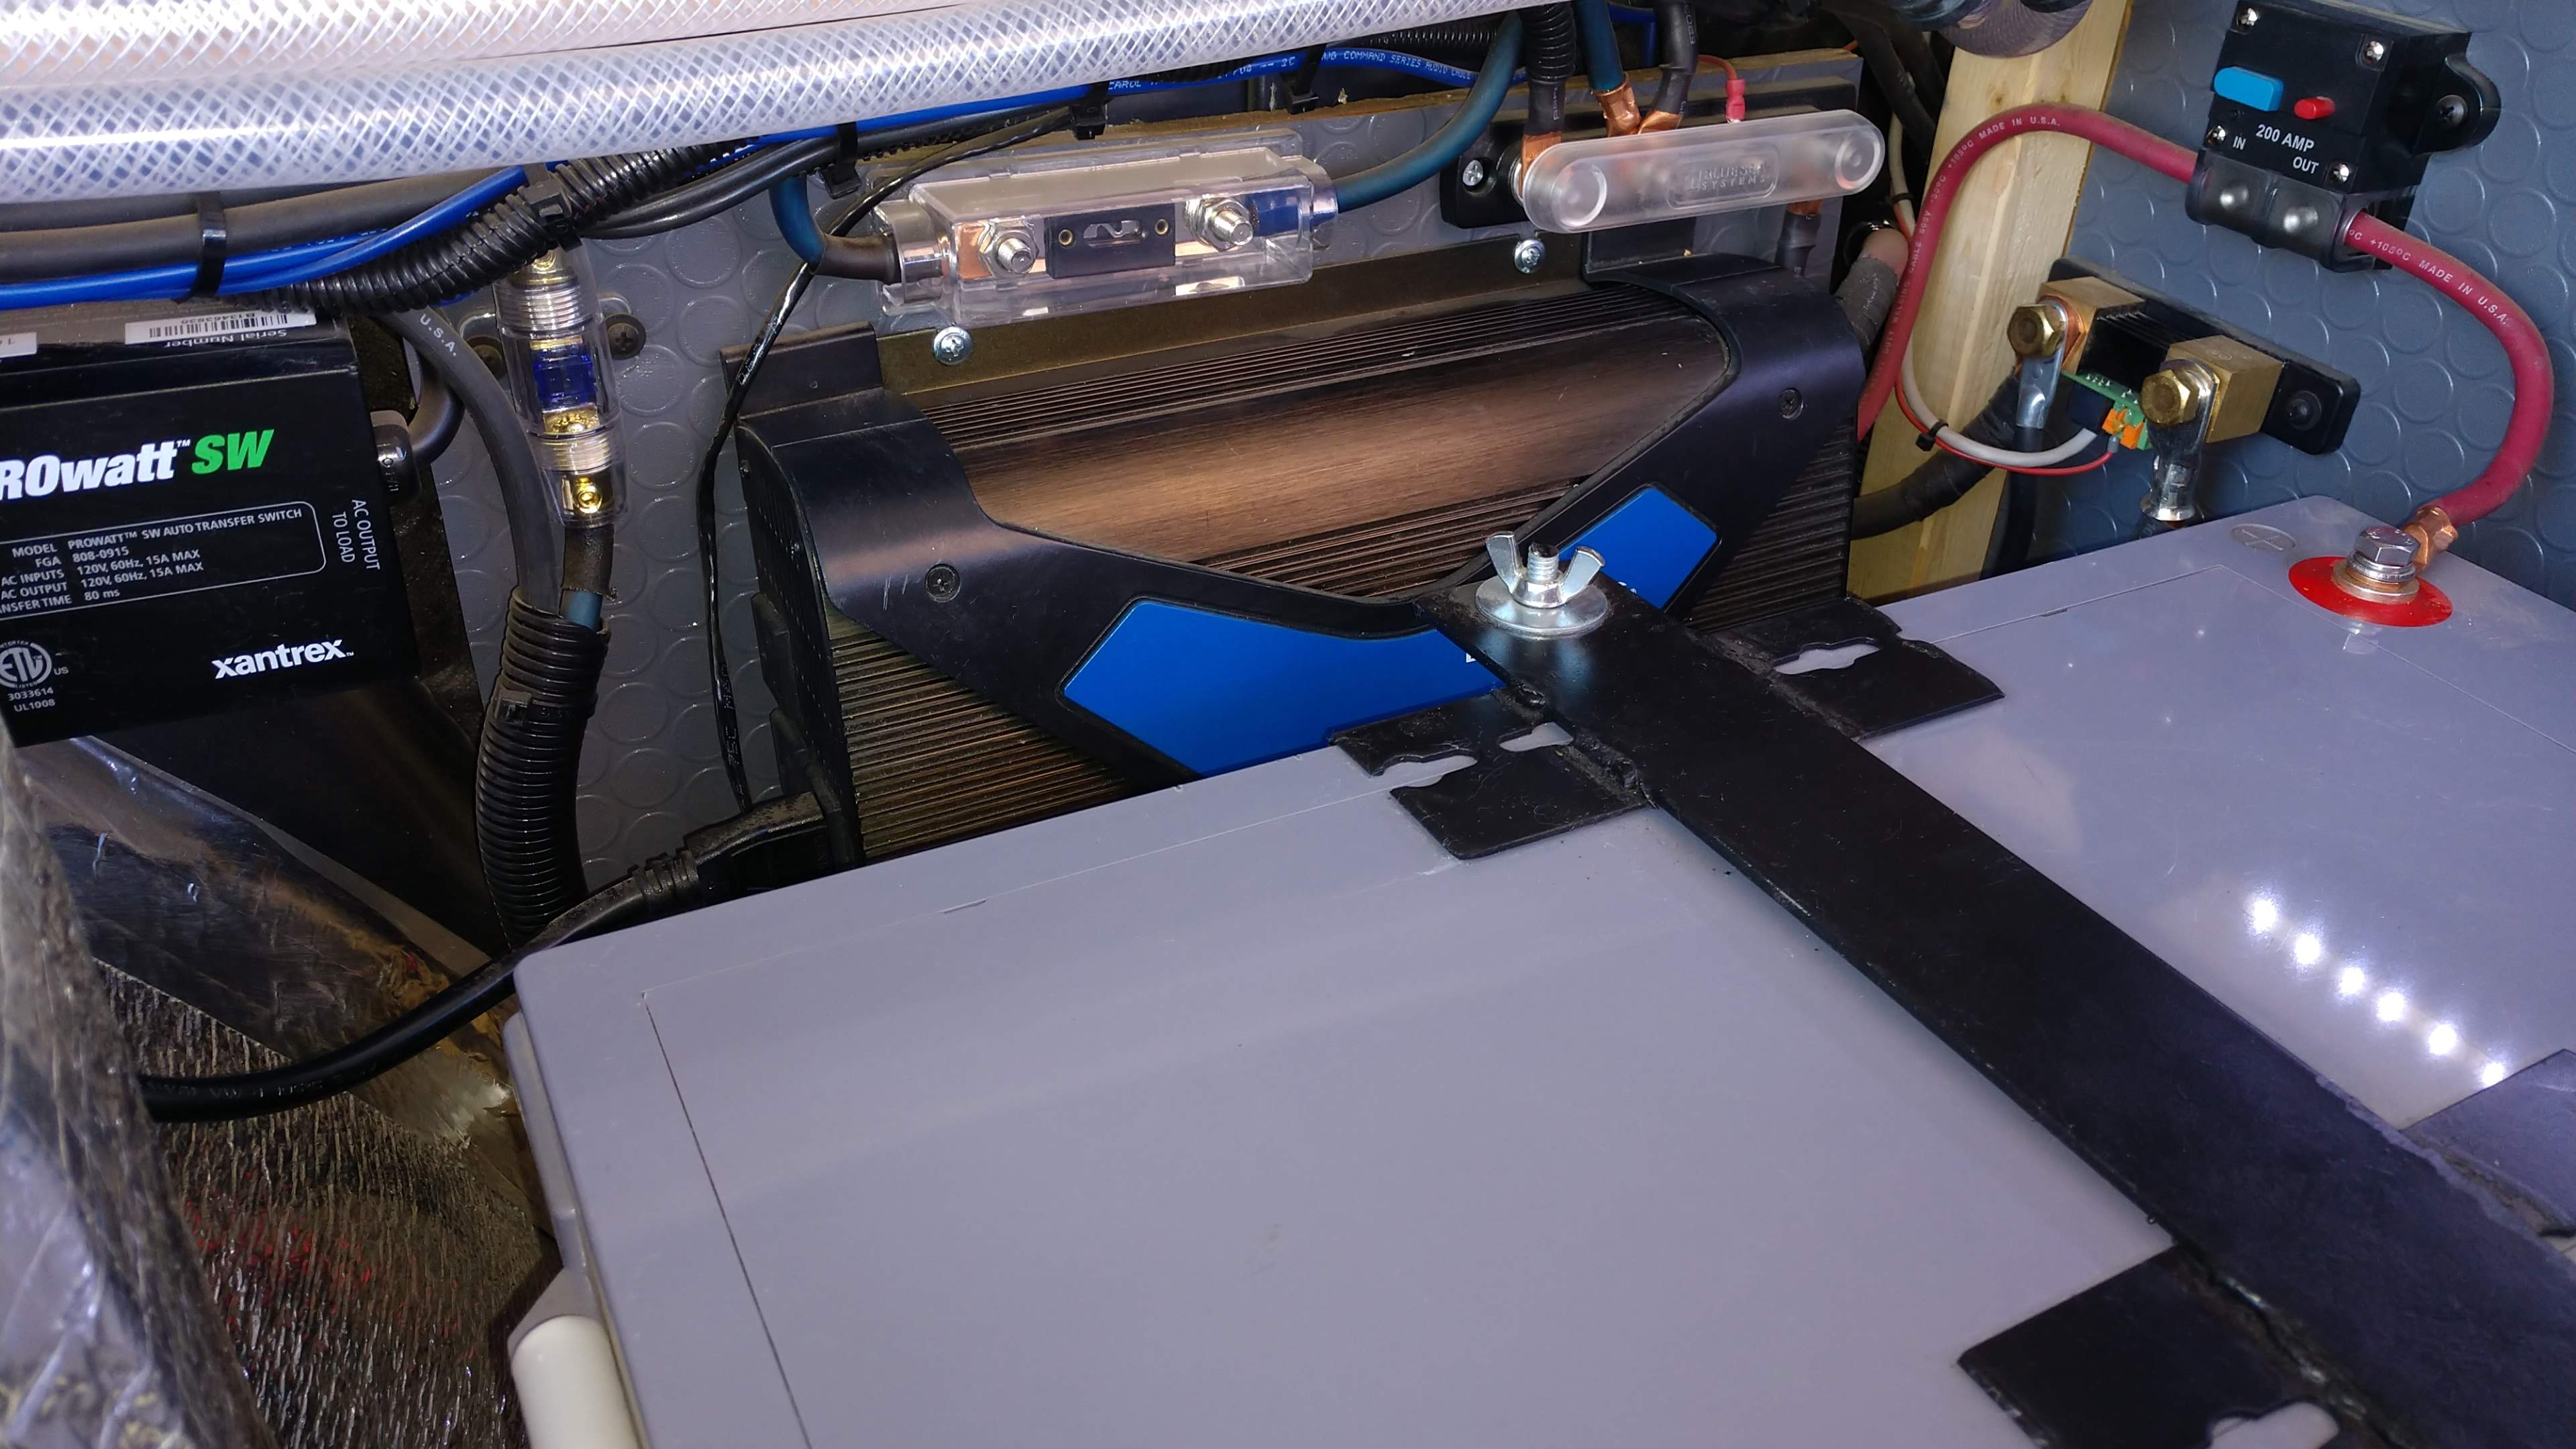
Inverter
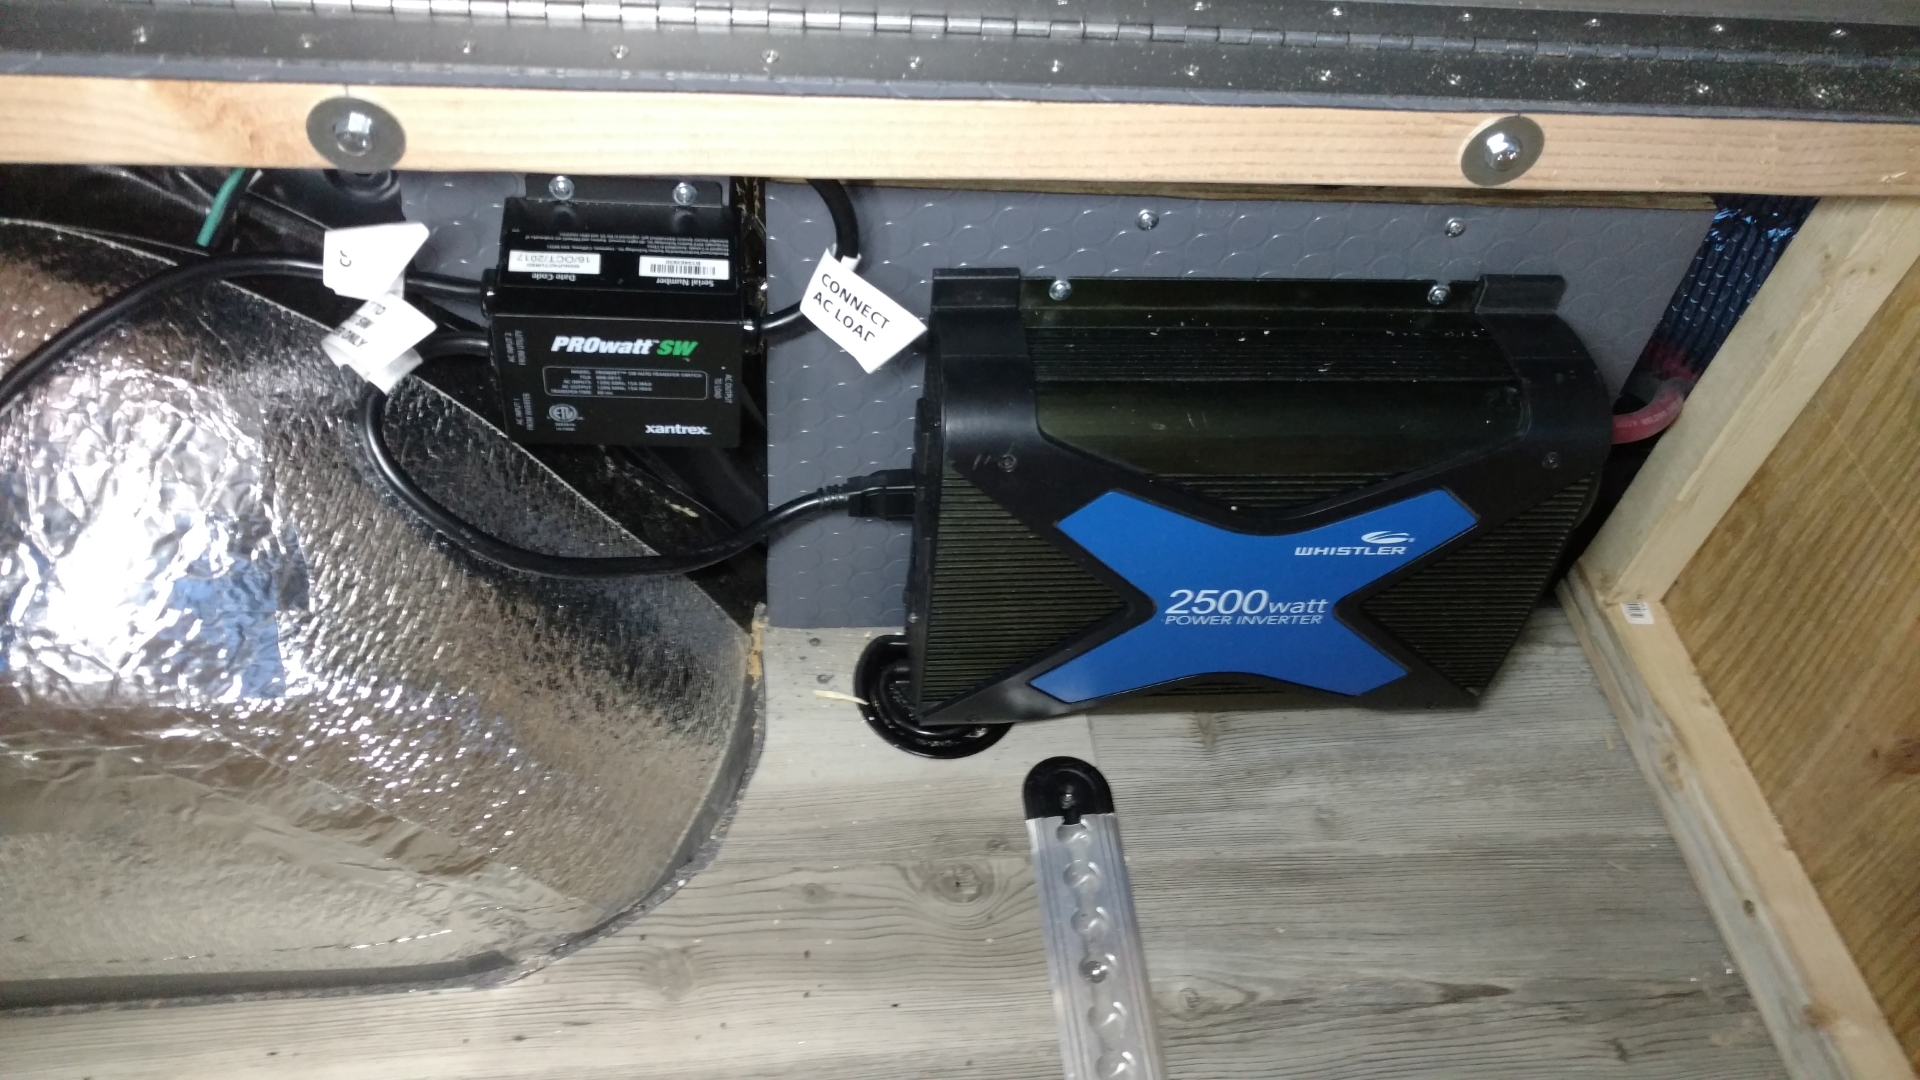
An inverter allows you to have 110V outlets like you see in your house. It takes 12V DC battery voltage and converts it to usable AC power. It really isn’t a necessity for most van people, but we wanted to have the option. We also needed it for our water heater since it’s electric and runs off 110V AC. There are many different inverters out there. The two main types are modified wave and pure sine wave. Modified wave inverters will run lights, appliances, and just about everything else that you plug into the wall. Pure sine wave inverters are required for more sensitive equipment. They are more expensive but are required to safely run laptops, newer TVs, and some battery chargers for cordless tools, etc. There are also many different sizes. We have a 2500 watt modified wave inverter in our van and it is more than enough. To give you an idea of what the largest load may be, a small microwave usually draws about 1500-2000 watts. Our water heater pulls about 1500 watts.
Sizing Your Inverter to Your Loads
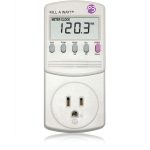
“How many watts does my hairdryer use?”
Not sure how much power something uses? Sometimes there are household appliances or things you plug in that are difficult to gauge for power consumption. You can always look in the owners manual, but sometimes that information isn’t very accurate. The absolute best way we found was to use one of these Kill A Watt tools! It accurately shows you how many watts an item uses as you are using it. Just plug it into the wall, then plug in whatever it is into the Kill A Watt meter.
Parts Used
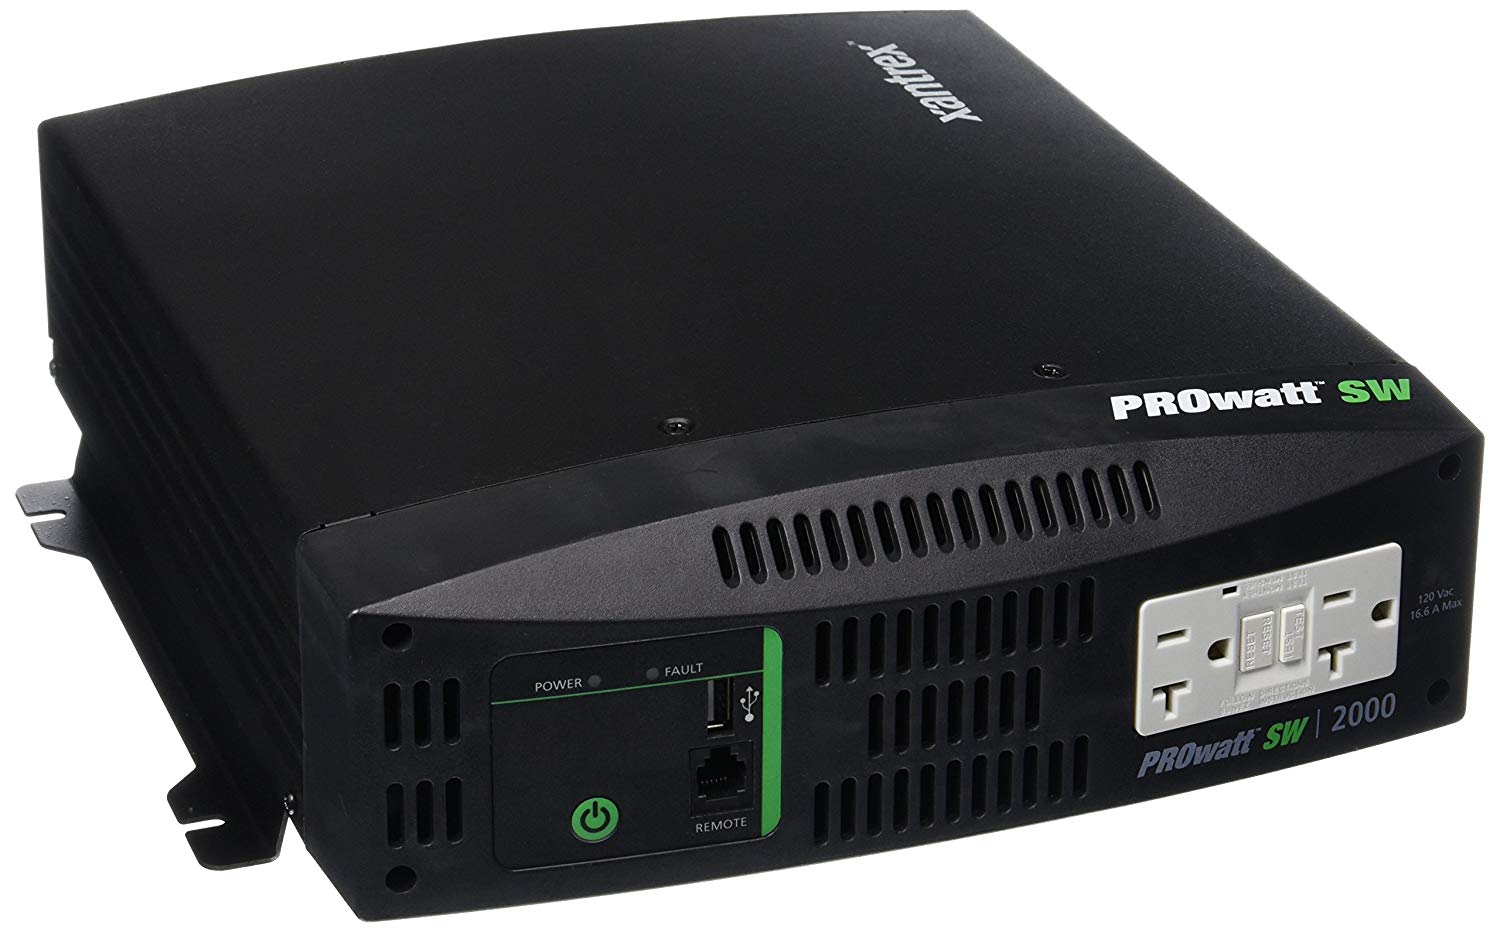
- I bought our inverter used from a buddy of mine. It was cheap and did the job. If I had to buy one new, I’d go with the Xantrax Pure Sine Prowatt 2000 just so I could wouldn’t have to worry about clean power to charge or run certain things off 110V. I’d also get the remote switch they offer for it. That is a must-have. We have one with our current inverter. You can leave the inverter on standby and flip the remote switch on when you want 110V power to the outlets.
- Kill A Watt tool
Shore Power

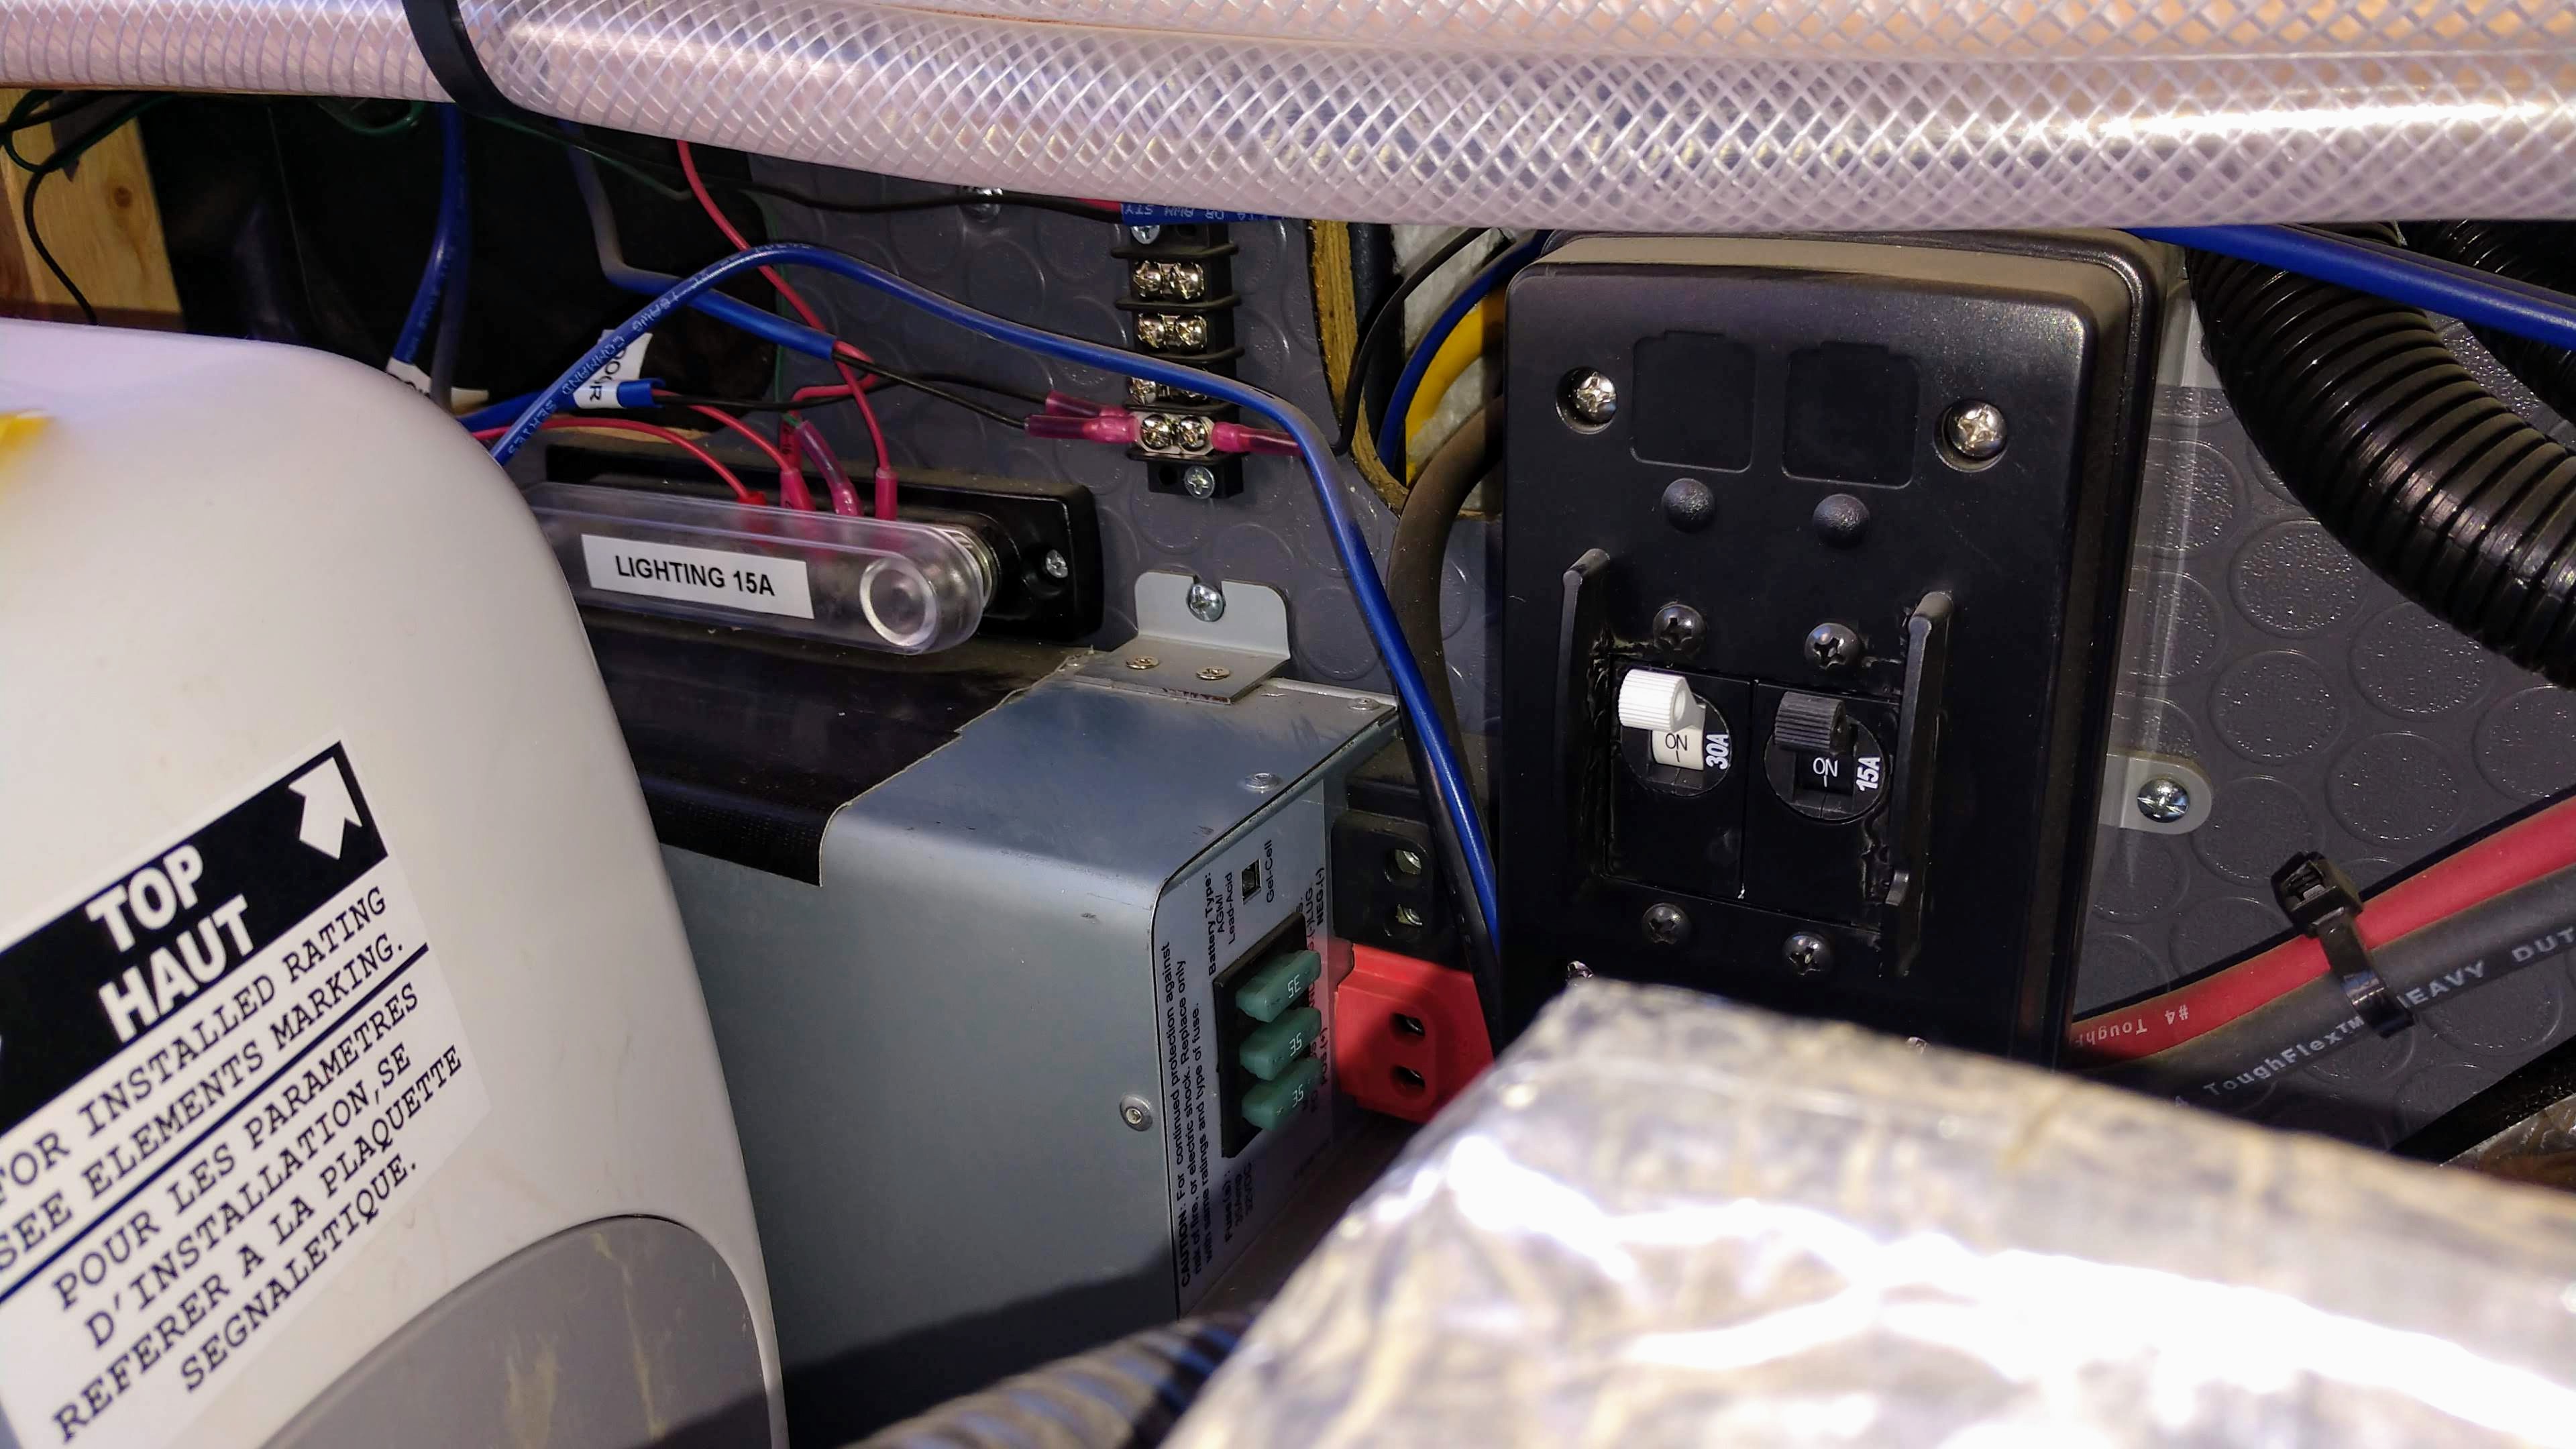
Shore power allows you to plug in your van and have power without draining your batteries. We don’t use it very often since we don’t usually camp at campgrounds, but it has come in handy. It’s nice to plug in the van before a trip to make sure the batteries are charged up while the fridge is running. In order to wire our van up to have shore power hookups, I had to install an auto transfer switch, an outdoor power plug, and a DC converter/charger.
Transfer Switch
The transfer switch automatically detects when you are plugged in and transfers the load to shore power instead of your inverter which draws from your batteries.
![]()
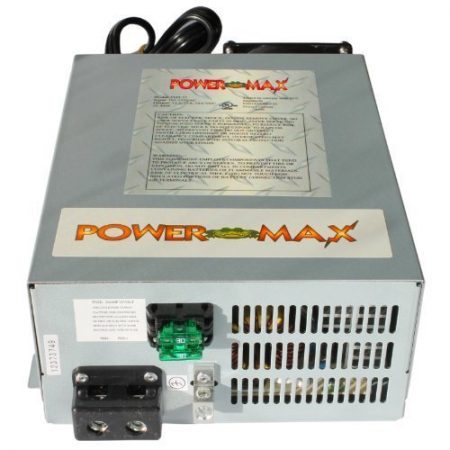
DC converter/ charger
The DC converter/ charger is basically a smart battery charger that runs off 110V. It plugs into the shore power side of the system and automatically charges the DC side of the system (the batteries) whenever the van is plugged in.
Outdoor Plug
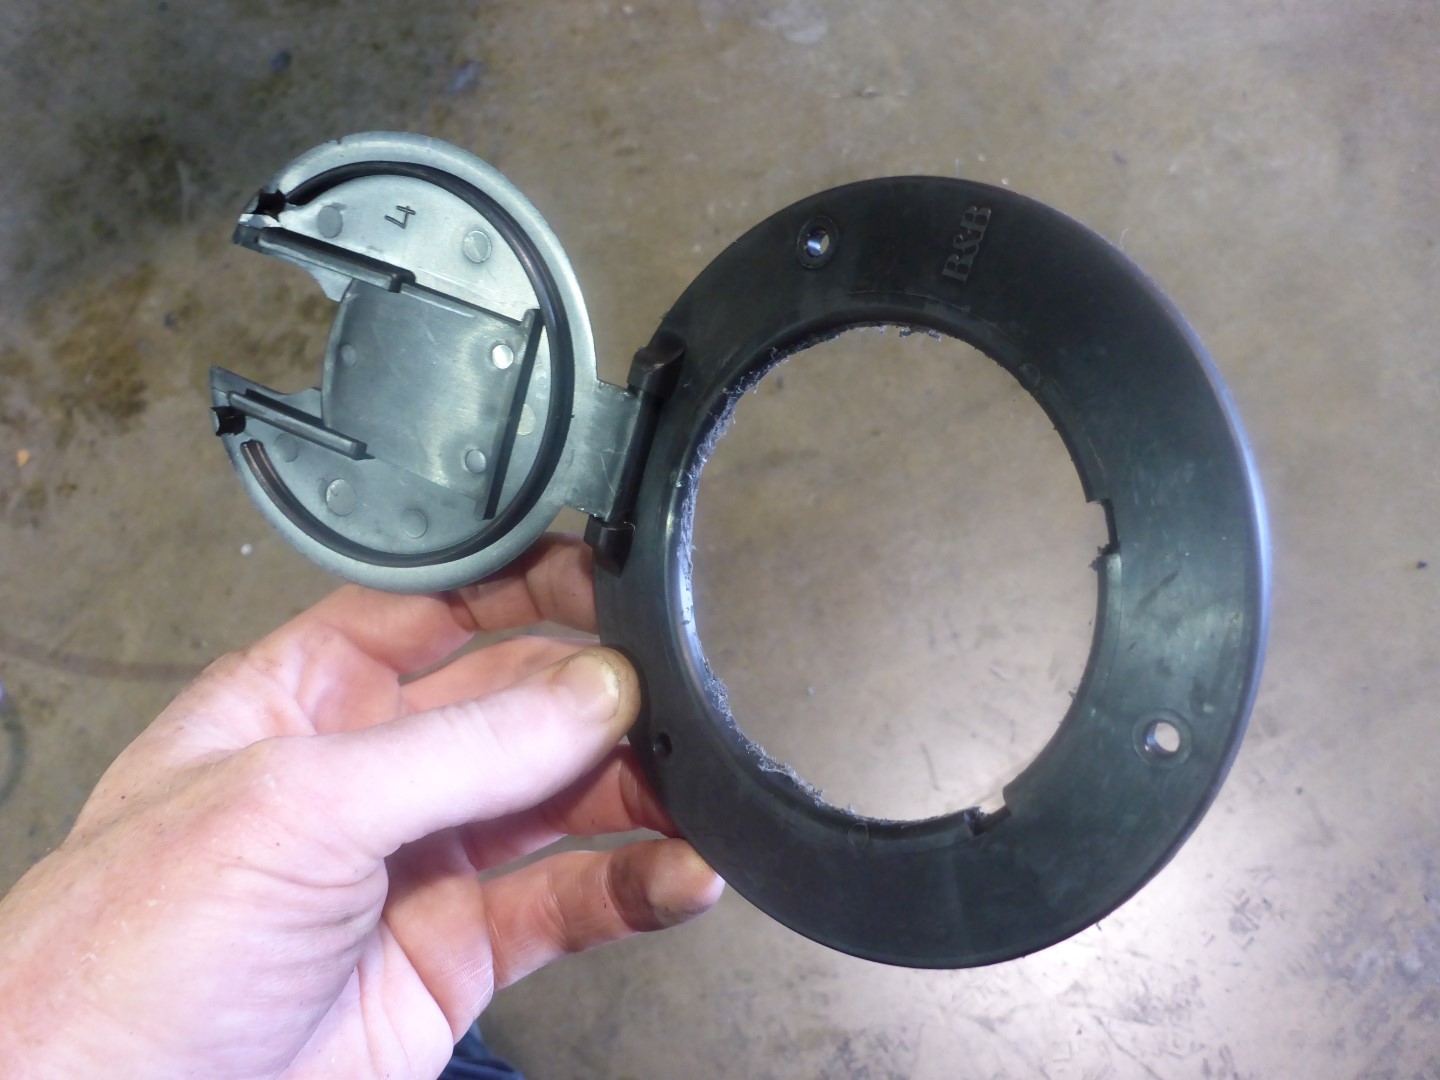
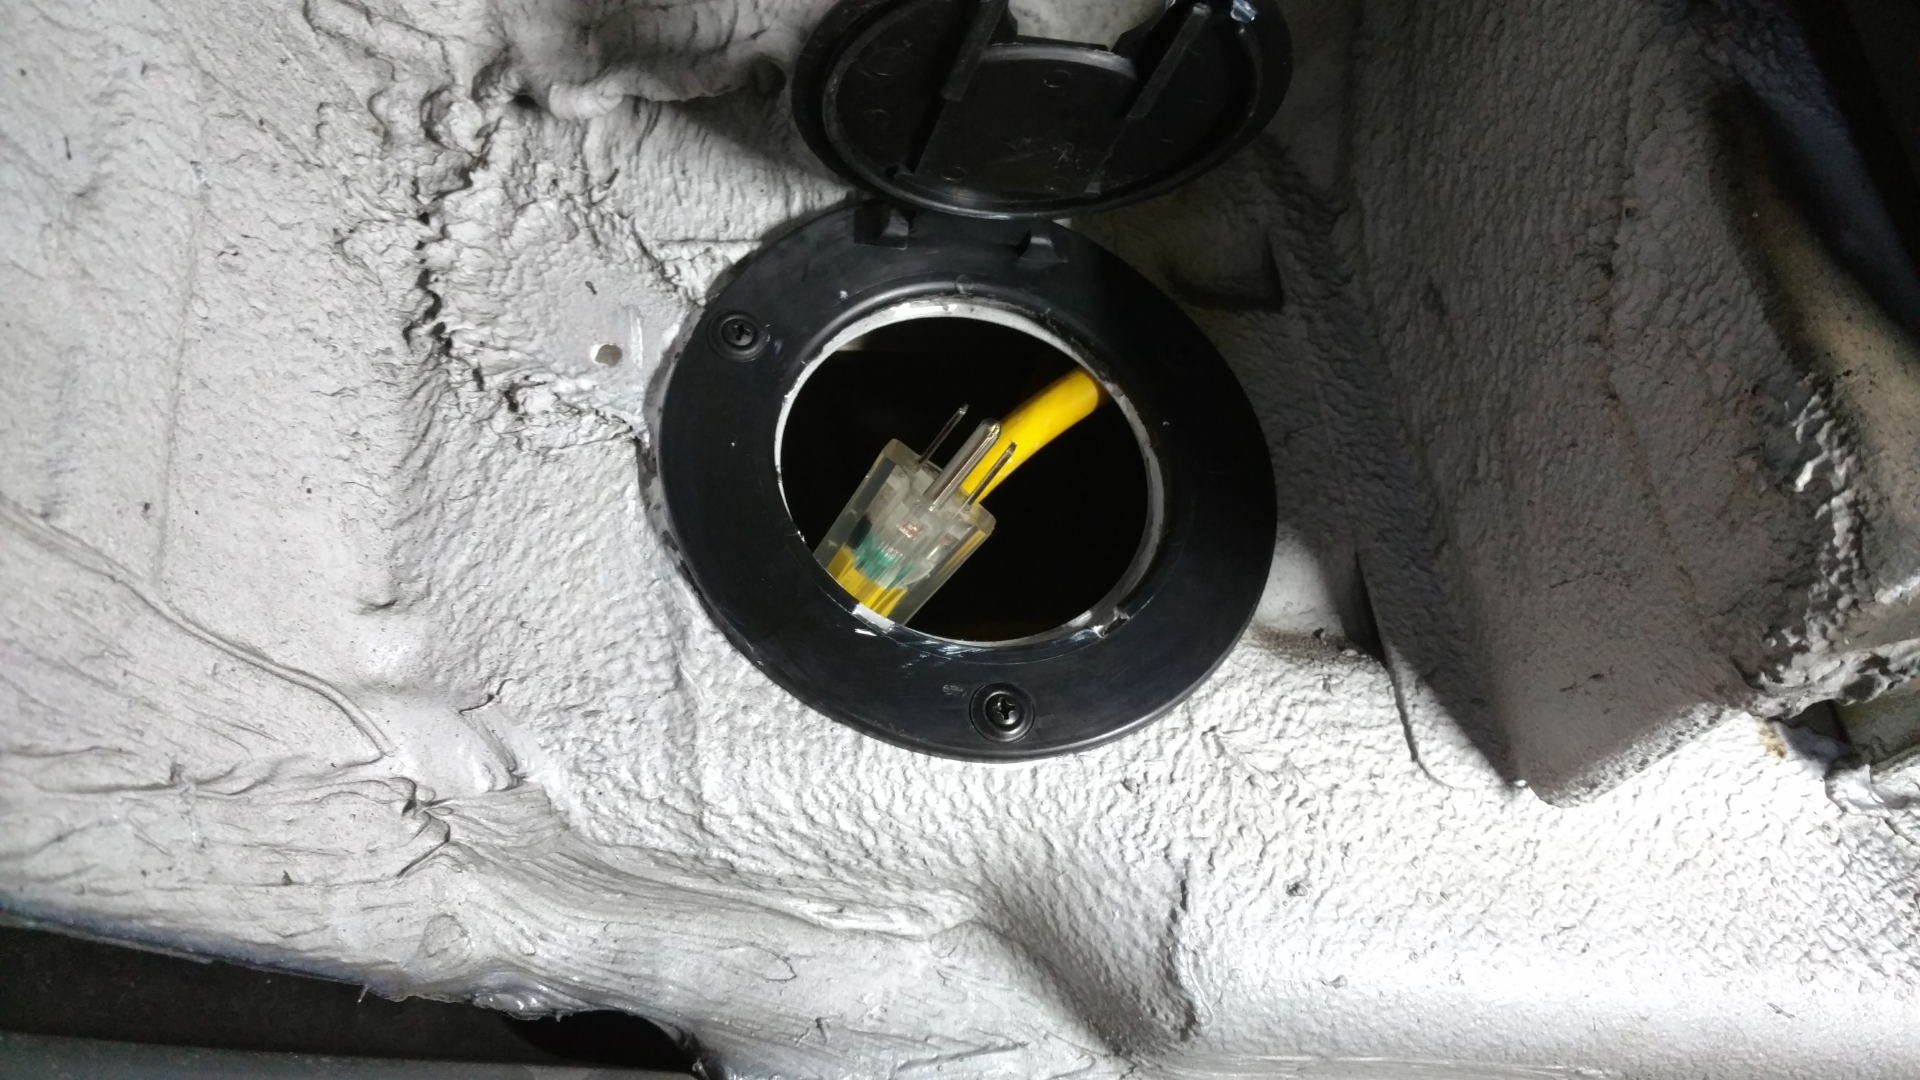
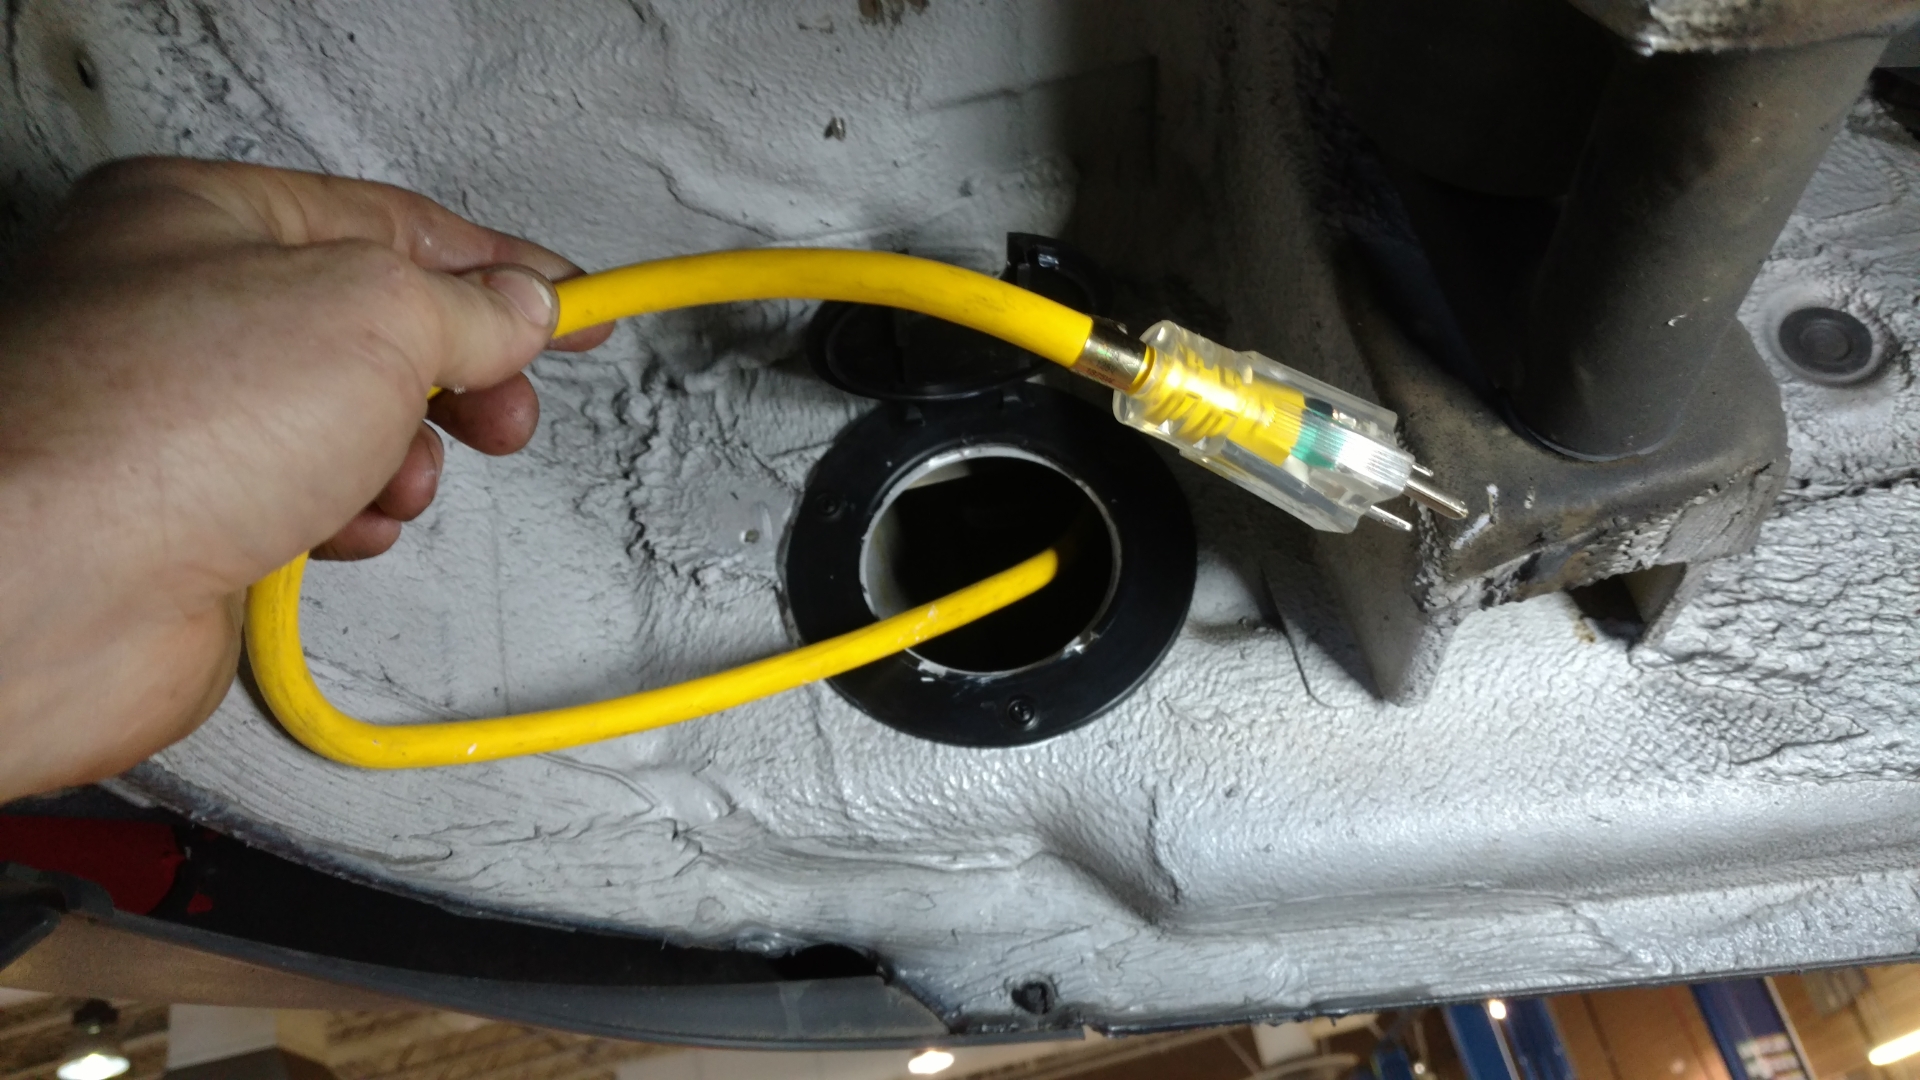
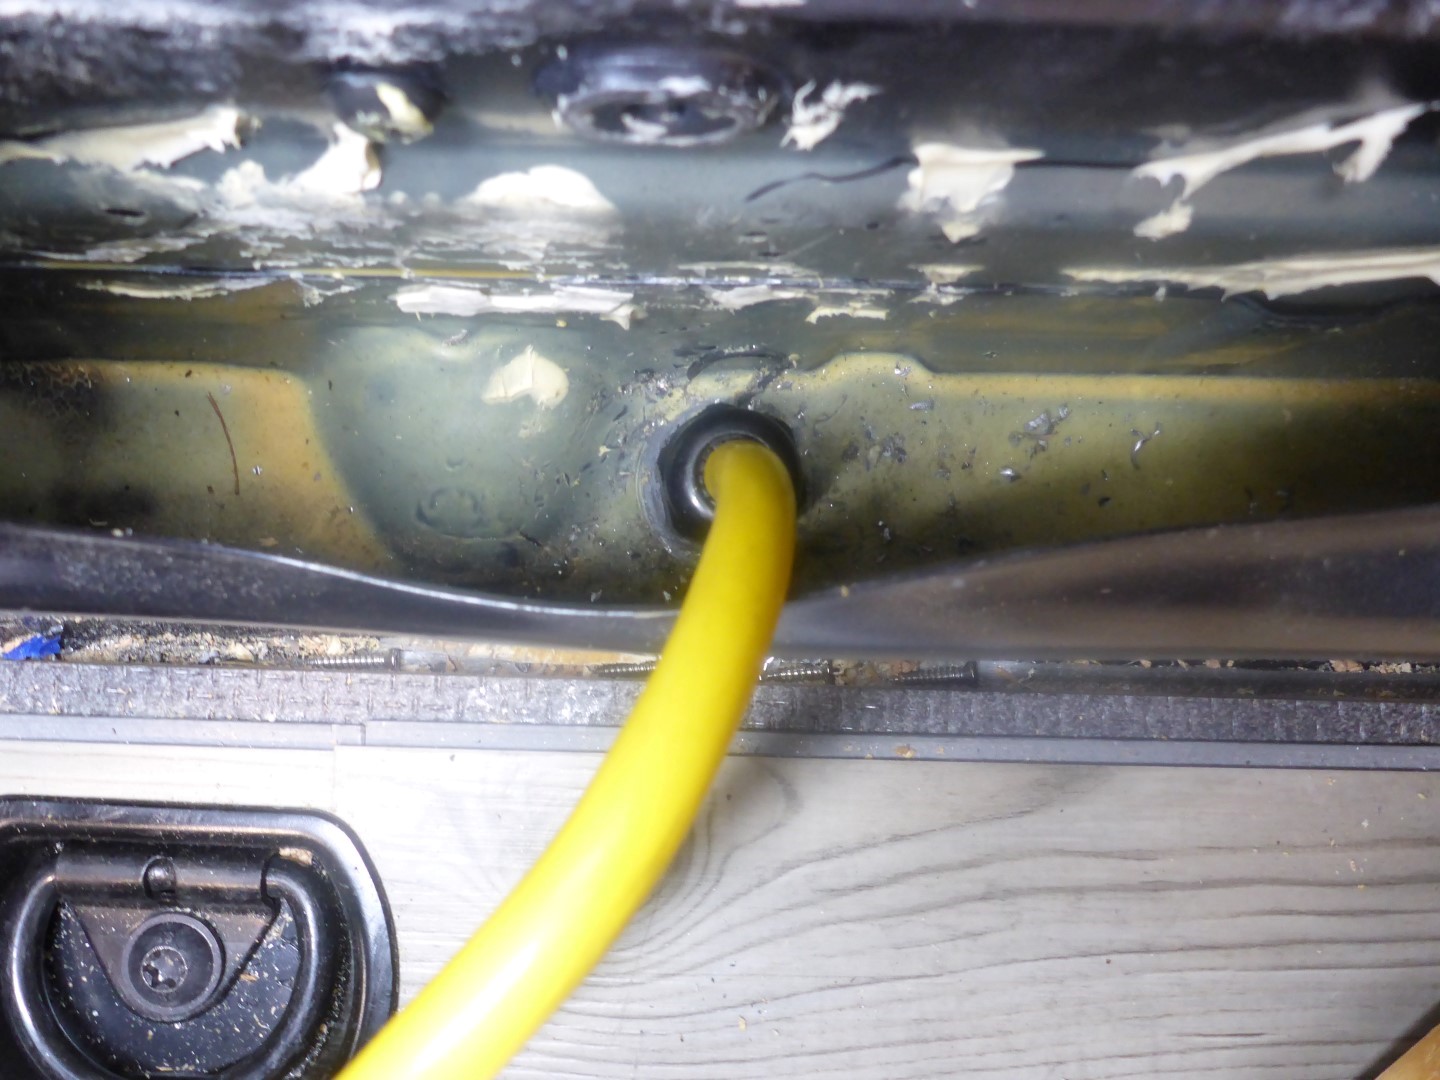
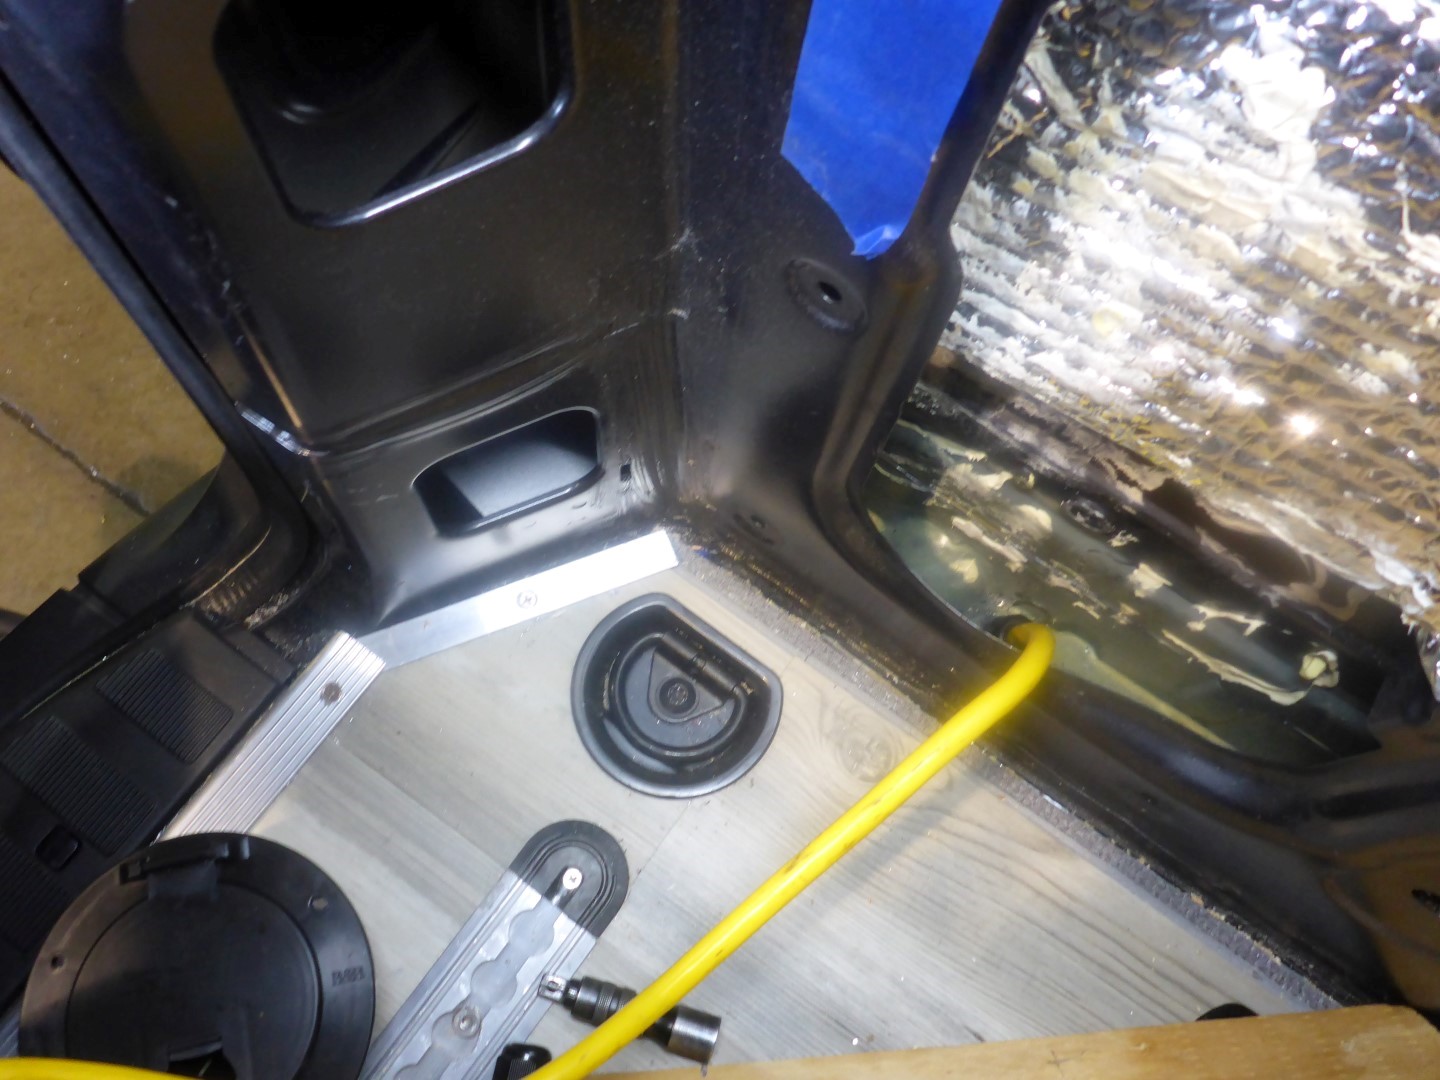
I installed a 15 amp plug inside the wall of our Sprinter. It is wired to our electrical system and tucks up inside the bottom of the van when not in use. I made it short enough so it didn’t drag the ground if left hanging. We always have a 25′ heavy duty extension cord stored inside the van to go from the van’s plug to a power source such as a campground.
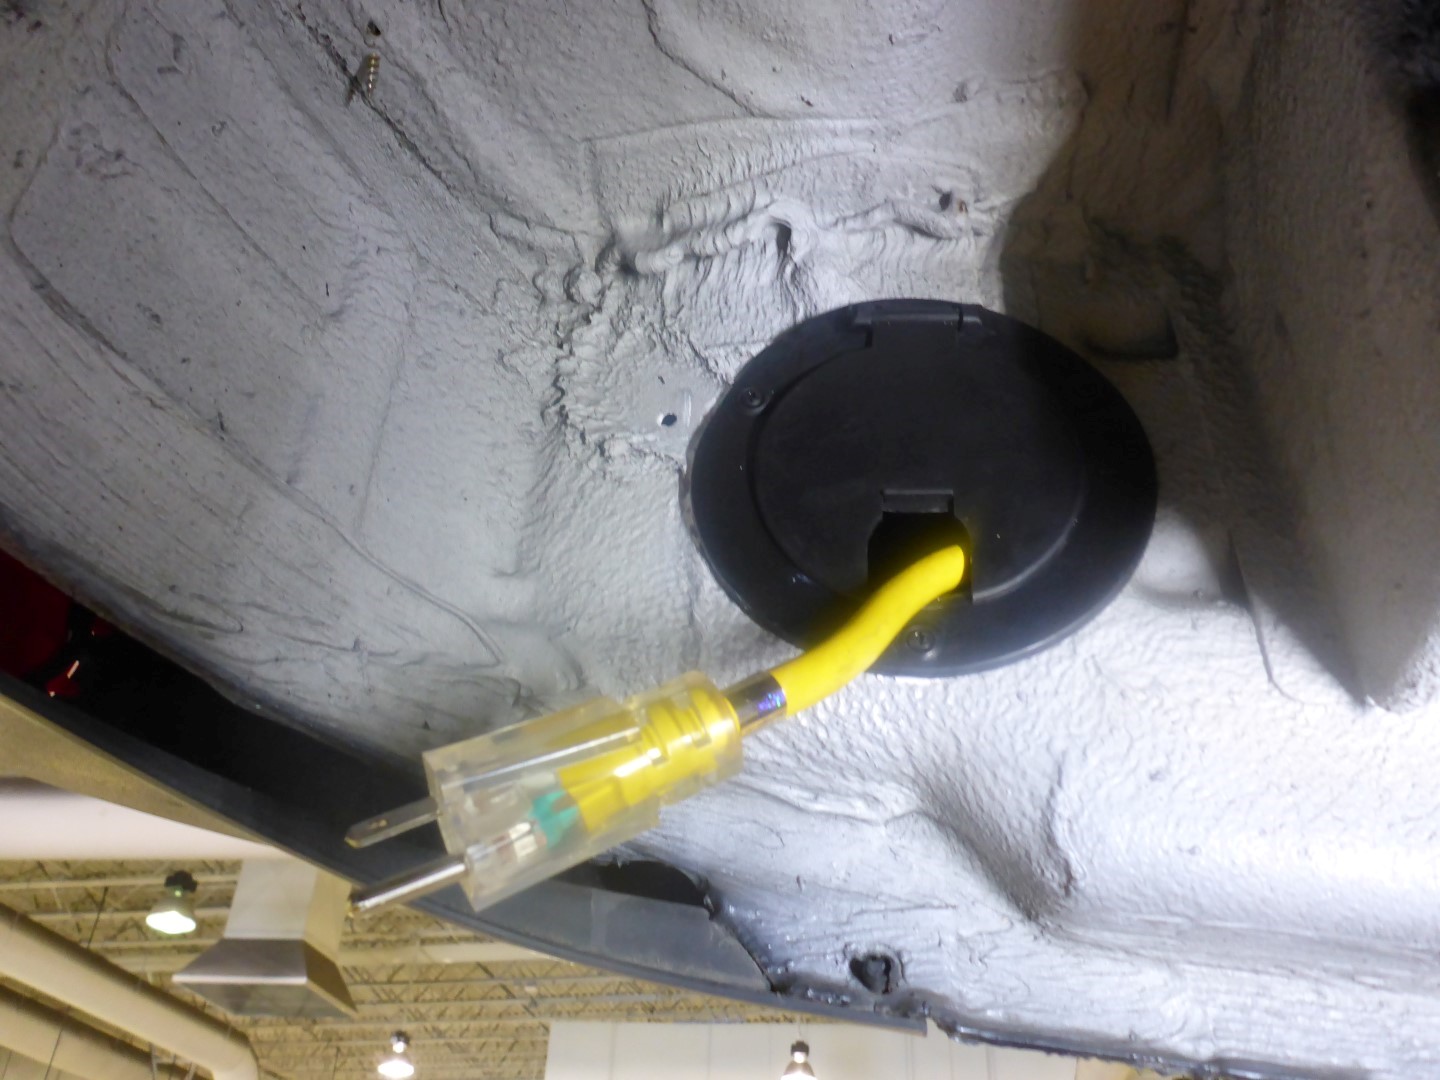
If you look under your Sprinter’s lower rocker panel, you’ll see a black, plastic plug. Pop that out and you can install one of these with some minor trimming. It makes for a nice cover while still being able to access the cord inside. I had to drill about a 7/8″ hole inside the floor of the wall space for a cable gland, but that way it keeps it watertight. Be sure to vacuum up any metal shavings after drilling in that area to prevent rust.
Parts Used
- Xantrax Transfer Switch
- DC converter/ charger
- Cable Gland
- Rocker Panel Cable Hatch
- 15 amp extension cord (shore plug)
Circuit Protection

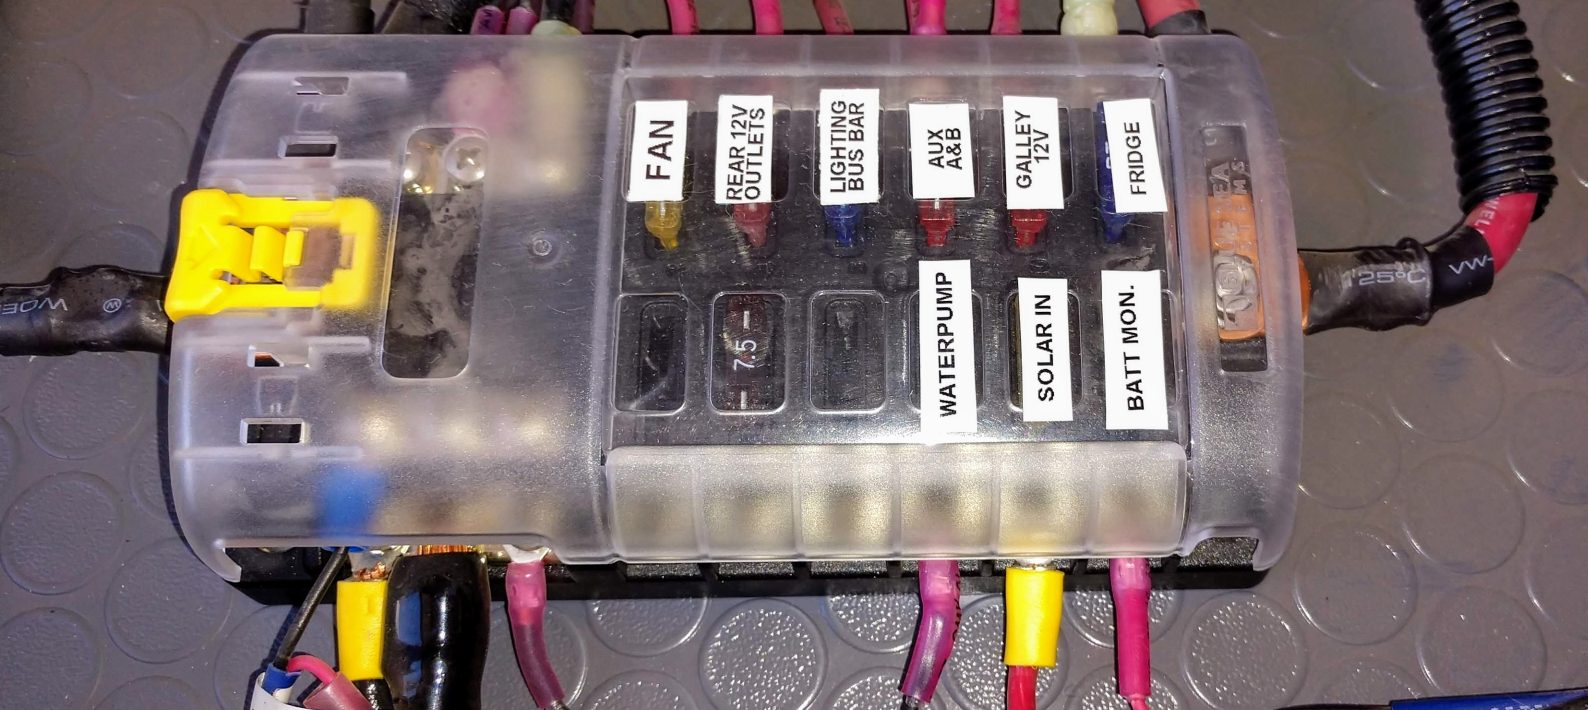
Every electrical system needs to be protected. You can’t just run a wire from your battery to an outlet or load and expect it to be ok. You need a fuse box. Loads need to be isolated and on their own fuse. I used a Blue Sea 12 circuit fuse panel to protect and distribute all the 12V DC system loads. For additional protection, each battery has a 200 amp fuse within 12″ of the positive post. There is a 150 amp breaker between the battery isolator and the alternator power. For the 110V AC side of the system, there are two, single pole circuit breakers: one for the main load/ power coming in and the other is for the AC outlets.
Originally I used 200 amp breakers at the batteries but then decided to change them out to fuses instead. Running the electric water heater would trip the breakers from time to time because I believe they can’t support that much load for that much time (10-15 minutes). They would get hot and trip/ fail. After installing fuses, I had zero issues. I could run my water heater pulling 125 amps for 15 minutes with no problems. I even dropped 10 amps on my gauge. It used to pull 135 amps.


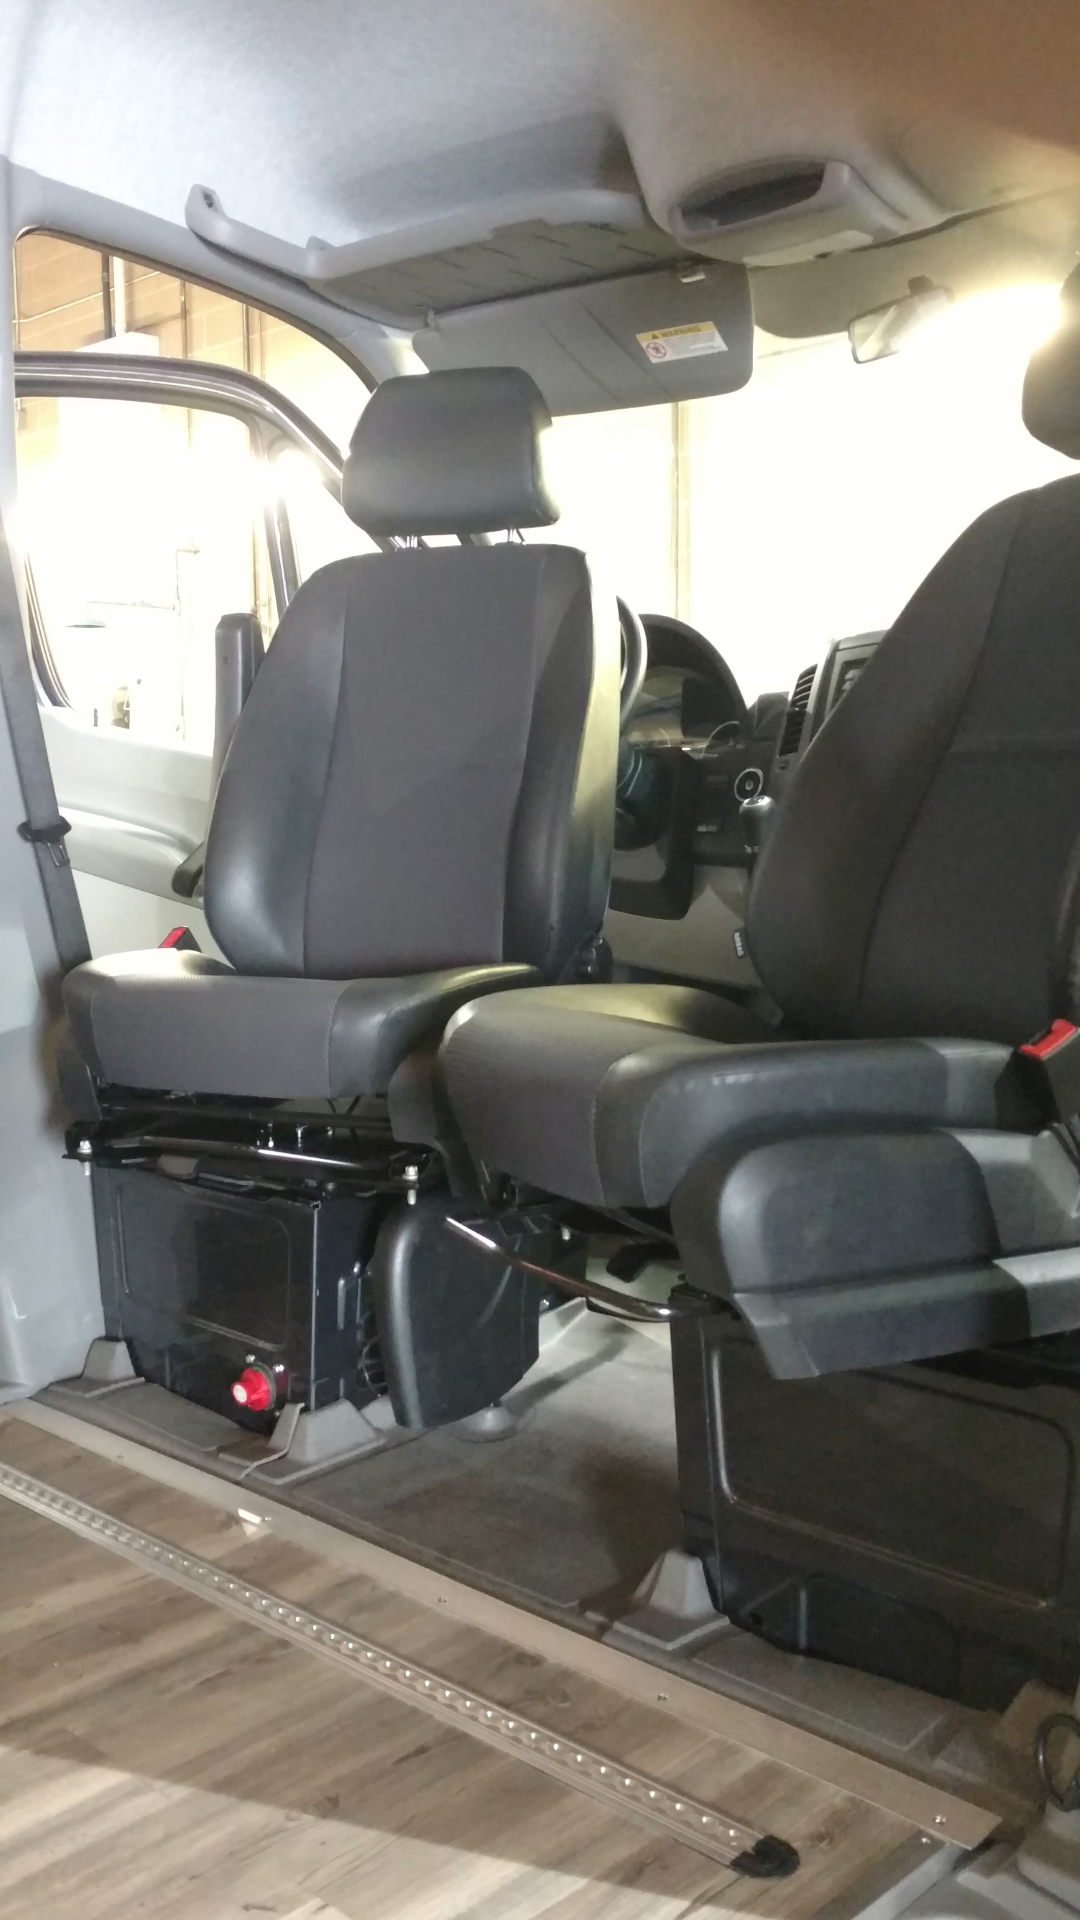
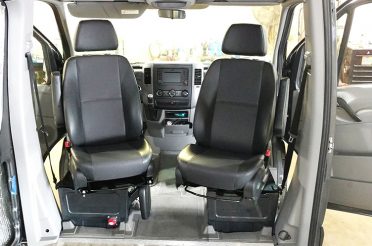
For the main battery disconnect to the front batteries, I used one of these and mounted it to the driver’s side seat pedestal. The rear 200ah battery is able to be shut off at the 200A battery breaker.

Parts Used
- Blue Sea 12 circuit fuse panel
- Main disconnect battery switch
- 200 amp fuses– at each battery
- extra fuses to have on hand
- 150A breaker– between battery isolator and batteries
- single pole AC circuit breakers
- Blue Sea circuit breaker enclosure
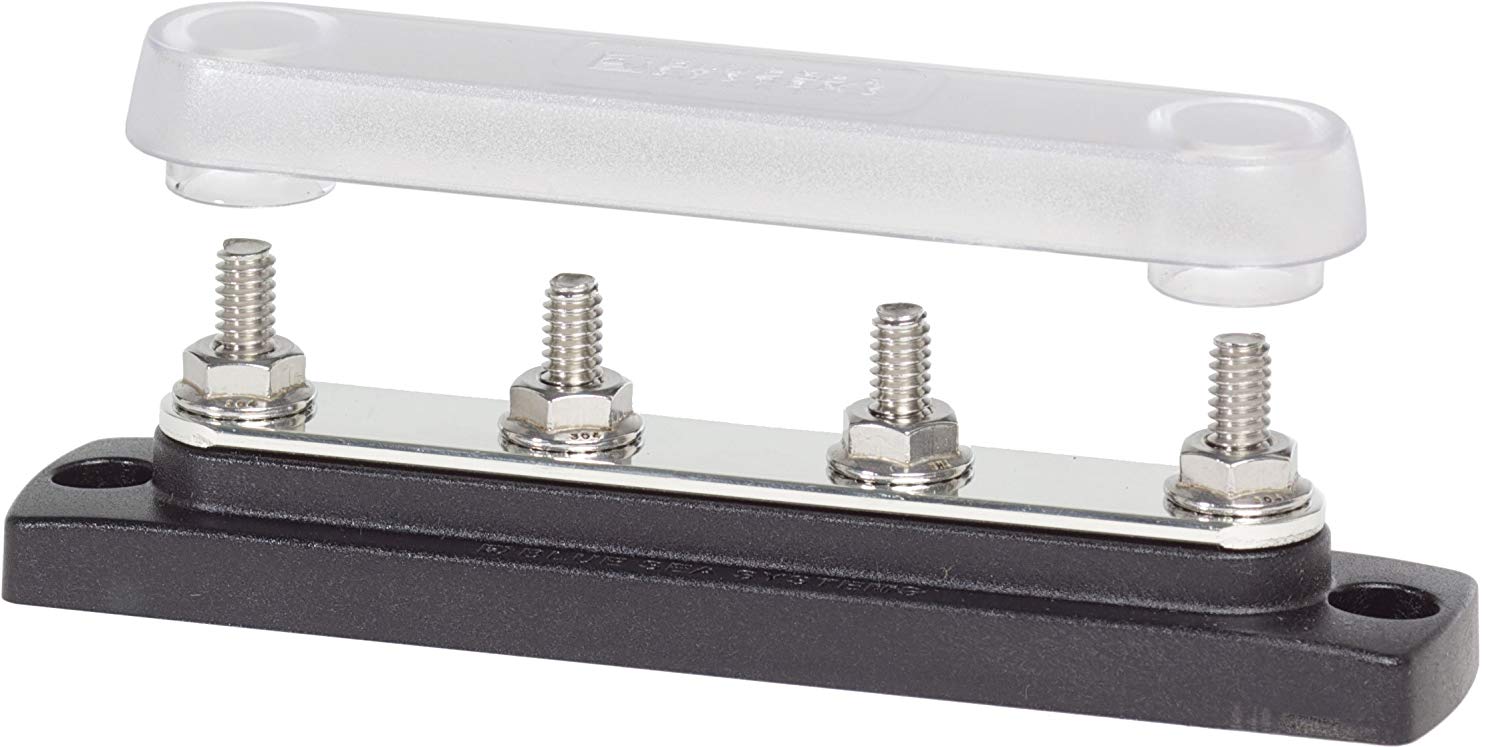
Power Distribution

In addition to the fuse panels, sometimes you need more places to attach a circuit. This is where bus bars come in handy. Just don’t forget to protect the power going to the bus bar with a fuse or breaker.

Parts Used
Outlets
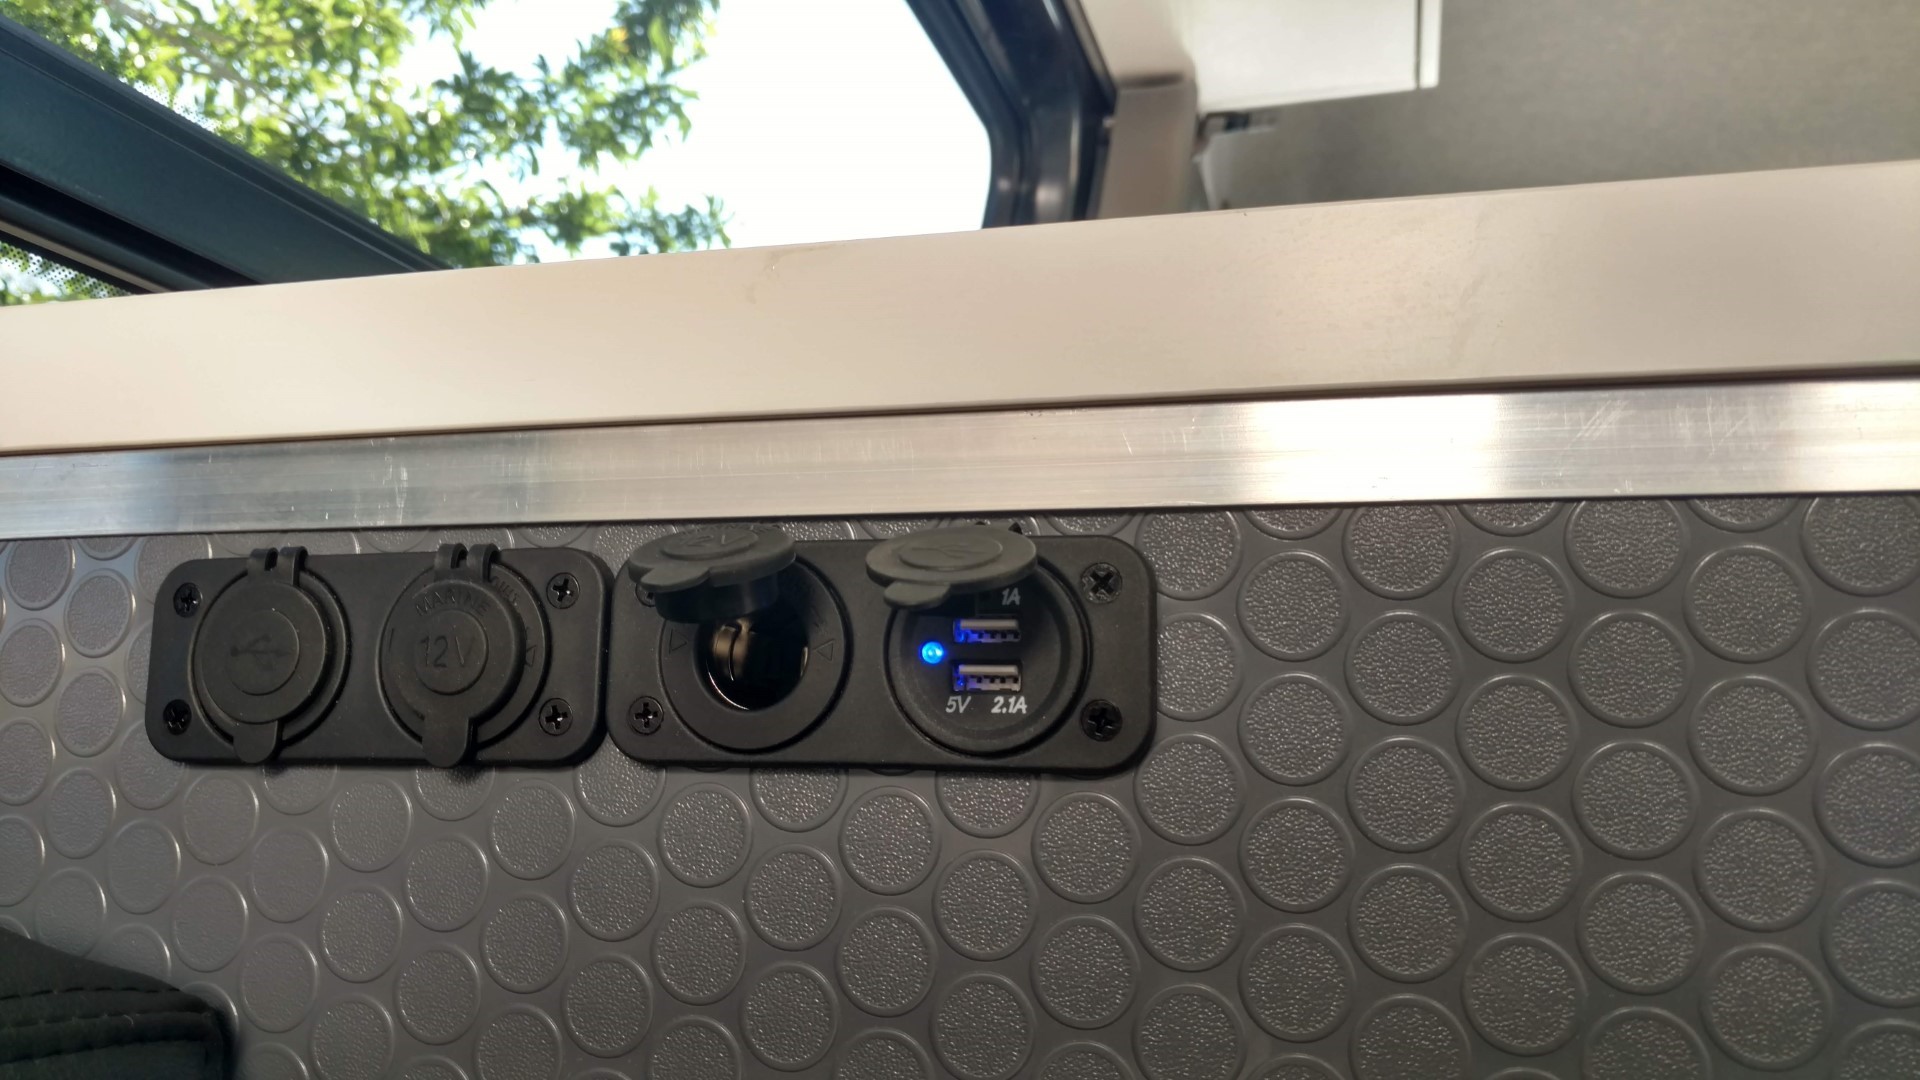
We use three different types of power outlets in our van.
1) We have 12V DC power outlets, similar to what you see in your car, like a cigarette lighter outlet.
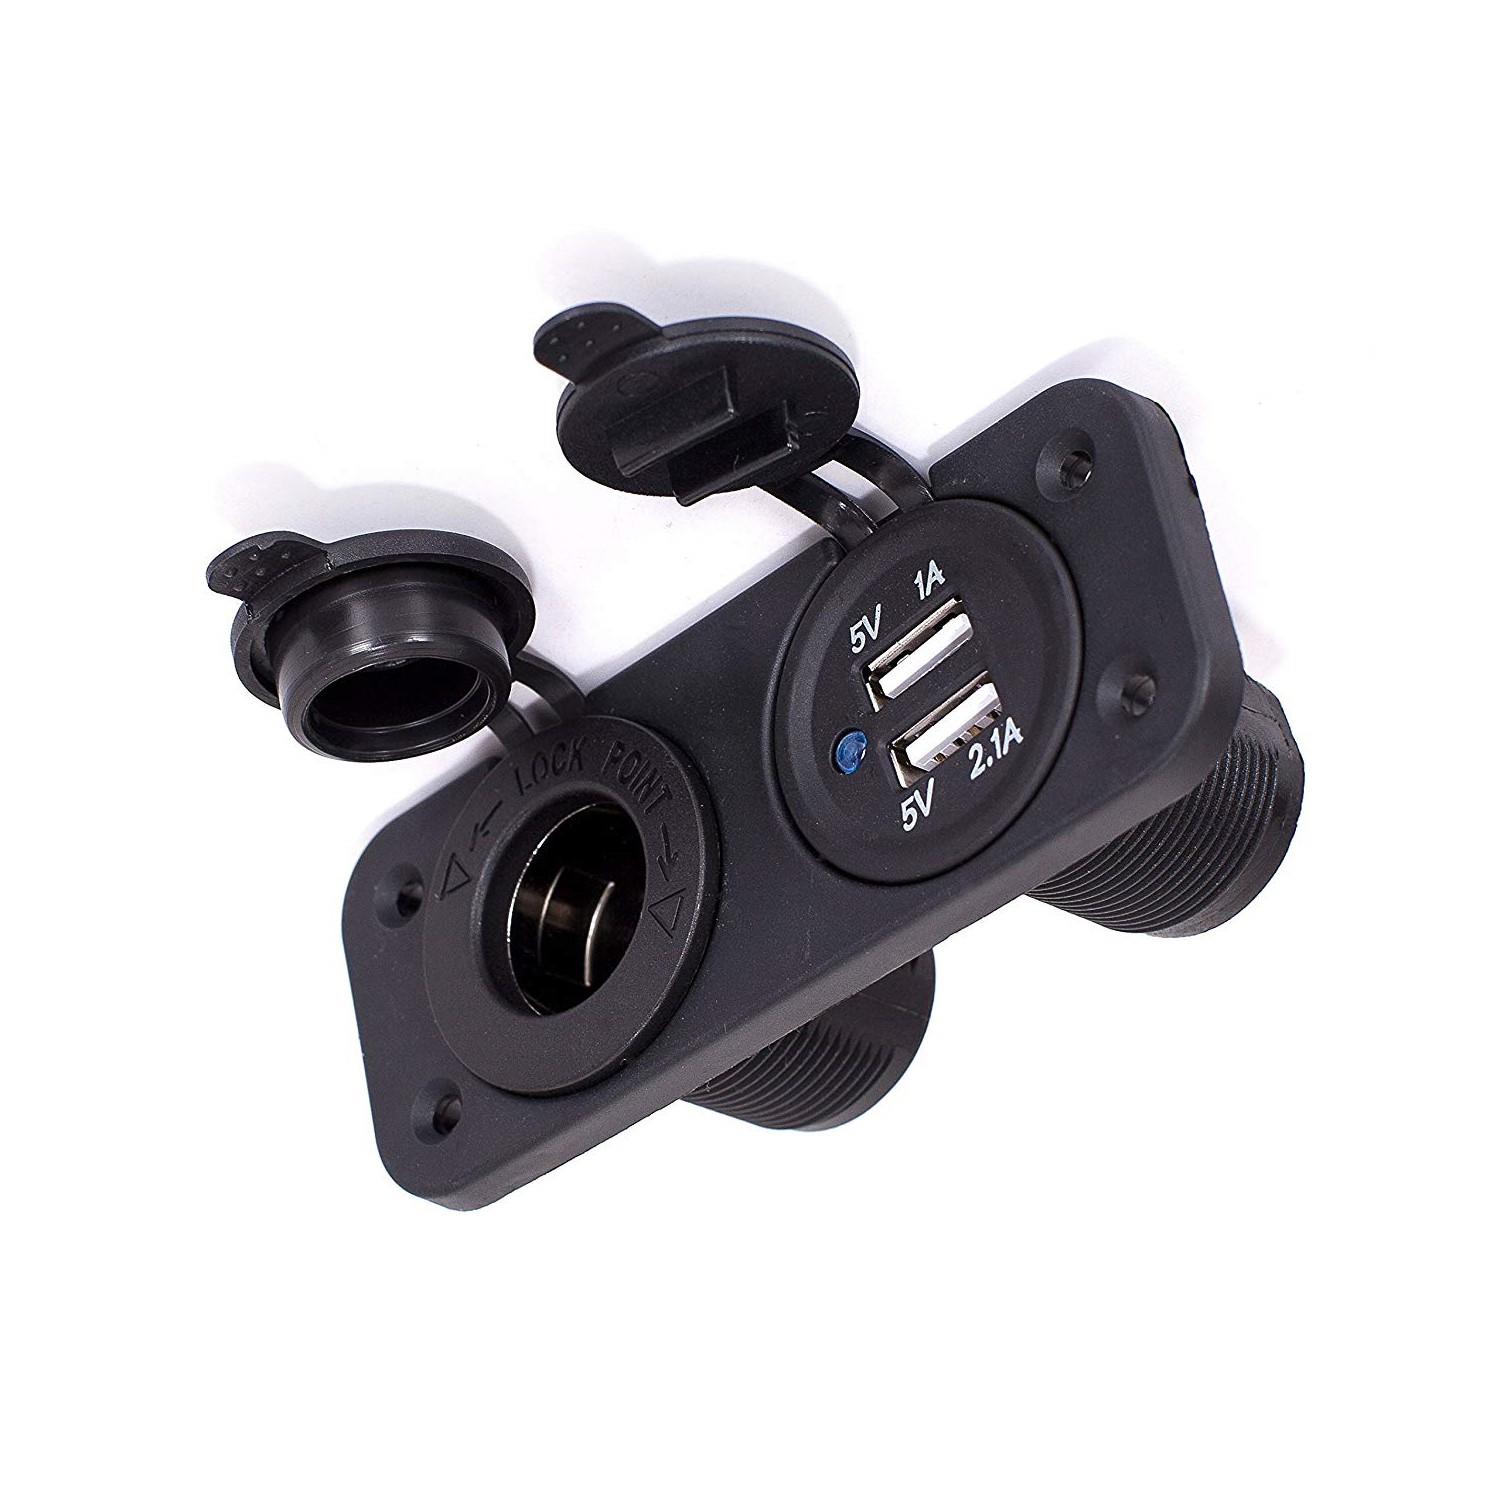
2) We also have several 12V DC USB outlets that are nice for charging several devices. The have 1A and 2A ports.
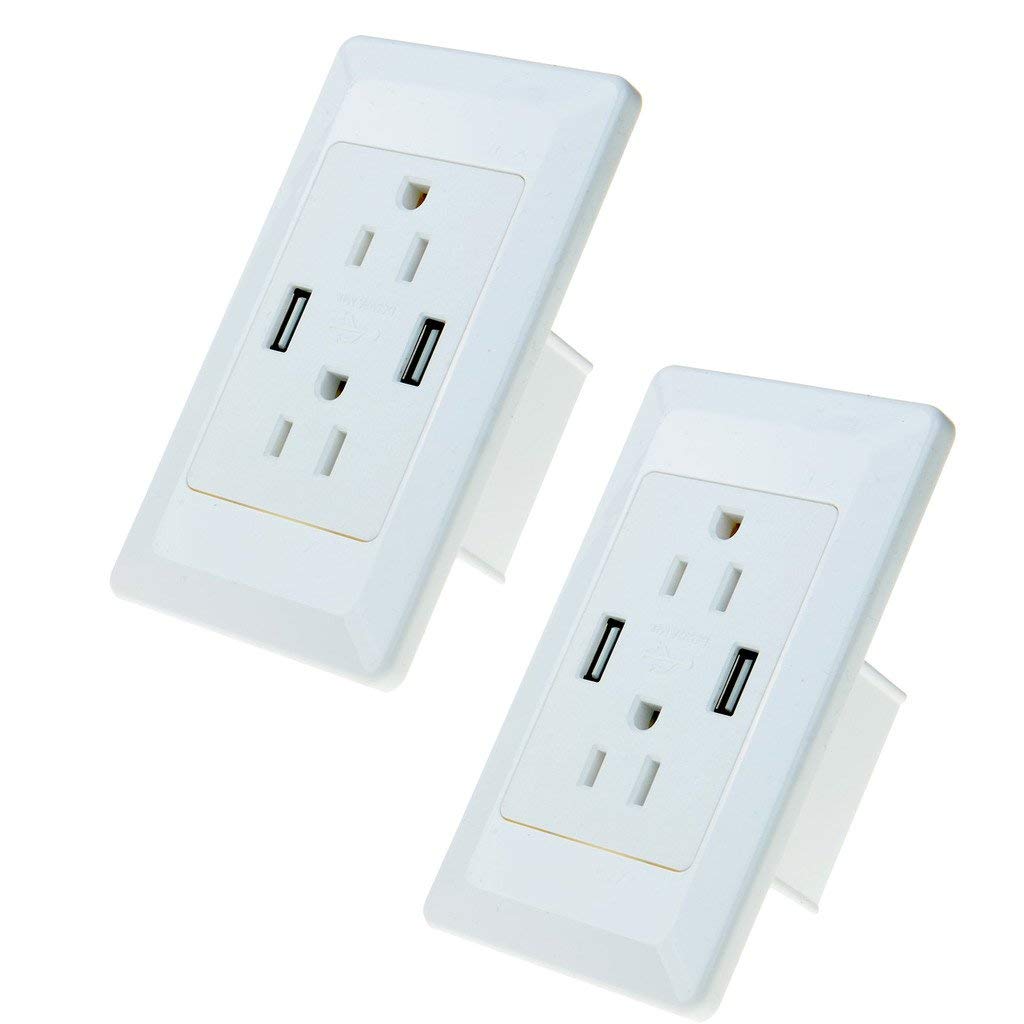
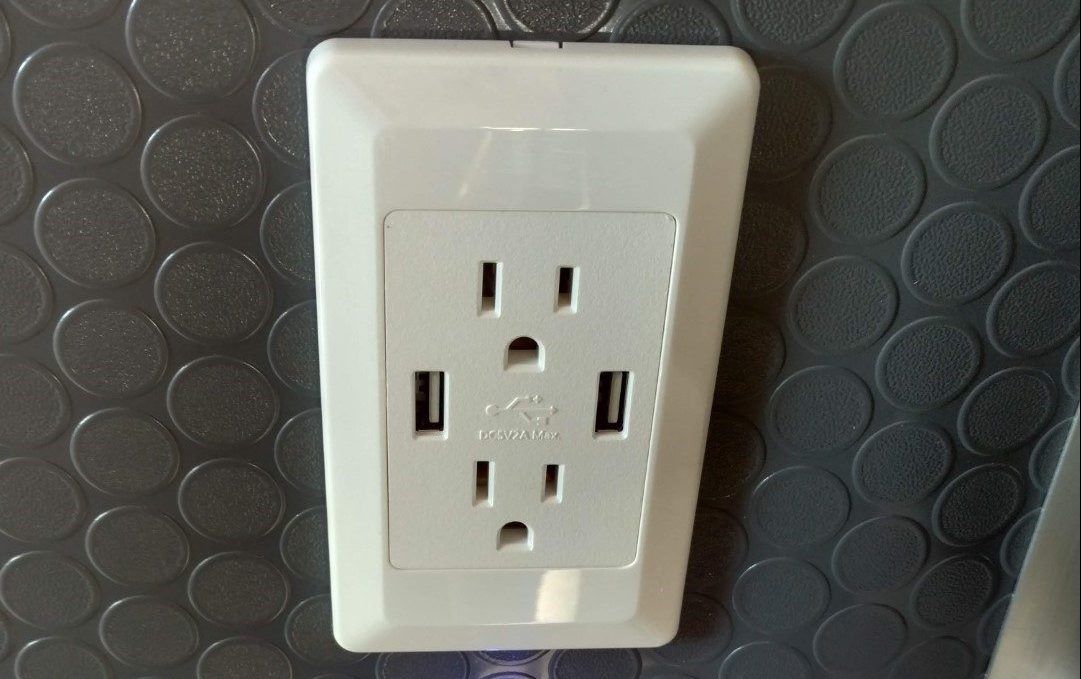
3) For 110V AC outlets, we have regular outlets as well as the ones with USB ports. You can never have too many USB’s!
Parts Used
Wiring


Wire Size
When wiring your van, it is important that you chose the correct size and quality wire for the job. Blue Sea has a page and chart to help you determine what gauge wire you will need based on the load it needs to support.
Parts Used
Here are some examples of the wire sizes I used in our van’s electrical system.
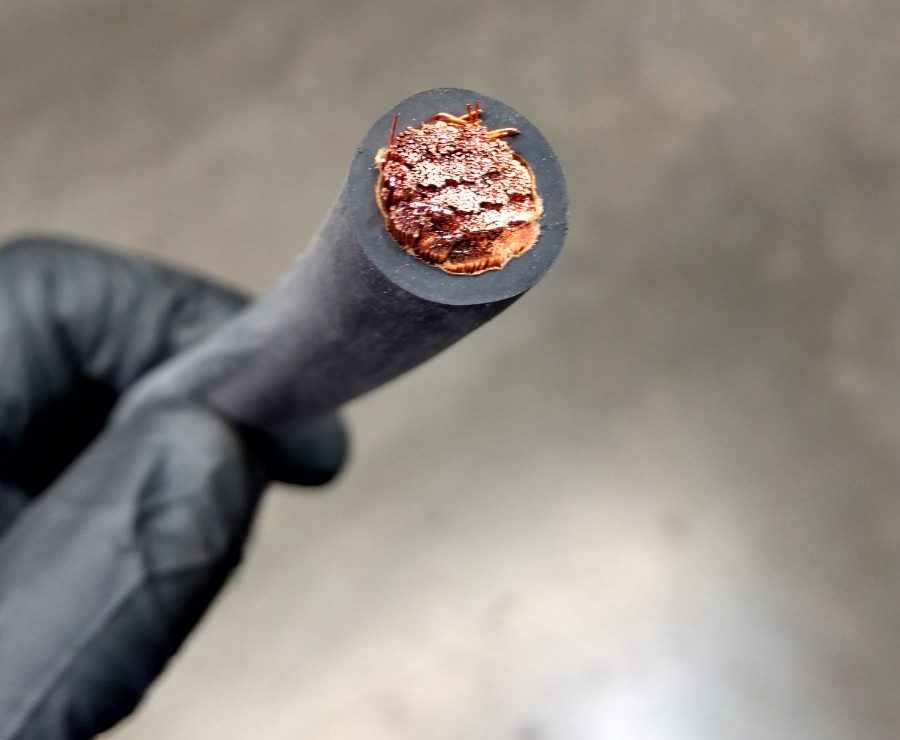
- Wiring from our 6V underhood batteries all the way back to our inverter: 2/0 gauge welding cable
- Battery cables from our large 200aH battery to the inverter (less than 12″): 4 gauge cable
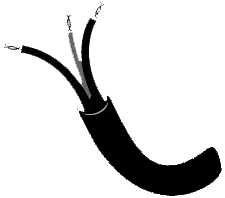
- All LED lighting circuits: 16 gauge dual conductor wire
- water pump: 16 gauge dual conductor wire
- 12V outlets: 16 gauge dual conductor wire
- refrigerator: 12 gauge
- For the 110V AC wiring, I used Romex 14/2 for all the outlet circuits and a 15A heavy duty extension cord for our shore power cord.
Wire Connectors and Ends
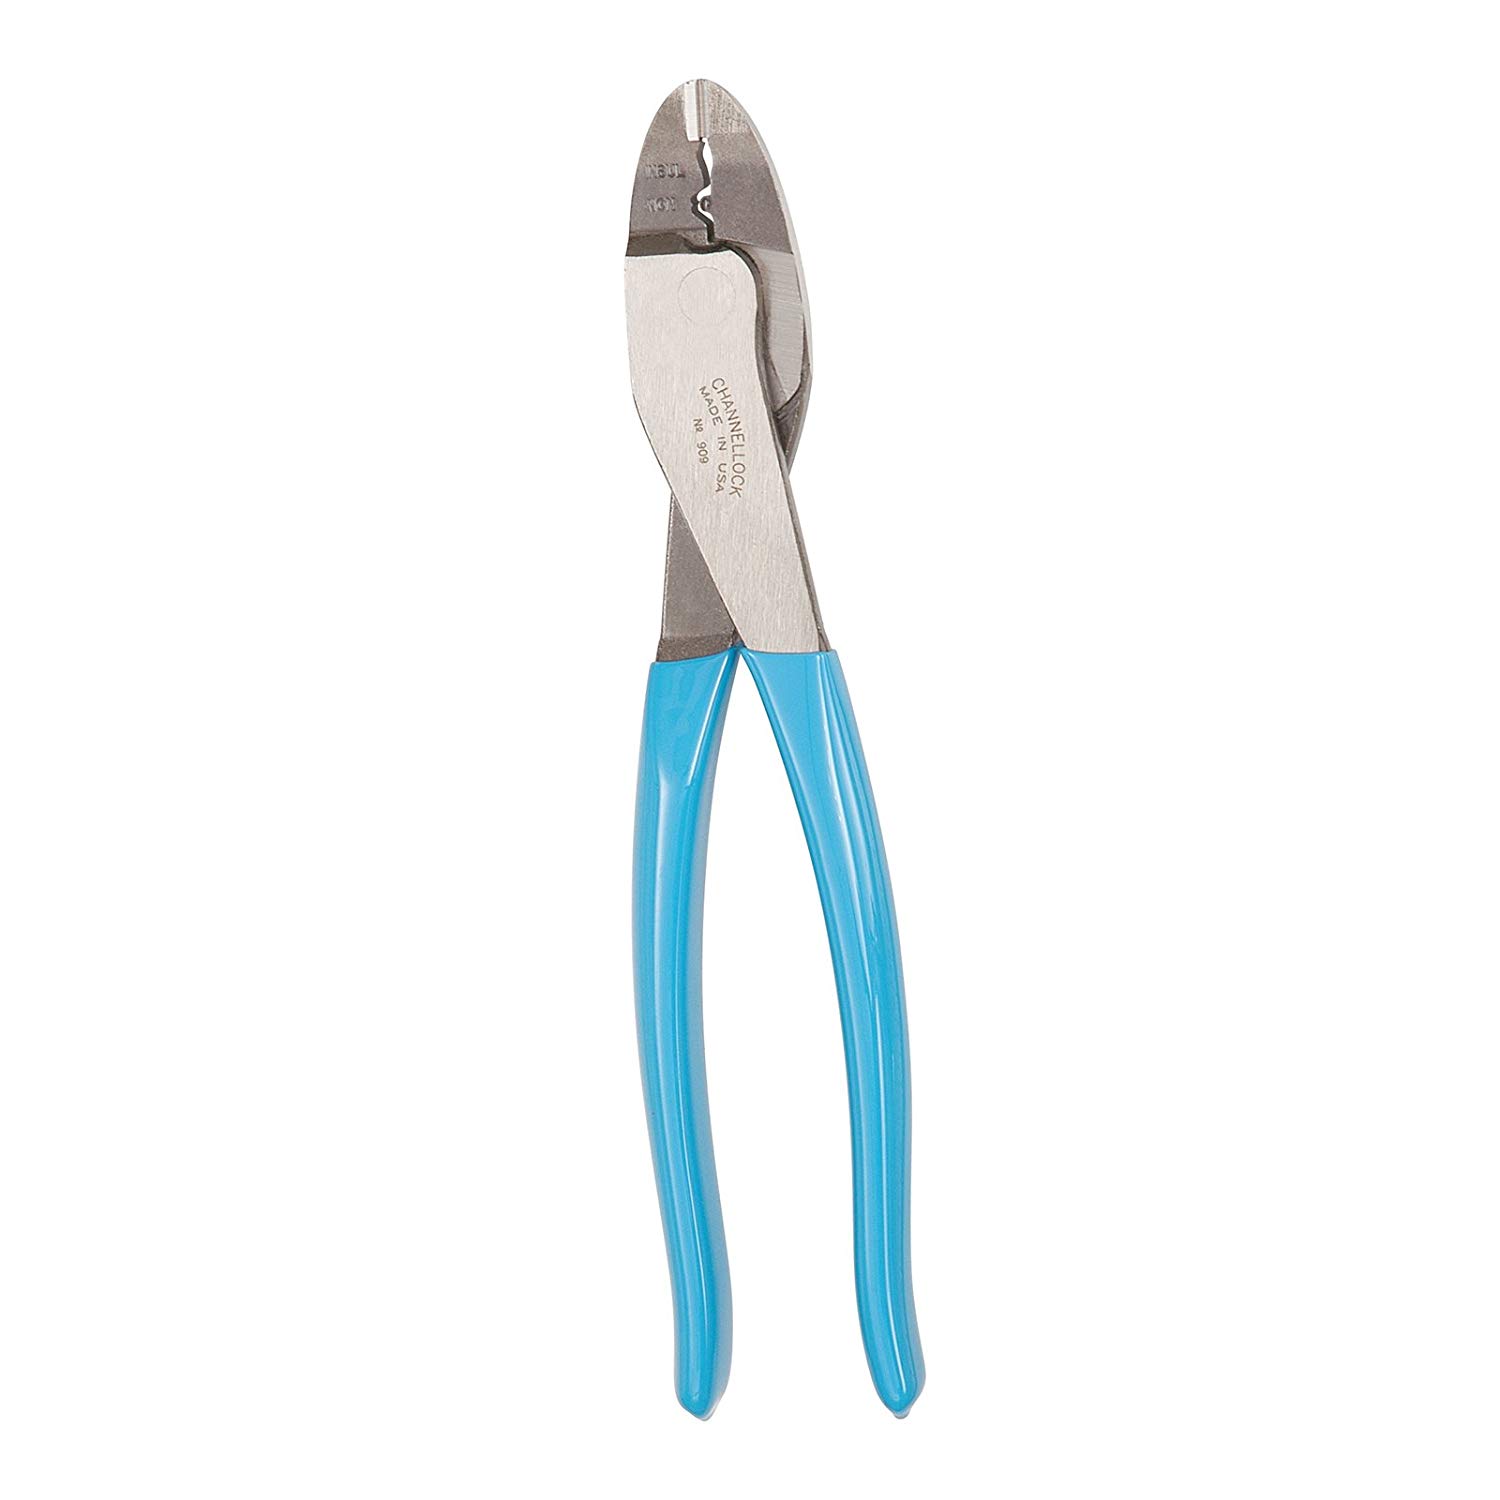
The connectors and crimps are also very important. Get a good crimp tool to do it properly.


Parts Used
- butt connectors- assorted
- butt connectors- a buttload of 22-16 gauge/ red
- male/female spade connectors
- fork spade connectors for use on the bus bars
- 4 gauge terminal ends, various sized eyelets
- 2/0 gauge terminal ends: used on battery cables
- weatherpack connectors: used on the lighting harnesses to make it easier to install
- crimp/ cutting tool for large cable
- 10-22 gauge crimpers
- wire strippers
Wire Protection
Keep in mind when running wiring that unprotected wires can easily chafe causing shorts. Protect your wiring with conduit and sleeving.
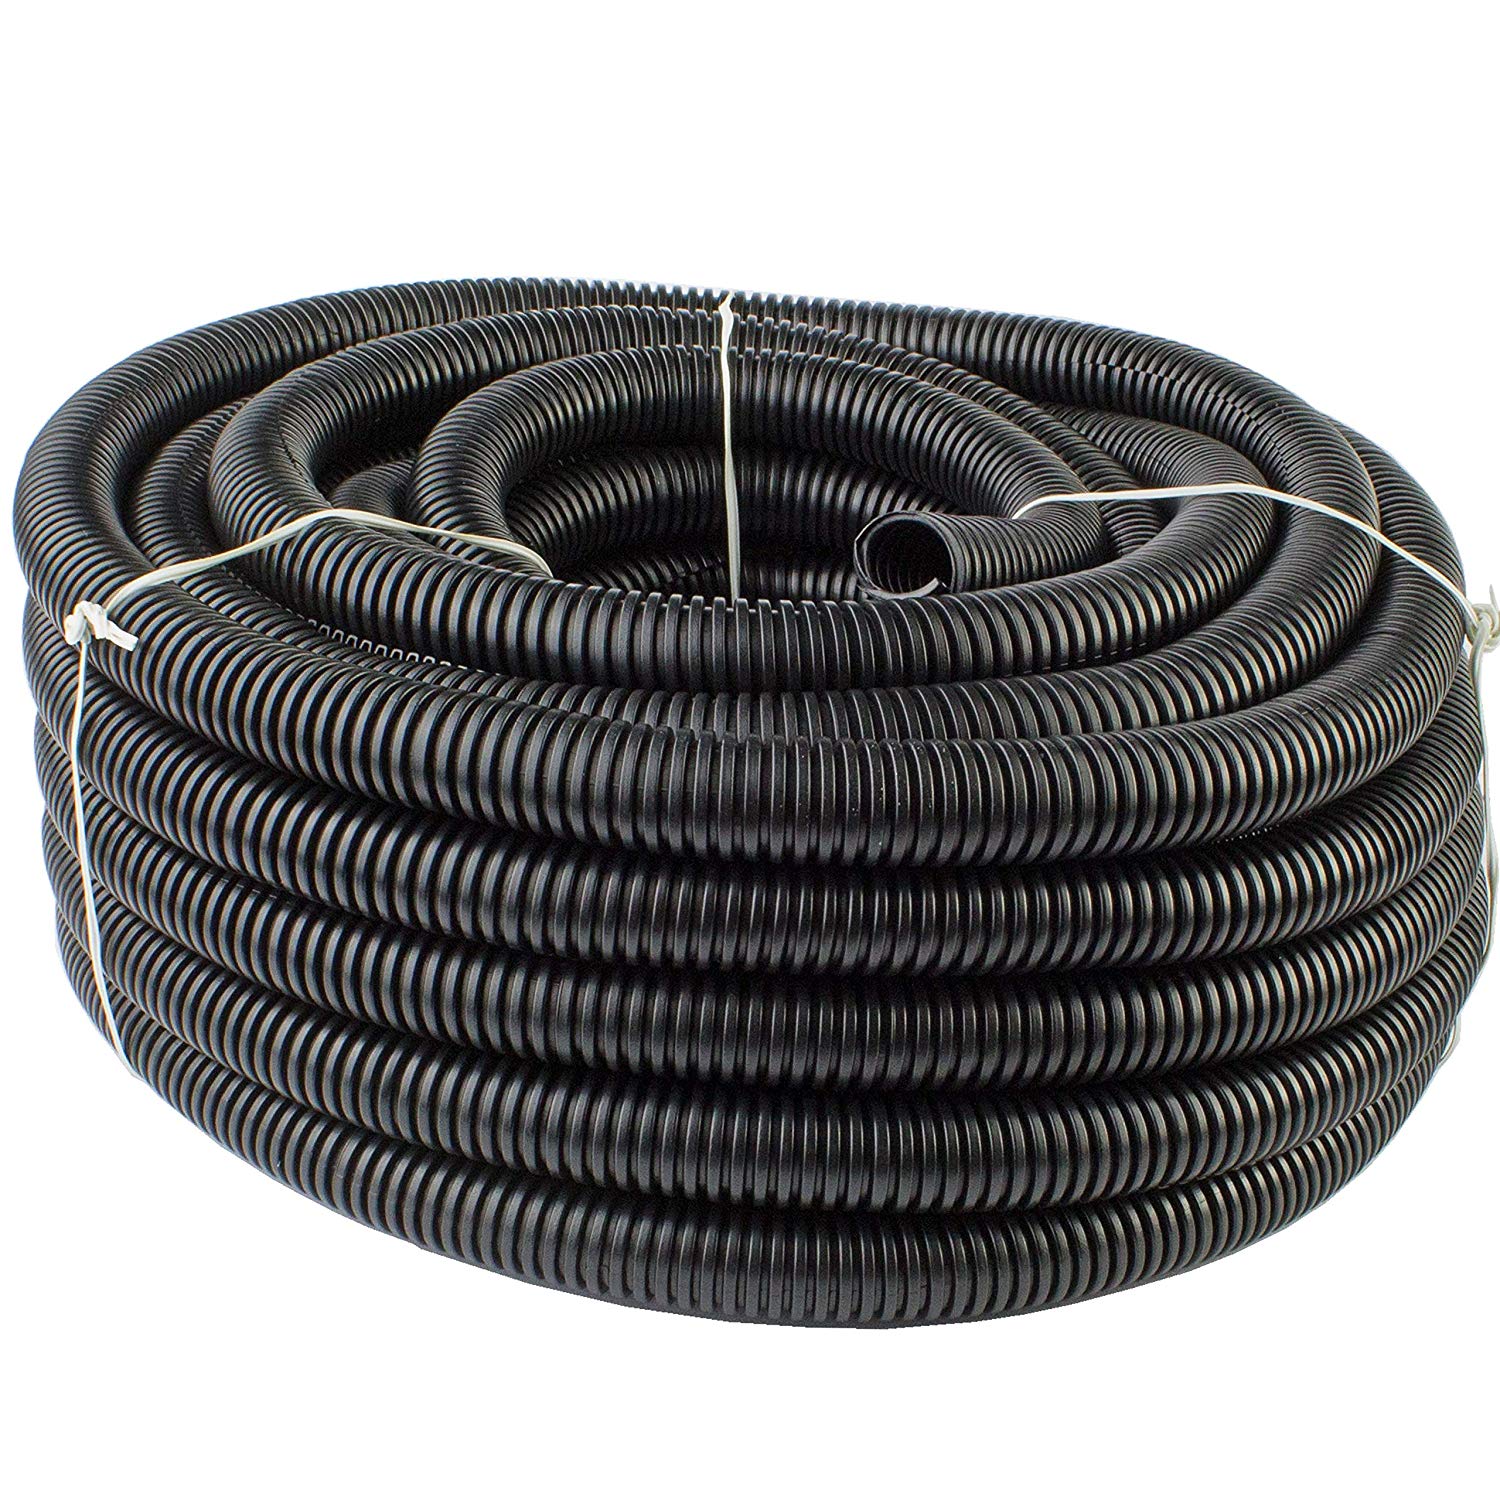

Parts Used
Battery System Monitoring

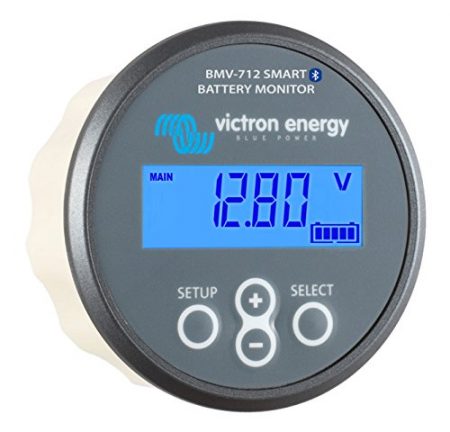
Monitoring your batteries is critical because you can damage your batteries if run low enough (below 50%). It’s also nice to know what kind of amperage you are using. It helps you control your power usage. We originally bought a cheap battery monitor but decided we should go with a good quality Victron BMV-712. That’s the Bluetooth model. The only reason I went with the Bluetooth model is that it makes it much easier to set up (using the app). It’s also convenient while driving to pull up the app when my phone is in the dash mount. I can quickly see what our battery state of charge is. It’s easy to install and utilizes a shunt that installs on the negative cable. All of the loads go through this allowing to closely monitor the battery and usage.
Parts Used
Planning Out Your Electrical System
![]()
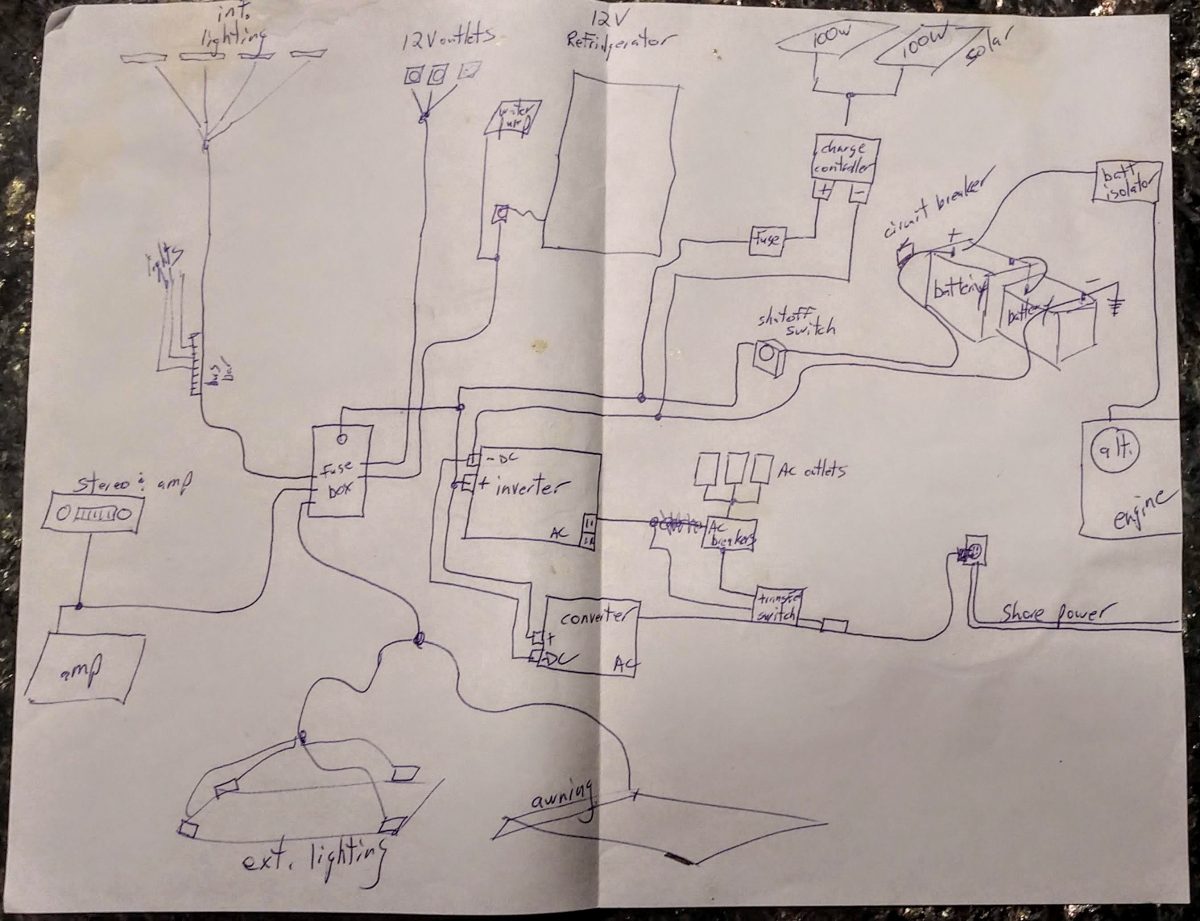
Draw up a Wiring Schematic
Even if it is a very crude and a rough plan of what you are going to be doing, a wiring diagram helps you get an idea of how you will wire everything up and what parts you are going to need. If you are unsure how to wire something or you are a little hesitant, get help! The Sprinter Buildout International group on Facebook and the Sprinter-Source forum is full of knowledgeable people who are willing to help. If that’s not enough, get help from a friend that knows electrical. Wiring up your van the wrong way can be a costly mistake and can turn out to be a big project to rip everything out and rerun circuits.
Below is a rough draft of our electrical system in the beginning.
Although a handful of changes were made, it gave me an idea of what I was going to need and how to wire everything up.

17 Responses
przemo
Hi Pete,
as always very inspirational and helpful post!
What is not on your plan, is connection of this 2 different battery types – 6v bank with renogy. Can you describe more less how you did it, if different batteries should not be charged together?
Pete
Thank you. The battery banks are both the same type, AGM, therefore safe to charge together. The two 6 volt batteries are wired in series to make 12V. From those batteries, large 2/0 gauge cable is routed to the back via the wire pass through under the driver seat. From there, they are routed to the back and connect at the inverter main terminals.
Scott Mead
Hello Pete,
Really great blog and write-ups. You’ve done an amazing job with your sprinter!
I posted this question on the sprinter forum, but perhaps you can help me. I noticed one of your posts mentioned that the ground for the rear cabin lighting was controlled by the BCM and that you modified the circuit to use the power from your house batteries to power the circuit, along with some additional switches and a dimmer to override the circuit so that lighting can be manually turned on. I would like to do the same thing with my sprinter. Where did you tap into the ground wire for the rear lighting? Any other guidance you could provide on how you accomplished this modification would be much appreciated.
Thanks again for sharing your sprinter build. It’s really super helpful!
Pete
Hey Scott, thanks for that! I’m glad my blog helps. The ground (or trigger wire) for the lighting is one of the circuits to the factory cargo lamps. I can’t remember which one it is, but I seem to remember it being a brown/red wire, maybe? Maybe not. lol I’d have to go look. I ended up scrapping the door switch idea though. For some reason, however, Mercedes BCMs work, when the LED lights were turned off, something still backfed from the BCM causing them to be super dim and stay on. It was really annoying when trying to go to sleep and when you want the van to be completely blacked out. So I ended up just using the wall switches to turn the ceiling lights on. I have switches on the B pillar just to the right of the slider door when entering and two at the back corner for when I open the rear doors. It hasn’t ever been an inconvenience. It works great and it’s much simpler. I also have a switch on the dash just to the left of the headlight switch for the rear lights. That helps out from time to time.
chris
Really cool. I decided to get a promaster. We are building. Right now, very overwhelmed about the electrical. Probably silly question, but if you’re in the area, would you install for us? I’d pay for your labor?
Pete
Hi Chris. Thanks. I don’t know where you’re at, but I don’t really have the time for any installs. Sorry 🙁 Let me know if you have any questions.
Seth Yates
Hi Pete, what model solar controller did you use? It looks like the Amazon link is broken and I’m getting a couple different models that show up when I search for the voyager 🙂
Pete
Hey Seth. Sorry about that. Amazon always seems to change product links from time to time. I used the Renogy Voyager 20A model. It’s been great and I’ve had no problems with it. Here’s the updated link. I updated it in the post too. Thanks for the heads up.
https://amzn.to/2J4jtxu
Seth Yates
Awesome! Thank you 🙂
Jason
Not going to lie…getting the cable gland nut on for the shore power cord was a royal pain in the ass. So happy thats done.
Pete
Yeah there’s not much room to work with in there. It was a bit tricky!
Rob
Hi Pete, thanks for your post. I am also just planning electricity for my sprinter conversion.
I have a question to alternator charging. Do you use any buck boost DC-DC Converter? Because your sprinter is quite new and it will probably have smart alternator that can produce higher voltage.
Pete
Hey Rob. No, there is no booster or DC to DC charger. I just hooked the alternator charge wire up to the house batteries with an isolator to shut it off when the van is off. You are correct, the alternator is a smart alternator and charges as needed. It is a 220 amp alternator and more than enough to keep the batteries topped off while driving and can even handle a decent sized load.
Chris mcq
Pete
What was the decision factor when hooking house bats directly to alternator vs with a b to b from starter batts…hope I got that right
thanks
chris
Pete
Hi Chris. I’m not really sure what you mean. You can tap into anywhere on the starter battery system as long as it can carry the load. I just wanted to make sure I wasn’t overloading any circuit when charging my house batteries. I hope this answers your question/ concern.
Chris
Question, you installed the 2 batteries under the hood. I have ’19 van with an auxiliary battery under the passenger seat. Does yours not have the option so you went with under the hood? I’m just trying to figure out if there was a reason for that. Also, if I just go under the seat, any downside to using a 12v deep cycle battery since I have the space? Do the ones for golf carts actually do better with the frequent charging?
Pete
Mine did not have that aux battery option, but that is not why I went with two 6V batteries up there. The 6V golf cart batteries work great for deep cycle applications because of the constant charge/ discharge abuse they can take. Also, two 6V batteries have a little more amp-hour capacity than most single deep cycle 12V batteries. With one 12V deep cycle battery, you’ll probably be limited to about 100-125ah.